It can be very useful to password protect cells in Excel so that other people cannot accidentally (or even deliberately) overwrite valuable data of formulas and functions. However, there are times when you need Excel cell protection password but you allow other users to access and edit other cells on the same spreadsheet. At first glance, this would seem like an unlikely thing to be able to do, but it is in fact very easy to achieve. You'll learn how to password protect cells in Excel and more in this article.
Part 1. How to Password Protect Cells in Excel 2016
You've worked hard on your spreadsheet and now you want to make sure anyone you share it with doesn't inadvertently change cells that shouldn't be changed. Thankfully, Microsoft Excel 2016 and earlier versions let you lock cells to protect them from being modified. You can lock all the cells in a worksheet or specific cells, allowing some parts of the spreadsheet to be changed. Here's how.
Option 1. How to Password Protect All the Cells in a Worksheet
By default, when you protect a sheet or workbook, all of the cells will be locked. This means they can't be reformatted or deleted, and the content in them can't be edited. By default, the locked cells can be selected, but you can change that in the protection options.
1. Navigate to the Review tab.
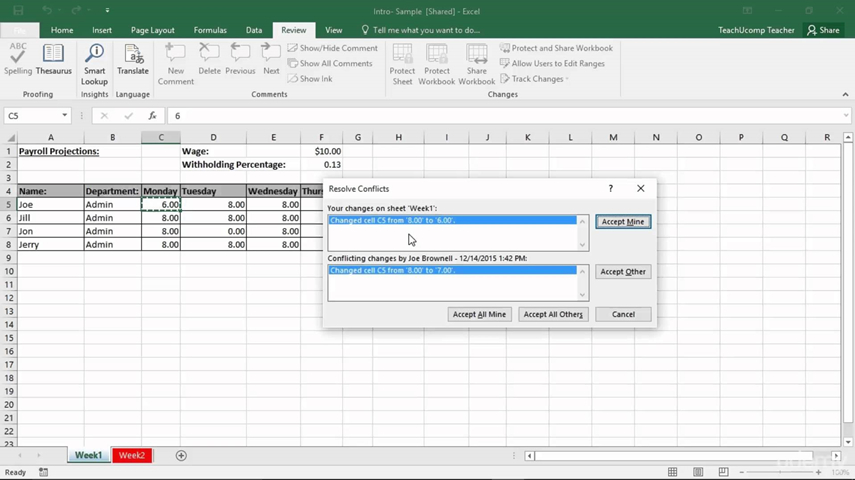
2. Click Protect Sheet. In the Protect Sheet window, enter a password that's required to unprotect the sheet (optional) and any of the actions you want to allow users.
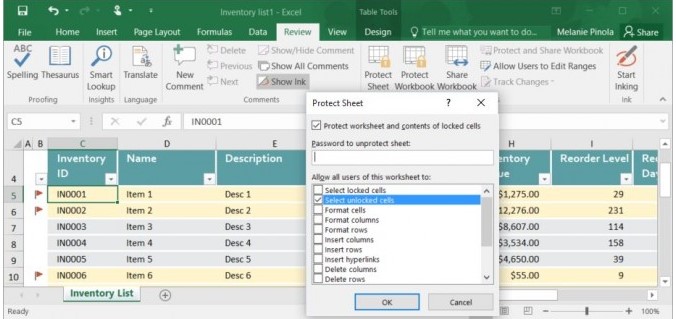
3. Click OK to protect the sheet.

When you or anyone else tries to edit any of the locked cells, this message will come up:
Option 2. How to Password Protect Specific Cells in A Worksheet
There might be times when you want to lock certain cells from being changed but still allow users to adjust other cells in a worksheet. In our example, in an inventory list you might allow unit prices and stock quantities to be updated, but not the item IDs, names, or descriptions. As mentioned above, all cells are locked by default when you protect the sheet. However, you can specify whether a cell should be locked or unlocked in the cell's format properties.
1. Select all the cells you don't want to be locked. These will be the cells that can be edited even after the sheet is protected.
2. Right-click on your selection, select Format Cells and click on the Protection tab. (Alternatively, under the Home tab, click on the expansion icon next to Alignment, and in the Format Cells window go to the Protection tab.)
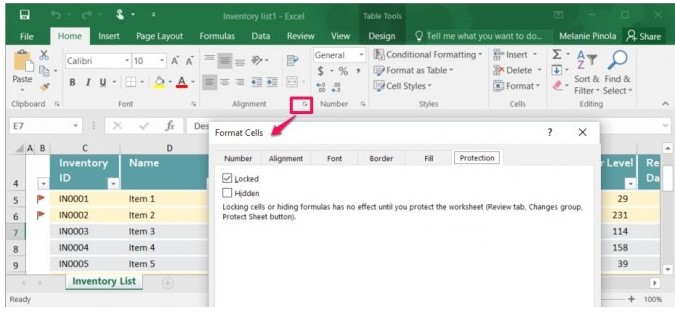
3. Uncheck "Locked" (which is checked by default) and click OK.
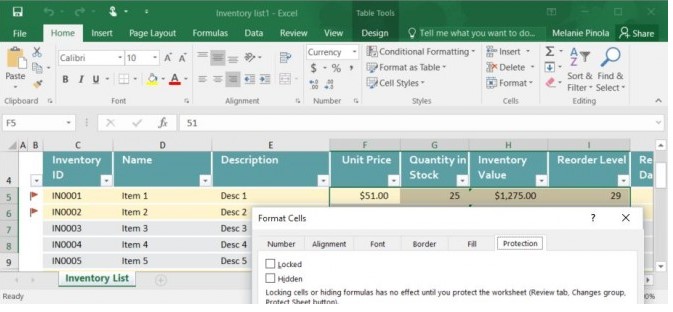
4. Go to Review > Protect Sheet and hit OK to protect the sheet. Any cells you didn't unlock under the Format Cells option (step 3 above) will be locked, while the unlocked cells will be editable:
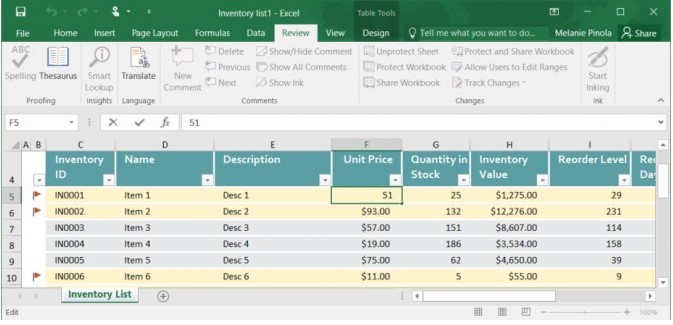
Note that cell locking (or unlocking) won't take effect until you do step 4, protecting the sheet.
If you want to quickly lock or unlock cells that aren't next to each other, you can use a keyboard shortcut. After selecting a cell or group of cells, use the Format Cells dialog as above to lock or unlock it. Then select your next cell(s) and hit F4 to repeat your last action.
When it comes time to send your Excel spreadsheet, it's important to protect the data that you're sharing. You might want to share your data, but that doesn't mean it should be changed by someone else.
Spreadsheets often contain essential data that shouldn't be modified or removed by the recipient. Luckily, Excel has built-in features to protect your spreadsheets.
Part 2. How to Password Protect Cells in Excel 2003
Don't know how to password protect a cell in Excel? The process is very easy. If you are using Excel 2003, choose Protection from the Tools menu. Select Protect Sheet, and then enter a password and confirm it. You can use Excel's protection feature for guiding the users through the cells they should modify. Before you go ahead to protect a sheet, it is suggested to uncheck the locked format. You should right-click input cells and choose Format or Format Cells (depending on the version), and then click the Protection tab. Uncheck the Locked option.
Much of our work is not possible without Microsoft Office. Microsoft Excel 2003 is often used to save data. For security reasons, it is necessary to encrypt an Excel spreadsheet. So everyone who has access to the document should enter the correct password. How to password protect cells in Excel 2003 worksheet? The method issimple, as below.
1. Open your workbook in Microsoft Excel 2003. In the menu bar of the File window, click "Tools" to open the drop-down list, then select "Options."
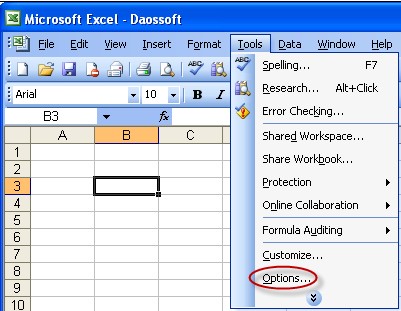
2. The Options window is opened as below. Type a password to encode the Excel document in the password to open the text. Type a password to change the password in the password to change the text.
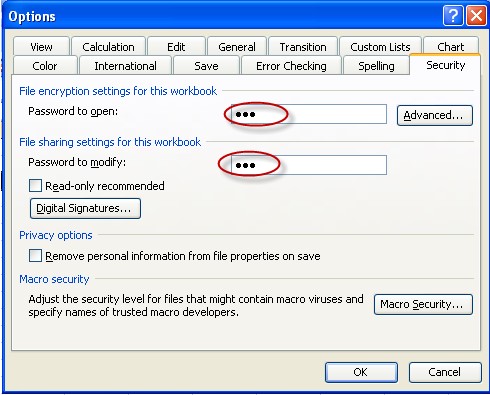
Important: If you type a password in the password to open the text, it means that you have set a password to protect the access rights of the Excel document. If you enter a password in the password to edit the text, it means that you have set a password to protect the modification right. Anyone who has no password to change can only read the document, but he can not change the document. In addition, if you want to select an advanced encryption type, click "Advanced ...". Select an encoding type from the next window in the list. Finally, click on "OK".
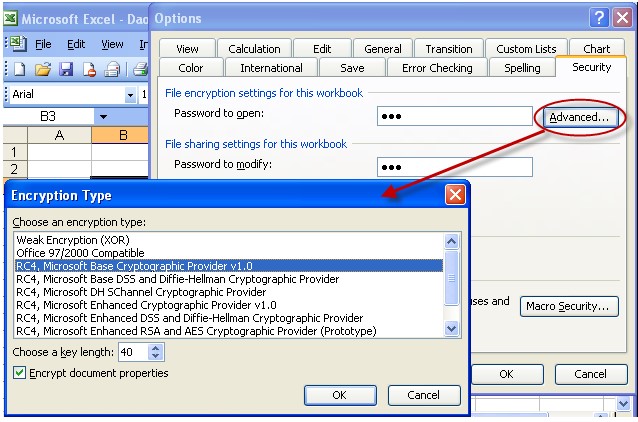
3. Type your password to confirm in the confirmation window. Then click on "OK". Type your password to change. Click OK.

4. Click "File" on the menu bar to open the drop-down list. Select "Save".
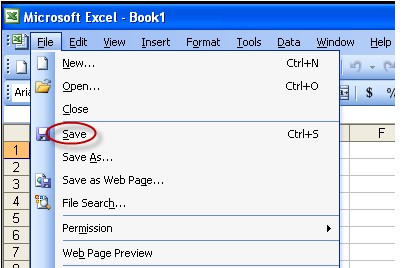
5. In the "Save As" window, type a name for this Excel document, and then click "Save."
You can encrypt a Microsoft Excel 2003 document as described above. After setting a password for the Excel document, whenever the Excel document is opened, it is protected by the following dialog. Anyone wishing to open and edit the Excel document must enter the correct password in the password text.

Bonus Tip: How to Unprotect Known Excel Cells Password
As you have just seen, it's very easy to password protect cell in Excel. Unprotecting a spreadsheet is even easier, provided that you know the password. Though, unlocking an Excel spreadsheet without the password is no big deal either.
You can unprotect specific ranges of cells. You can also reԛuire other users to enter a password before editing these areas, or you can limit the editing to certain users. Excel allows you to make these changes either by using the ribbon commands or by using mouse shortcuts.
1. Select the "Review" tab.
2. Click "Unprotect Sheet" if the worksheet is already protected.
3. Click "Allow Users to Edit Ranges."
4. Click the "New" button in the dialog box to create a new editable range.
5. Click inside the "Refers to Cells" field, and then drag your cursor over the range of cells in the worksheet you want to make editable. To unlock multiple areas at once, hold down the "Control" key while selecting the additional cells. The selected cell ranges appear automatically in the "Refers to Cells" field.
6. Type a password in the "Range Password" field if you want to require password access, or click the "Permissions" button to specify which users can edit the fields. Click "OK" when done.
7. Click the "Protect Sheet" button to re-enable protection, and then click "OK."
You also have some other options available in the Protect Sheet dialog box. The main one we are concerned about is deselecting the option Select Locked Cells. If you deselect this option it means only the Unprotected cells can be selected by your users. It also means they can use the tab key to go from one Unprotected Cell to another.
Bonus Tip: How to Unprotect Unknown Excel Cells Password
If you have forgotten or lost an Excel password, you must restore or delete your Excel password. Generally, recovery of passwords takes longer time since there are billions of combinations that may be needed to be tested before the reԛuired password is found. Hence software called PassFab for Excel is used. The technique behind this software is that it uses a different approach to open the file without actually tracing the password. This means that the requirement of needing a password is nullified in this method of recovery.
What is more, it has a very user-friendly interface and a heuristic processor for faster speed and accessibility. It can be customized according to the needs of the user and has the option of step by step installation which is convenient and easy to use. If you get into the trouble of forgetting Excel password and other passwords, the PassFab for Excel is your best helper. Welcome to have a free trial and I think you will also like it.

Summary
Finally, this article has discussed how you can protect Excel cells and lock the entire workbook from changing or opening. However, sometimes you may not want to go that far and rather lock only certain cells in your sheet.
