Password protection is the best protection nowadays. People protect their important Excel sheets using a password. These protections are used so that any unauthorized person could not temper the data in excel sheet. Sometimes you don't want your user to modify the data in the worksheet but you only want him to go through the readings, so you use Excel sheet protection. Now the question arises that how to protect a worksheet in Excel? Answer to this simple question has been described in the section below.
First of all, let’s see what is Worksheet Password Protection? Worksheet password prevents the user from changing, moving, or deleting data in a worksheet. With worksheet protection, you can make only certain parts of the sheet editable and users will not be able to modify data in any other region in the sheet.
Part 1. Using Excel 365, Excel 2016, Excel 2013, Excel 2010, Excel 2007:
Only Excel 2003 password protection method is different. After Microsoft Excel 2003, Password protection has been improved and has been made easy. A password prevents other people from removing the worksheet protection - it needs to be entered to unprotect the sheet. Now using a couple of clicks you can Protect your Excel Sheet. Just follow the steps below and in no time your sheet will be protected and ready to deliver.
1. Open the Excel document that you want to protect with any of Microsoft Excel Version above 2007.
2. Navigate to “Review” tab from Menu bar.

3. In “Review” Tab you will see “Protect Sheet” option. Select that option.

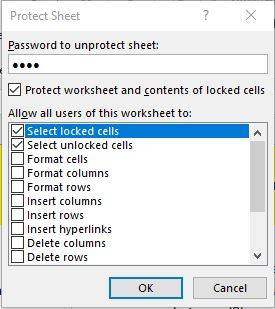
4. New window will appear with password box asking for password. Enter a strong password for better protection and click “OK”.
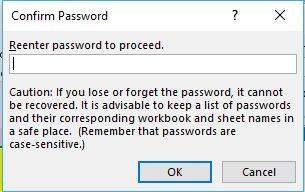
5. Now another window will appear with a box asking to re-enter password. Re-enter your password and click “OK”. Save the document.
Your file has now entered in “Read-Only” mode. Only user with known password can edit, modify, delete or remove protection from the sheet.
Part 2. Using Excel 2003:
If you are using Microsoft Excel 2003, its password protection method is little different because of its different interface. Just follow the simple steps and protect your file:
1. Open the Excel Document with Microsoft Excel 2003 that you want to protect with password.
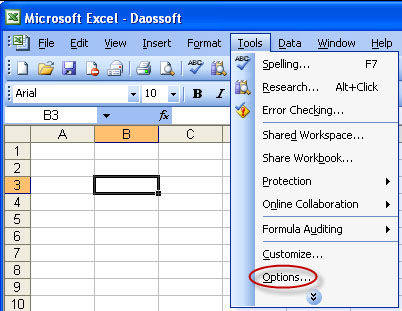
2. On the menu bar of the file window, click "Tools" to open the drop-down list then select "Options".
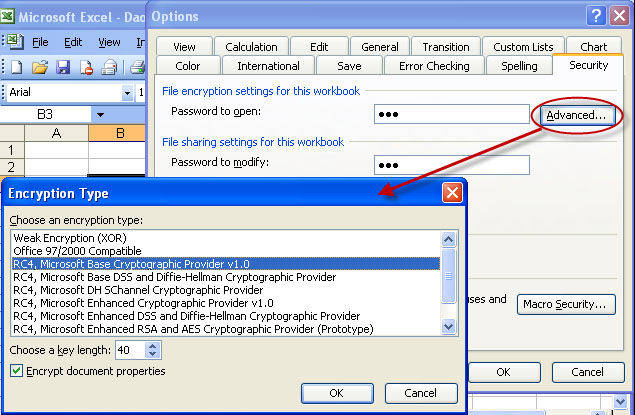
3. A new “Option” window will appear, look for Security Tab and click on it. There you will see two types of password fields. Typing a password in the Password to open text means that you will set a password to protect the Excel document's access permission. Typing a password in the Password to modify text means that you are setting a password to protect the modifying privilege. Anyone who has no password to modify can read-only the document, but he cannot modify the document. Set the password in the fields and click “OK”.
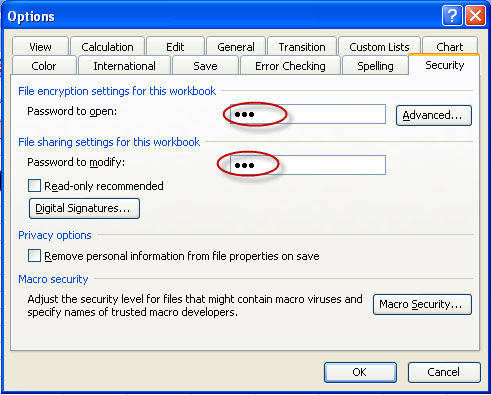
Important: You can see “Advanced” option in front of “Password to open” field. If you click on it new window will appear. Select an encryption type in the list. Then click "OK".
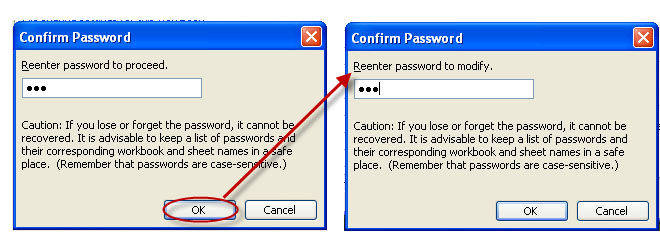
4. If you have set both passwords after clicking “OK” two new windows will appear asking you to re-enter both password first “Password to Open” then “Password to Modify”.
5. Now save the document by clicking "File" in the menu bar and selecting "Save".

Now your document is password protected. When you again open the protected Excel file it will first ask the “Password to open” then it will redirect you to read-only mode. If you want to edit you have to provide “Password to Modify”.
Bonus Tips: How to Unprotect Excel Sheet
You can unprotect Excel Sheet by following the same steps. But instead of “Protect Sheet” there will be available “Unprotect sheet”. When you will click on that option it will require a password, if you know the password it would be easy to unprotect. But if you lost or forgot your password you don’t have to worry. Use PassFab for Excel software to unprotect sheet. It not only recovers the password but it provides the opportunity to remove the password as well.
Here is the guide to use PassFab for Excel to unprotect your Microsoft Excel sheet:
Section 1. How to Unprotect Excel Sheet without Password
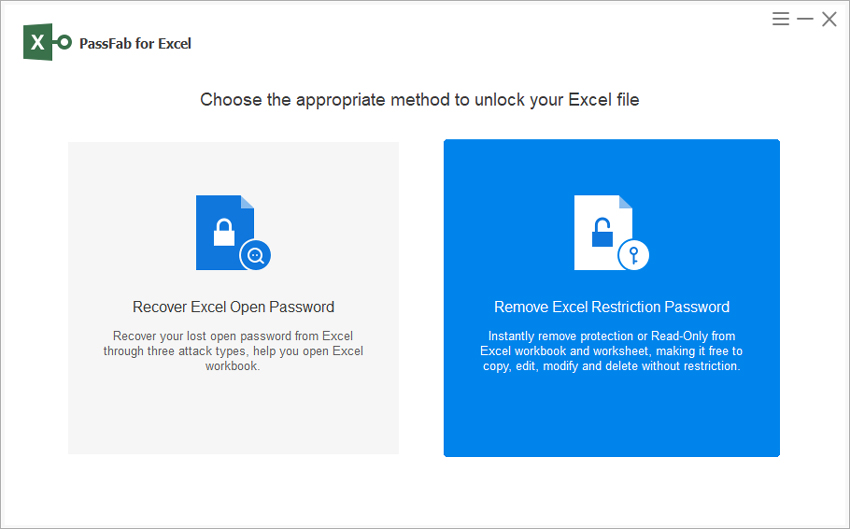
Step 1. Download and install PassFab for Excel, launch it and choose "Remove Excel Restriction Password".
Step 2. Now import your Excel spreadsheet which is protected.
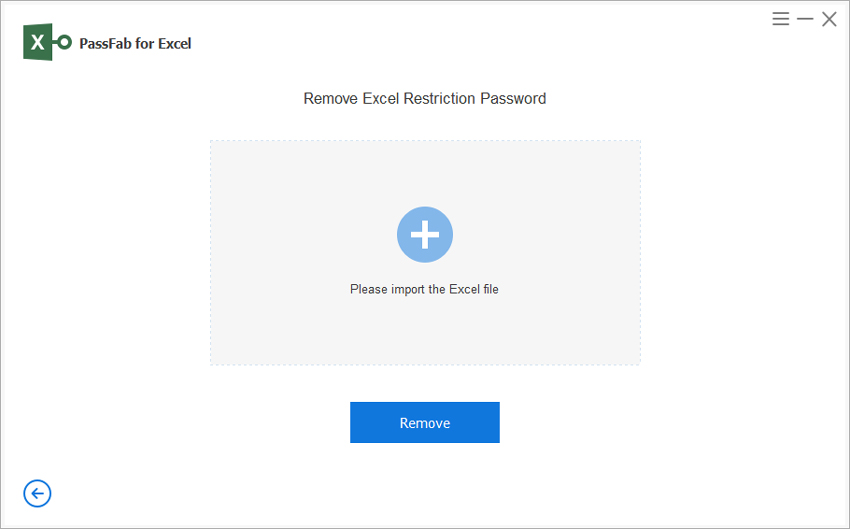
Step 3. Click on "Remove" button and go ahread.
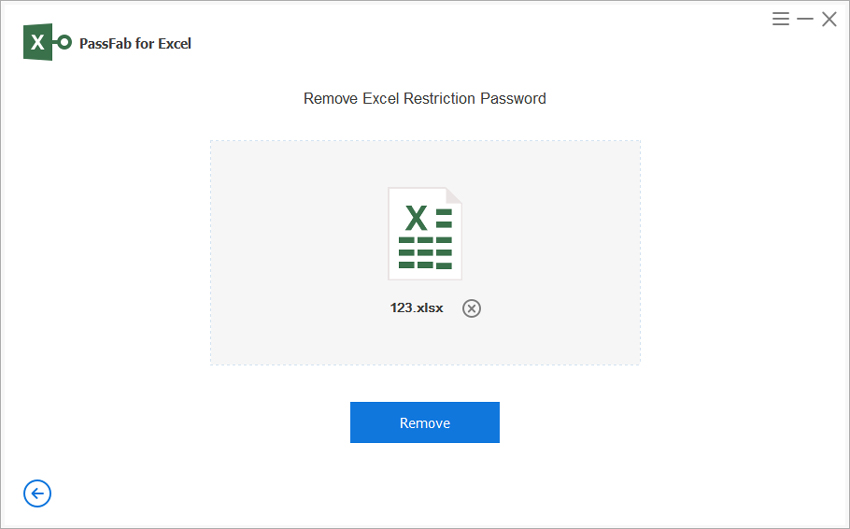
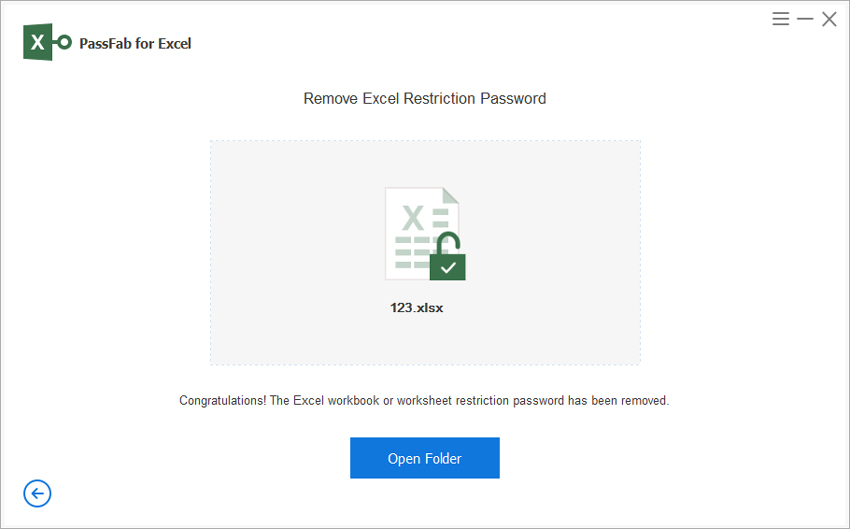
Step 5. Within seconds, your sheet password will be removed successfully.
Section 2. How to Recover Forgotten Excel Workbook Password
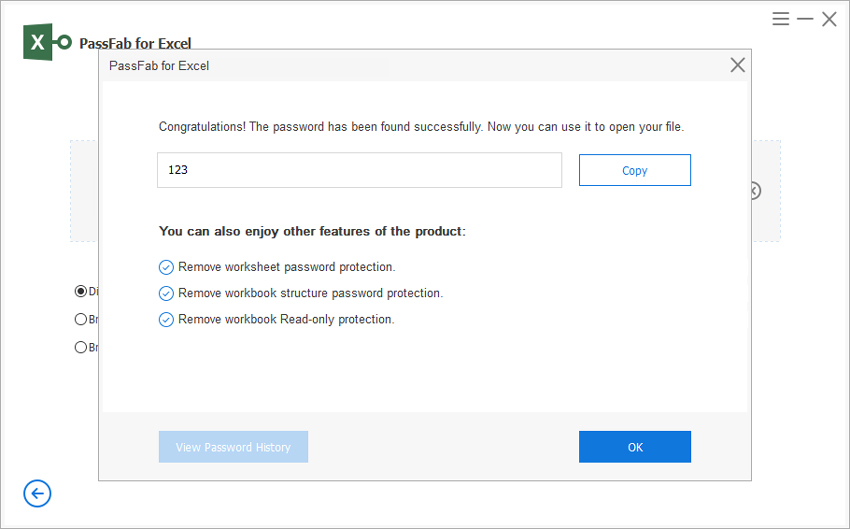
You just have to install and run this Excel password recovery software. Then import your protected Excel file and select any of the 3 options for password attack. After selecting the Password Attack type click start and let the software do rest. A dialogue box will appear with the password of your Excel file. Use this password to decrypt your file. There are 3 options available:
- Dictionary Attack: If you have a password dictionary already, please import the dictionary file, it will help you sift the right password from the dictionary. Actually, this option guarantees a great rate for success.
- Brute-force with Mask Attack: Enter whatever you still remember in the password. This option will check the customize number, symbols, and characters to find your password.
- Brute-force attack: This option will check all characters one by one to find your password. It’s the default option for Excel spreadsheet password recovery.
Step 1. Open this Excel password recovery tool from PassFab. Choose "Recover Excel Open Password" and click on "+" to import the Excel file you want to open.

Step 2. Now select the Attack type and set parameters accordingly. There are three types of attacks which are Brute-force Attack, Brute-force with Mask and Dictionary.
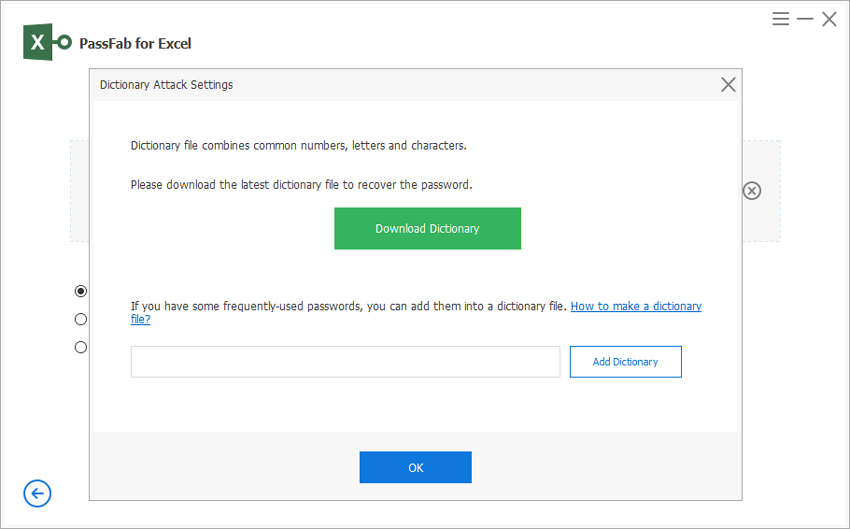
Step 3. Click on "Recover" button to recover the password.

Step 4. Now you can easily open the file with the recovered password.
Conclusion
You don’t need to be an IT expert for encrypting your Excel file. It’s only a couple of steps procedure. Apart from that now you can protect you excel file without fear of losing the password. If your boss asked you to get an old protected Excel file fixed, you don’t need to follow any solutions just use PassFab for Excel, the best Excel password unprotect software and get your work done easily.
