It is for sure, that the Read Only feature in Excel is there to prevent any accidental changes to an Excel file. But what if someone sends an Excel spreadsheet and asks you to customize and edit something on the file itself. But unfortunately, you find it locked with a Read Only option enabled. Now, the inevitable question comes “How to change Excel from Read-only?” It is simple and you can do it by all by yourself. In this article, we are here to help you with it.
Solutions on How to Change Excel from Read-Only
The Read-only feature is a simple security measure so that no one can change your Excel file. But you can change or modify by disabling the Read-only on any Excel file by following certain steps. As we have used many versions of Excel like 2003, 2007, 2010, 2016 etc, and with changing encryption algorithms, the procedure and the steps on some versions are a bit different. Here we will talk about the ancient 2003 version and the latest 2016 version. So, here’s how to change an Excel file from Read-only:
For Excel 2003:
Excel 2003 followed a binary package while saving files. But it changed from 2007 and onwards when the binary package was transformed to a fully XML based one namely from “.xls” to “.xlsx”. If by any chance you are using a 2003 version and someone sends you a worksheet from a 2007 version or later, and if the file is opening as "Read-only”, fear not, you can edit and save that very file in Excel 2003 too. Follow these steps:
Way 1: Save with A Different Name:
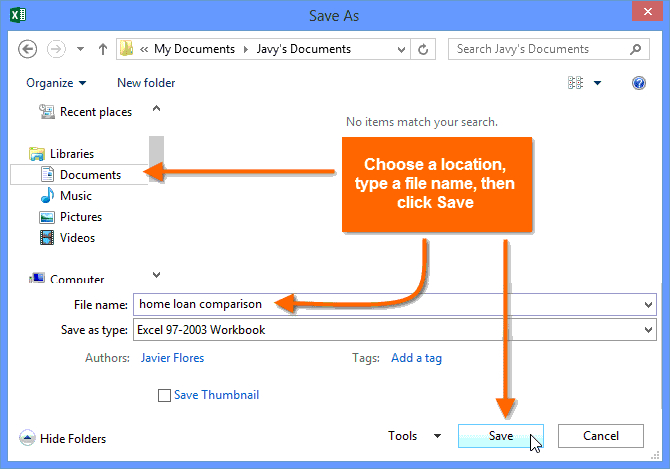
Open the Read-only file in Excel 2003, and just tap "Save As" and save the file with a new name and preferably to a new location.
Way 2: Un-select from Properties:
If the above method doesn’t work,
- Simply select the Excel file un-opened.
- Now, right click it and go to "Properties"
- Tap on "General" and un-check the box that shows "Read Only" box.
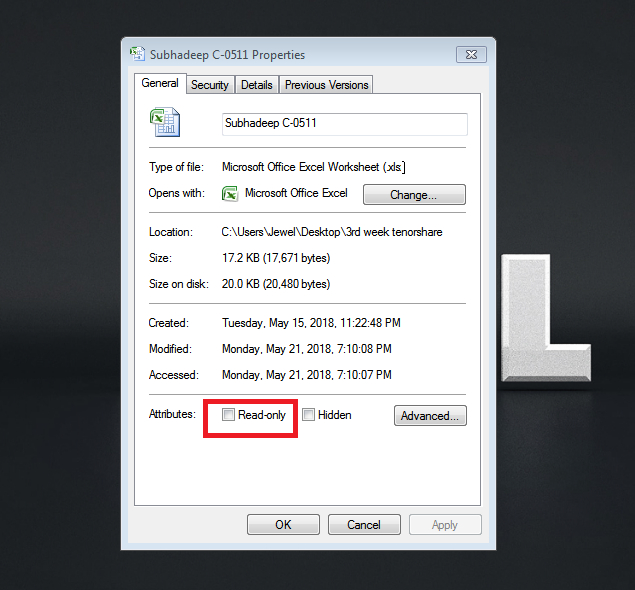
Keep in mind, this method will work only if the file is not password protected.
For Excel 2016:
The Excel 2016 provides stronger protection for files as compared to 2003, 2007 and even 2013. It has a very potent encryption algorithm and files get saved in “.xlsx” format. Here the Read-only feature can come up in certain cases and can be resolved easily too. Here’s how to change a Read-only Excel file in Excel 2016 version:
Way 1: Disable Marked as Final:
If you see your Excel file “Marked as Final”, it just means the workbook is final and read-only. To disable this, click the “Edit Anyway” option on the top of the taskbar and that’s it! You have a fully workable workbook that you can edit freely.

Way 2: Disable Modify Password:
If a Modify password is active on your target Excel file and if you don’t know the password, you can only open this file in Read-only mode. Also, the changes you make won’t be saved unless and until you save the file with a brand new name and preferably in a different location. Here’s how to disable Read-Only mode:
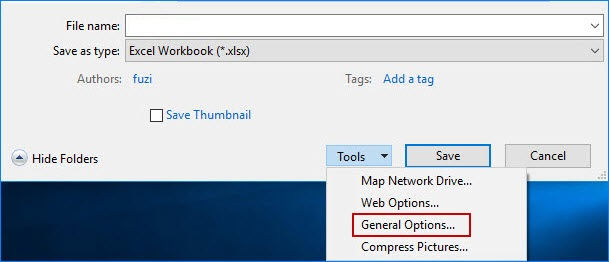
1. Open the Excel workbook. Go to “File” and then to “Save As”, and select the path where to save this file.
2. Now, in this box, find and tap on the “Tools” button. Then go to “General Options”.
3. In the new window, wipe out the modify password and simply uncheck “Read-only recommended” box. Now, “OK”.
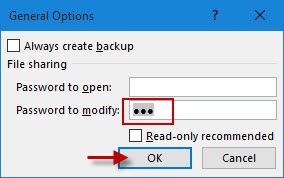
4. You will be automatically redirected to the “Save As” dialog box again. Here tap on the “Save button” to save the entire workbook.
This is how to change a Read-only Excel file on Excel 2016!
Way 3: Disable Worksheet Password
If you have the worksheet password active, your workbook will prevent anyone to tamper any data inside your worksheet. Anyone can open and see the document but will be prohibited to change anything inside the sheet.

In this case, the Read-Only mode can be disabled by the following steps:
1. Open the required Excel file.
2. Navigate to “Review” and then tap on “Unprotect Sheet”.
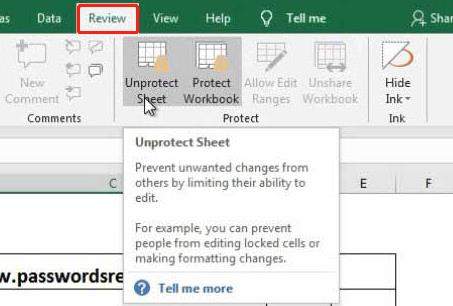
3. When prompted for a password, simply type and tap “OK”.
This will disable the Read-only mode and you will be authorized to change or modify and finally save the document.
Bonus Tip: How to Change Forgotten Excel Password
If you want to know how to unlock an Excel file without actually having the password, you can do it with the help of PassFab for Excel software. This software is an unlocker tool that can unlock any Excel file and eventually disable the Read-only mode, by recovering the original password by Brute-Force decryption and other methods. The most highlighting factor here is that it supports all versions of Excel starting from 1997 to 2016. It is intuitive and works effectively as well. Here's how to use it.
1. Launch the Excel Password Recovery software on your PC.
2. Click “Add” to import the Read-Only enabled Excel file .
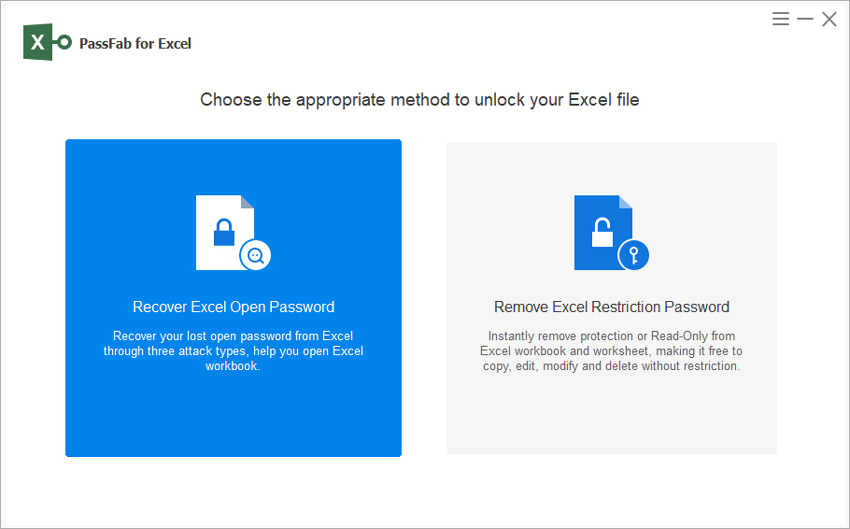
3. You will find 3 decryptions methods listed below. Choose one and proceed.
- Dictionary Attack: Needs password dictionary for fast working
- Brute-force attack: The default option for this software. Takes a bit of time but works effectively.
- Brute-force with Mask Attack: This needs your input for working.

4. Now, after selecting the desired attack, tap on “Start”.

This will start the decryption process right away. After some time, you will see a dialog box with the unlocking password that can help you unlock your required Excel file. This is how to change Excel file from Read-only the right way!
Conclusion
So, these are the best ways to bypass or change Excel from Read-only mode. All these methods are really effective and will do the work for you just fine. But most of these are a bit tough to implement but you can get help from the detailed steps that we have provided. In case, you don’t want all this hassle, close your eyes and go for the PassFab for Excel software. This will do the job for you perfectly. It is super fast, effective and most importantly completely hassle-free. Install and let it do its magic. Undoubtedly, it is the best method listed here to change Excel Read-only mode. Highly recommended!!
