When multiple people have to access spreadsheets in a company then it is very crucial to prevent all sorts of unauthorized access and modification. Sensitive or private data stored in Excel files can be marked as read-only to add a layer of security on top of it. This not only makes the file harder to access but also requires password input for making any changes in the file. Password encryption is recommendable when you are dealing with multiple employees or want to prevent accidental deletion of the important data file. If you want to know how to make an Excel file read only then follow this guide.
Solutions on How to Make Excel File Read Only
The very first thing you can do is to “Mark as Final” it will not make Excel read-only but as the name suggests, it will tag the file as final document and give a warning message whenever someone tries to makes changes in document, this is how you do it:
Step 1: Click “File” in the menu bar and then Select “Info”.
Step 2: Now, click “Protect Workbook” and select “Mark as Final”.
The problem with this solution is that it only shows warning whenever someone will try to make changes in the file. However, the user can still modify the file, in order to prevent that you will have to set password encryption to make sure no unauthorized changes are made. Password protections come in 2 general types, one is to prevent opening of the file and other password protections restricts modifications.
1. How to Make Excel Spreadsheet Read Only (Excel 2003/2007):
By default all files created have read and write access however you can restrict this by marking the file as read-only, this will disable editing of file and make sure no unauthorized changes are made. One thing must be clear here that enabling “read-only” alone won’t make your excel file 100 percent safe, you will need to set password decryption too this is how you do it:
Step 1: Open Excel file you want to mark as read only for protection.
Step 2: Go to “Tools>Options>Security”, you will see the following UI on your screen.
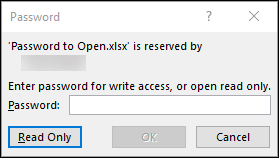
Step 3: Check the “READ-ONLY RECOMMENDED” box to mark the file as read-only, optionally you can follow step 4 to add an extra layer of protection by password.
Step 4: You can also set Password protection by typing in a strong password in “Password to Modify” textbox.
2. How to Make Excel Sheet Read Only (Excel 2016/2013/2010):
If you want to make your Excel files write protected and want to prevent unauthorized access and editing then follow these instructions on Microsoft Excel(2016). One thing must be noted here you can make your excel file read-only without setting a password however user will be able to edit that, if you want strong protection then it is recommended to set “Password to Open” and “Password to modify” both for maximum security and prevent against unauthorized breaches.
Step 1: Open the Excel File you want to encrypt, like any other Excel file.
Step 2: Open ‘’Save As” dialog box from top file menu, a tool dropdown will appear near “Save As” button.
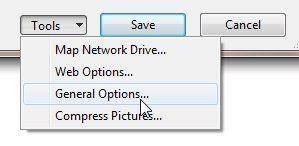
Step 3: Open the dropdown and choose “General Options”, it will show some other settings.
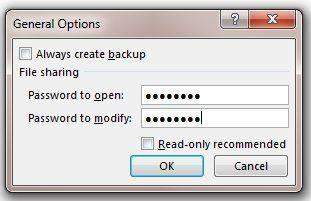
Step 4: Now, check “Read-only Recommended” and optionally you can also set password if you want.
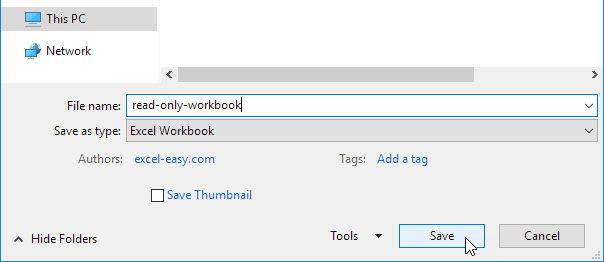
Step 5: Now, save the file and close it, the file will now have read-only protection whenever someone tries to open it.
Bonus Tip: How Decrypt Excel File
If you know how to make Excel read-only and protect it with password protection, but you don’t know how to decrypt this protection in case you forget your password then worry no more. There are number of ways you can achieve this, I’ll cover most basic one so you can unlock your access file easily. This is how you do it:
PassFab for Excel can be used to decrypt and open password protect Excel file, this method works for almost all versions of Microsoft Excel files. It can unlock your password very easily with brute force attacks. It works for both workbooks and spreadsheets and supports multi-core CPU and GPU acceleration for fast cracking. This is how you use this program to unlock Excel files:
Step 1: Open the program. You will see below interface, now click “Add” to import to import Excel spreadsheet whose password you want to recover.

Step 2: There are 3 types of attack available, Brute force, Brute force with mask, the Brute force with a dictionary. Choose the attack type and set parameters accordingly.
Note: Dictionary Attack can be used when you already have a dictionary file, the Brute force with Mask attack let you crack the password with whatever you remember, Brute force attack will try all the combinations to unlock the password.
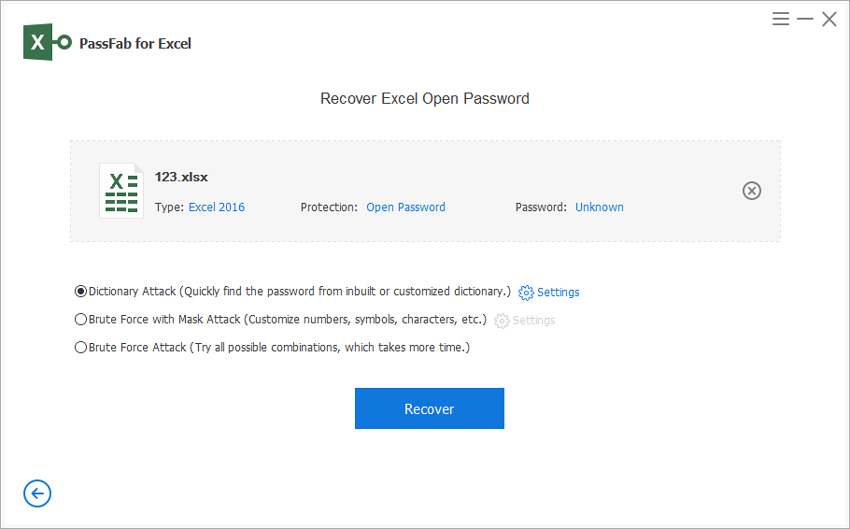
Step 3: Click “Start”, this will initiate brute force attack, it may take time according to password length and complexity.

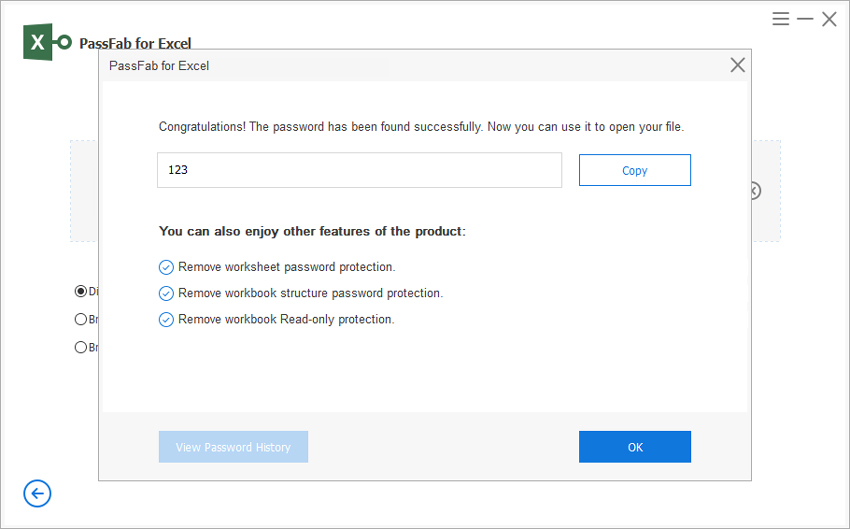
Step 4: Your password will be cracked once the attack is complete and a window will pop up having the password.
Bottom Line
This guide covered you can mark your Excel file as read-only to make sure no one can change the data inside the file. All sorts of unauthorized modification and viewing can be restricted via setting password protection. If you somehow forget your password and want to decrypt the file, we also have shared an awesome tool which can unlock your password protection with brute force and it works with almost every version of Excel.
