There are a lot of files that you want to be secure, Excel 2010 keeps good care of that by providing read only Excel 2010 feature. With this, you can make your file turn into read only format, that means, nobody can edit your file but can only read it. There are different types of read only features. Either you apply password to the file or you don't. If you apply password to the file for read only feature, the next time anyone opens the file will have to enter the password to edit the file.
It is very simple that you apply password to you Excel file that contains your precious data and you don't want others to edit it or replace it with some other information. But sometimes, you forget the password you applied to your Excel 2010 file. It is then, the basic problem starts, which is how to remove read only password from Excel 2010? By following these simple steps, you can apply password to your Excel 2010 file and can easily remove it if you have forgotten the password for it.
Option 1: Make Excel 2010 Read-only Password
Excel 2010 Read-only is an excellent option when you don't want to opt for third-party software. To set a password to your Excel 2010 file so that nobody can edit it but only read the information you have shared, just follow these simple steps.
Step 1: Open the file you want to apply password on.
Step 2: From the "File" menu, select "Save as".
Step 3: A new window will pop, select the option "Tools" from it and a new dropdown will be shown to you.
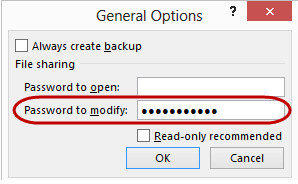
Step 4: From that dropdown, select "General Options".
Step 5: A new prompt will be shown asking for password to modify.
Step 6: Enter the password you want to set to your file and check the checkbox "read only recommended".
Step 7: Press "Ok" and save the file, your file is password protected for read only mode.
Option 2: Disable Excel 2010 Read-only Password
Now, let's come to other side of the topic. Read only is a very useful feature provided by Excel, but sometimes, you really want to edit your file and the first thing that comes in mind is how to disable read only in Excel 2010. For that, following are the ways through which you can easily remove read-only feature from your Excel 2010 file.
1. VBA Code
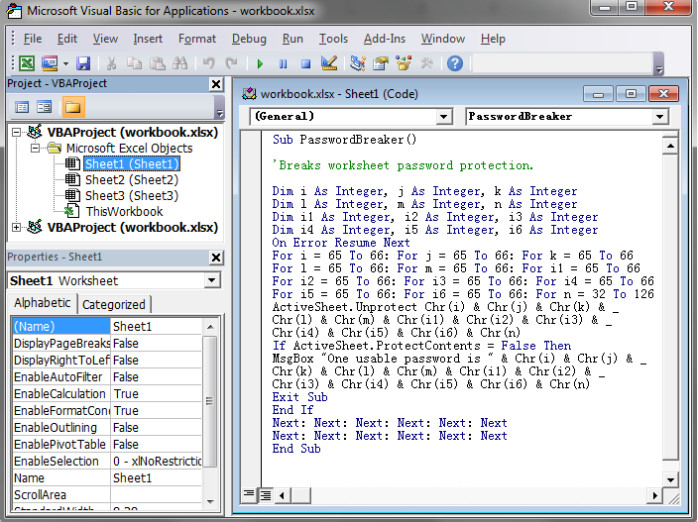
If you have the question that how to remove read only from Excel 2010 in mind, VBA (Visual Basic for Applications) code is the easiest way to follow. Microsoft provides this feature to remove any sort of password applied to the Excel file so that you can have access to your important files you forgot password for. Following are the simple steps to use VBA code to remove password from an Excel 2010 file.
Step 1: Press "ALT+F11" to open the Visual Basic for Applications console.
Step 2: Import your password protected file into it.
Step 3: Click on the Insert option and press "Module"
Step 4: Copy the VBA code for password recovery (you can easily find on internet).
Step 5: Run the code and it will remove the password from your protected Excel 2010 file.
2. Zip Software
If you have forgotten password for your Excel 2010 file, you can always rely on zip software. Removing password protection from any sort of Excel file is very easy using zip. Following are the simple steps that you need to follow to remove password from an Excel 2010 file.
Step 1: Change the file (you want to remove password protection from) format from .xlsx to .zip by renaming the file.
Step 2: Open the zip archive and right click on your file.
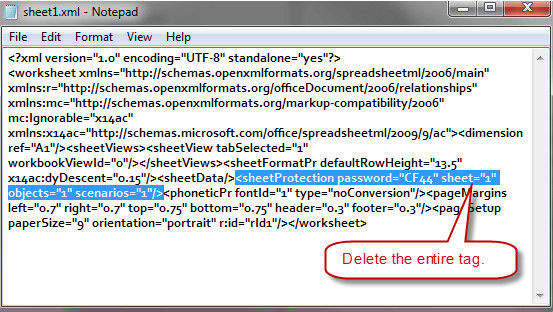
Step 3: Choose "Edit" and it will open in Notepad.
Step 4: Remove all the tags with "Sheet Protection".
Step 5: Save the Notepad file and close it.
Step 6: Change the format back to .xlsx from .zip and your Excel 2010 file is unprotected.
3. PassFab for Excel
PassFab for Excel with its user-friendly GUI experience is one of the best tools to make an Excel 2010 file in the read-only mode. If you are having trouble with the above-mentioned methods, then try going for this one because it is very easy to use PassFab for Excel. It is a very powerful and useful software that can easily remove any kind of password set to your Excel 2010 file. Ignoring the length and complexity of your password, PassFab for Excel works very smoothly while unprotecting your Excel 2010 files. To unprotect your Excel 2010 file, you can follow these simple steps.
Step 1: Download, install and run the software.
Step 2: Open the file you want to unprotect.

Step 3: Choose the type of attack you want to unprotect your Excel 2010 file with.
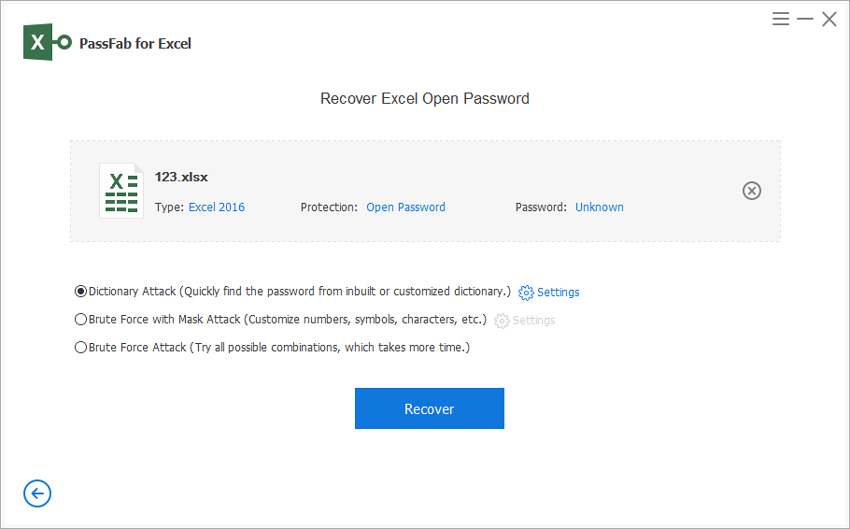
Step 4: The Excel password recovery tool will automatically unprotect your file within some time.
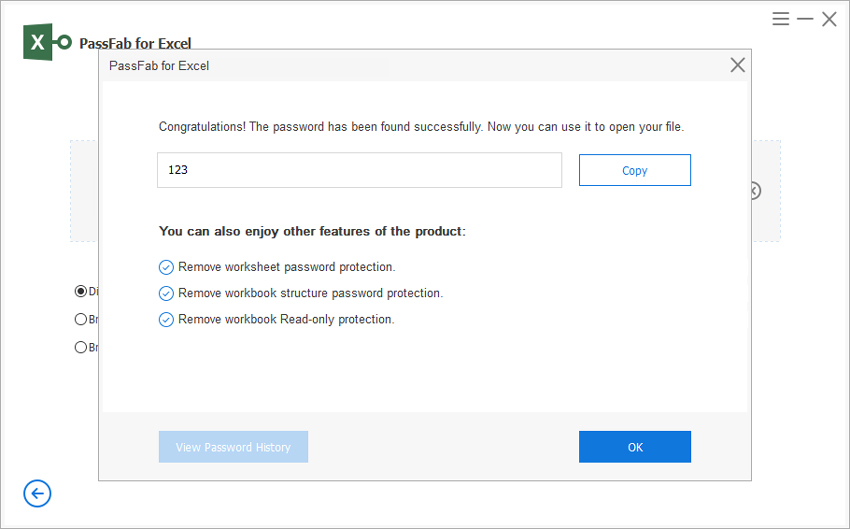
The tool is really amazing and supports almost every version of Windows. It can crack every version of Excel's password. The software is not free to use but a free trial is available.
Summary
Excel 2010 provides every basic feature that fulfils privacy issues for many people. So far, we have discussed some of the easiest ways to make a spreadsheet read only Excel 2010. We have also discussed a lot of simple ways to unprotect your Excel 2010 file if you have forgotten password for it. If you can find any other interesting ways to protect your Excel 2010 file or to unprotect it, just let us know and we will surely look into it. Thank you.
