Excel 2013, like other productivity tools in Office suite, allows users to protect their files using a password. Protecting your Excel file provides it with a layer of security: unauthorized persons cannot access sensitive and private data stored in the file. Secondly, it protects the file when sending it to other users over different media. It is, therefore, important to secure your Excel files with a password. This article explains how to password protect Excel 2013.
Method 1. Protect Excel 2013 with Open Password
Wondering how to set password in Excel 2013? The Open Password feature that is accessed through the Save As option can be used to protect your Excel file. Follow the procedure below.
Step 1: Navigate to the Excel file and open it.
Step 2: In the ribbon, click File and then Save As.
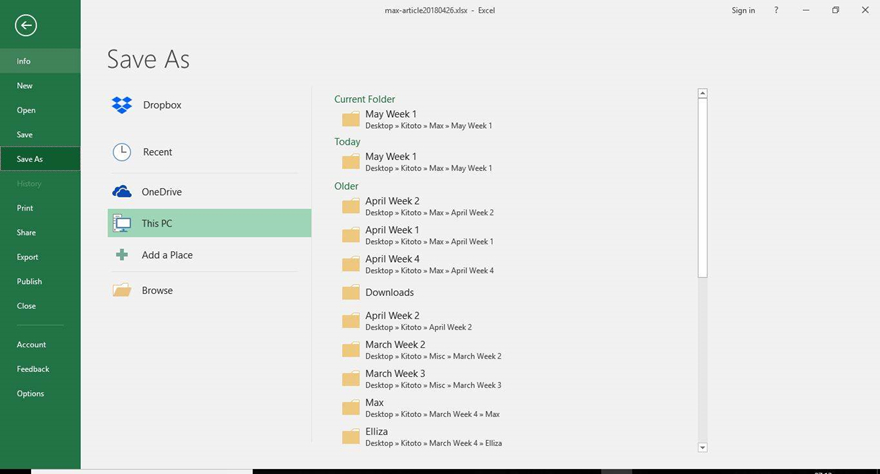
Step 3: Select a file location on which you’ll save your document by clicking This PC or Browse.
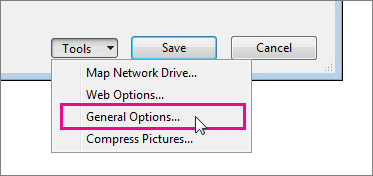
Step 4: Click Tools in the Save As pop-up window then proceed to click General Options.
Step 5: Key in a password under the Password to open option and reenter it to confirm password in the prompt that appears next.
Note: Check other options such as Read-only or Always create a backup.
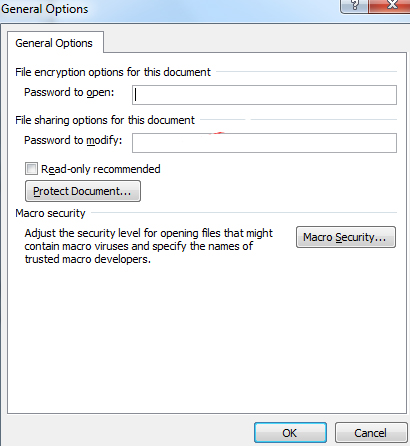
Step 6: Click Ok and then Save.
Any user will be prompted to key in a password when trying to access the file.
Method 2. Protect Excel 2013 via Modify Password
Modify Password feature allows users to modify the contents of the Excel File. To set Modify Password, follow the procedure below.
Step 1: Navigate to the Excel file and open it.
Step 2: In the ribbon, click File and then Save As.

Step 3: Select a file location on which you’ll save your document by clicking This PC or Browse.
Step 4: Click Tools in the Save As pop-up window then proceed to click General Options.

Step 5: Key in a password under the Password to modify option.
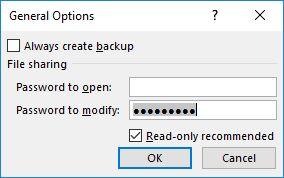
Step 6: Reenter the password to confirm it in the prompt that appears next. (Note: Check other options such as Read-only or Always create a backup.)
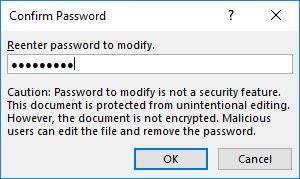
Step 7: Click Ok and then Save.
Note: Users who don’t have the modify password, can click the Read Only button to access the contents of the file.
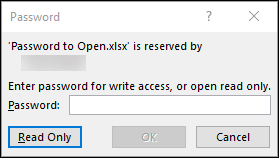
Method 3. Protect Excel 2013 with Read Only Password
The Read Only feature ensures that users cannot edit the contents of the workbook unless they use the Save As feature to save the document in a different location. Follow the procedure below.
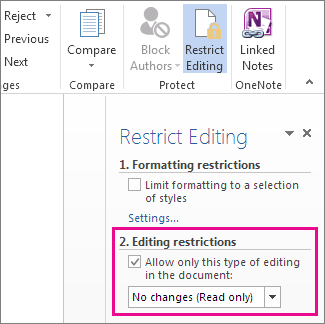
Step 1: In the ribbon, click Review > Restrict Editing.
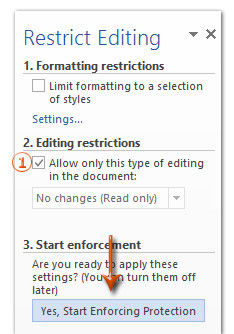
Step 2: Under Editing Restrictions, check the “Allow only this type of editing in the document” checkbox and select the No changes (Read Only) option.
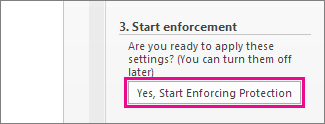
Step 3: Click “Yes, Start Enforcing Protection” option.
Method 4. Protect Excel 2013 using Workbook Structure Password
Thinking of how to add the password to Excel 2013? The most direct way of protecting your password is by using the Protect Workbook feature that is located in the Info under the File option. Follow the procedure below.
Step 1: Navigate to the Excel document you would like to password protect and open it.
Step 2: In the ribbon, click File and then Info.
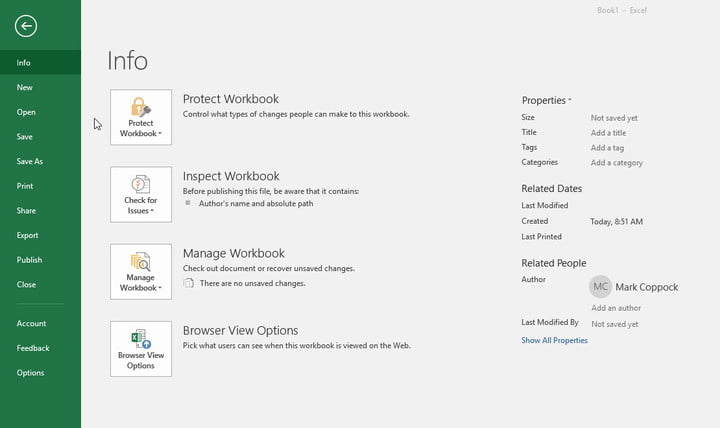
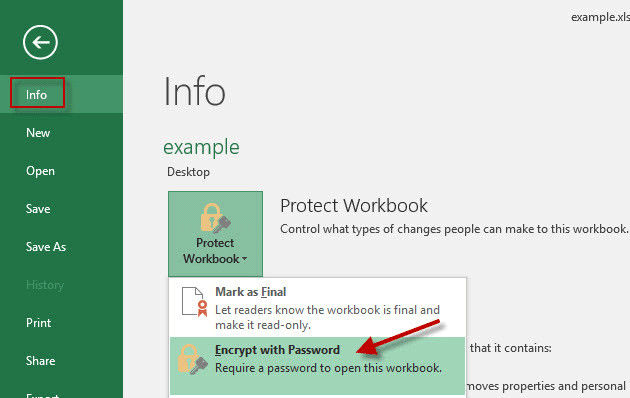
Step 3: Click Protect Workbook. It is the first option in the Info section. Then proceed to click Encrypt with Password.
Step 4: Excel will prompt you to key in a password. Type one and record it somewhere safe e.g. On your notebook.
Note: Losing your password means that you will not access it.
Step 5: Reenter the password to confirm it.
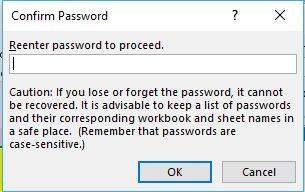
You will have protected your Excel file with a password. Close the file then open it. You will be prompted to type in the password to access the file.
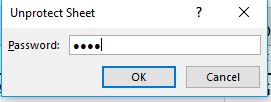
Method 5. Protect Excel 2013 through Sheet Password
Sheet password protects only one worksheet and not the whole workbook. To set it, follow the procedure below.
Step 1: Select a worksheet at the bottom of your screen, right-click it and click Protect Sheet. Alternatively, in the ribbon, click Review > Protect Sheet under the Changes group.

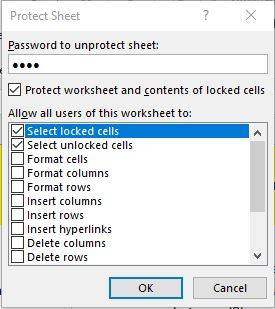
Step 2: Enter the protect sheet password, check other options and reenter the password to confirm it.
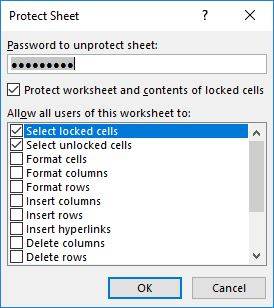
Users can open the worksheet but will be required to enter the password to make any changes.
Extra Tip: How to Unprotect Excel 2013 Password
PassFab for Excel is a great tool that allows users to recover and remove passwords for Excel 2013 files. It uses multi-core CPU and GPU acceleration to swiftly recover the passwords. To use PassFab for Excel to recover your forgotten Excel password, follow the procedure below.
Step 1: Download install and launch PassFab for Excel on your PC.
Step 2: Click the Add button to import the password protected file.

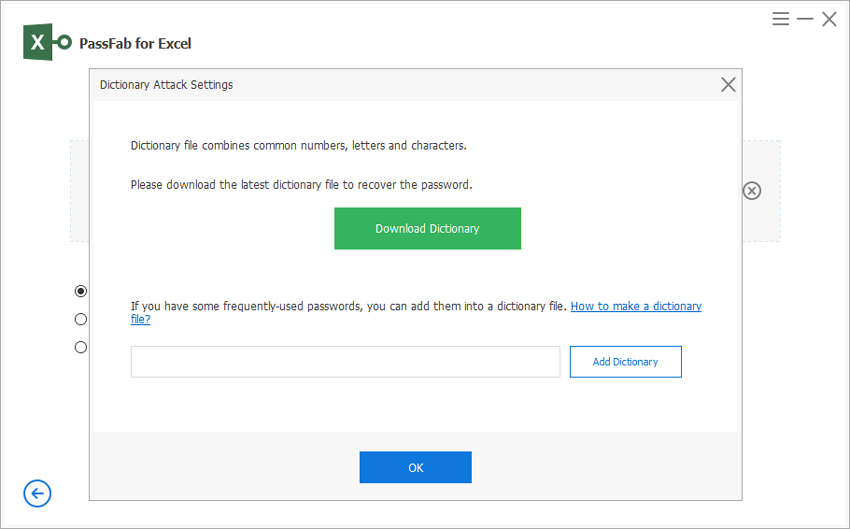
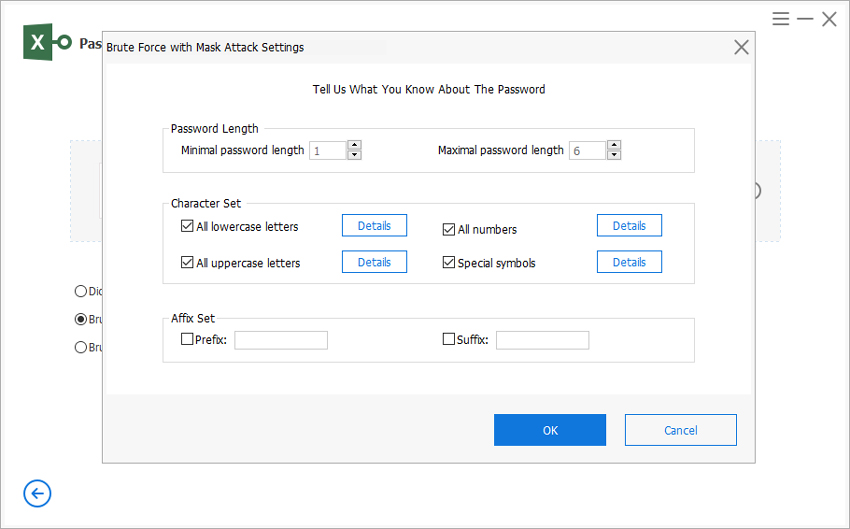
Step 3: Choose a suitable attack that will be used to recover the password: brute force with mask Attack, Dictionary attack or Brute Force Attack.
A. Dictionary attack can only be used if you have a dictionary. Download one or import it to the program if you already have one.
B. Brute Force with Mask attack option helps you key in any characters you recall about your password, making it easier for SmartKey Excel Password Recovery to recover it.
C. Brute Force Attack unlocks your password by using a combination of all likely characters.
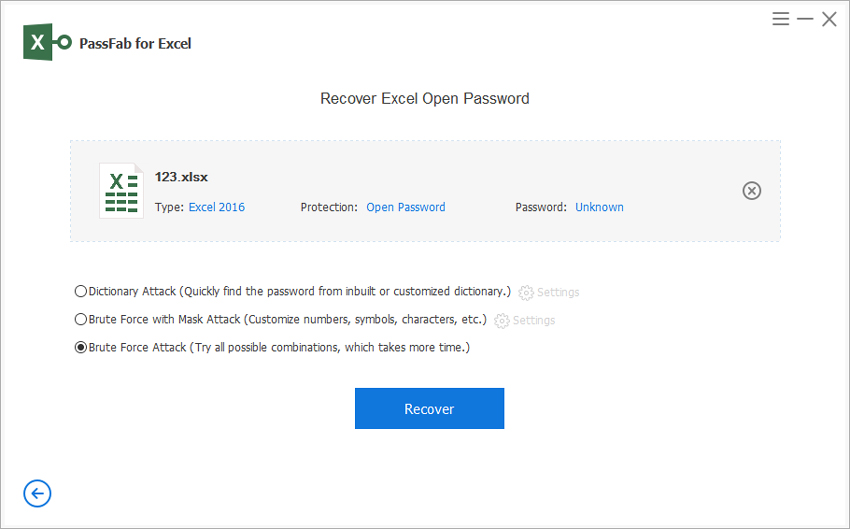
Step 4: Click Start and wait for the password to be recovered.

Summary
This article explains different ways to password protect Excel 2013 file. It is important to note down your password because you won’t be able to access the file without it. However, if you forget it, we recommend using PassFab for Excel to recover it.
