Hi, while the most recent (14/02/18) auto updates were installed they failed and windows removed failed files. Problem error code 0x800f0922 appeared, as the website does not explain how to cure the problem with any clarity, so not sure what to do. Possibly to do with the NET framework. Should I wait for a possible patch/workaround?
While working on Windows, you come across many problems. Sometimes, you see an error with a message, while other problems show symptoms, and you fail to identify the actual issue and the reasons behind it. Resolving errors for unknown reasons is quite difficult and complex. In this article, you will learn how to resolve one such error, i.e. Windows update error 0x800f0922.
Part 1. What is Windows Update Error 0x800f0922?
Part 2. What Causes Error 0x800f0922?
Part 3: Understanding and Identifying Error 0x800f0922 Symptoms
Part 4. How to Fix 0x800f0922 Error?
- Fix 1: Check and Install all .Net Framework Versions
- Fix 2: Delete Edge Browser Files
- Fix 3: Reinstall Edge Manually
- Fix 4: Use PassFab FixUWin
- Fix 5: Reset All Windows Components
- Fix 6: Execute Windows Update Troubleshooter
- Fix 7: Delete Files from Temp Folder
- Fix 8: Run SFC and CHKDSK Commands
- Fix 9: Turn App Readiness Service On
- Fix 10: Update Windows 10 with Media Creation Tool
Part 1. What is Windows Update Error 0x800f0922?
Error code 0x800f0922 in Windows 10 is the issue that mostly happens when the system fails to connect to the Windows Update server. When there is a problem downloading Windows 10 updates, the processor returns this error code. It also indicates that the System Reserved partition space has become so low that you cannot install quality, cumulative, feature, or security updates.
Part 2. What Causes Error 0x800f0922?
Here is the list of some potential reasons behind error 0x800f0922 in windows 10:
- Corrupted Windows Update Temporary Files
- Disabled/Unreachable .NET Framework Components
- Missing Microsoft Edge Component
- Low Space in System Reserved Partition
- Microsoft Update Server connection failed
- Antivirus Interference
- Corrupt System Files
- Disabled App Readiness Service
Besides all the reasons mentioned above, when you do not shut your computer down properly, or sudden power failure and system crashes happen, they can cause PFN list corruption as the processes do not get enough time to complete or get suspended completely.
Part 3: Understanding and Identifying Error 0x800f0922 Symptoms
Here are some symptoms to identify the windows update error code 0x800f0922:
- Slow PC performance
- Stuck Windows updates
- An error message stating, “We couldn't update the system reserved partition, “ along with the error code 0x800f0922
When a 0x800f0922 windows 10 cumulative update fails, you see the following message on the screen.
Part 4. How to Fix 0x800f0922 Error?
The following ways help you to fix the windows update error 0x800f0922:
Before attempting to resolve a problem, you must diagnose it properly. To diagnose PFN list corruption in Windows 11, you can use different tools such as,
Fix 1: Check and Install all .Net Framework Versions
If any of the required .NET Framework components are missing, you will not be able to install any Windows updates. So, making sure these components are installed and accessible is one of the most constructive solutions to error 0x800f0922 in windows 10.
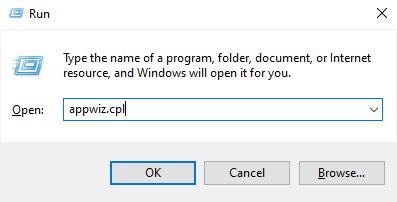
Step 1: Open Run dialog, type appwiz.cpl, and click OK.
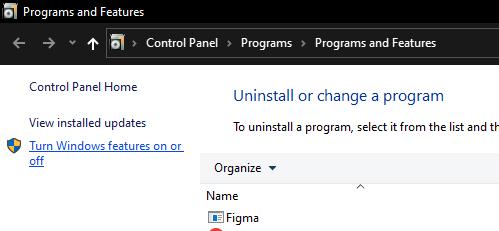
Step 2: Navigate to Turn Windows features on and off link.
Step 3: Tick the checkbox before .NET Framework (includes .NET 2.0 and 3.0).
Step 4: Also select .NET Framework 4.8 Advanced Services and click OK.
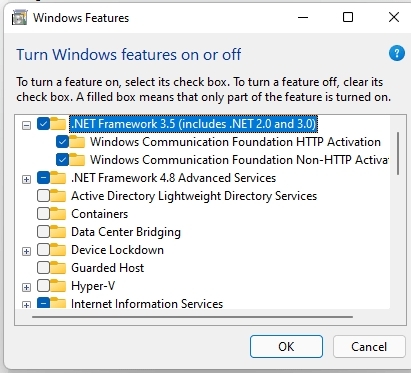
Let Windows install the selected frameworks. Once done, restart your computer and check if the 0x800f0922 error is resolved.
Fix 2: Delete Edge Browser Files
Sometimes, deleting Microsoft Edge will result in Windows 10 Update 0x800f0922 error. You can try to fix the error by deleting the Edge directory if you have deleted Edge before encountering this error.
Step 1: Open File Explorer.
Step 2: Now, navigate to Local Disk(C:)\Program Files(x86)\Microsoft.
Step 3: Select Delete after right-clicking on the Edge Folder.
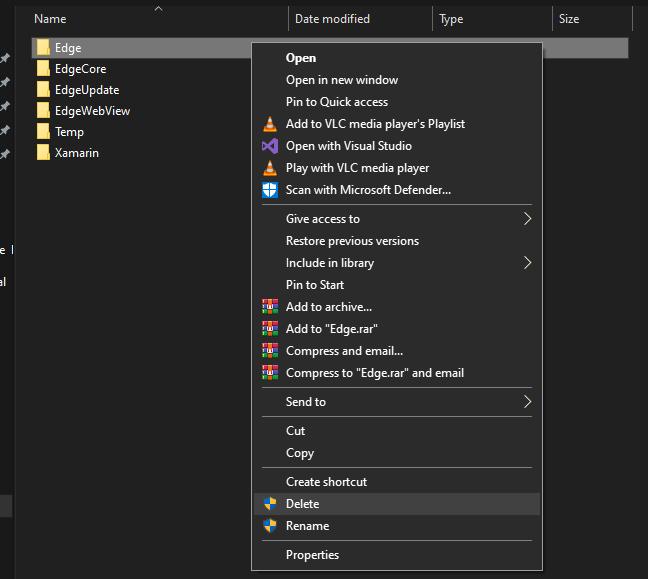
Now you have to restart your computer, and windows 10 will automatically reinstall Edge components while restarting.
Fix 3: Reinstall Edge Manually
If deleting the Edge directory did not help you resolve error 0x800F0831, you can try reinstalling Edge manually. Note that Microsoft Edge cannot be uninstalled from the Microsoft Store or console, so you have to do it in Safe mode.
Step 1: Click the Start button and then the Power button.
Step 2: Now restart your computer while holding down the Shift key.
Step 3: Press Troubleshoot -> Advanced options -> Startup settings -> Restart.
Step 4: Press F4 to enable safe mode.
Now to reinstall Microsoft Edge manually, go through these steps:
Step 5: Open Run Window by pressing Windows+ R.
Step 6: Type C:\Users\%username%\AppData\Local\Pacakges. Click OK.
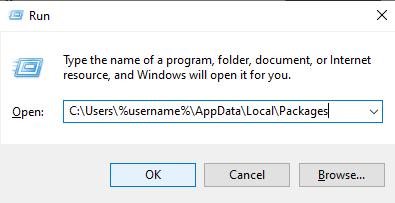
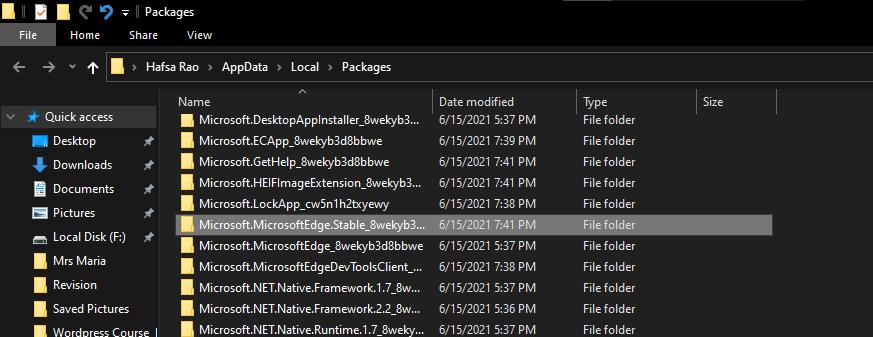
Step 7: Right-click on Microsoft.microsoftEdge_8wekyb3d8bbwe in the Packages folder.
Step 8: Select Delete.
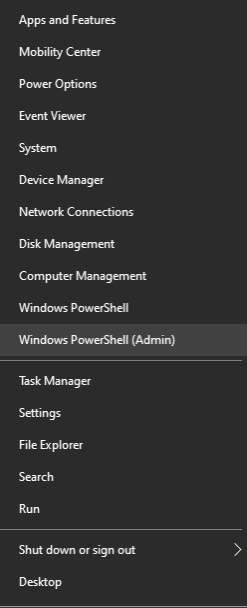
Step 9: Now, open Windows PowerShell (Admin) by right-clicking the Start button.
Step 10:Type Get-AppXPackage -AllUsers -NameMicrosoft.MicrosoftEdge | Foreach {Add-AppxPackage-DisableDevelopmentMode-Register “$($_.InstallLocation)\AppXMainfest.xml” -Verbose}, press Enter.

Restart the computer and reattempt to install Windows 10 update.
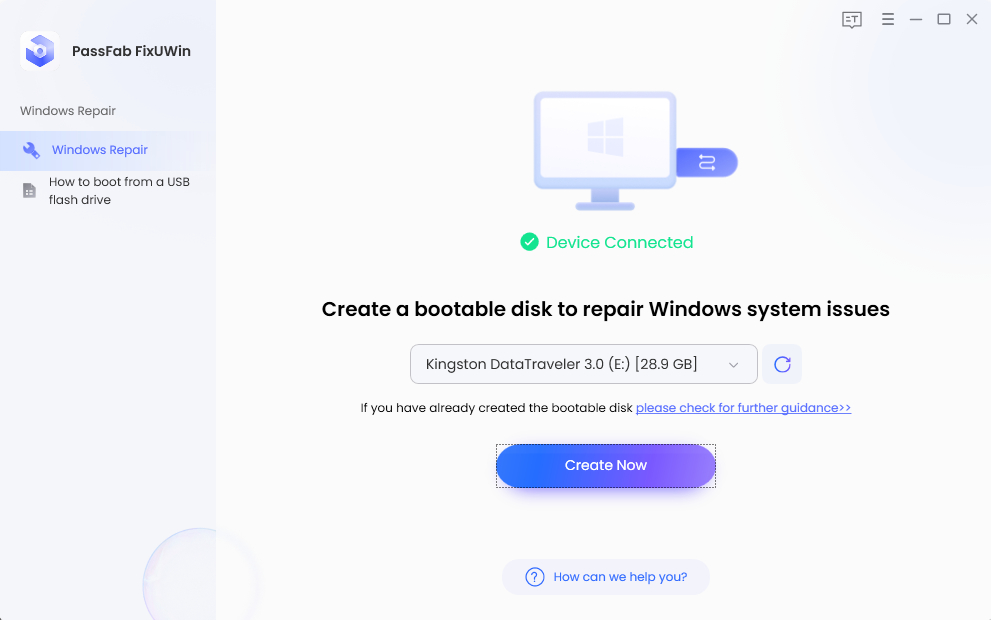
Fix 4: Use PassFab FixUWin
PassFab FixUWin is an all-in-one tool that sorts out all the errors by scanning your PC. This wonderful tool can fix PC crashing, blue/black screens, or any other issue. Here is how to use it to remove different errors in Windows 10/11:
- Install and launch PassFab FixUWin and attach a USB/DVD/CD.
- Now click Create boot disk now.

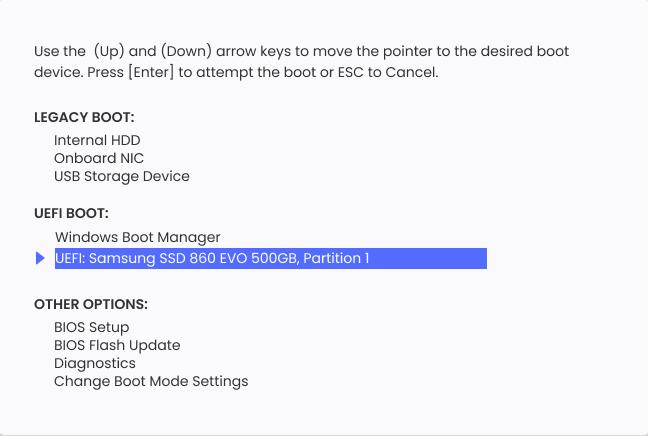
- Restart your PC, press the Boot key, set bootable USB on priority, save changes, and exit the boot menu.

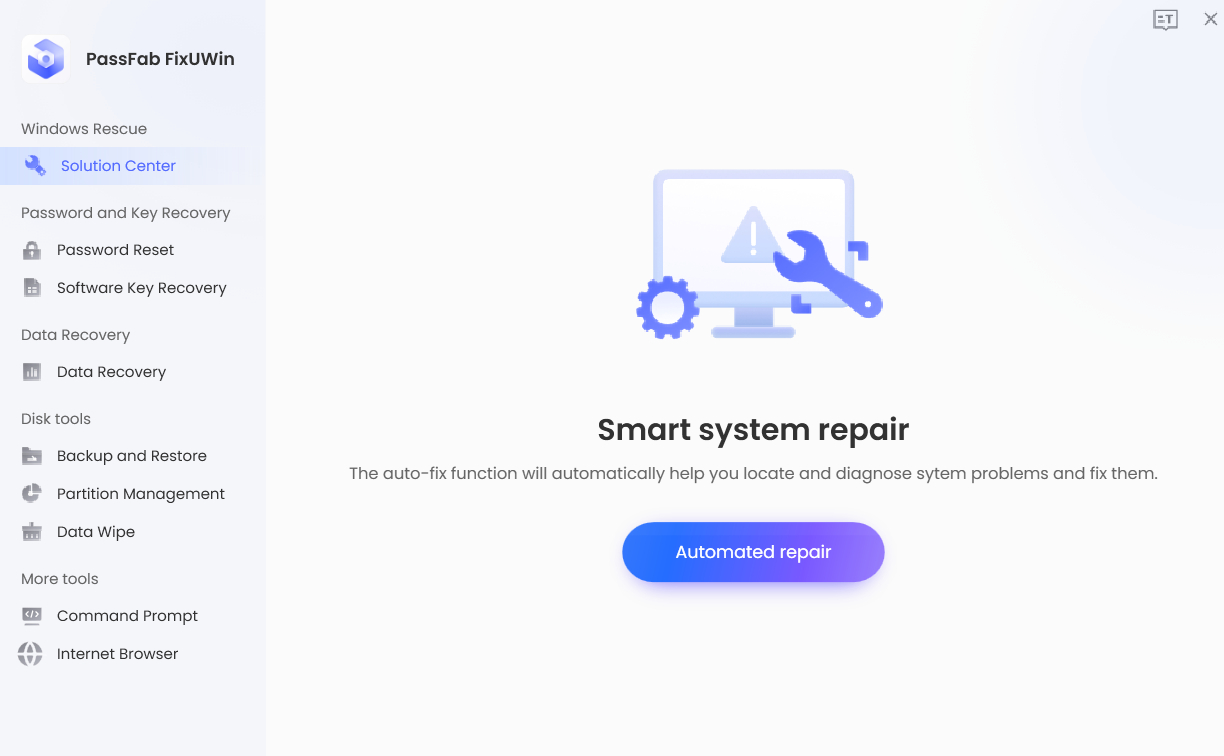
- Now, click Automated Repair.Waite for the tool scan and fix your pc automatically.

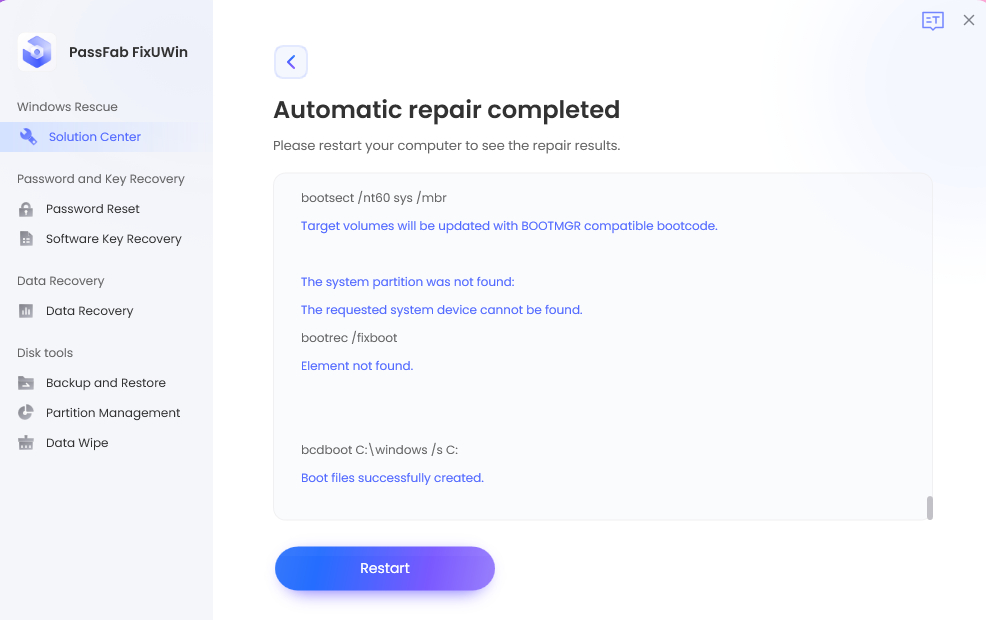
- Click Restart to reboot your pc.

After performing these steps, you will be able to resolve any Windows error.
Fix 5: Reset All Windows Components
Another fix to resolve the update error 0x800f0922 in Windows 10 is resetting the Windows Update component, which will clear the current DNS cache while restarting all the services involved in installing Windows Update. It also clears any temporary folders used by WU components. Here is how to reset all the Windows components:
Step 1: Open the Search Box, type cmd -> Run as administrator.
Step 2: Now, run the following commands respectively:
- net stop wuauserv
- net stop cryptSvc
- net stop bits
- net stop msiserver
- ren C:\Windows\SoftwareDistribution SoftwareDistribution.old
- ren C:\Windows\System32\catroot2 catroot.old
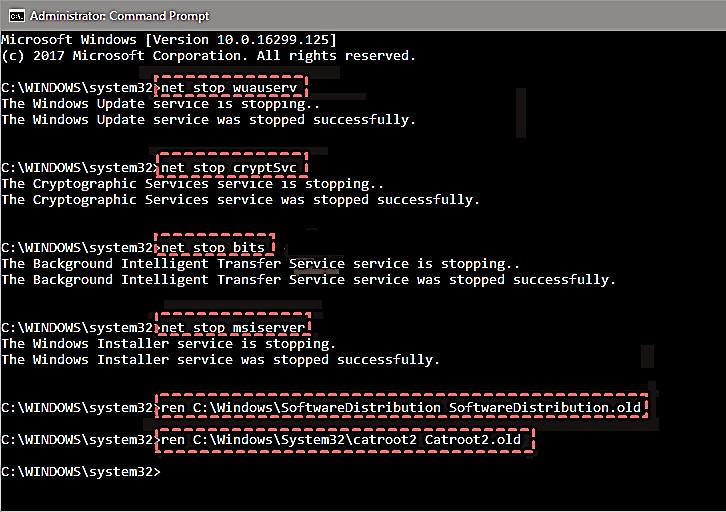
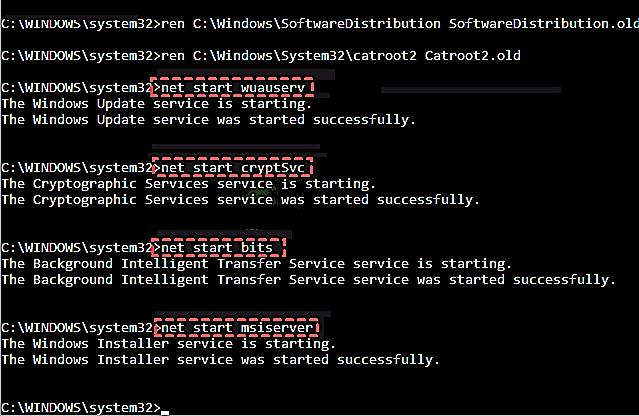
Step 3: Again, enter the following commands in the Command Prompt and press Enter after each command:
- net start wuauserv
- net start cryptSvc
- net start bits
- net start msiserver
Fix 6: Execute Windows Update Troubleshooter
For checking and fixing Windows update errors, Windows 10 provides a built-in troubleshooter. Before trying anything else, you should run the Windows Update troubleshooter to eliminate error kb5010795 0x800f0922.
Step 1: Open Start, type Troubleshoot, press Enter.
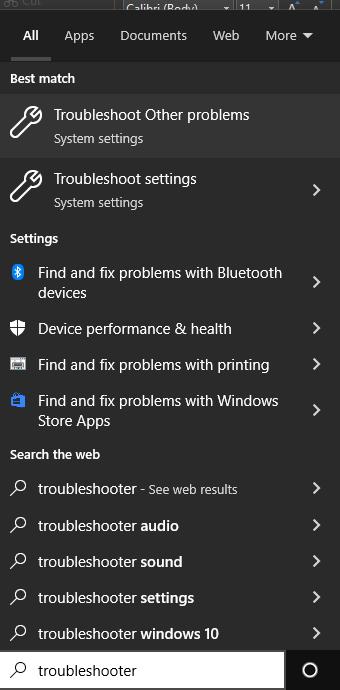
Step 2: In the right panel, click on Additional troubleshooters.
Step 3: Select Windows Update.
Step 4: Click Run the troubleshooter.
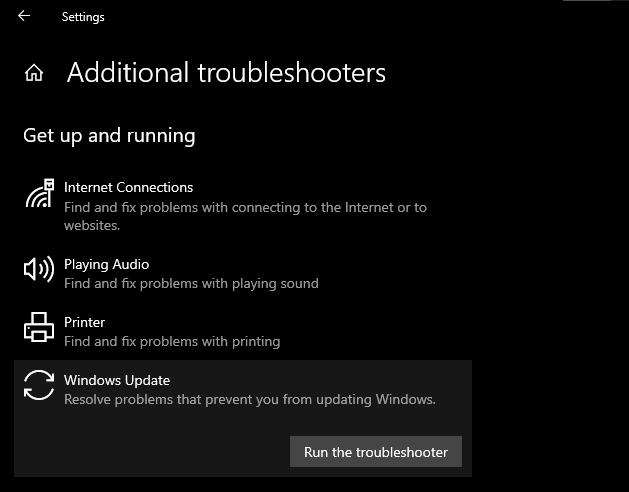
Wait until the tool detects and fixes the error automatically.
Fix 7: Delete Files from Temp Folder
By deleting the contents of the temp folder, you can also fix the window update error 0x800f0922.
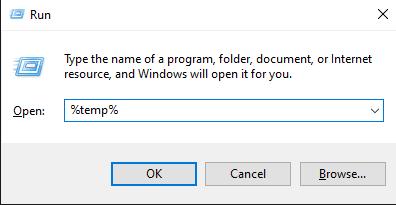
Step 1: Open Run Window by pressing Windows+ R simultaneously.
Step 2: Type %temp%, hit OK.
Step 3: Select all files and folders by using Ctrl+ A.
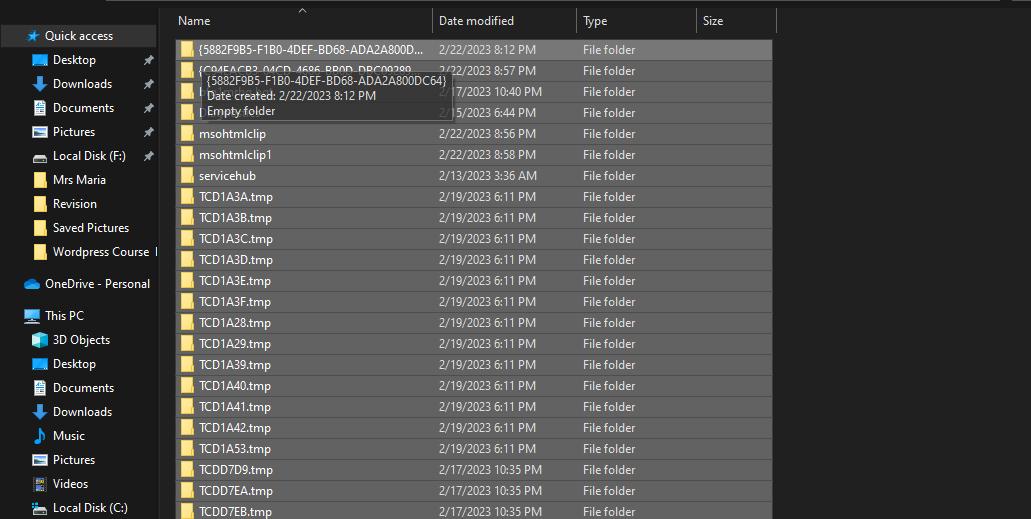
Step 4: Press Shift + Delete keys.
Step 5: Click Yes to complete deletion.
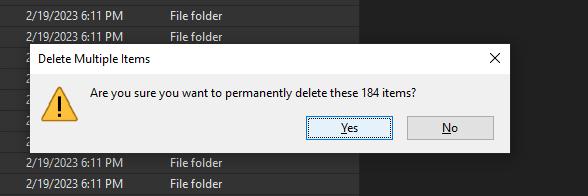
Step 6: Click Yes to complete deletion.
Step 7: Select all the folders and files, press Shift + Delete and confirm this action.
Now, again try to install the Windows updates you were facing issues with.
The DISM tool will check the system image and replace it with the healthy one if damaged.
Fix 8: Run SFC and CHKDSK Commands
If the problem is being caused by corrupt system files or the problematic partitions in your hard disk, you can run the SFC and CHKDSK commands in the Command Prompt to repair them automatically.
Step 1: Open Command Prompt (Admin) by typing cmd in Run dialog.
Step 2: Type sfc /scannow. Hit Enter.
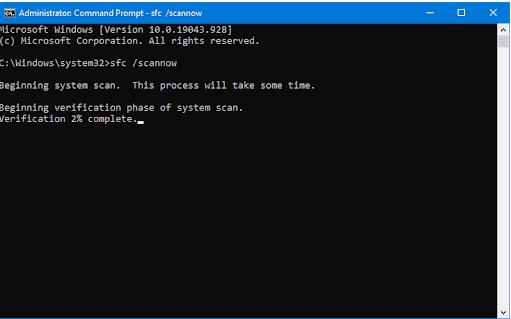
Let SFC scan, complete and repair any damaged system files.
Step 3: Type CHKDSK /f. Hit Enter.

The CHKDSK command will look for errors in your hard drive and try to fix them if found.
Fix 9: Turn App Readiness Service On
The App Readiness ensures the Windows Update process completes by generating and maintaining Windows Updates logs. The pending Windows update will fail if this service is disabled. Here is how you can make sure that the App Readiness service is enabled on your PC.
Step 1: Open Run Window by using Window+ R.
Step 2: Type services.msc, press Enter.
Step 3: Find App Readiness in the right panel of the Services Window, right-click and select Properties.
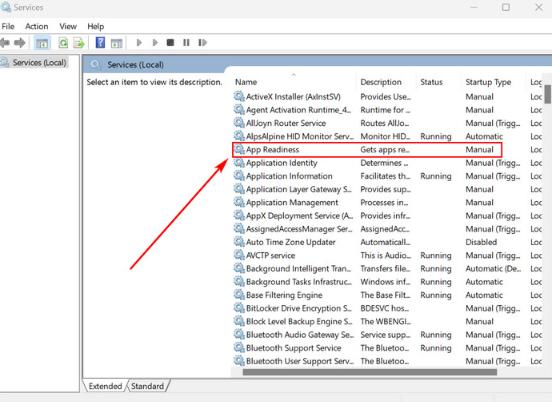
Step 4: Switch the Startup type to Manual.
Step 5: Click the Start button if the App Readiness service is not running.
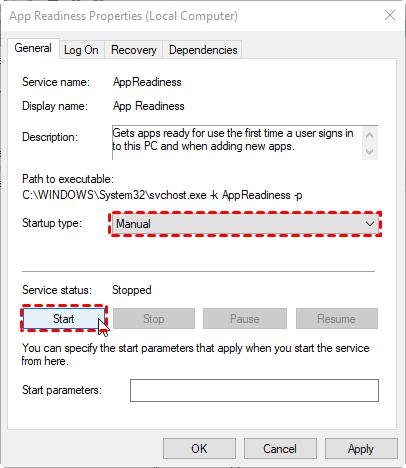
Step 6: Now, click Apply and then OK.
Step 7: Use the corresponding button to restore your UEFI settings.
Reattempt to install the updates after restarting your computer.
Fix 10: Update Windows 10 with Media Creation Tool
If the above methods fail to resolve Windows update error 0x800f0922, you can use the Windows Media creation tool as the last resort to update Windows. Here is how you can use this tool to update Windows 10 and fix error 0x800f0922.
Step 1: Visit Microsoft’s official website.
Step 2: Download and run MediaCreationTool.exe.
Step 3: Accept the license terms in the Windows 10 Setup Window.
Step 4: Choose the Upgrade this PC now option, and click Next.
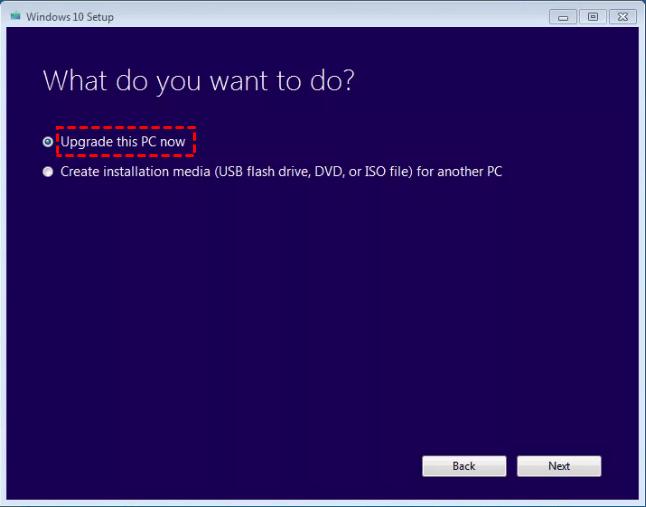
The Media Creation Tool will attempt to upgrade your PC to the latest Windows version. Hopefully, you will not face any issues with Windows updates after this.
Conclusion
Seeing an error while installing Windows updates sounds strange, but it happens with many users worldwide, and this issue is not new. Windows update error 0x800f0922 is an error that occurs while downloading and installing the newest Windows 10 updates. Although resolving this error may seem difficult, it is not quite impossible. In this article, we have suggested some best ways to help you resolve error 0x800f0922. Out of all the methods, PassFab FixUWin is the most recommended one because it automatically scans your PC and fixes the errors quickly.
