While working on our Windows PC, we come across various errors. Some of these errors are simple and easy to resolve and do not interrupt our work. But what about the errors that seem so complex and impossible to be resolved? These types of errors are usually system errors, and when they occur, your computer stops working, and you see strange error messages on a blue or black screen. In this article, we will discuss one such error, i.e., kernel_security_check_failure.
Part 1: What is Kernel Security Check Failure?
Part 2: Some Possible Reasons Which may cause Kernel Errors
Part 3: How to Fix Kernel Security Check Failure
- Method 1: Boot in Safe Mode
- Method 2: Check System Memory
- Method 3: Install Pending Windows Updates
- Method 4: Install Pending Driver Updates
- Method 5: Repair Corrupted Windows System Files with SFC and CHKDSK commands
- Method 6: Temporarily Disable your Antivirus
- Method 7: Perform System Restore
- Method 8: Reset the PC
Part 4: The Simplest Method to Fix Kernel Security Check Failure Windows 10 ErrorRecommended
Part 5: FAQs:
Part 6: How to Prevent kernel_security_check_failure?
Part 1: What is Kernel Security Check Failure?
The kernel_security_check_failure Windows 10 error indicates that one or more of your hardware or software failed the compatibility and integrity check. This error usually occurs when some system files get corrupted due to viruses, malware, or other reasons. It is a critical and unexpected error that suddenly stops the computer and reboots it automatically. However, if you are facing this error, you may feel like it is a dead end, but this is not the case. You can still use your computer by resolving the kernel security check error.
Part 2: Some Possible Reasons Which may cause Kernel Errors
Identifying the real culprit behind the kernel error is not easy, as various factors can cause it.
- The outdated system or device drivers
- Virus or malware
- Corrupt or damaged system files
- Any third-party antivirus software
- Damaged or corrupted memory
Although you cannot tell the exact reason behind the issue, you can always try the following fixes to eliminate it.
Part 3: How to Fix Kernel Security Check Failure
You will find many solutions to Windows 10 kernel security check failure on the Internet, but we have gathered the best for you.
Method 1: Boot in Safe Mode
Sometimes, your computer fails to boot when trapped in a Blue Screen of Death error. In such circumstances, you need to boot into the safe mode to perform some troubleshooting operations. In safe mode, most Windows errors do not appear as it requires only a few features. Here is how you can boot into the safe mode in Windows 10:
Step 1. Turn off your computer, restart it, and when you see the Windows loading screen, press the power button to restart it again.
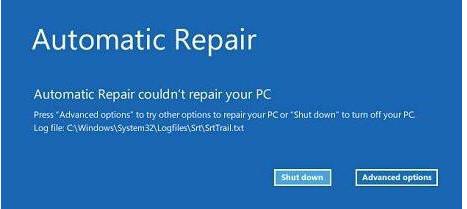
Step 2. Repeat the above steps for three times. You will see the Windows Startup Repair screen.
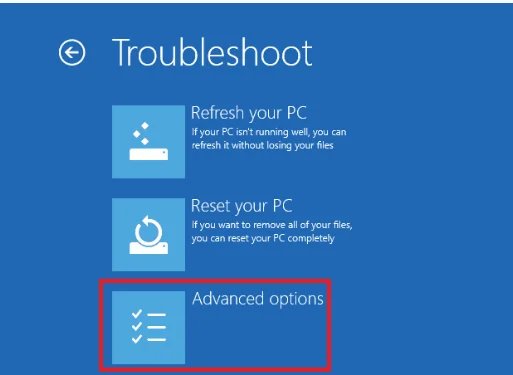
Step 3. Click Advanced Options -> Troubleshoot.
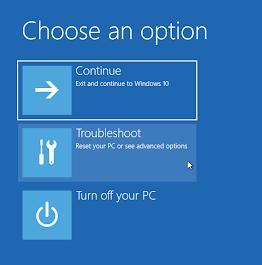
Step 4. Again click Advanced Options and go to Startup Settings.
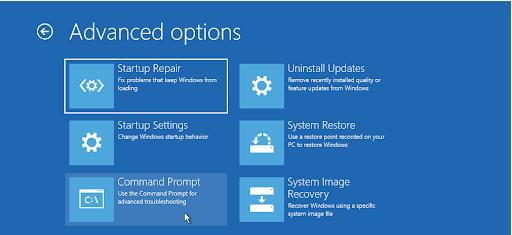
Step 5. Press F5 to enable the safe mode with networking.
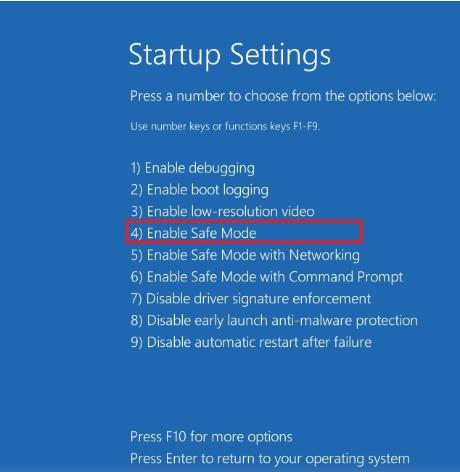
Now, your computer will restart and boot into safe mode. You can now proceed with the other solutions in this article.
Method 2: Check System Memory
As stated earlier, damaged memory can cause kernel security check failure Windows 10. You can check your system memory, i.e., RAM, by running Memory Diagnostic Tool as follows.
Step 1. Boot into Safe mode and search Memory diagnostics in the search bar.
Step 2. Open the app that appears on top.
Step 3. Now choose Restart now and check for problems (Recommended) option.

Your computer will restart, and the memory diagnostics tool will start working. If it shows any errors, your RAM is damaged and has problems. You can contact your PC manufacturers to replace or repair it.
Method 3: Install Pending Windows Updates
Sometimes, your PC starts malfunctioning when you do not install the available Windows updates. So, if you want your PC to run smoothly, you must install all the pending updates as follows.
Step 1. Boot into safe mode and press Windows + I to open the Settings app.
Step 2. Go to the Updates and Security option.

Step 3. Click the Check for updates button to look for any pending updates.
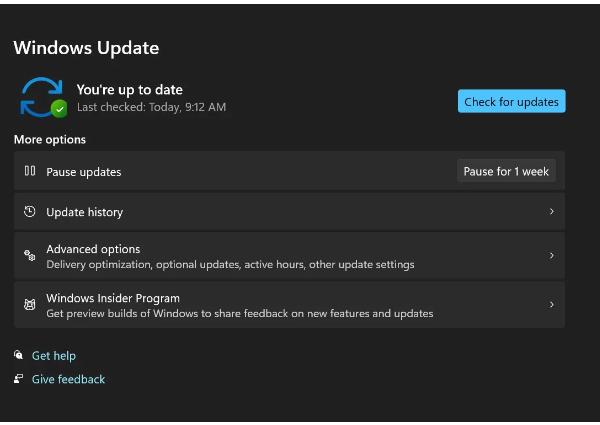
If there are any updates, they will appear in the same window.
Step 4. Click the Install now button to install all available updates.
When the updates have been installed, your PC will restart to implement the updates. Now you can try to boot your computer in normal mode to see if the BSoD kernel security check failure Windows 11 is gone.
Method 4: Install Pending Driver Updates
Some of the drivers are crucial for the smooth operation of your computer; if any of them is not updated properly, it can create problems such as kernel error Windows 10. You can check for and install any pending driver updates as follow.
Step 1. Boot into Safe mode and search Device Manager in the search bar.
Step 2. Open the Device manager application that appears on top.
Step 3. Go through the list of all the device drivers and check if any driver has an exclamation (!) mark.
Step 4. Right-click on the driver that needs to be updated and select the Update driver option.
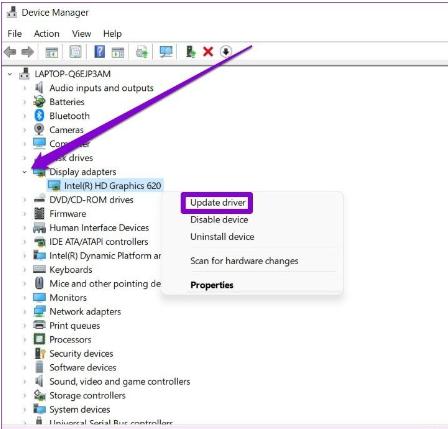
Let the driver update. Repeat the same for all the drivers requiring updates and restart your computer afterward.
Method 5: Repair Corrupted Windows System Files with SFC and CHKDSK commands
When one or more system files are corrupt or damaged, their dependent operations also stop working. So, if that is the case with you, you can run System File Checker (SFC) and CHKDSK tools to check all the system files for any possible damage and repair them automatically.
Step 1. Boot into Safe mode and open the command prompt.
Step 2. Type and run sfc /scannow.
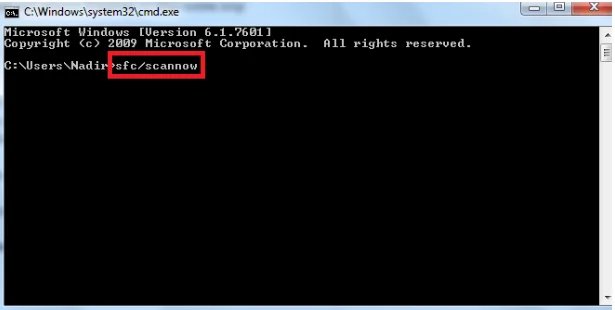
This will scan all the system files and repair any damaged files found. This may take longer, so make sure not to shut down or close the command prompt unless it completes.
Step 3. Now run chkdsk c: /f /r /x command.

Step 4. Once the above command finishes, restart your computer and check for the error again.
Method 6: Temporarily Disable your Antivirus
If you have any third-party antivirus installed on your computer, it may stop some system's routines from working properly, doubting them as a virus. You can try disabling any such program and check if the problem resolves.
Step 1. Boot into Safe mood and open Task Manager by searching in the search bar.
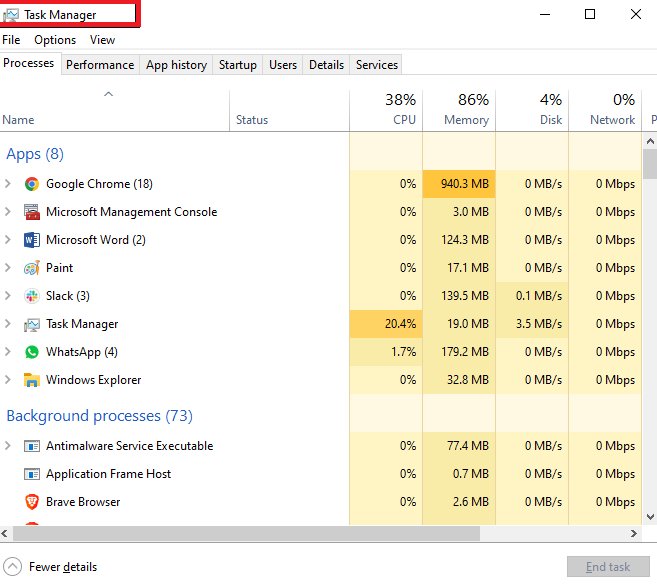
Step 2. Switch to the Startup tab and look for your antivirus software.
Step 3. Once you find it, select it by clicking on it once.
Step 4. Click Disable, close Task Manager, and restart the computer.
Now, your computer runs without any security from third-party antivirus software. If you want to enable it, follow the above steps and click Enable button.
Please Note that this method is not recommended due to its security risks.
Method 7: Perform System Restore
When nothing else works, the last option you are left with is performing a system restore. The system restore reverts any changes made after creating a particular restore point, such as any newly installed software, any changed settings, etc. Here is how you can perform a system restore in Safe mode.
Step 1. Open Settings, go to Updates and Security and switch to the Recovery tab in the left navigation menu.
Step 2. Click Get started button.
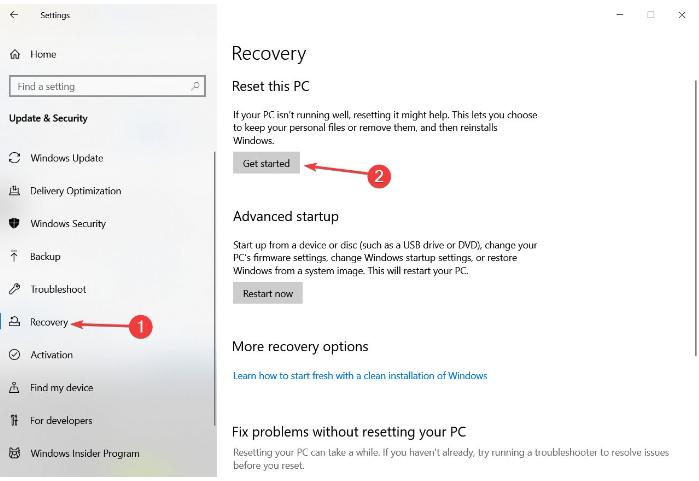
Step 3. Now, choose Keep my files.
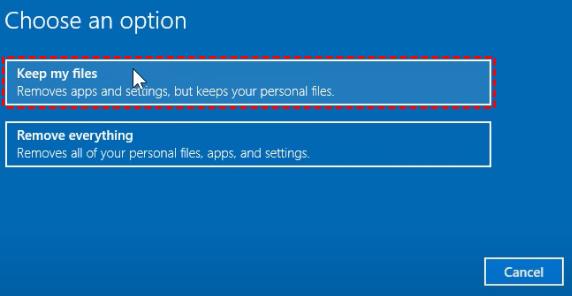
Step 4. Choose how you would like to perform a system restore and proceed by following the on-screen instructions.

After the system has been restored successfully, the Windows 10 kernel security check failure will not appear.
Method 8: Reset the PC
Resetting your PC means that you want to remove all the settings you made from your PC. After performing a system reset, your PC will appear as new, except that it will have all your data if you choose to keep it while performing a system reset. Here are the steps to reset a computer.
Step 1. Restart your computer from the Start menu while holding the Shift key.
Step 2. Click Troubleshoot -> Reset this PC -> keep my files (you can also choose to remove everything if you want).
Step 3. Choose a way to reinstall Windows.
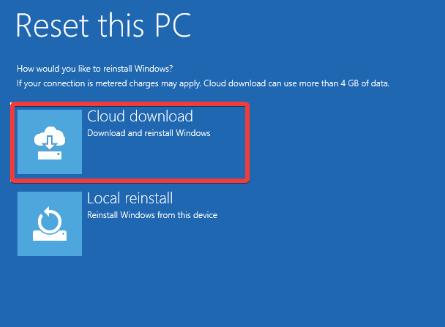
Step 4. Proceed with on-screen instructions to complete resetting the PC.
Part 4: The Simplest Method to Fix Kernel Security Check Failure Windows 10 ErrorRecommended
PassFab FixUWin is an amazing Windows repair tool that you can use to resolve any Windows problem, such as a blue/black screen of death, a PC crashing, being stuck in a boot loop, etc. The incredible tool guarantees 100% accuracy. Here is how you can resolve kernel security check failure problems using it:
- Install and launch PassFab FixUWin on any PC.
- Insert a USB/CD/DVD and click Create boot disk now.

- Switch to the faulty PC and plug the bootable USB/CD/DVD into it.
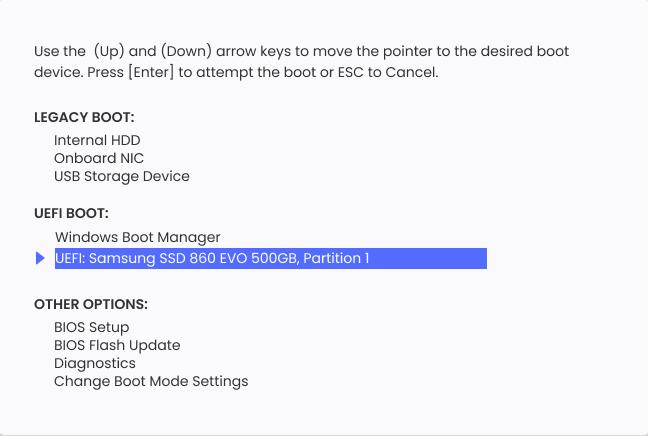
- Restart the computer, press the Boot key, set USB on boot priority, and exit the boot menu.

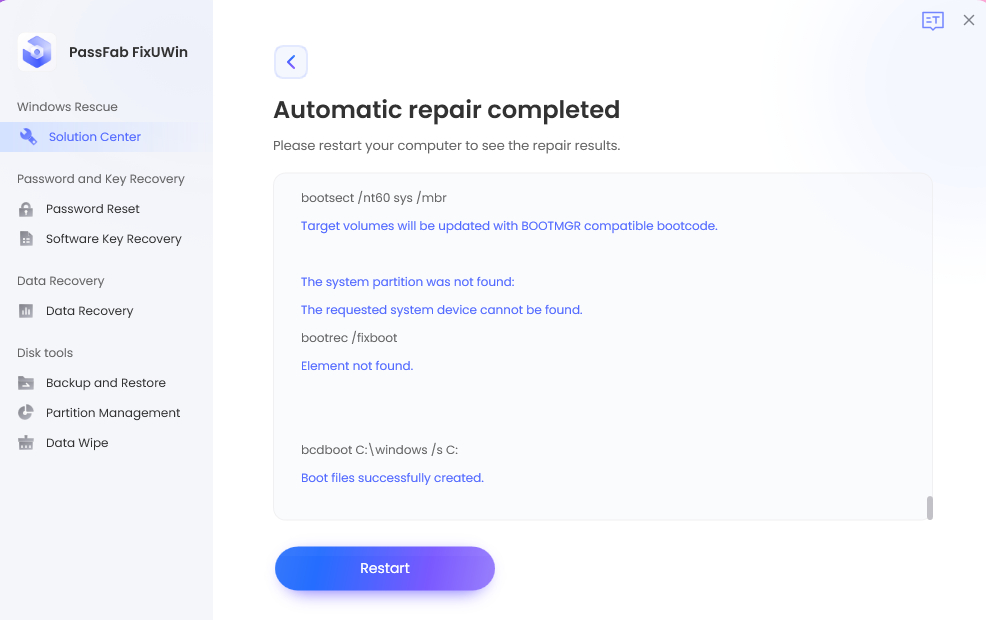
- Click Automated repair.

- Click Restart to reboot your computer after repair complete successfully.

Part 5: FAQs
1. Can I resolve kernel error myself?
Yes, you can resolve it by following the methods mentioned above. However, they are most suitable for Windows 10 and 11.
2. Is kernel security check failure a fatal error?
Yes, it is a critical error and causes a system crash as soon as it occurs.
3. Can we disable the kernel security check?
No, kernel security check cannot be disabled as it is a crucial part of Windows.
Part 7: How to Prevent kernel_security_check_failure?
Although the BSoD errors and system crashes are unpredictable, here are some measures that you can take to avoid kernel_security_check_failure in the future.
- Update your system and drivers regularly
- Remove junk data and temporary files from your computer frequently
- Use a reliable antivirus
Conclusion
We believe that with these provided information and methods, you can fix kernel security check failure windows 10 by yourself. All these proven methods are collected from some users who has the same situation. Among them, we recommend you use PassFab FixUWin to fix windows 10 kernel security check failure as it is the easiest way with powerful function without technical requirements.
