“Recently I get at any random time a blue screen that comes up saying something has gone wrong and it need to reboot with an error code reading : ‘PAGE_FAULT_IN_NONPAGED_AREA’ there is no other code or info on the screen indicating where why or what. Can anyone help????” from Microsoft User
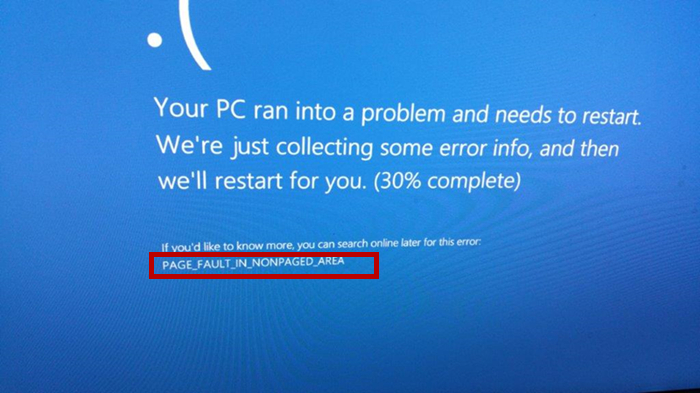
If you are having the same issue as what indicated by the Microsoft Windows user, and looking for the key to the problem, then you have come to the right place. Here we will show you how to fix Page Fault In Nonpaged Area blue screen.
Part 1. What Does Page Fault in Nonpaged Area Mean?
Many of you should be curious: what does Page Fault in Nonpaged Area mean? Generally speaking, this error code occurs when your Windows computer start booting or sometimes crashing, and you see a blue screen on your computer saying:
“Your PC ran into a problem and needs to restart. We’re just collecting some error info, and then we will restart for you. If you’d like to know more, you can search online later for this error: PAGE_FAULT_IN_NONPAGED_AREA.”
According to the Microsoft document, this blue screen error suggests that there are invalid system memory being referenced, and it could be the wrong memory address or something similar. Simply put, the operating system is trying to require the data stored in the Page File while it fails to find, and there comes the error. Typically it happens when system changes have been made or you have upgraded Windows operating system.
Part 2. What Causes Page Fault in Nonpaged Area in Windows?
Now we will discuss what causes Page Fault in Nonpaged Area Windows 10. chances are you may be able to identify your problem and find the cut-throat solution.
As aforementioned in Part 1, this error happens when system changes or OS upgrades, but the reasons for the error code can be various:
- 1. If you have installed a faulty system service, and this could cause the misbehave of your computer.
- 2. The wrong or missing device driver(s) in your computer may lead to the error, especially when you have updated device drivers in your PC.
- 3. If you have installed new hardware devices in your computer recently, consider it as the cause for the installation may result it defective RAM.
- 4. Antivirus software is likely to cause Page Fault in Nonpaged Area, to some extent.
Sometimes it is hard to locate the cause of your problem, but whatever the cause is, you can find a solution to fix the nuisance. So move on to the next part for details.
Part 3. How Do You Fix A Page Fault in Nonpaged Area?
This part sums up 9 effective methods to resolve Page Fault in Nonpaged Area in Windows. Without any further ado, let’s dive into the step-by-step solutions.
Note: To perform these steps you’re required to get into the GUI in your computer. If, somehow, you cannot, try to boot into Safe Mode.
Solution 1. Test Your RAM
Since the error has something to do with the RAM, it is worth a try to test RAM for your computer. In order to test RAM, do this:
- 1. Download Memtest86+ in your computer (you can do this step in Safe Mode or bootable PC).
- 2. After downloading, burn it into a CD, or put it into a USB flash drive. You will be able to do it by following the prompts of the program.
- 3. Insert the burnt CD or USB drive to your computer that is giving the error.
- 4. Boot your PC into BIOS (usually pressing the F2, F12, Del, ESC key after starting), and make sure to choose the inserted device as the first boot device.
- 5. Boot your computer in your CD or USB, and the Memtest86+ will launch, then start to test RAM. It may take up to 30 minutes or so.
- 4. Antivirus software is likely to cause Page Fault in Nonpaged Area, to some extent.
If Memtest86+ indicates an error, then you should have found the culprit and follow the suggestions to fix it. If no errors found, then the RAM is not a problem. You can try the next method.
Solution 2. Disable automatic paging file size management
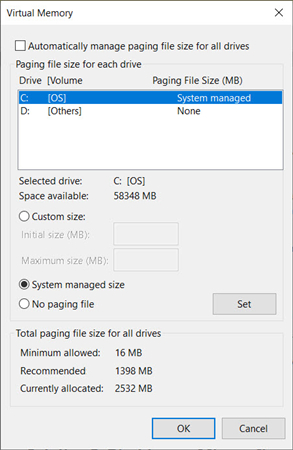
A paging file is an area on the hard disk that Windows uses as if it were RAM, so it may help in fixing Page Fault in Nonpaged Area Windows 10 by disabling automatic paging file size management.
- 1. Right click on This PC on your desktop or File Explorer, and click Properties.
- 2. Click Advanced system settings on the left.

- 3. In the newly pop-up pane, click Settings under Performance.
- 4. Click Advanced tab > Change, and untick the box for Automatically manage paging file size for all drives. Then click OK to save it.

- 5. Restart your computer and check your problem.
Solution 3. Disable non-Microsoft services
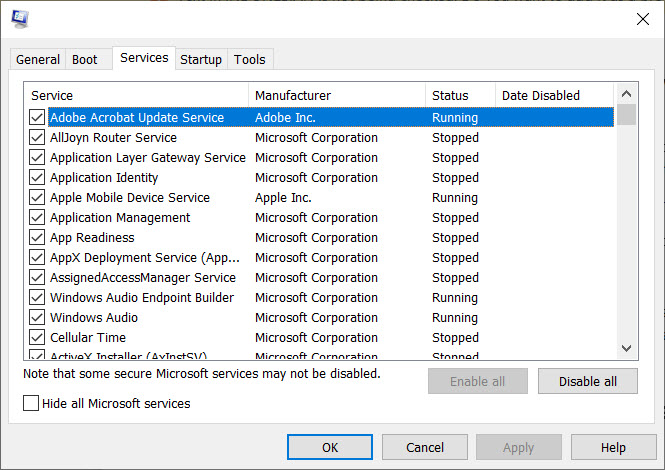
The non-microsoft services would be a possible cause for Page Fault in Nonpaged Area blue screen, and turning off these services will help troubleshoot.
- 1. Run msconfig in the Run box and the system configuration window will open.
- 2. Click the Services tab, and disable all the non-Microsoft services.

- 3. Restart your computer and see if the error has gone.
If your problem has been resolved, then the non-Microsoft should be the problem. You can re-enable these services one at a time, so that you can locate the exact one to blame. If your problem still persists, then go to the next solution.
Solution 4. Disable Antivirus Software
Under some circumstances, the antivirus software can trigger software conflicts, then the blue screen issue happens. Therefore, it is recommended to disable antivirus software in your computer. After that, restart Windows. If your problem is fixed, then the antivirus software is the culprit, and you should head to the software developer for further advice.
Solution 5. Run System Restore
Windows allows users to restore the system back to the previous state when the system faulty or crashing happens. Note that this will work if System Restore Point has been created before.
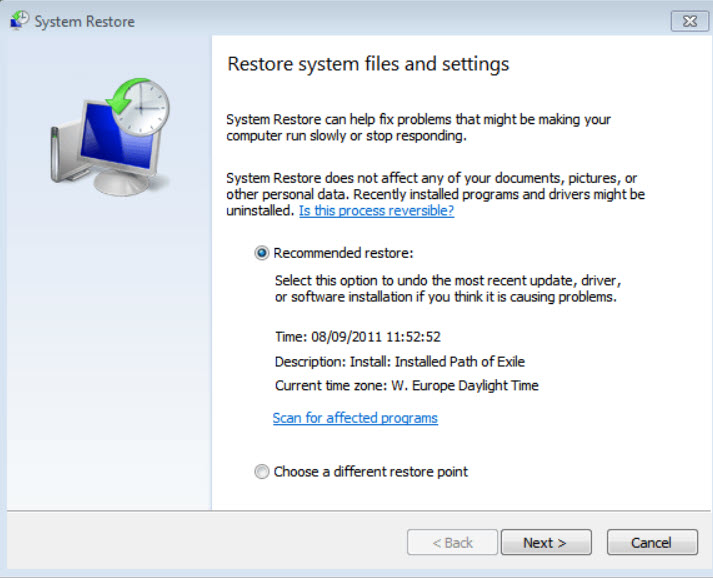
- 1. Open Control Panel, and go to All Control Panel Items > Recovery > Open System Restore.
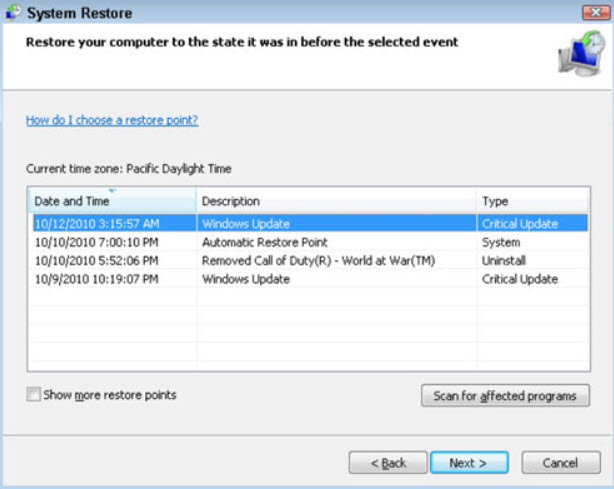
- 2. Select Choose a different restore point, and click Next.

- 3. Be sure to choose a Date and Time that is earlier than when the error occurred. Choose Next.

- 4. Follow the on-screen instructions to finish the process.
After system restore, your problem will be fixed and you are good to go.
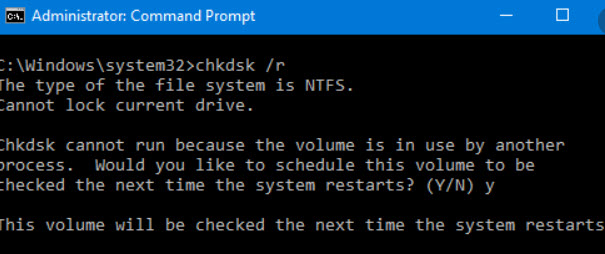
Solution 6. Run CHKDSK Command
If you don’t want to restore system, running a check disk may help resolve the Page Fault in Nonpaged Area error.
- 1. Type CMD in the search box from the Start menu, and right click on Command Prompt for Run as administrator.
- 2. In Command Prompt, type chkdsk /f /r and press Enter key.

- 3. Type Y to confirm a disk check next time restarting, and press Enter key.
- 4. Restart PC and you will be prompted with the disk check process. Follow the process to finish it.
This will scan your hard disk and fix any detected problems.
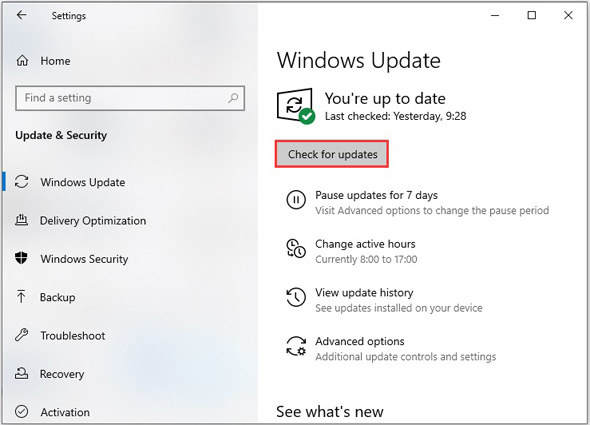
Solution 7. Run Windows Updates
You may see the Page Fault in Nonpaged Area error because your system lacks security Windows updates, and you can update Windows to fix it.
- 1. Open the Settings app in your Windows 10 computer, and click Update & Security.
- 2. Click Check for updates. Then Windows will check if there is any update available.

- 3. If there is available update, download and install the updates.
- 4. Running Windows update can take some time. So be patiently.
Once updated, check if your problem has been fixed.
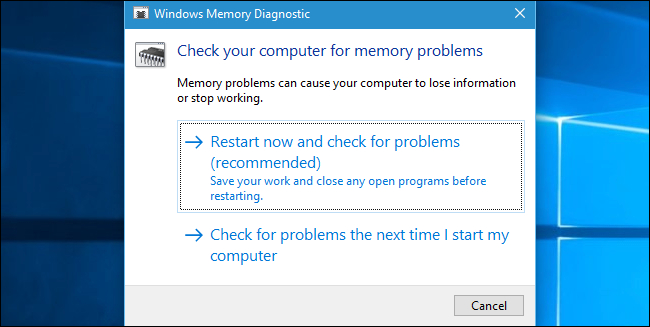
Solution 8. Run Windows Memory Diagnostics tool
To know how to run Windows Memory Diagnostics Tool, follow these steps:
- 1. Run mdsched.exe in the Run box, and the Windows Memory Diagnostic window will open.
- 2. You will be presented with two options to schedule a memory check. Just choose the option that you prefer.

- 3. Then you will be able to start diagnostic process when your computer restarts. Follow the process.
Do whatever suggested by the test result. If no problem was found, then you can check the next method.
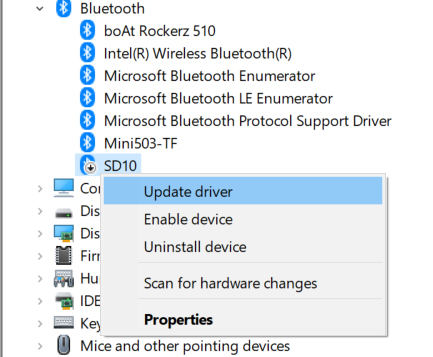
Solution 9. Uninstall, rollback or update your audio or display driver
As per Part 2, the problematic device driver can do harm to your computer and it could cause problems like Windows 10 Page Fault in Nonpaged Area, and your audio or graphics card driver should be given attention to. So you can uninstall, rollback, or update your audio or graphics card driver.
- 1. Run devmgmt.msc in the Run box, and this will open Device Management.
- 2. In Device Management, double click the device category. To find your audio device driver you should double click Sound, video and game controllers; to find graphics card driver you should double click Display adapters.
- 3. Right click on your audio driver or display driver, and select Properties.

- 4. Click the Drive tab. Then you can Update Driver, Roll Back Driver, Uninstall Device driver for that device.
- 5. You can choose the action you like by clicking that button, and then follow the screen instructions to finish it.
After the driver has been uninstalled/updated/rolled back, reboot your computer and see if Page Fault in Nonpaged Area blue screen disappears.
Final Words
Voila! This article explains what Page Fault in Nonpaged Area error is, why this error happens, as well as 9 solutions to fix Page Fault in Nonpaged Area Windows 10. hopefully it comes in handy when you are having the same problem. By the way, if you forget your Windows password, PassFab 4WinKey would be useful for it helps you remove or reset your Windows password, and delete your Windows account so that you can access your computer again.

