PassFab 4EasyPartition, the top partition manager for Windows, seeks to improve disk performance. It enables you migrate OS to SSD/HDD safely in just few clicks. Let’s check how to use this wonderful tool.
Part 1. How to perform system migration?
Step 1. Connect to a new disk first
Connect your computer to a new USB flash drive/HDD/SSD that you want to migrate to.
1. Single slot computer (laptop and all-in-one computer)
Before using Passfab 4EasyPartition, a new USB flash drive/HDD/SSD is required to connect to your device by using a SATA USB cable or external hard drive disk enclosure box.
2. Multiple slots computer (desktop and certain laptops with multiple slots)
Different from laptop, desktop typically enables you to install multiple hard drives on the host. Before using Passfab 4EasyPartition, install a new hard drive on your desktop.
Step 2: Perform system migration with PassFab 4EasyPartition
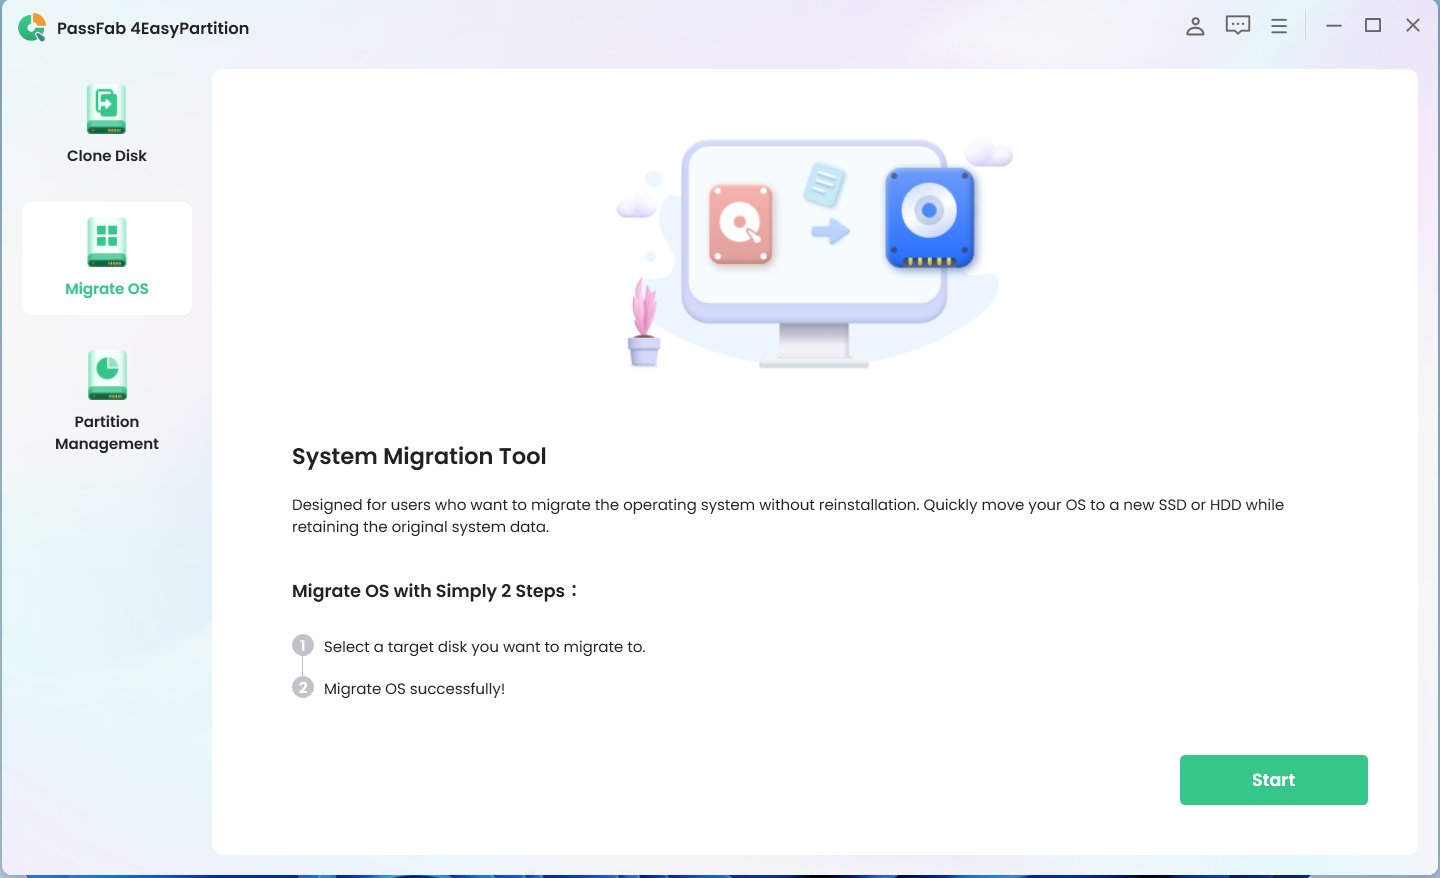
- Download and launch PassFab 4EasyPartition, click “Start” to start the process.

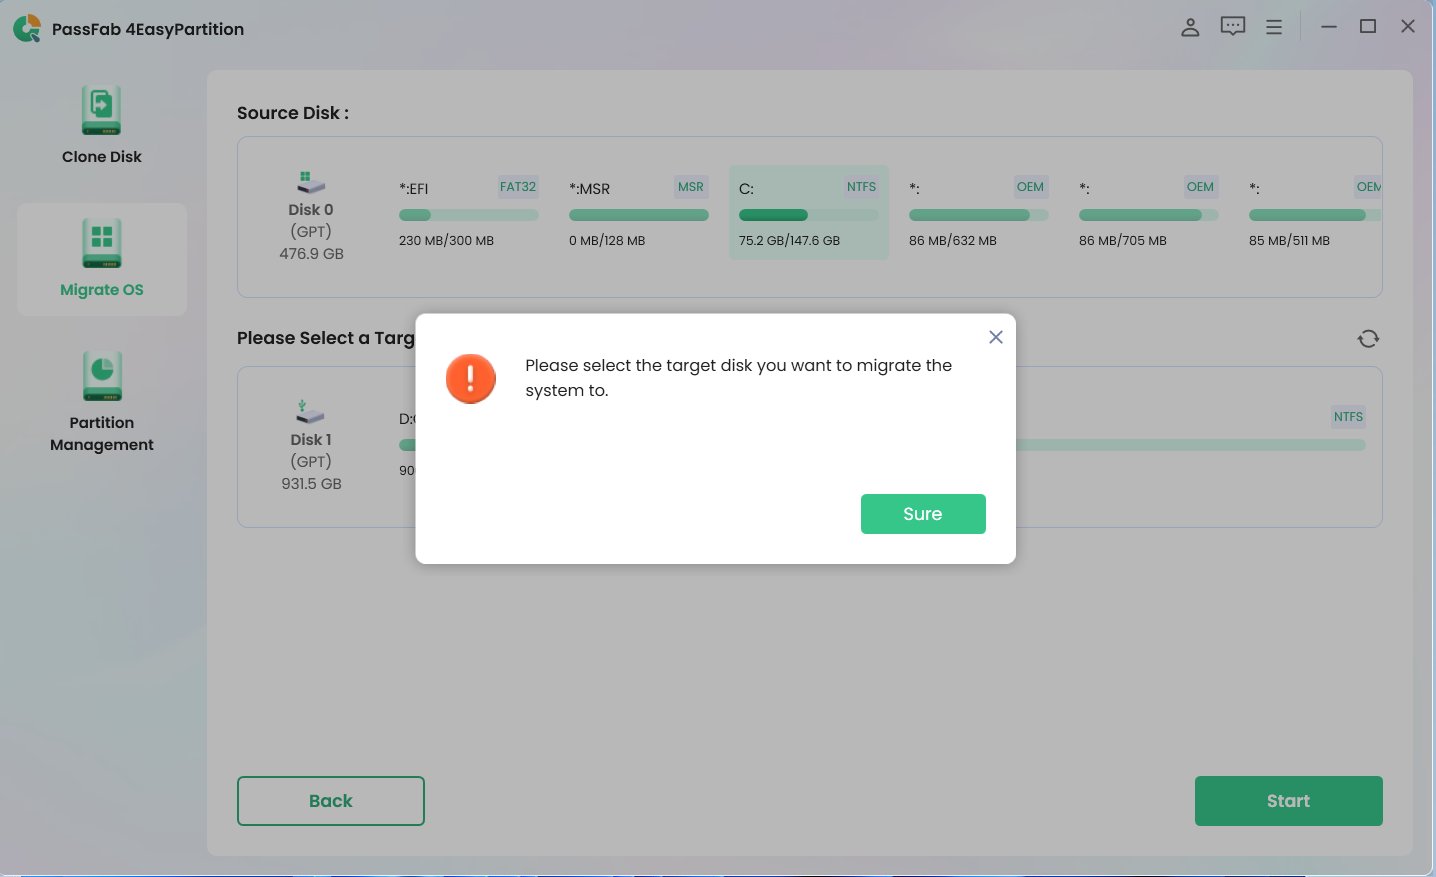
- Select the source disk you are going to migrate from and select the target disk that you want to migrate to and then click “Start” to continue.

Tips:
Usually the source disk refers to the disk where the system is located. Target disk refers to the external disk you inserted.
- A risk pop-up windows will be displayed. Click “Sure” to proceed the next step.

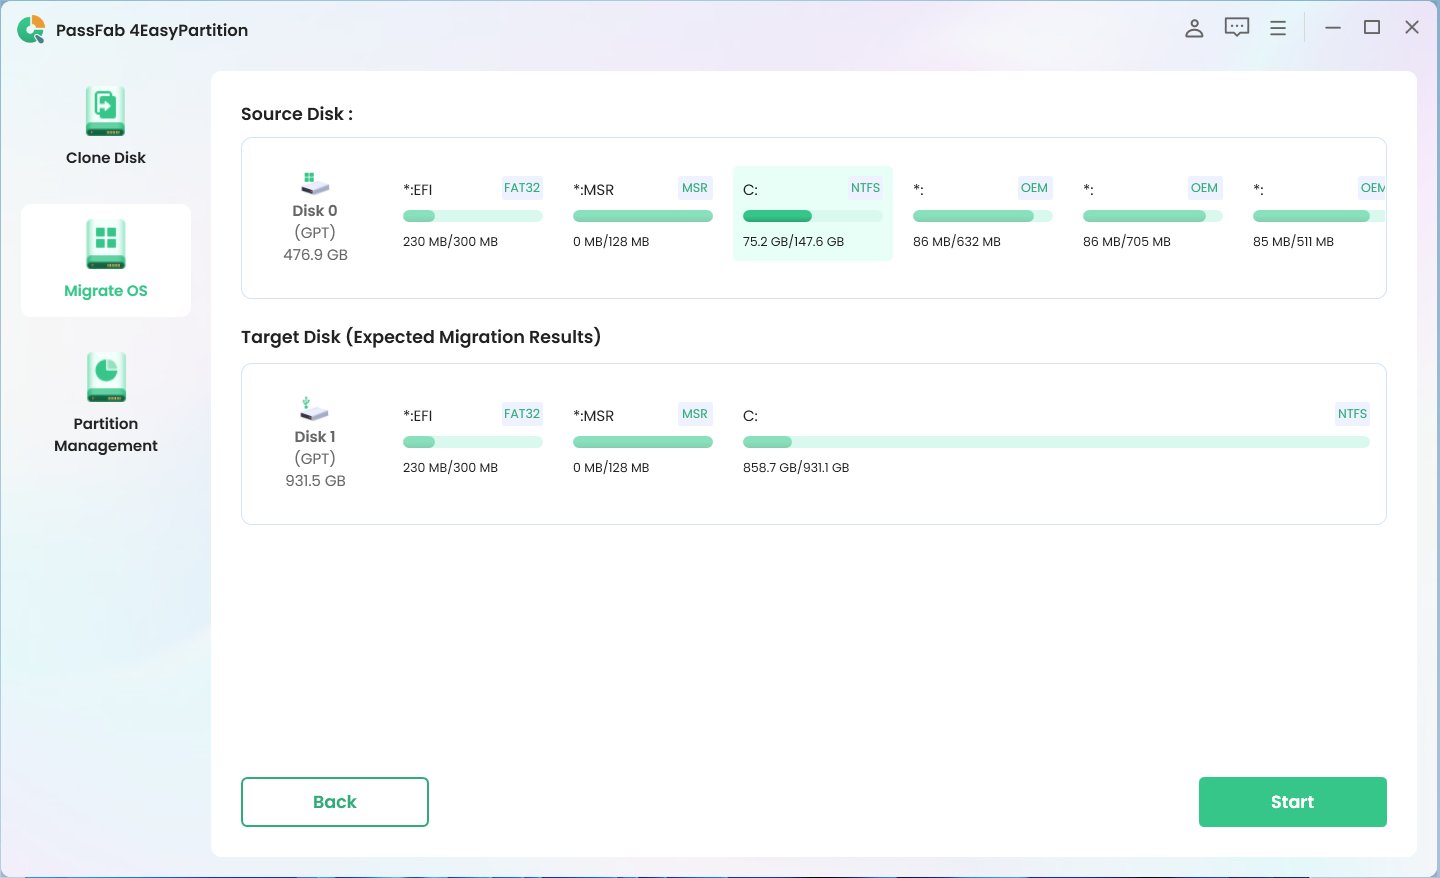
- In the preview interface, please check the information of source disk and target disk, and click “ Start” to perform system migration.

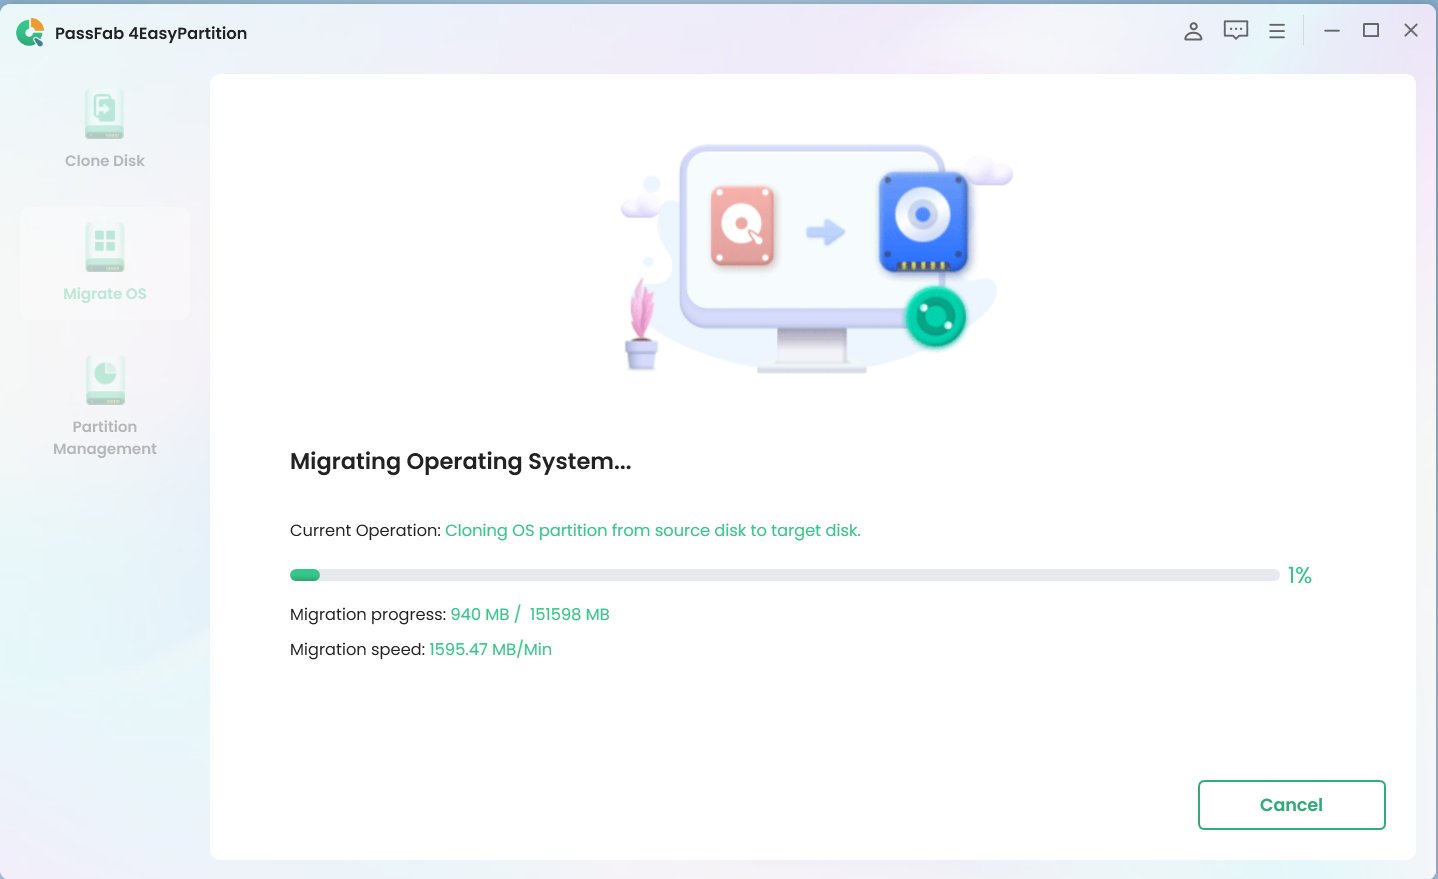
- System migration is in progress. Please wait for a while.

Tips:
The migration process may take a few minutes or tens of minutes, depending on the data volume of the source disk. The more data there is, the longer it will take.
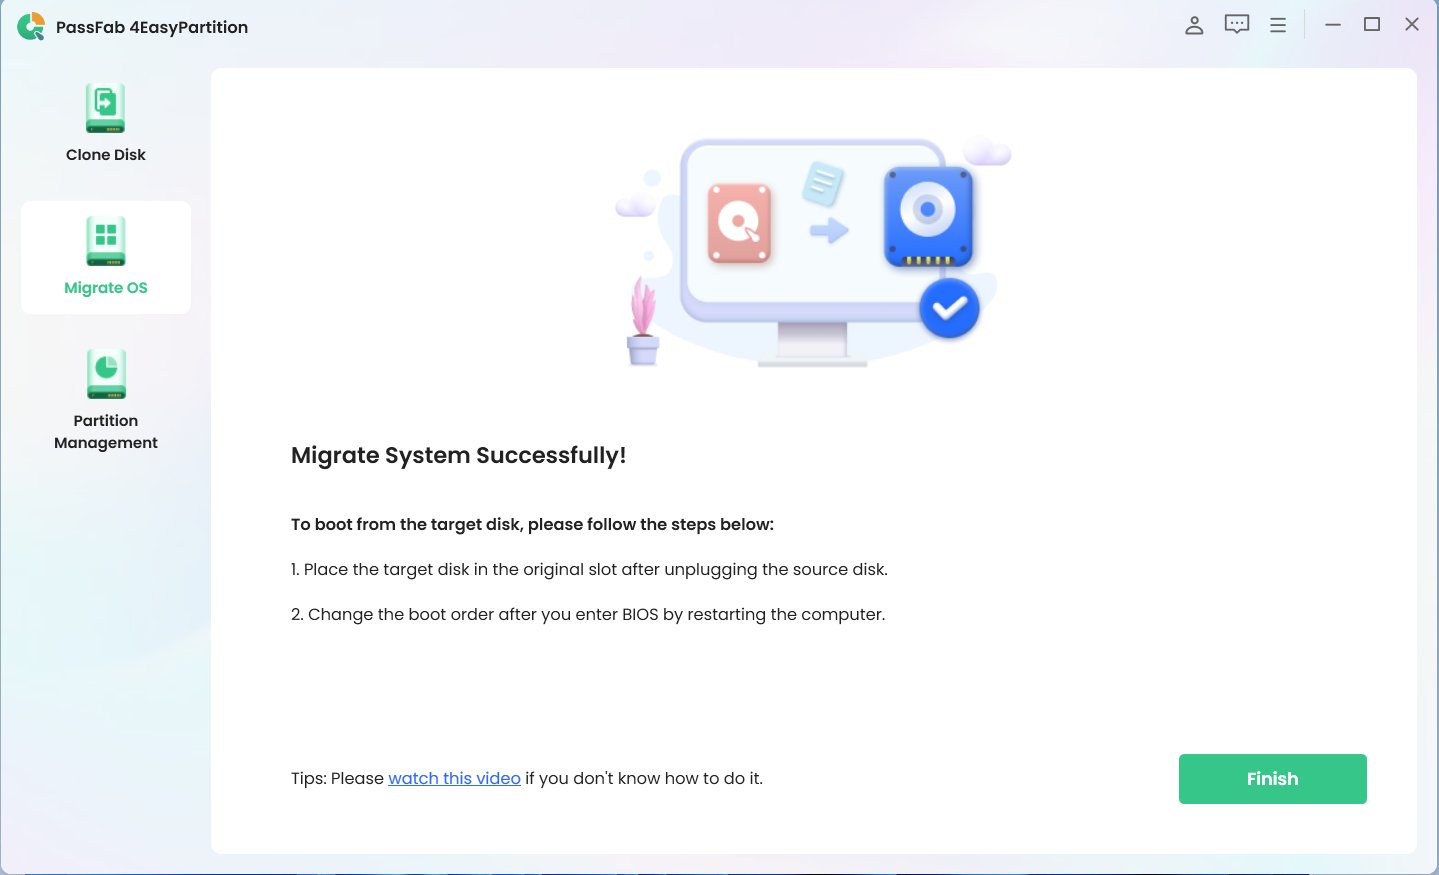
- Migrate your system successfully. Click “Finish” to complete the process.

Step 3: Boot computer from the new disk
By now, you have migrated your entire system to a new disk. Your computer can start properly. If you want to start your computer from the new disk, please check this video.
1. Single slot computer (laptop and all-in-one computer)
After migrating OS to the new hard drive, replace the original hard drive with the new one. The computer will automatically recognize the new hard drive and working normally.
Tips:
If your computer cannot start properly, please refer to the startup steps of multiple slots computer in the following.
2. Multiple slots computer (desktop and certain laptops with multiple slots)
After migrating successfully, to boot from the new disk, please unplug the source disk from your host.
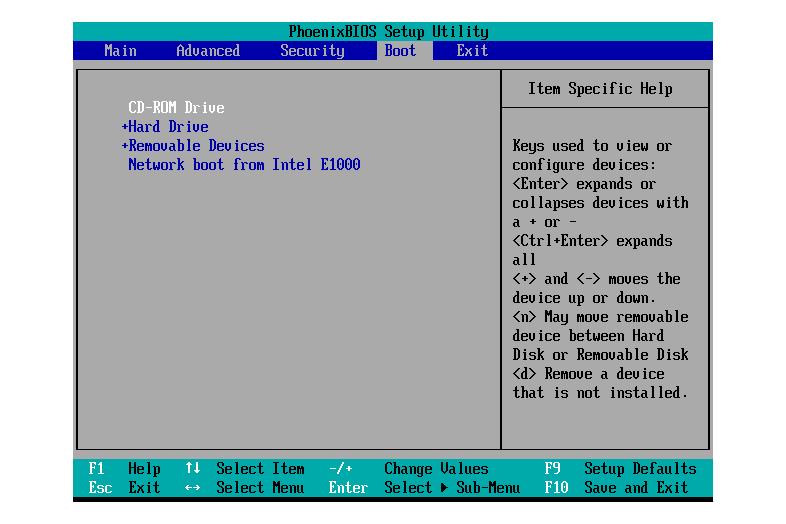
Due to different motherboards, some computers can start from the new disk normally while others may not. In this case, you are required to enter into BIOS to set the new drive as the boot device as follows:
- Restart your computer and press the Boot key constantly and wait until the Boot menu occur.
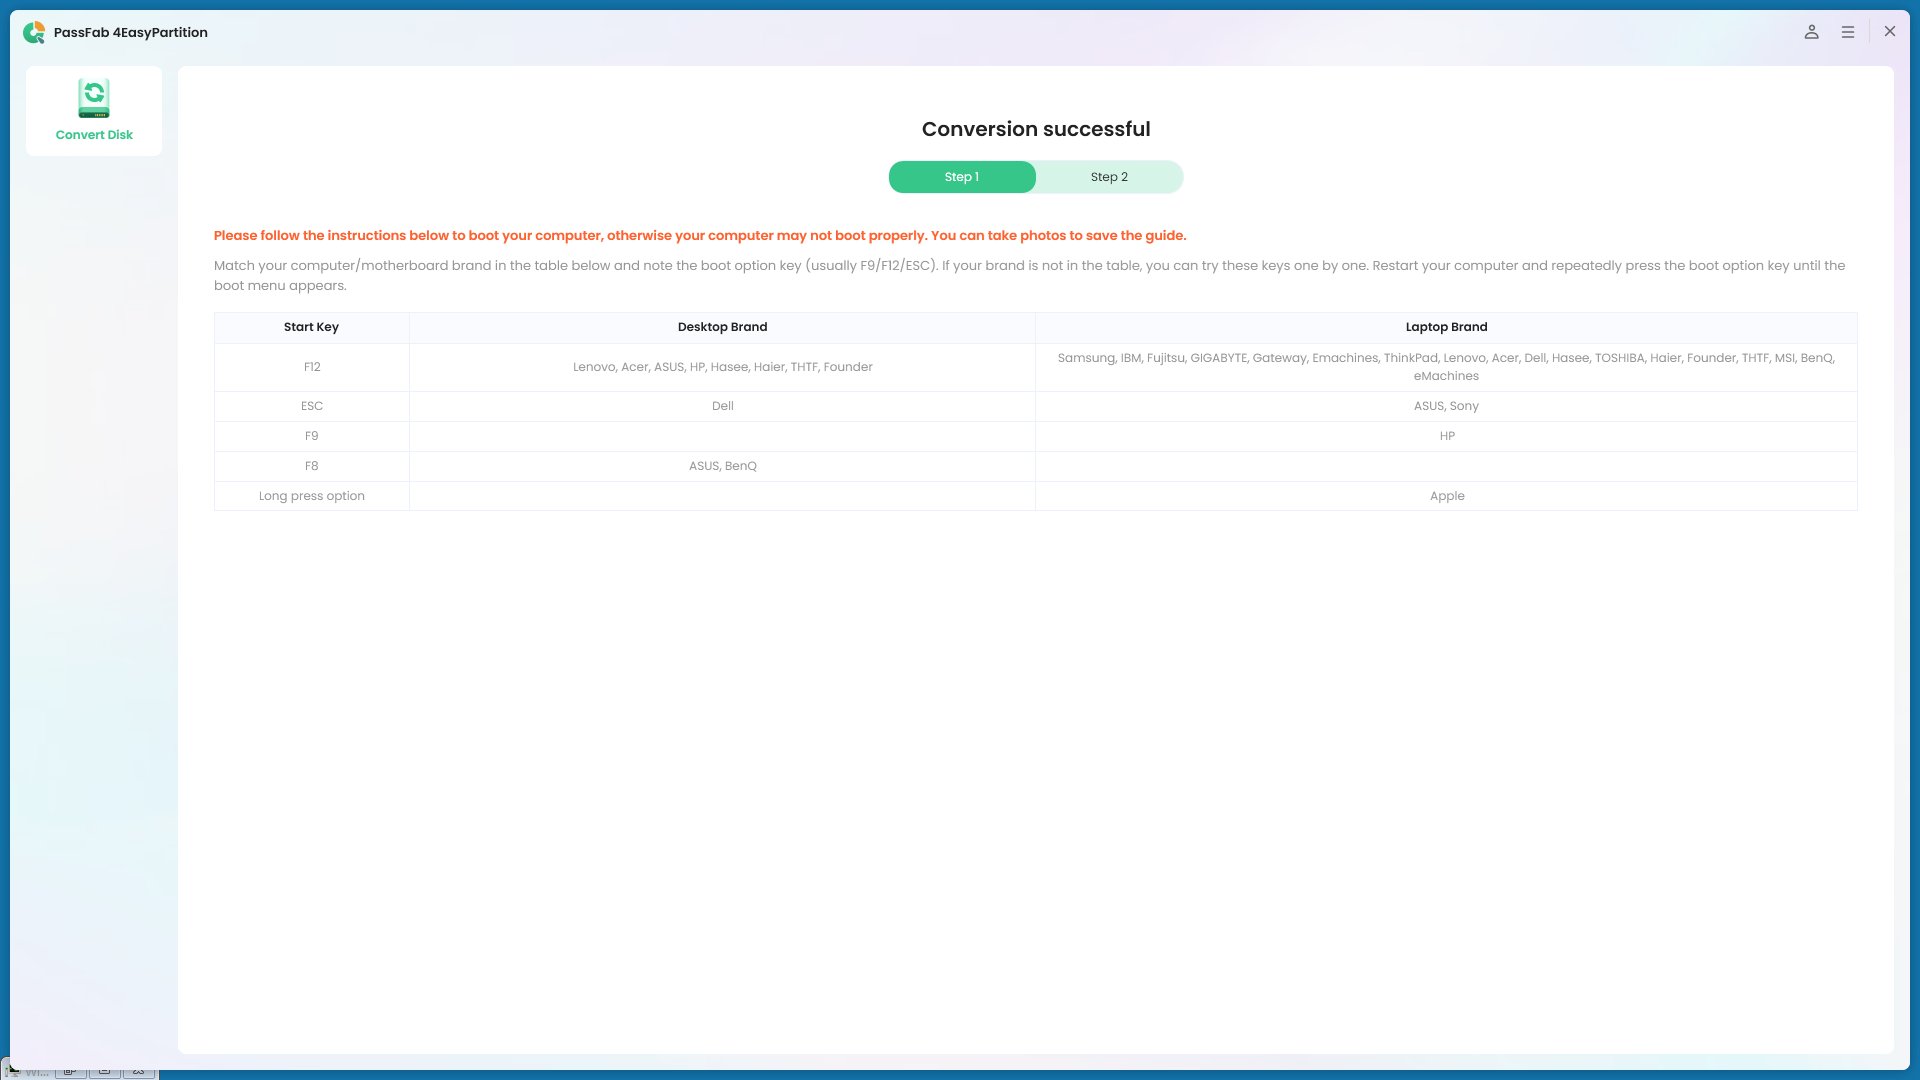
Boot Key Desktop Laptop Motherboard F12 ASUS, Acer, Founder, HP, Hasee, Haier, Lenovo, THTF Acer, BenQ, Dell, Emachines, eMachines, Fujitsu, Founder, GIGABYTE, Gateway, IBM, Lenovo, SAMSUNG, ThinkPad, Hasee, TOSHIBA, THTF, MSI Great Wall, Dell, TOSHIBA, Foxconn, GIGABYTE, Fujitsu, Gamen, Haier, IBM, Lenovo, Topstar, SONY, THTF, SAMSUNG, ThinkPad, Acer, HP, Hasee, Founder Esc Dell ASUS, Sony Great Wall, Foxconn, ESC, SOYO, MAXSUN, Colorful, SONY, SAMSUNG, Spark, UNIKA F9 BenQ, HP BISOTAR, HP - Select the new hard disk and set it as the prior boot choice. Hit Enter to reboot from it.

Part 2. How to Perform disk management
PassFab 4EasyPartition provides more funtions of resize, create, delete, split, format partitions, and change driver letters, simplifying disk management on your pc.
Something you Need to Know First
- To safeguard important data, it is advisable to back up your data first in case improper operations cause data loss.
- During the whole process of managing your partition, avoid abruptly terminating the process or forcibly shutting down the program.
- To prevent a power outage when performing operations, ensure that your computer has sufficient charge.
- When your perform each action, please close all the running program on your pc.
- If you don't want to perform the action or want to change some parameters before executing tasks, we provide undo option as a symbol in the bottom right corner.
1. Resize/Move partition
You can resize your partition space according to your need. Resize partition enables you to extend volume and shrink volume. For example, if your pc comes with a big C: drive with other small data partitions, or a small C: drive with other big data partitions, you may not make full use of your disk space. Therefore, resizing partition helps you well-manage your data.
- Click “resize/move” from the right menu.

- In the pop-up window, choose a partition you want to resize from the list. Drag the cursor to specify the partition space. You can also specify more detailed partition information like partition size, space of front part, space of rear part.

- Click “OK” to confirm your operations. Click “Execute Task” to check your operation again. Click “OK” to proceed.

2. Extend/Shrink partition
Extend/shrink also helps to resize your partition. Different from resize/move function, it will not separate unallocated space. (Unallocated space can only be used after the disk letter is modified).
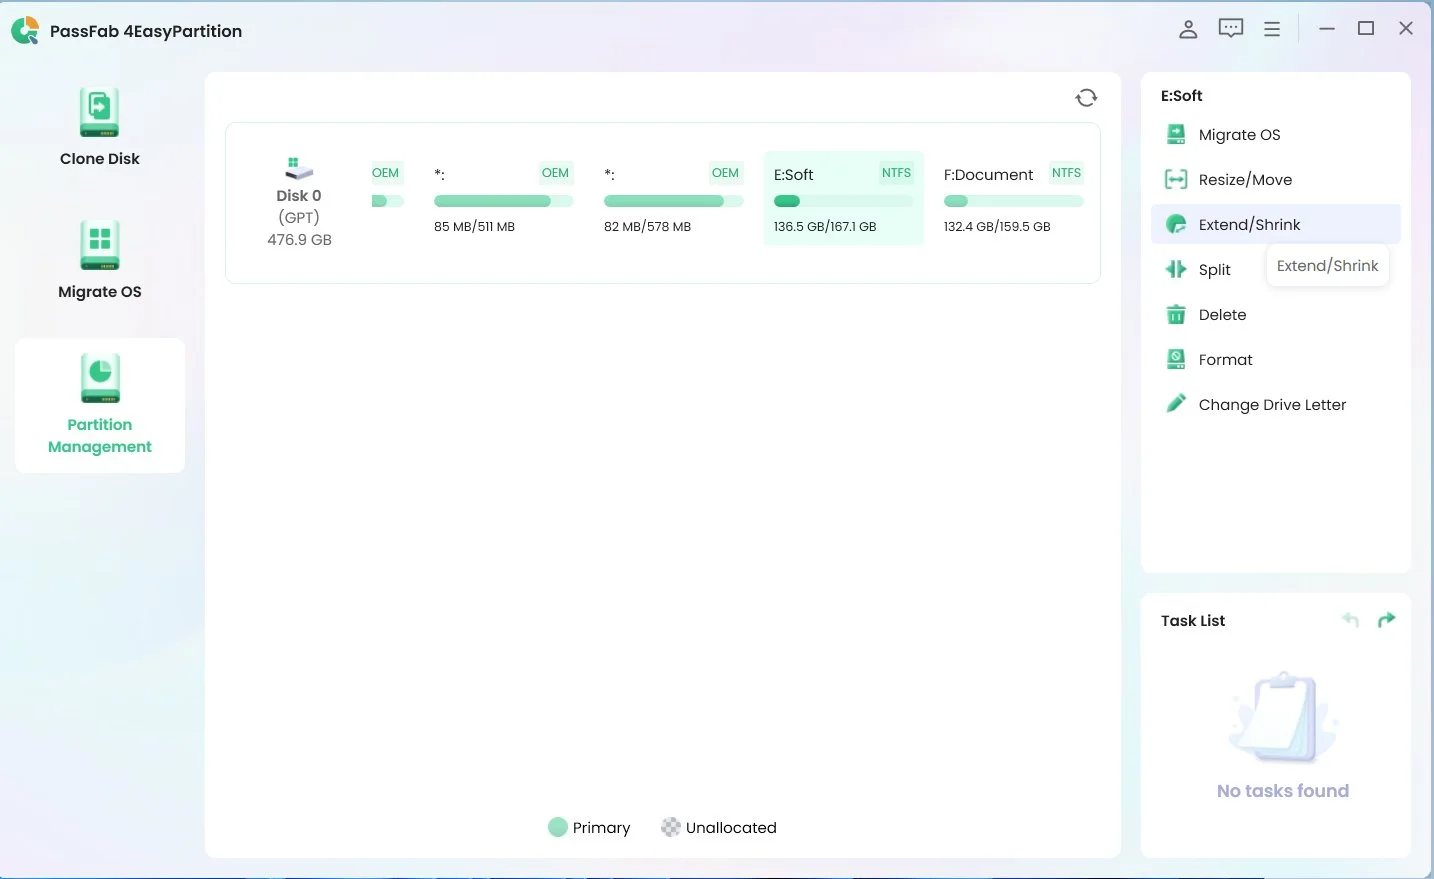
- Click “Extend/Shrink” from the right menu.
- Choose the partition and drag the cursor next to the partition head or tail to change the disk layout. You can also specify the partition size.

- Click “OK” to add your operation to execute list. After confirming your action by choosing “Execute Task”. Select “OK”.

3. Split partition
If your computer has only one partition, all system, applications, and private data are stored in it, it will be hard to manage your data and slow down system performance when too many other files keep with the system disk. What’s worse, you may lose all the data if suffering virus attack or other accidents.
Therefore, it is necessary to have more than one partition on your pc. Splitting partitions is to make one partition into two.
By executing actions several times, you will get several partitions to store different types of data. Your system, applications, and other personal data can be well-kept and managed.
- Choose the target partition (here I choose E:) from the list and click merge from right menu.
- In the following interface, you can drag the cursor to specify the size of the new partition.
You can also specify more detailed information of the new one including new partition size, volume label, driver letter, file system, and cluster size and etc.

- After confirming your action, you can click “Execute Task” to check.

Tips:
You can only split the partition with unused space. If a partition is fully utilized, it cannot be split.
4. Create partition
Creating a partition refers to divide a hard drive into multiple sections. Only after creating one or more partitions on a disk can the disk be utilized for storing various types of data. Creating more than one partition helps you to better mange your pc. If there is only one partition (usually C:) on your pc, too many other files keep with the system disk, it will slow down system performance. If reset pc, all data kept in the drive will be erased.
Generally speaking, we recommend that the system be placed on a separate disk and other types of files be placed on a different partition.
- Choose the unallocated space from the list and then click create.

- In the pop-up window, you can drag the cursor to specific the size and location. You can also specific information about the new partition, including partition size, driver letter, volume label , file system, cluster size, space of front and rear part.

- Click “OK” to add it to execute task. And then click “OK” to perform action after checking your execute task.

Tips:
If you set the drive letter to "None", the partition becomes hidden and cannot be accessed through "My Computer" or any other file explorer.
5. Delete partition
Deleting a partition can erase all the data that was stored in it. Therefore, it is advisable to back up or move any important files from the partition before deleting it.
- Choose the partition that you want to delete from the list and click delete from the right menu. in the pop-up window, click “Yes” to continue.

- Click “OK” to add the operation to the task list. After confirm your action, choose “OK” to proceed.

6. Format partition
Formatting a partition helps erase all the data within it and restructure the unallocated storage space for better utilization of the available disk space.
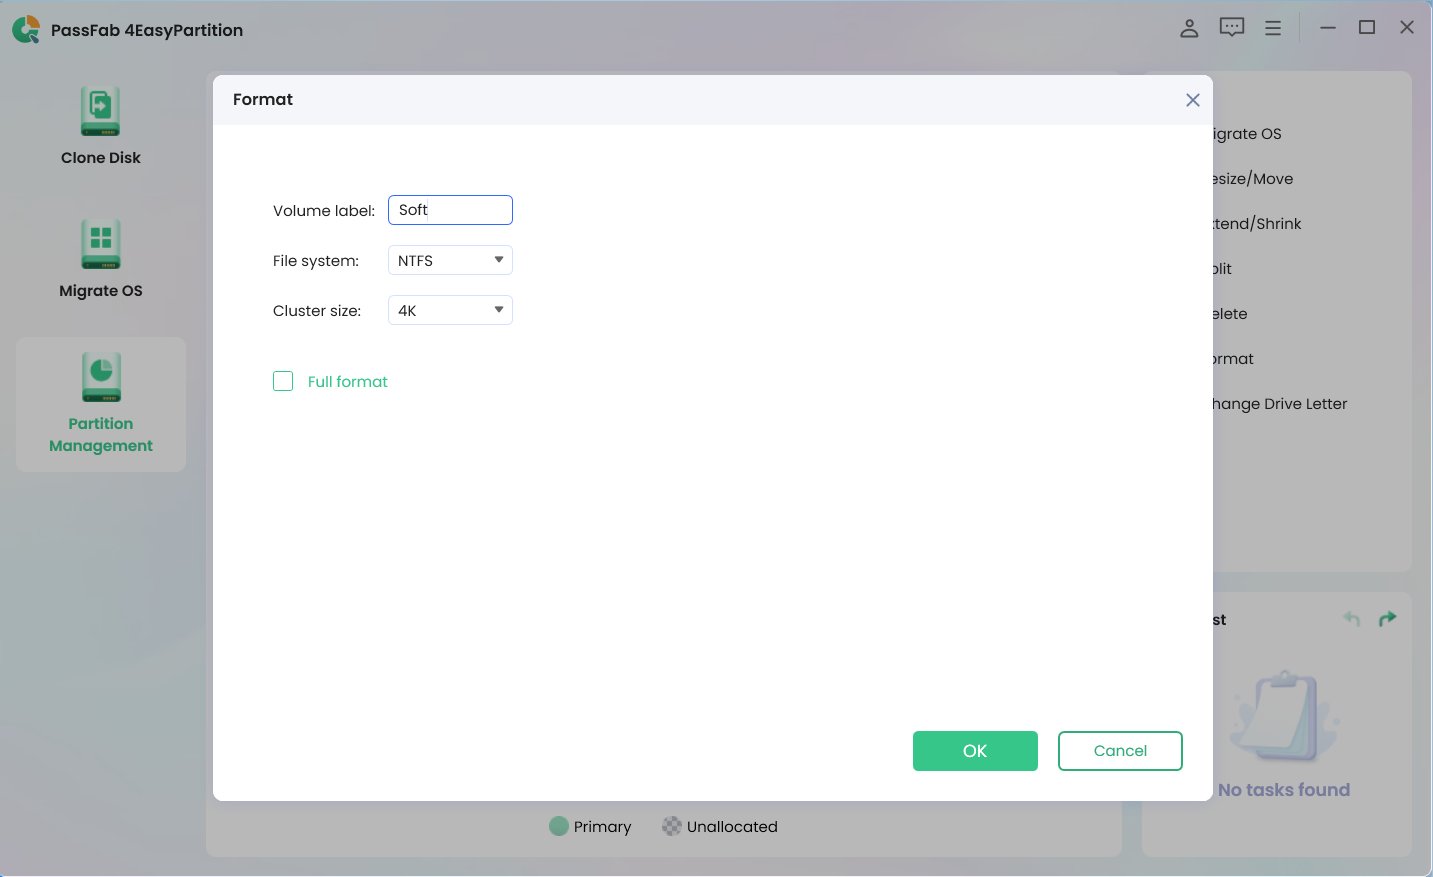
- Choose the partition that you want to format from the list. And then click “Format”.
- In the pop-up window, you can re-name the volume label, and reset the file system and cluster size.

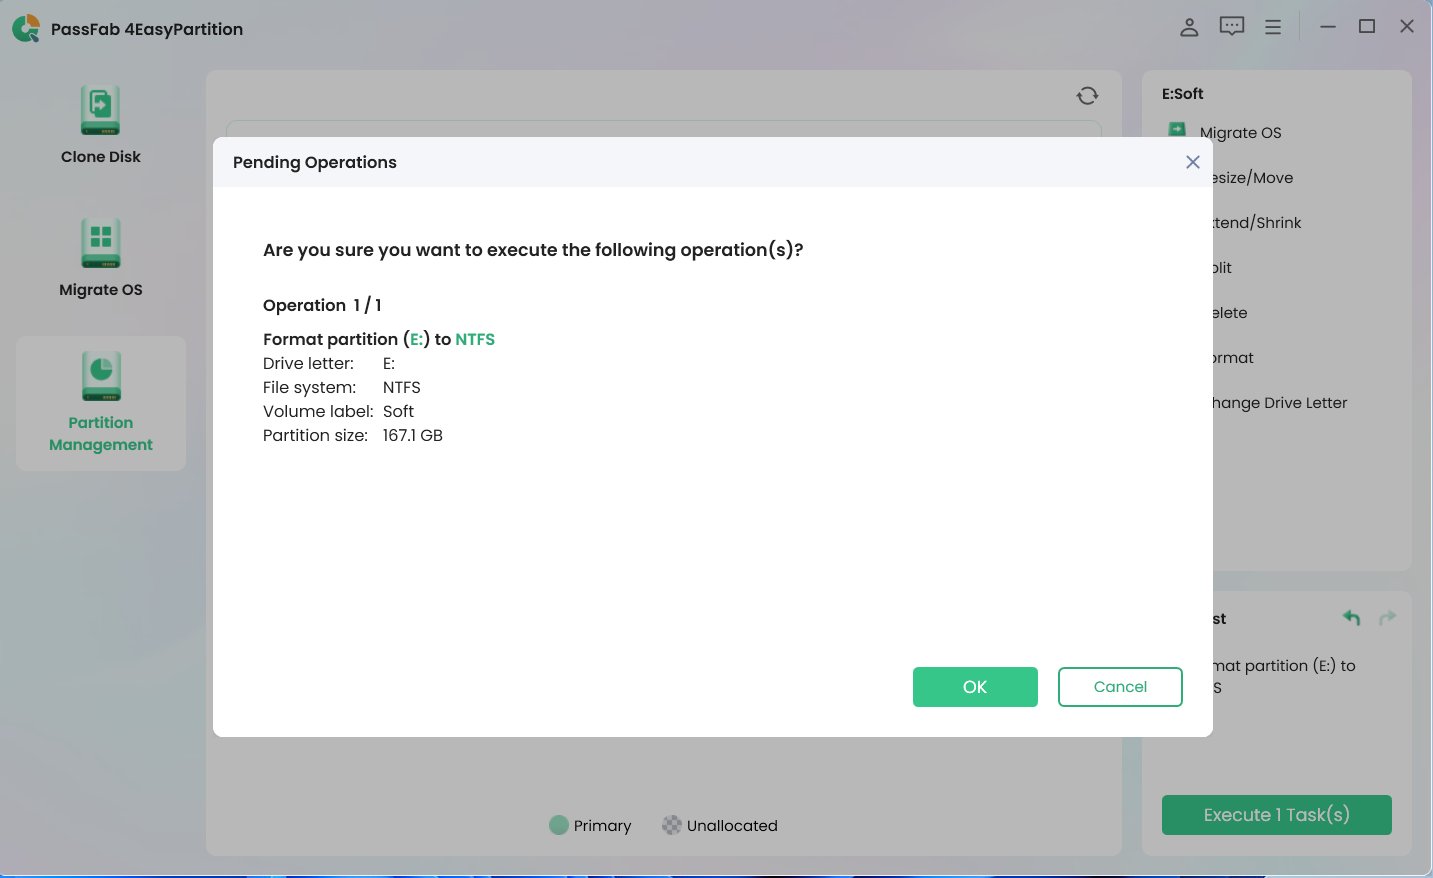
- Click “OK” and then you will see a risky pop-up windows, telling that format partition will erase disk data. Click “OK” to confirm the operation and add it to the task. Check your execute task and click “OK” to perform action.

Tips:
1. A full format erases any files from the disk, and checks the disk for bad sectors. A full format will takes more time. If you choose full format, all the data will be unrecoverable.
2. For setting Cluster Size, the smaller of the cluster size may let your partition generates many file fragments during the process of the data read-write and the bigger cluster may waste less disk space, so we suggest you use this default cluster size.
7. Change driver letter
Windows generally allocates an alphabetical identifier to the majority of drives, such as C:, D:, and E:, to make access to files and folders more precise . Change Drive Letter enables your to assign new letters to their drives in your own way.
- Choose the partition you want to rename from the list an select change drive letter from the function menu on the right.
- In the pop-up interface, it shows your current drive letter and let you choose the new dive letter from the list. You can rename the target disk with any letter as long as they are not be used.

- After choosing new letter, choose “OK” and you will see the operation is added to task list in low right corner. As see, I change drive letter D: to B:.

Tips:
1. Some software and their shortcuts require you to use specific drive letters. Changing drive letter may put this software at risk of not working properly.
2. You may not have the permission to change the system disk letter.
3. If you choose “None” as your new driver letter, the drive will be hidden and you will not see it on your pc.
Part 3. How perform disk cloning
Something you Need to Know First when Cloning
- when cloning disk or partition to another, those data in the target disk/parititon will be lost, so please backup the important data in target disk first or use a empty one.
- During the cloning process, it is advised to avoid executing any additional operations on your computer. If the computer's specifications are relatively low, it may result in the computer running slowly or even cause the target disk or partition to revert to its original format or become offline, leading to the potential loss of any unsaved data on the local disk.
1. Clone disk
Disk cloning is the process of creating a one-to-one copy of a hard disk drive (HDD) or solid state drive (SSD), not just its files. A disk clone can be used to upgrade a disk or replace an aging disk with a new one.
-
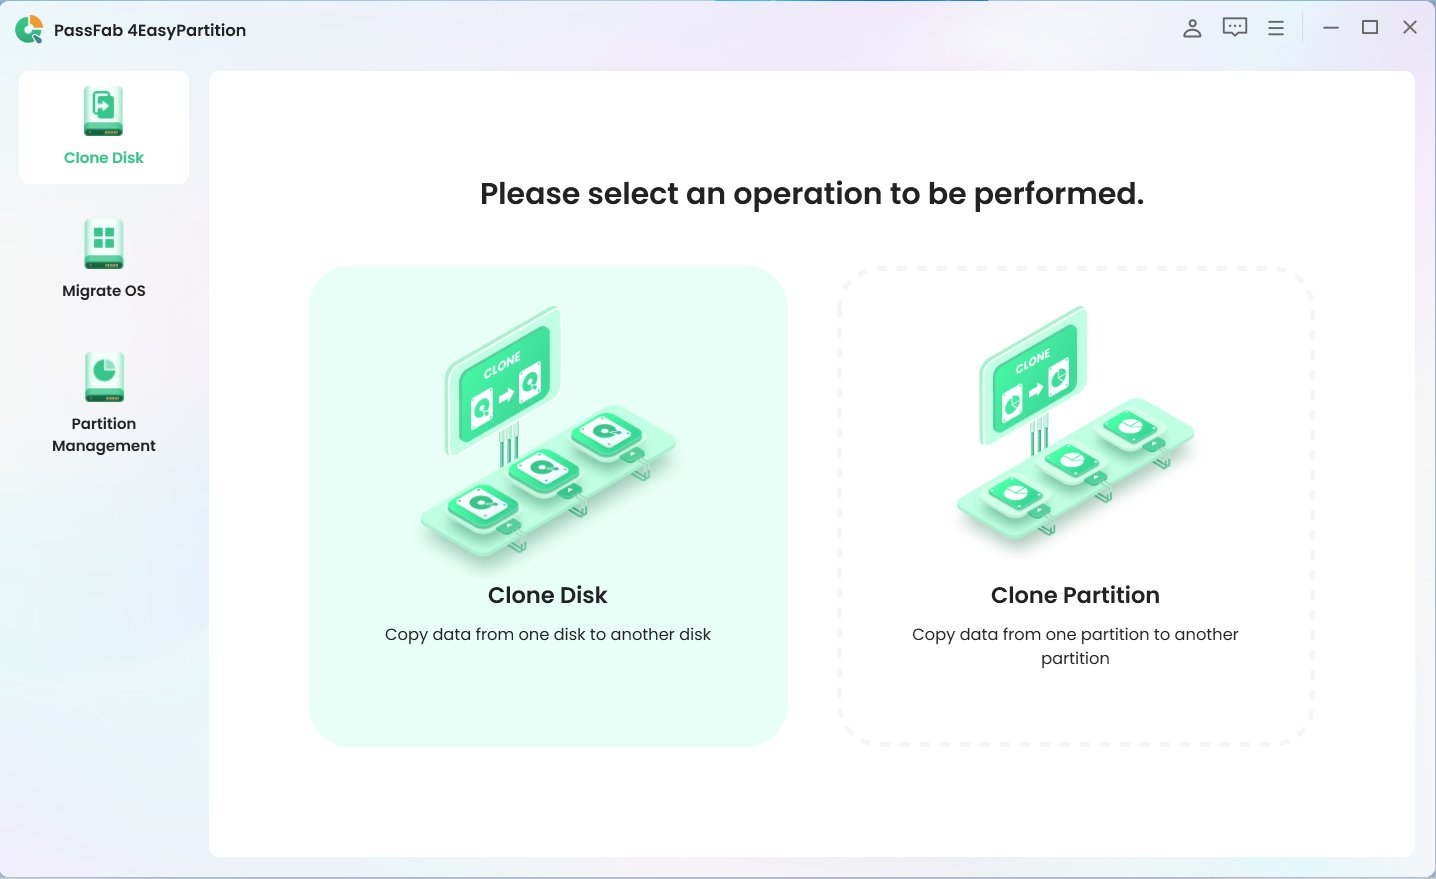
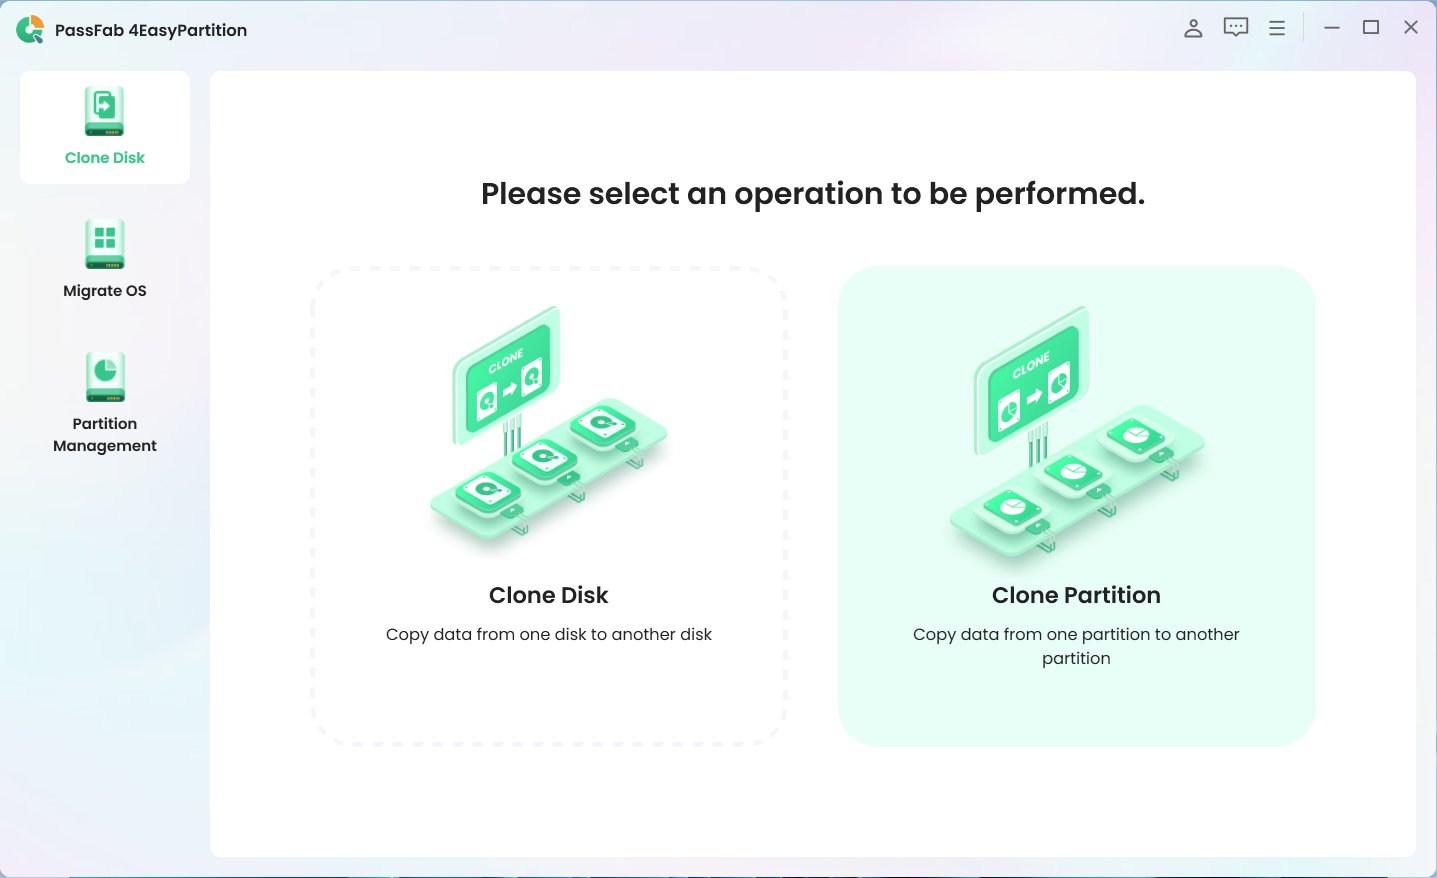
Download PassFab 4EasyPartition and click "Clone Disk" to start the process.

-
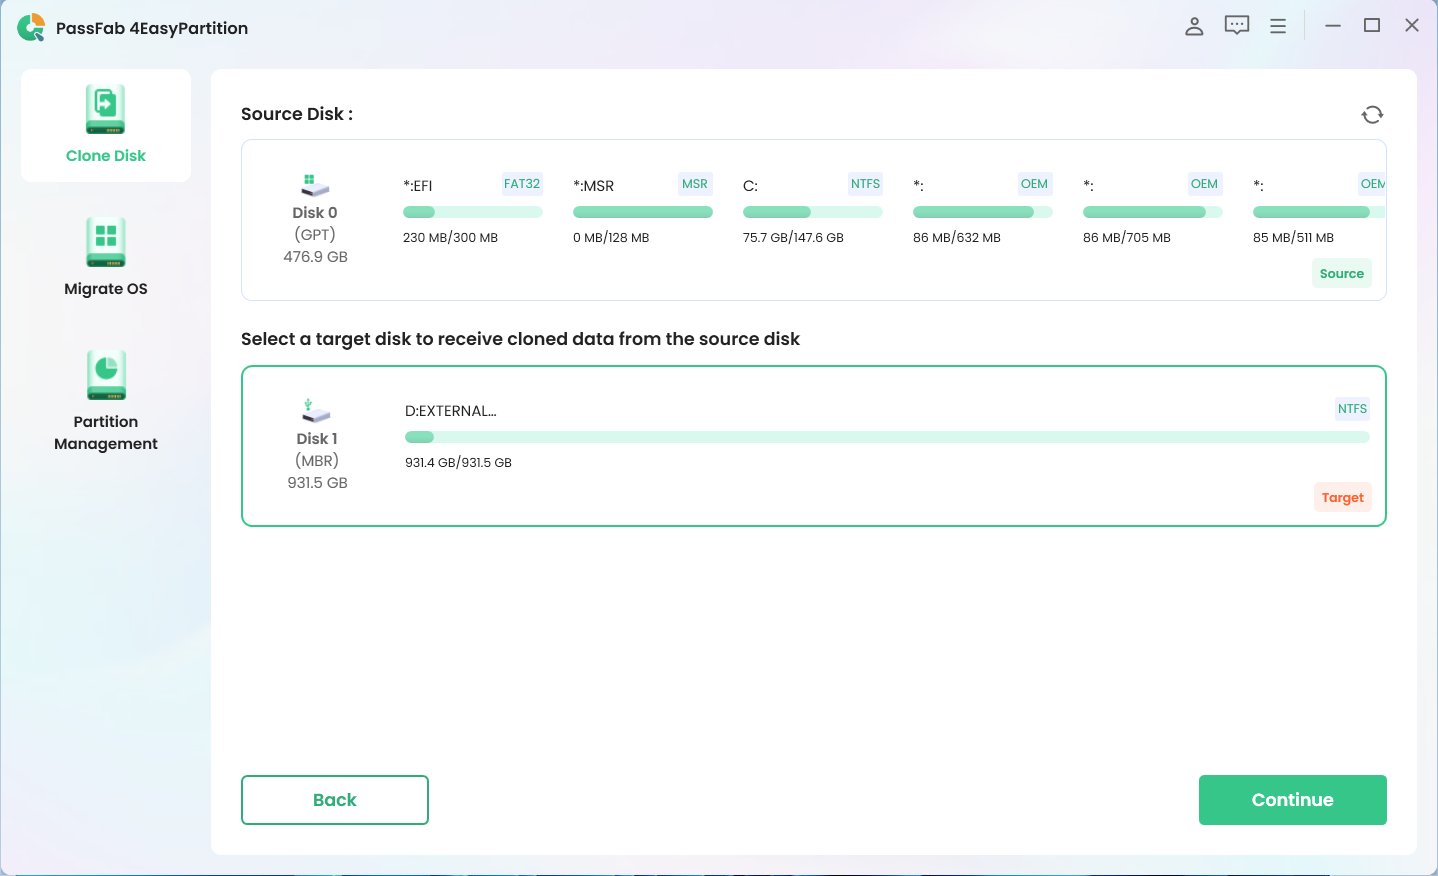
Select the target disk you want to clone to, and then click "Continue" to proceed

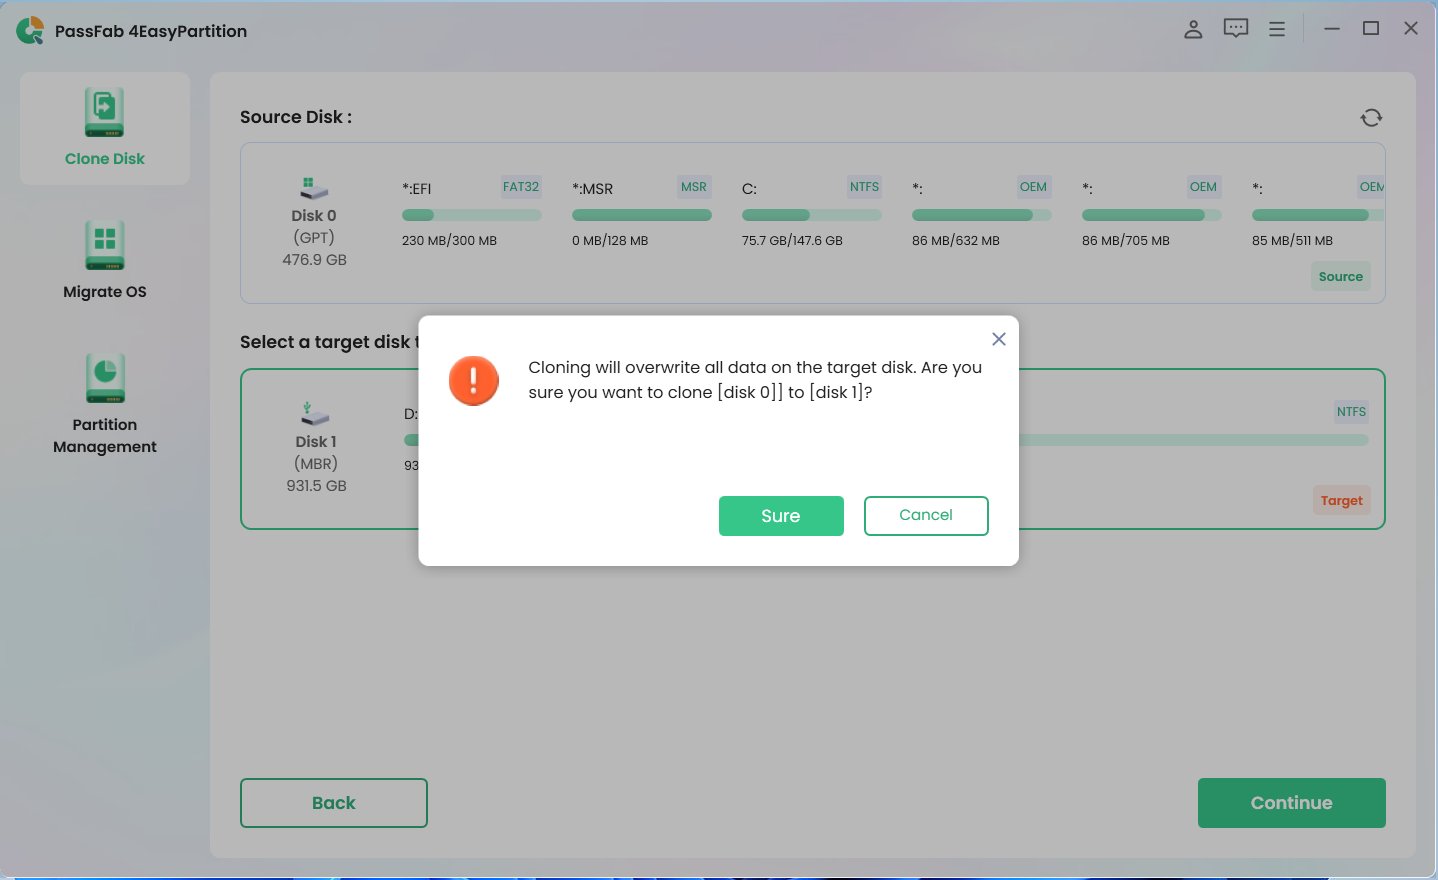
A risk pop-up windows will be displayed. Click “Sure” to proceed the next step.

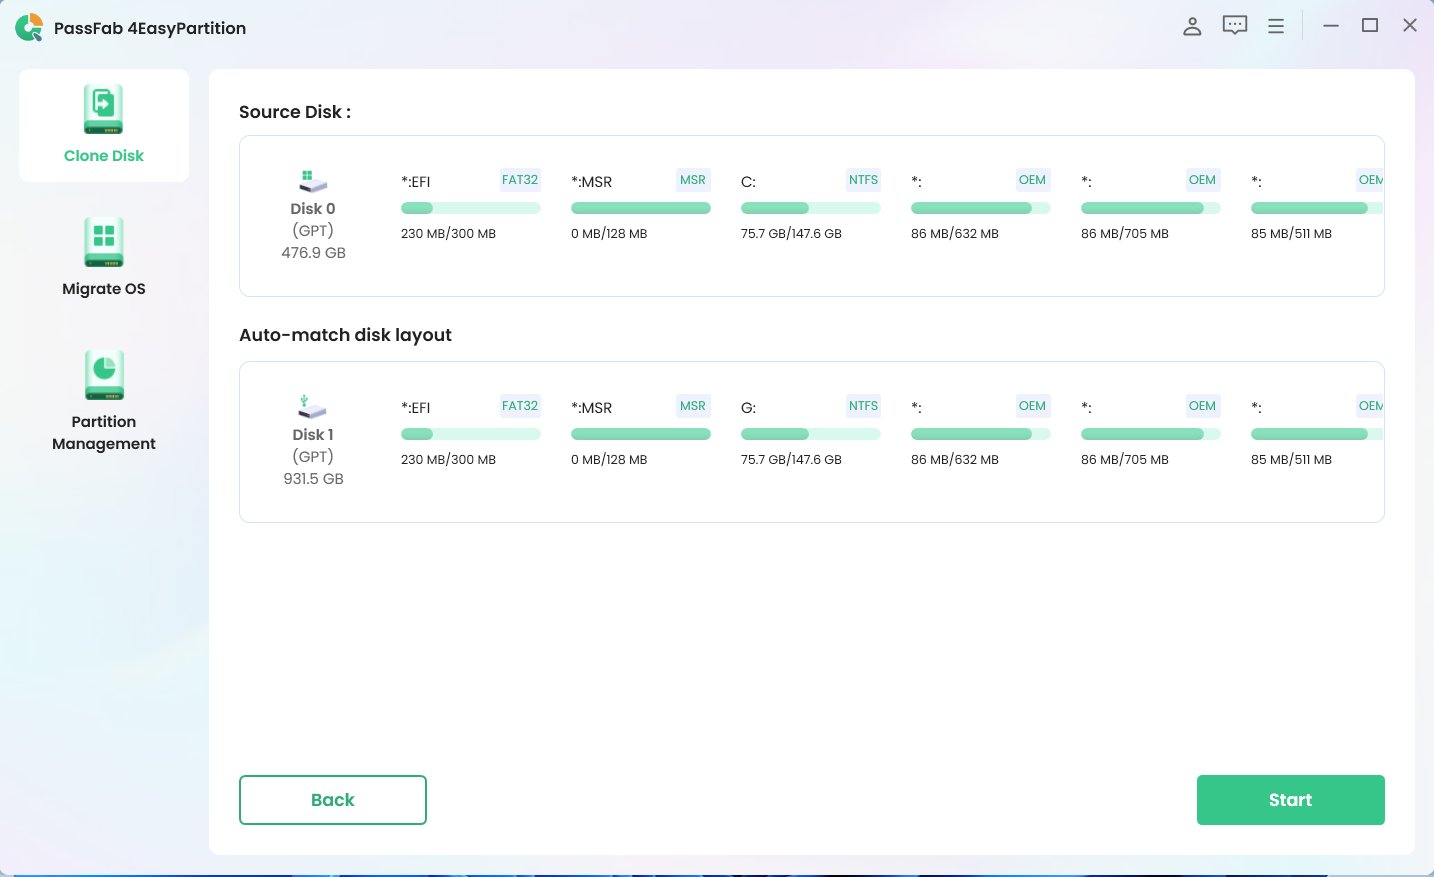
In the preview interface, please check the information of source disk and target disk, and click“ Start” to perform disk cloning.

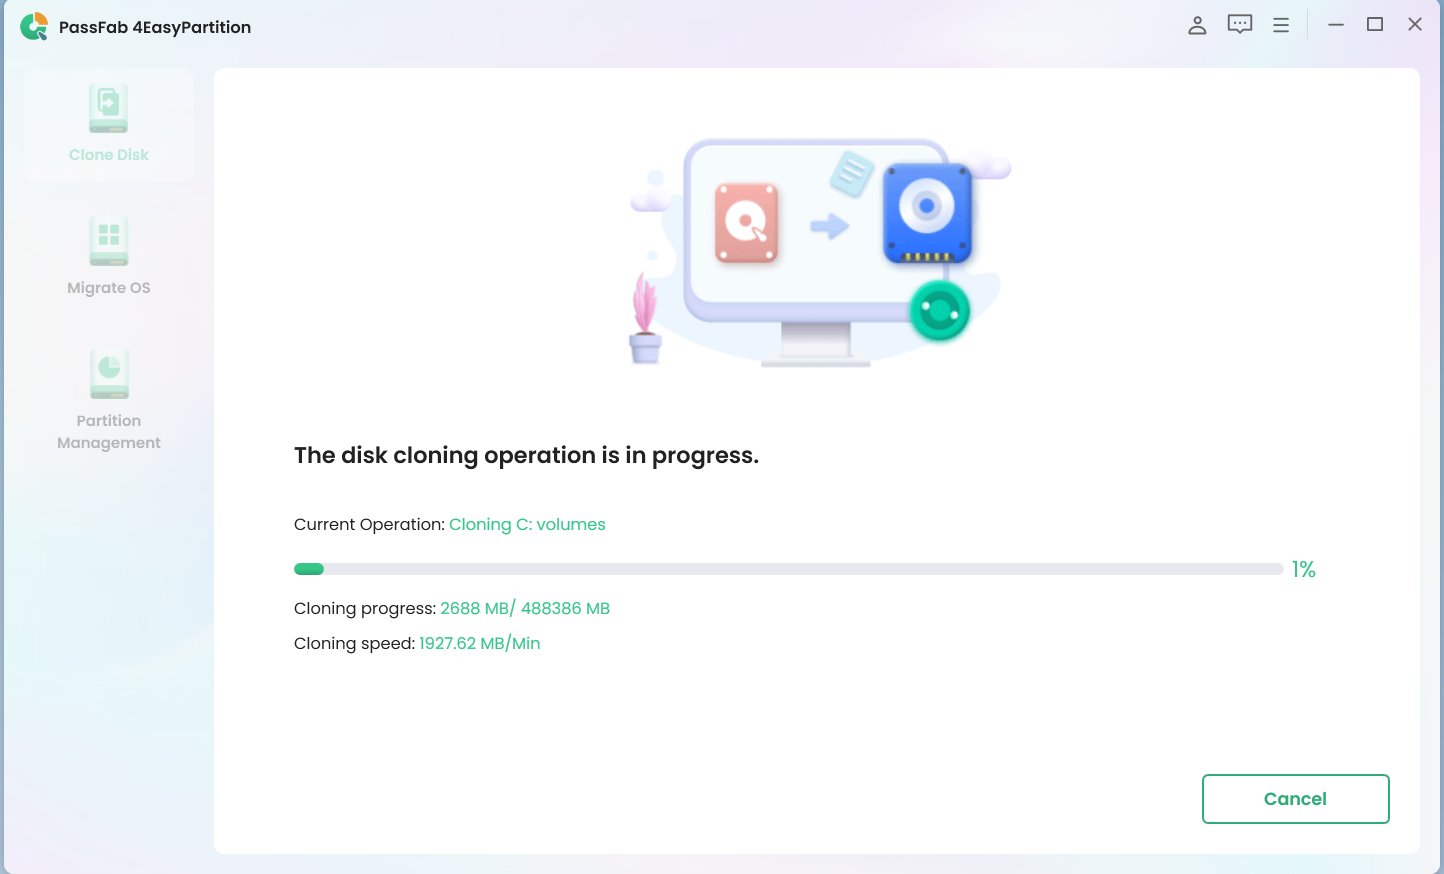
The disk cloning operation is in progress. Please wait for a while.

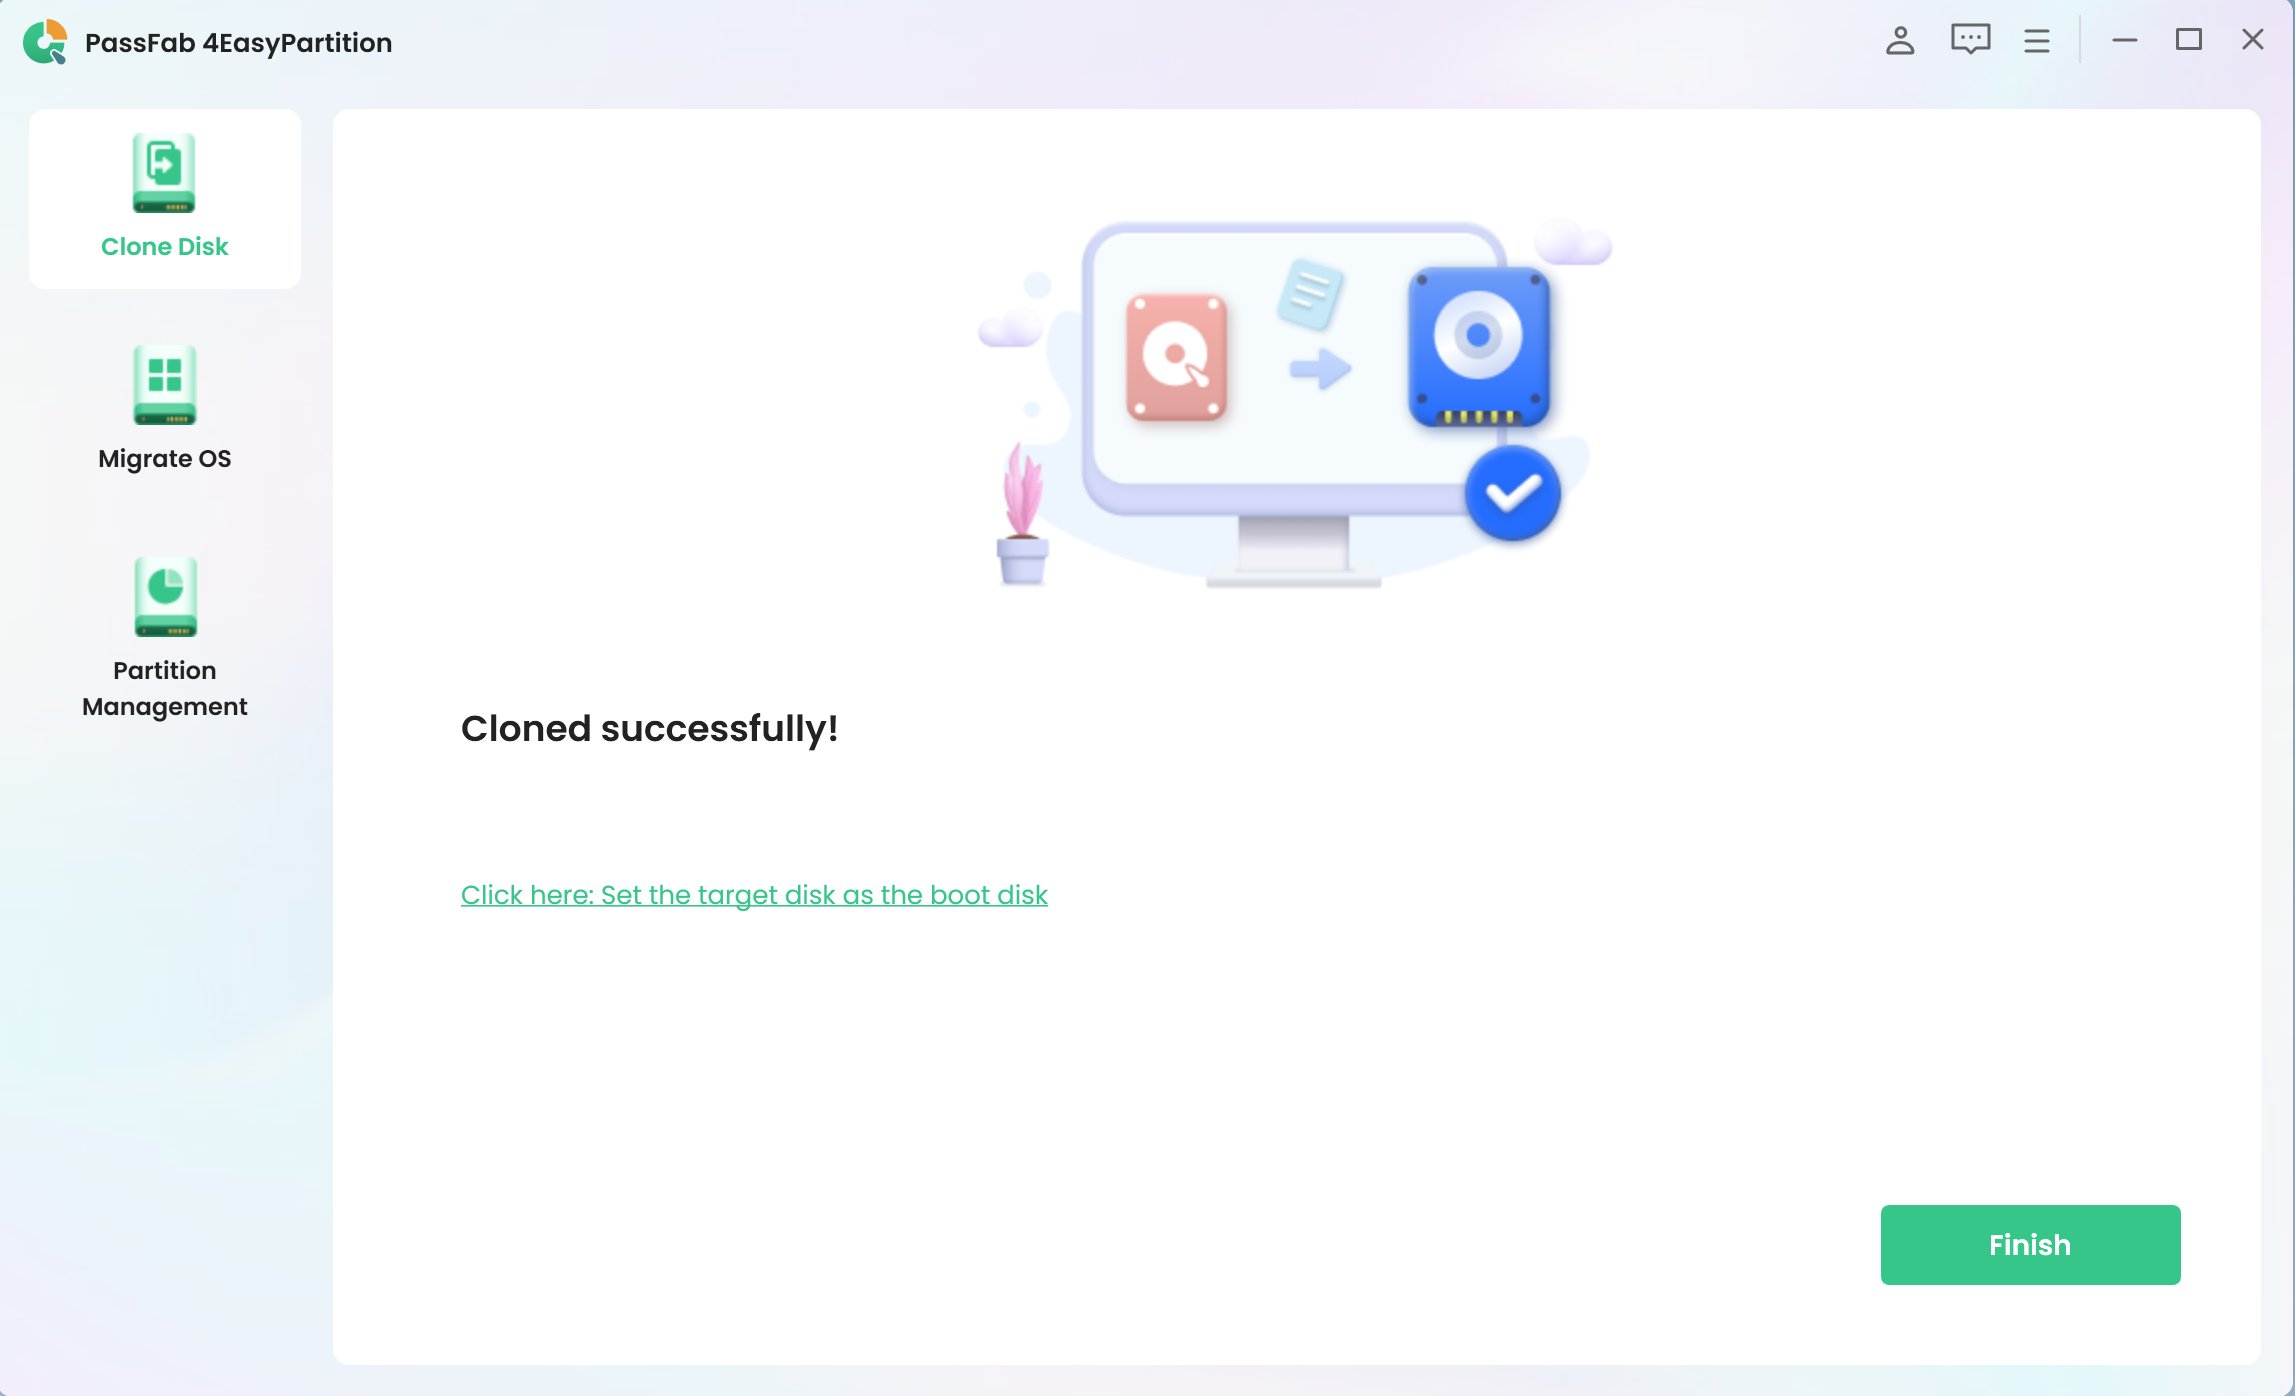
Clone your disk successfully. A risk pop-up windows will be displayed. Click “Reload” and then Click "Finish" to complete the process.

2. Clone partition
Cloning a partition is the process of copying the contents of one partition on the disk to another partition without losing any data. The target partition will be loaded with the same data as the source partition.
-
Launch PassFab 4EasyPartition and click"Clone Partition”

-
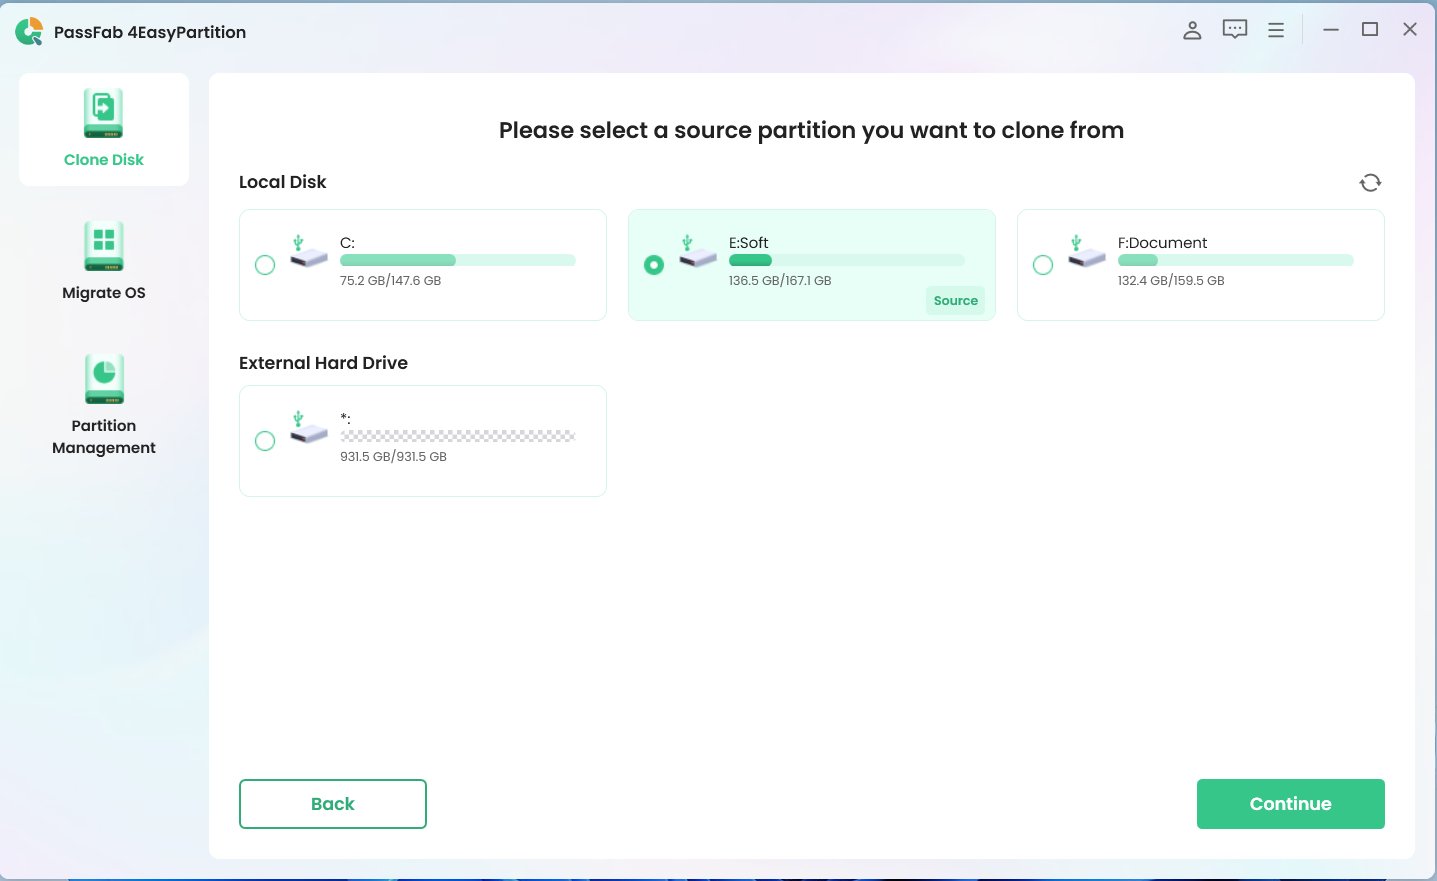
Click the source partition you need to clone and click“continue”to proceed((here I choose E:).

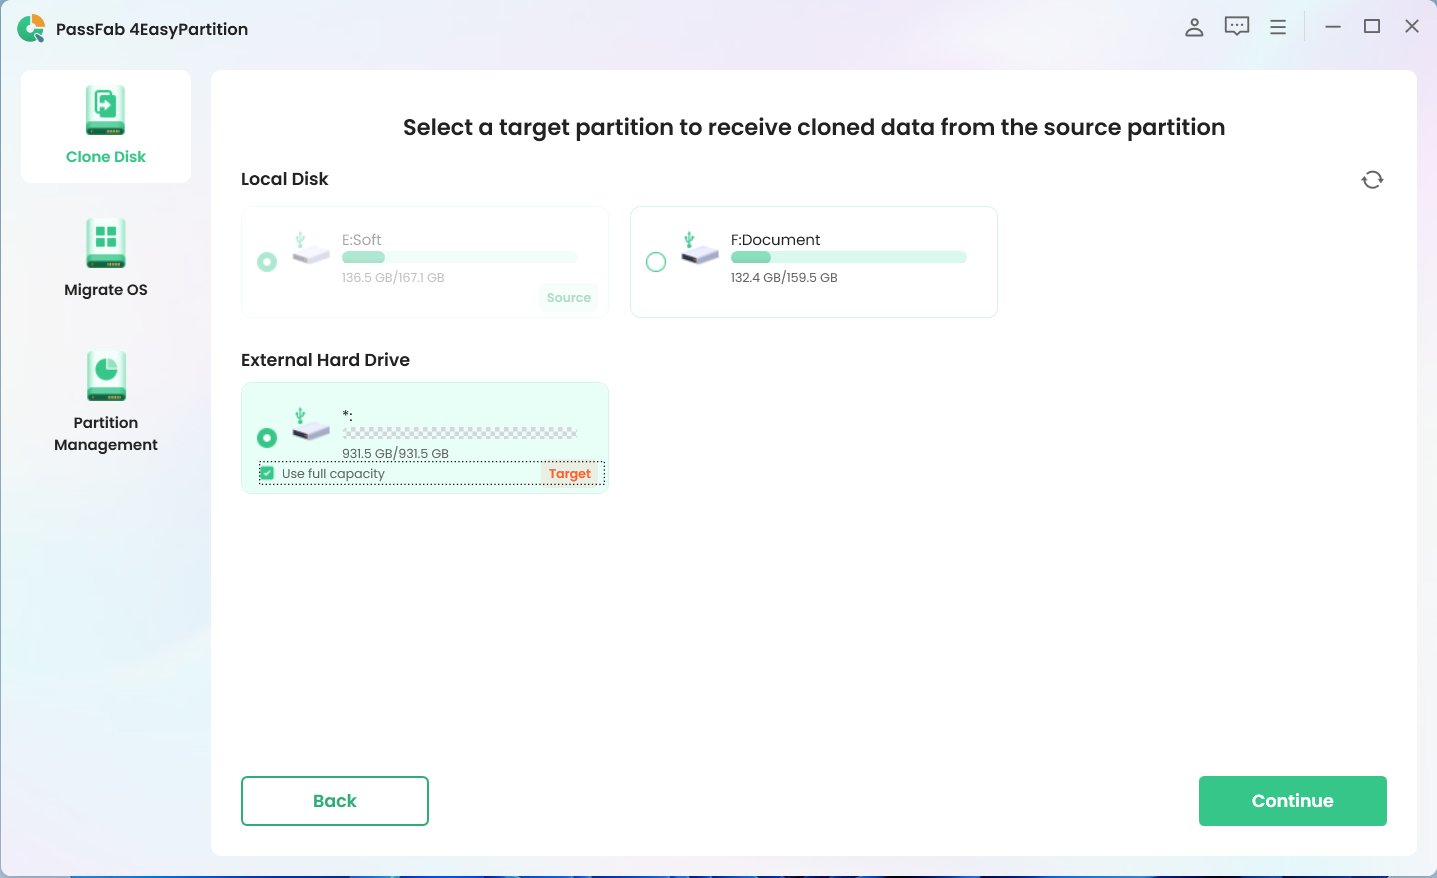
Next, select a target partition to receive the cloned data. If you are using a newly purchased disk as the target partition, it offers the option to "Use full capacity" in the unallocated space.

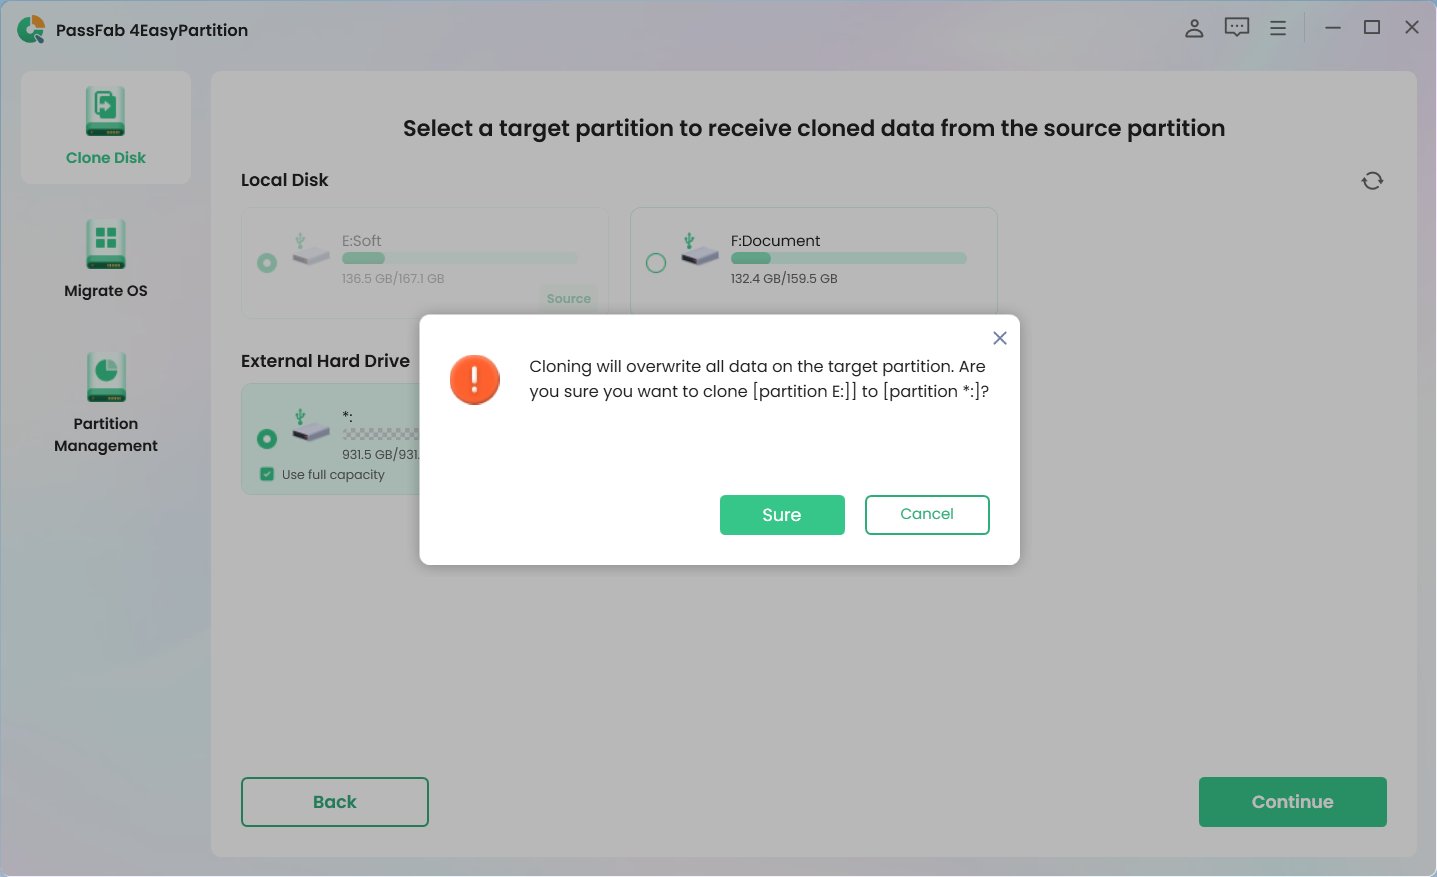
A risk pop-up windows will be displayed. Click “Sure” to proceed the next step.

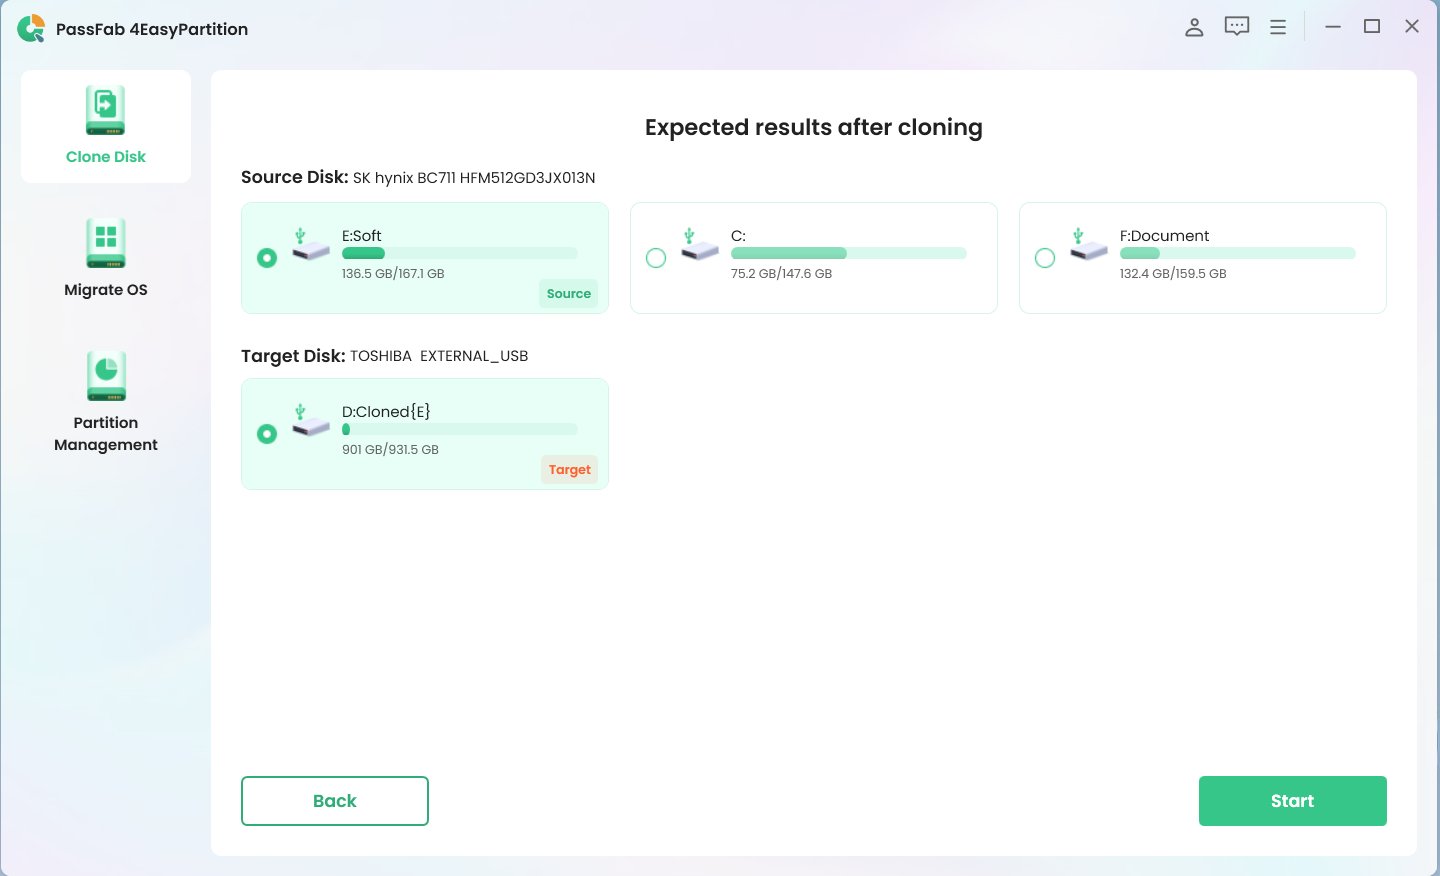
In the preview interface, please check the information of source disk and target disk, and click “ Start” to perform partition cloning.

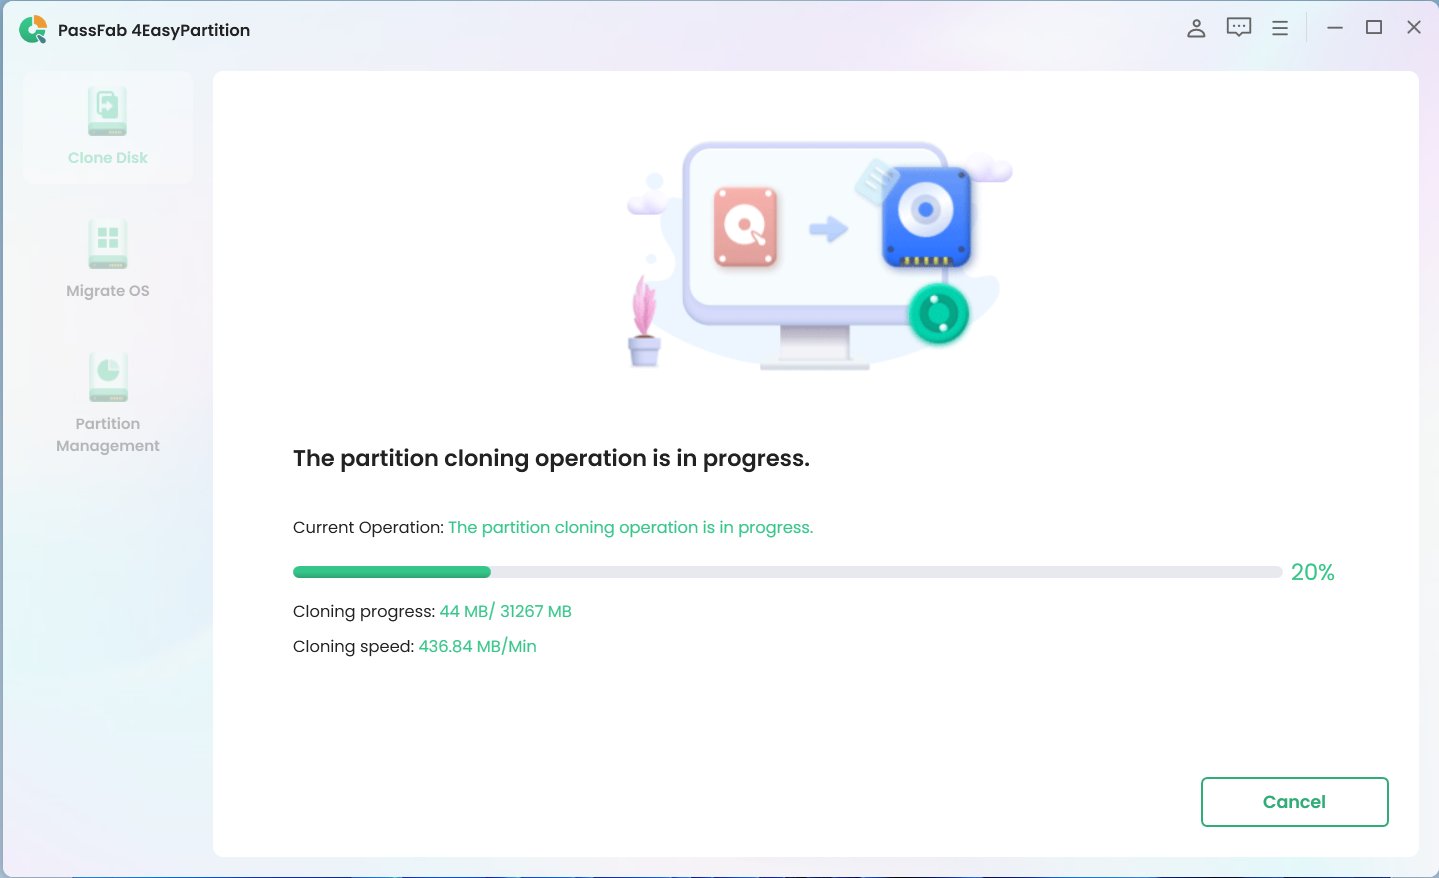
Partition Cloning is in progress. Please wait for a while.
-

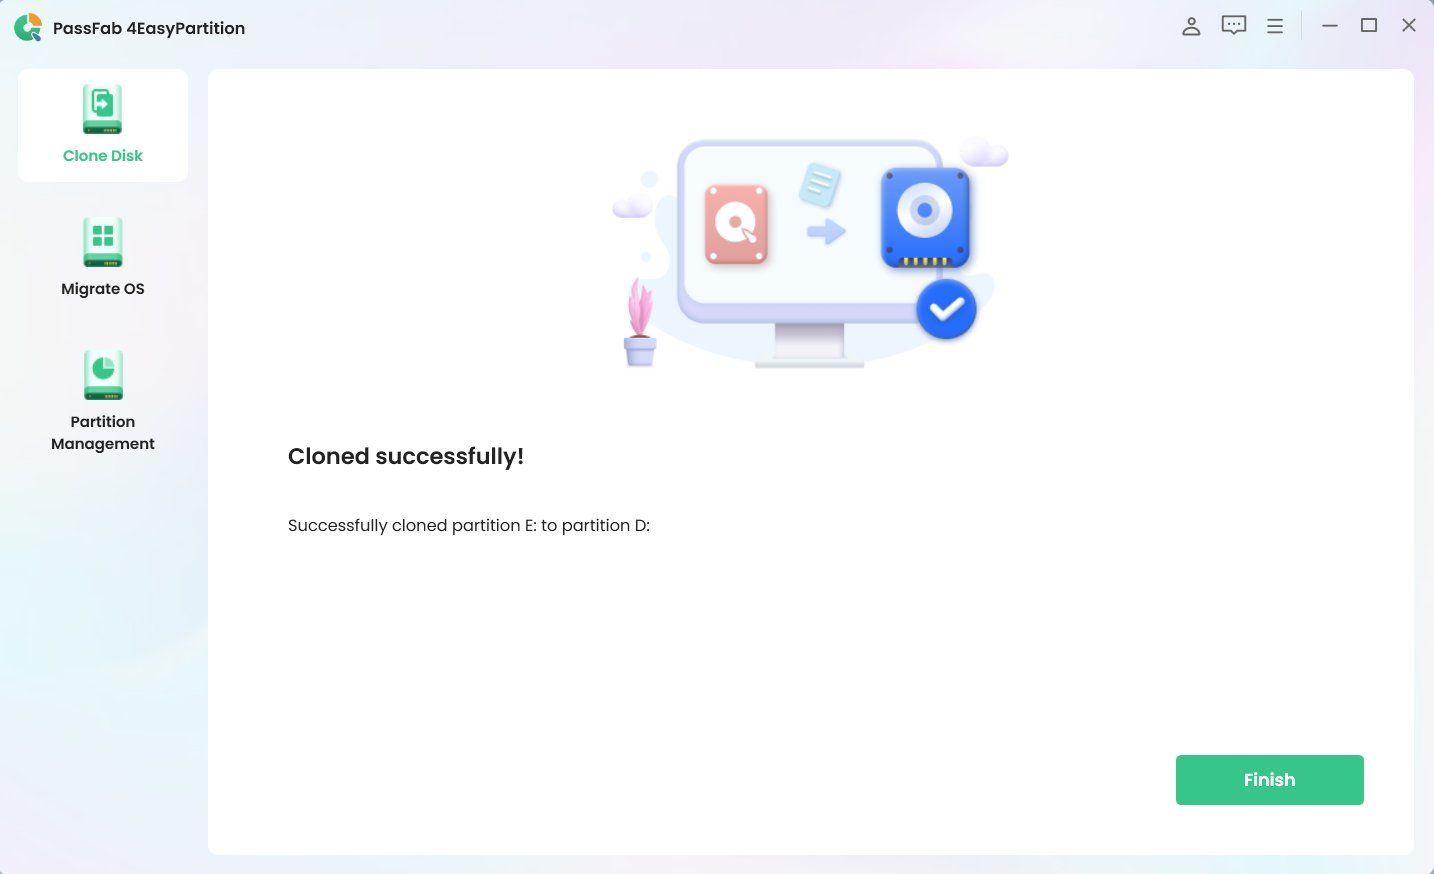
Clone your partition successfully. Click “Finish” to complete the process.

Part 4. How to Convert Disk
PassFab 4EasyPartition is the ultimate MBR/GPT disk converter that enables you to convert MBR to GPT or GPT to MBR quickly and safely. You can use 4EasyPartition to effortlessly convert MBR to GPT for Windows 11 upgrading without data loss.
1. Convert MBR to GPT
-
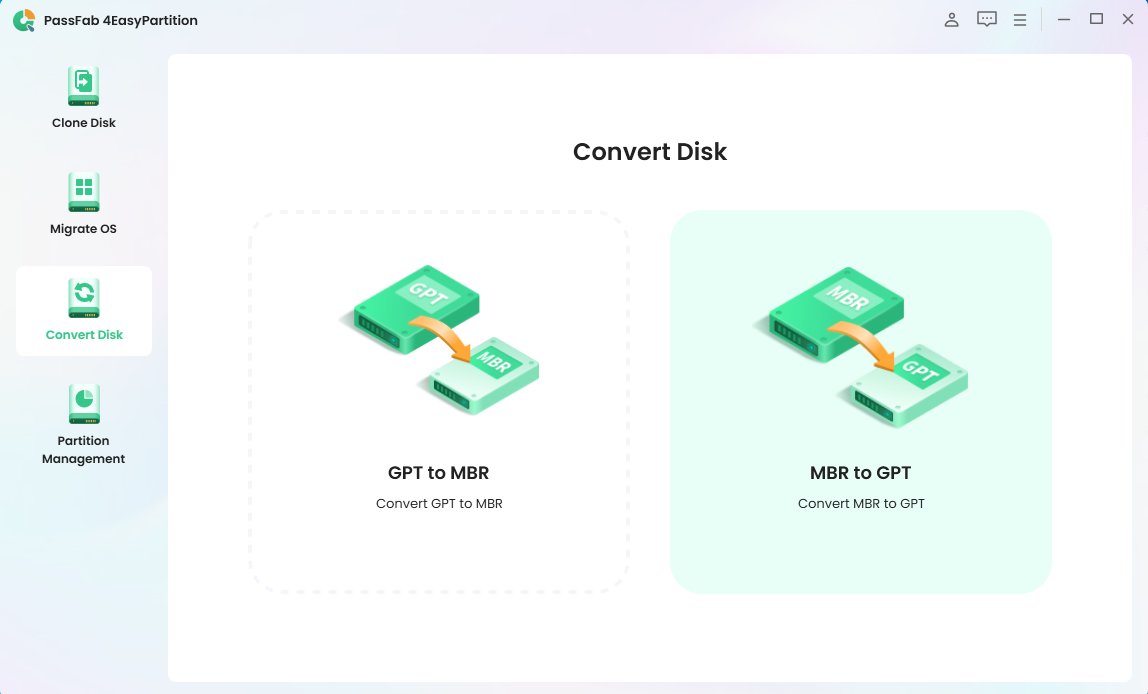
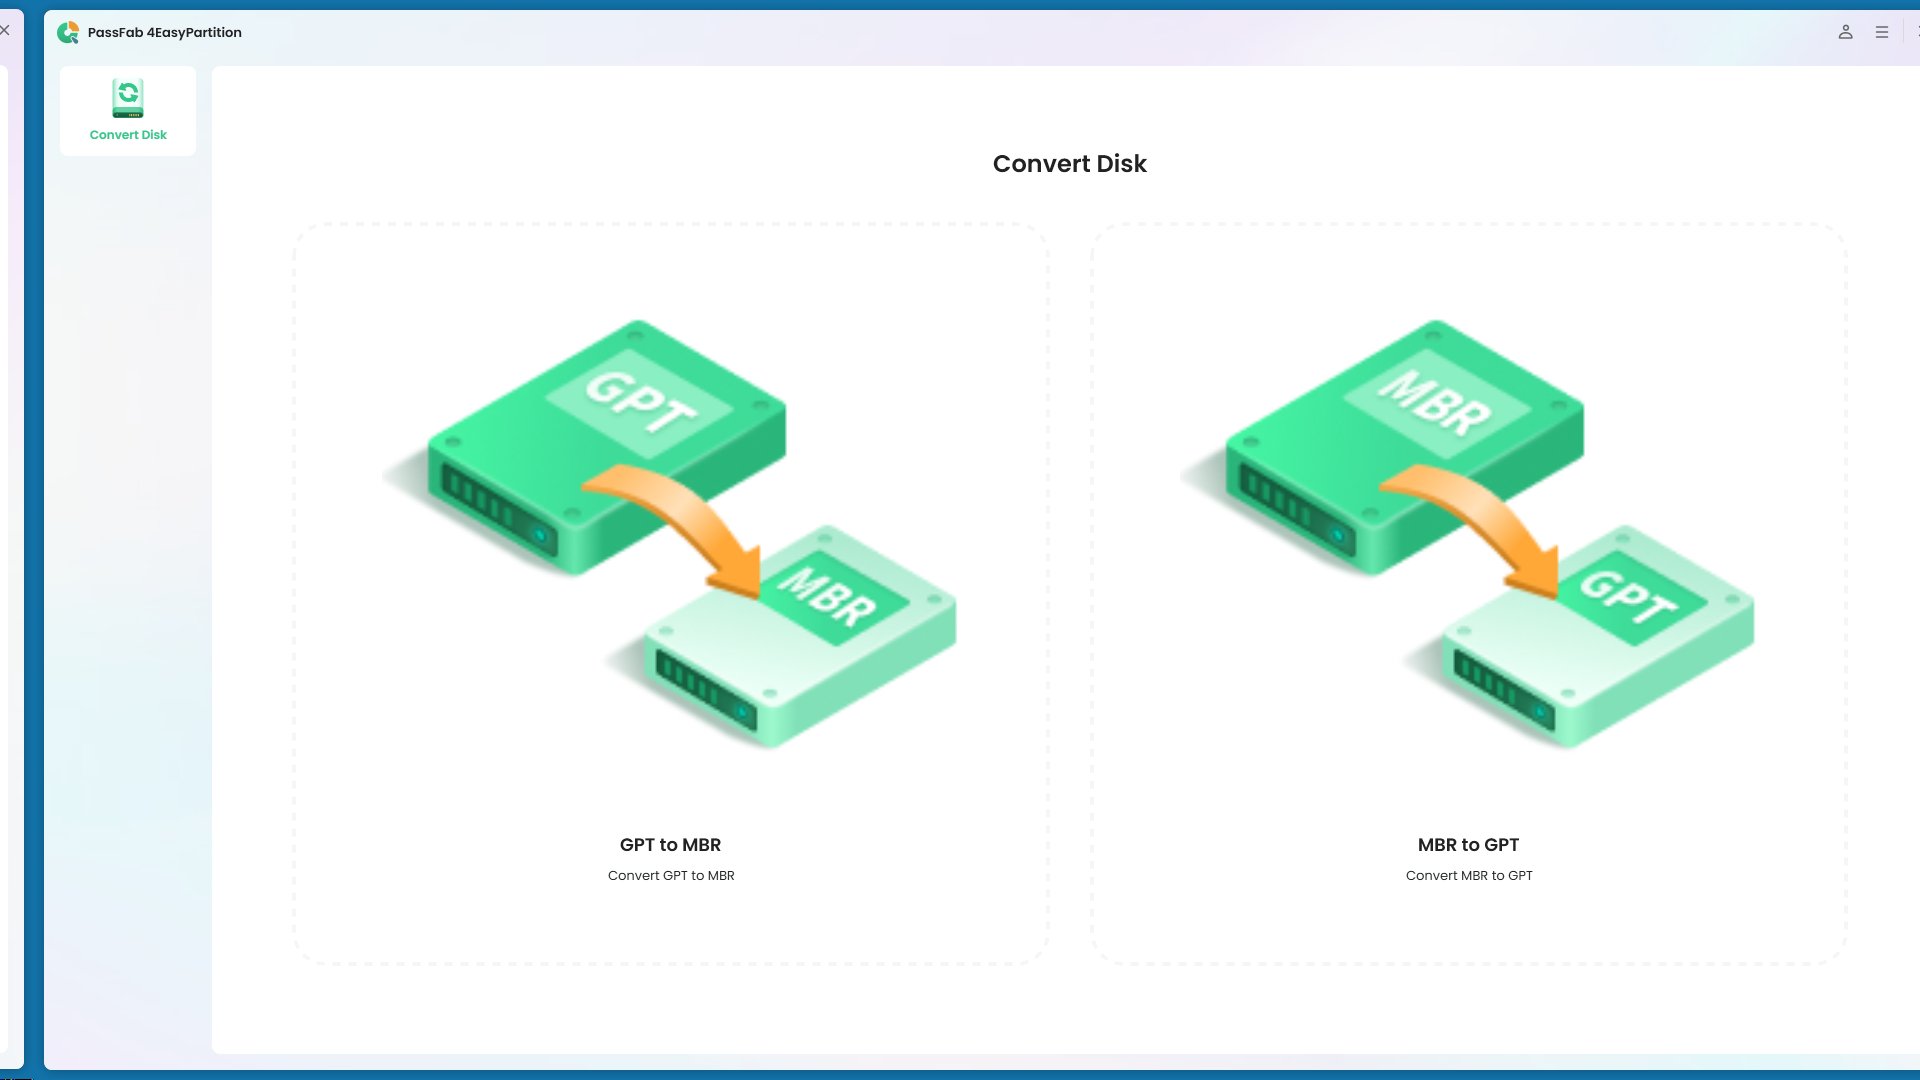
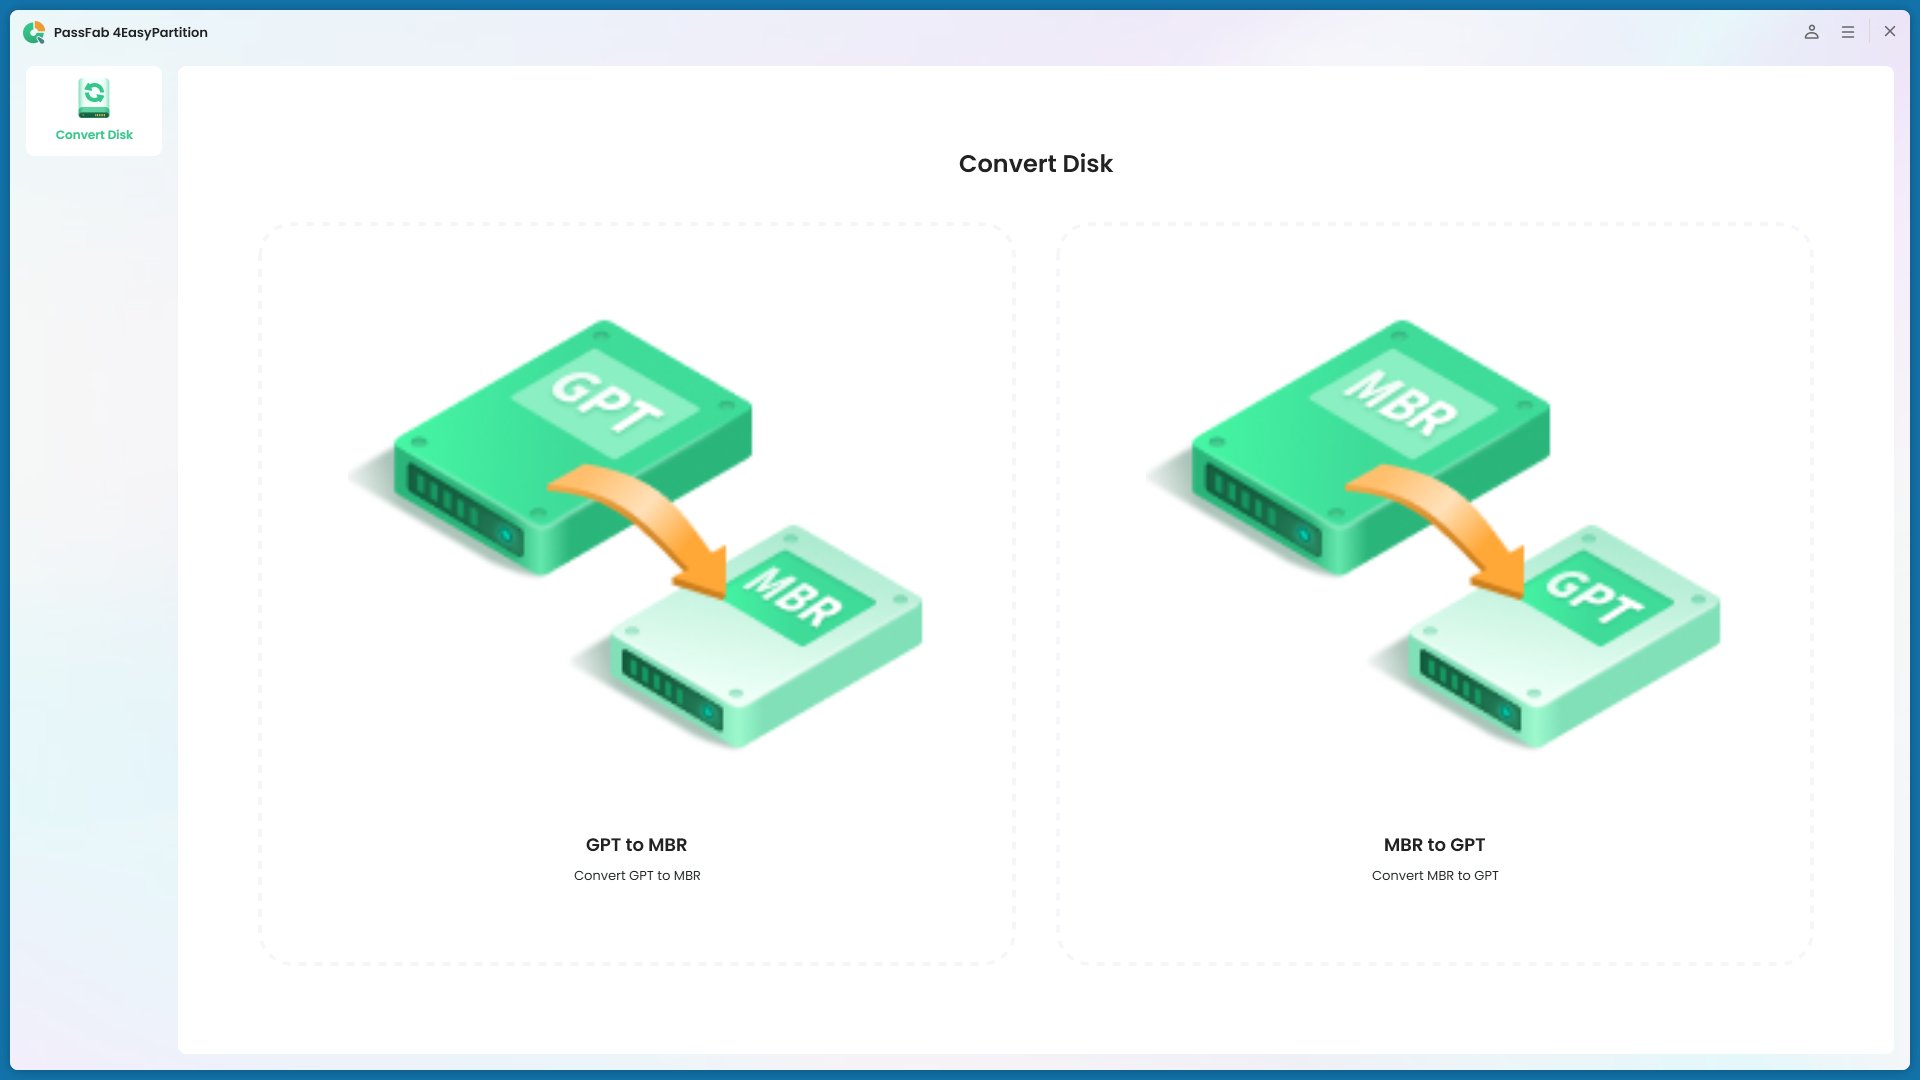
Download and install PassFab 4EasyPartiiton on your computer, then launch the application, select “Convert Disk” in the left navigation panel and click “Convert MBR to GPT” to continue.

-
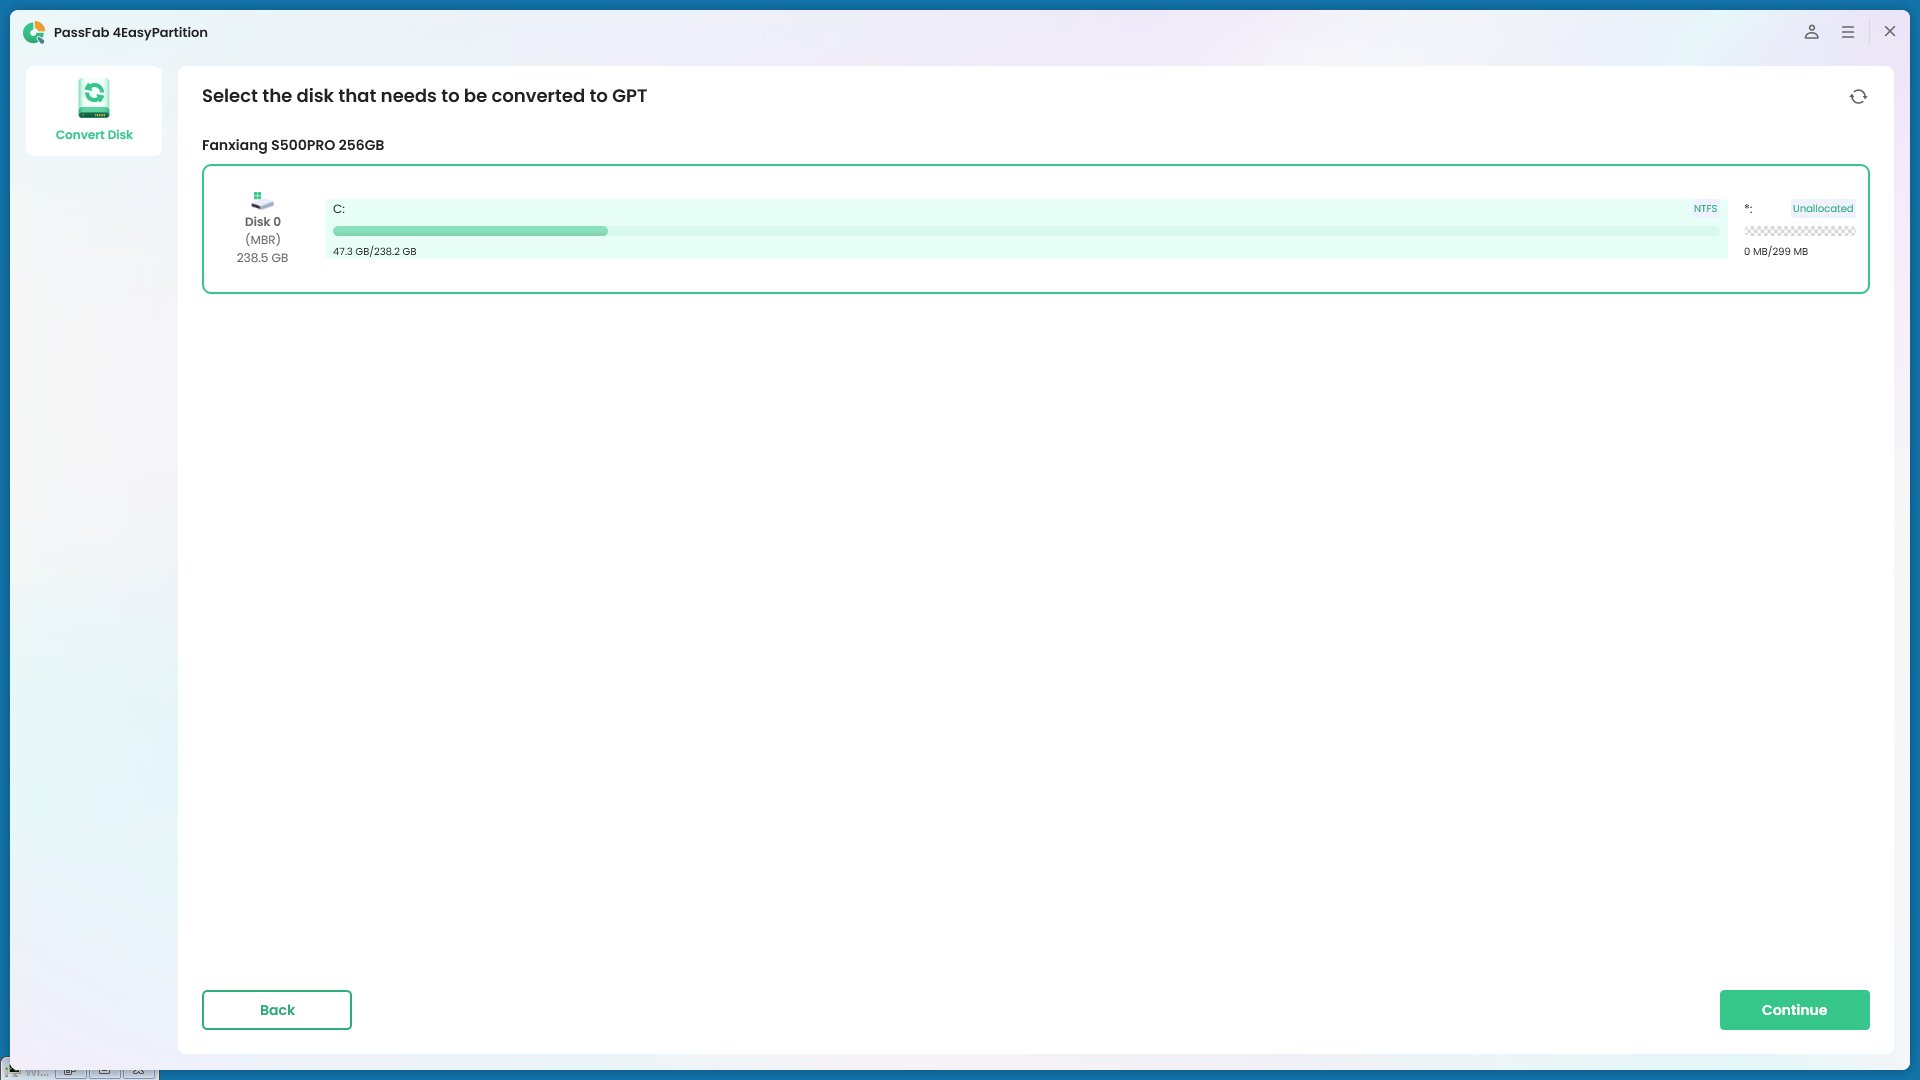
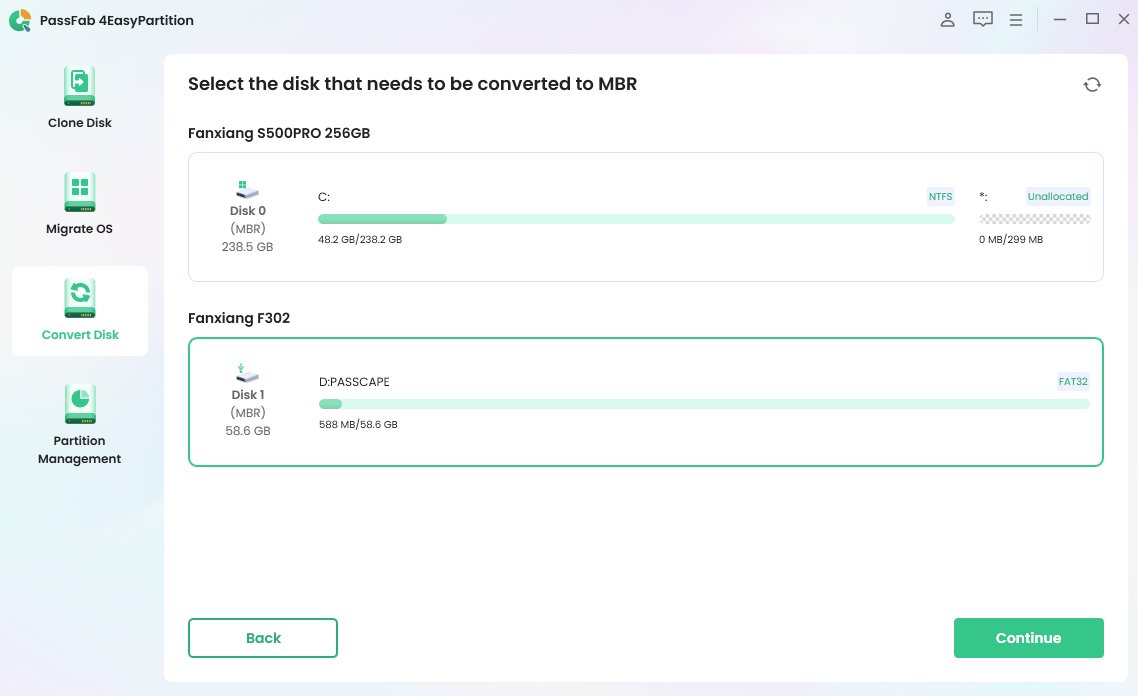
Select the disk you want to convert, then click "Continue" to access the execution interface.

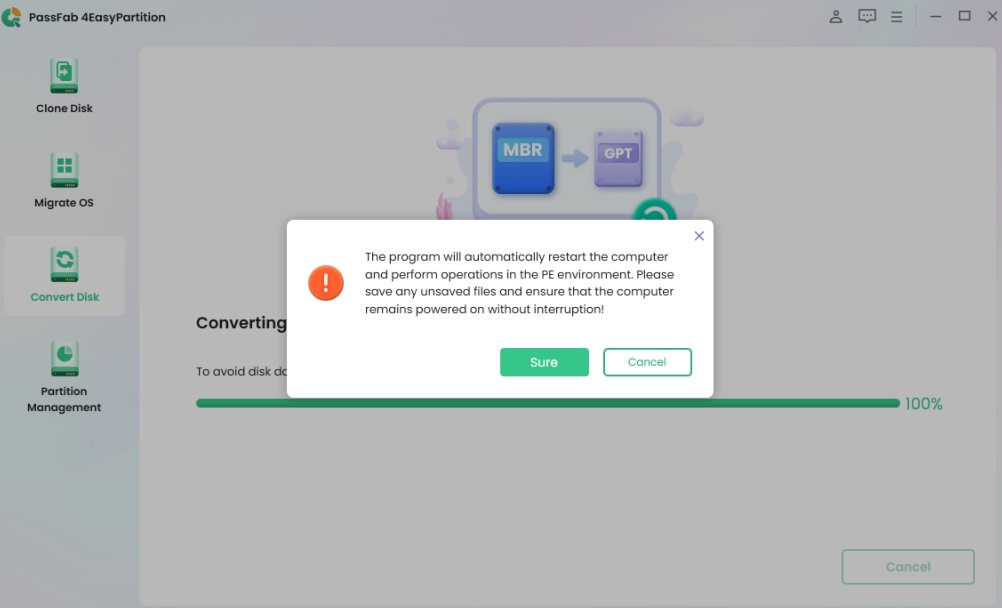
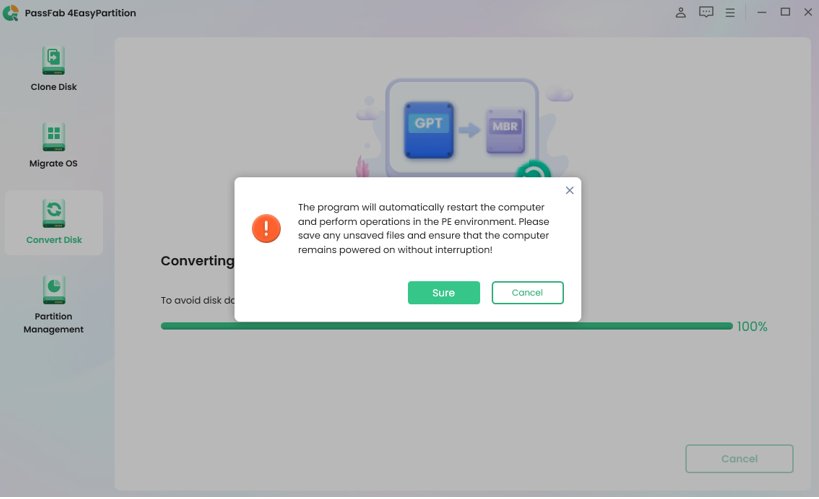
If the selected disk is the system disk, the program will download the PE components. After successful download, a prompt window will appear. Make sure to save all unsaved files and prevent power failure. Check that everything is in order and then click “Sure”. The computer will restart and automatically enter the PE environment.

-
After the program starts in the PE environment, select "Convert MBR to GPT" to continue.

Select the disk you want to convert, click "Continue".

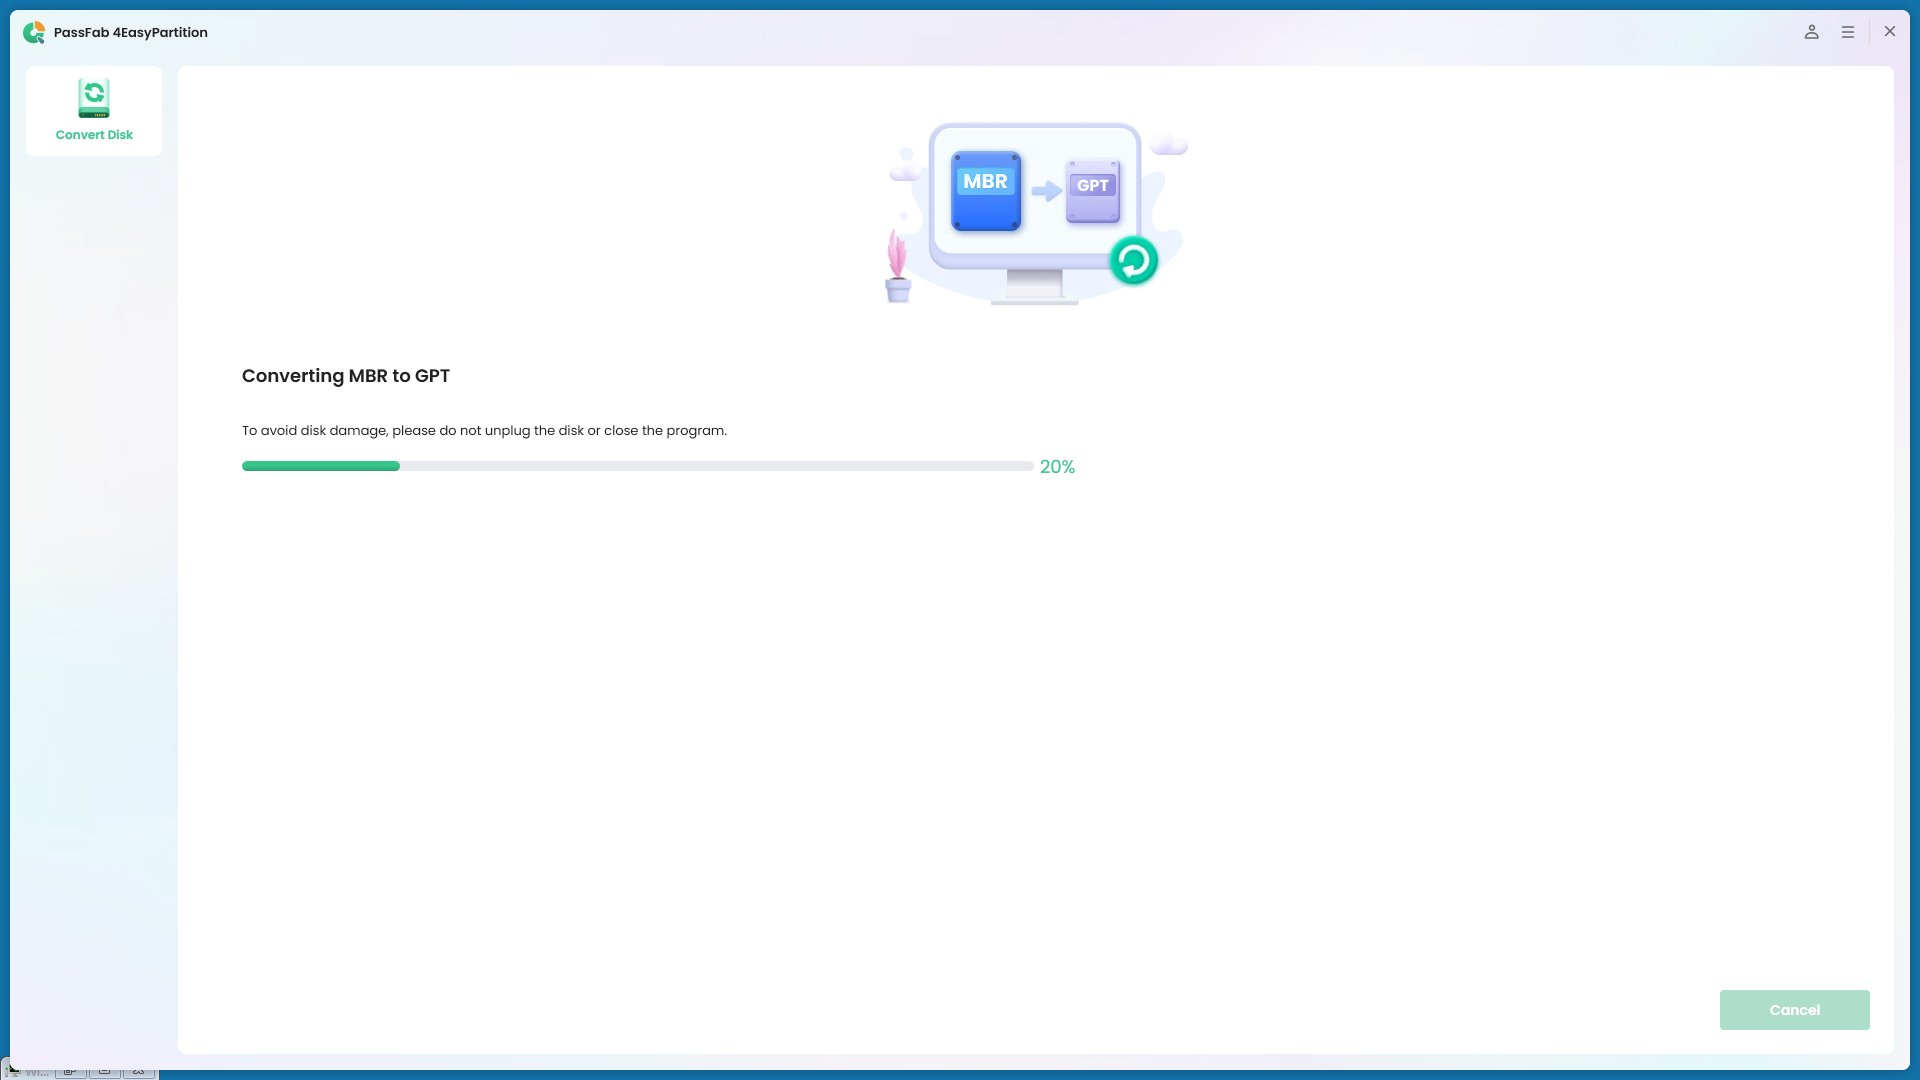
PassFab 4EasyPartition is converting MBR to GPT. The speed of disk conversion depends on the number of partitions on the disk.

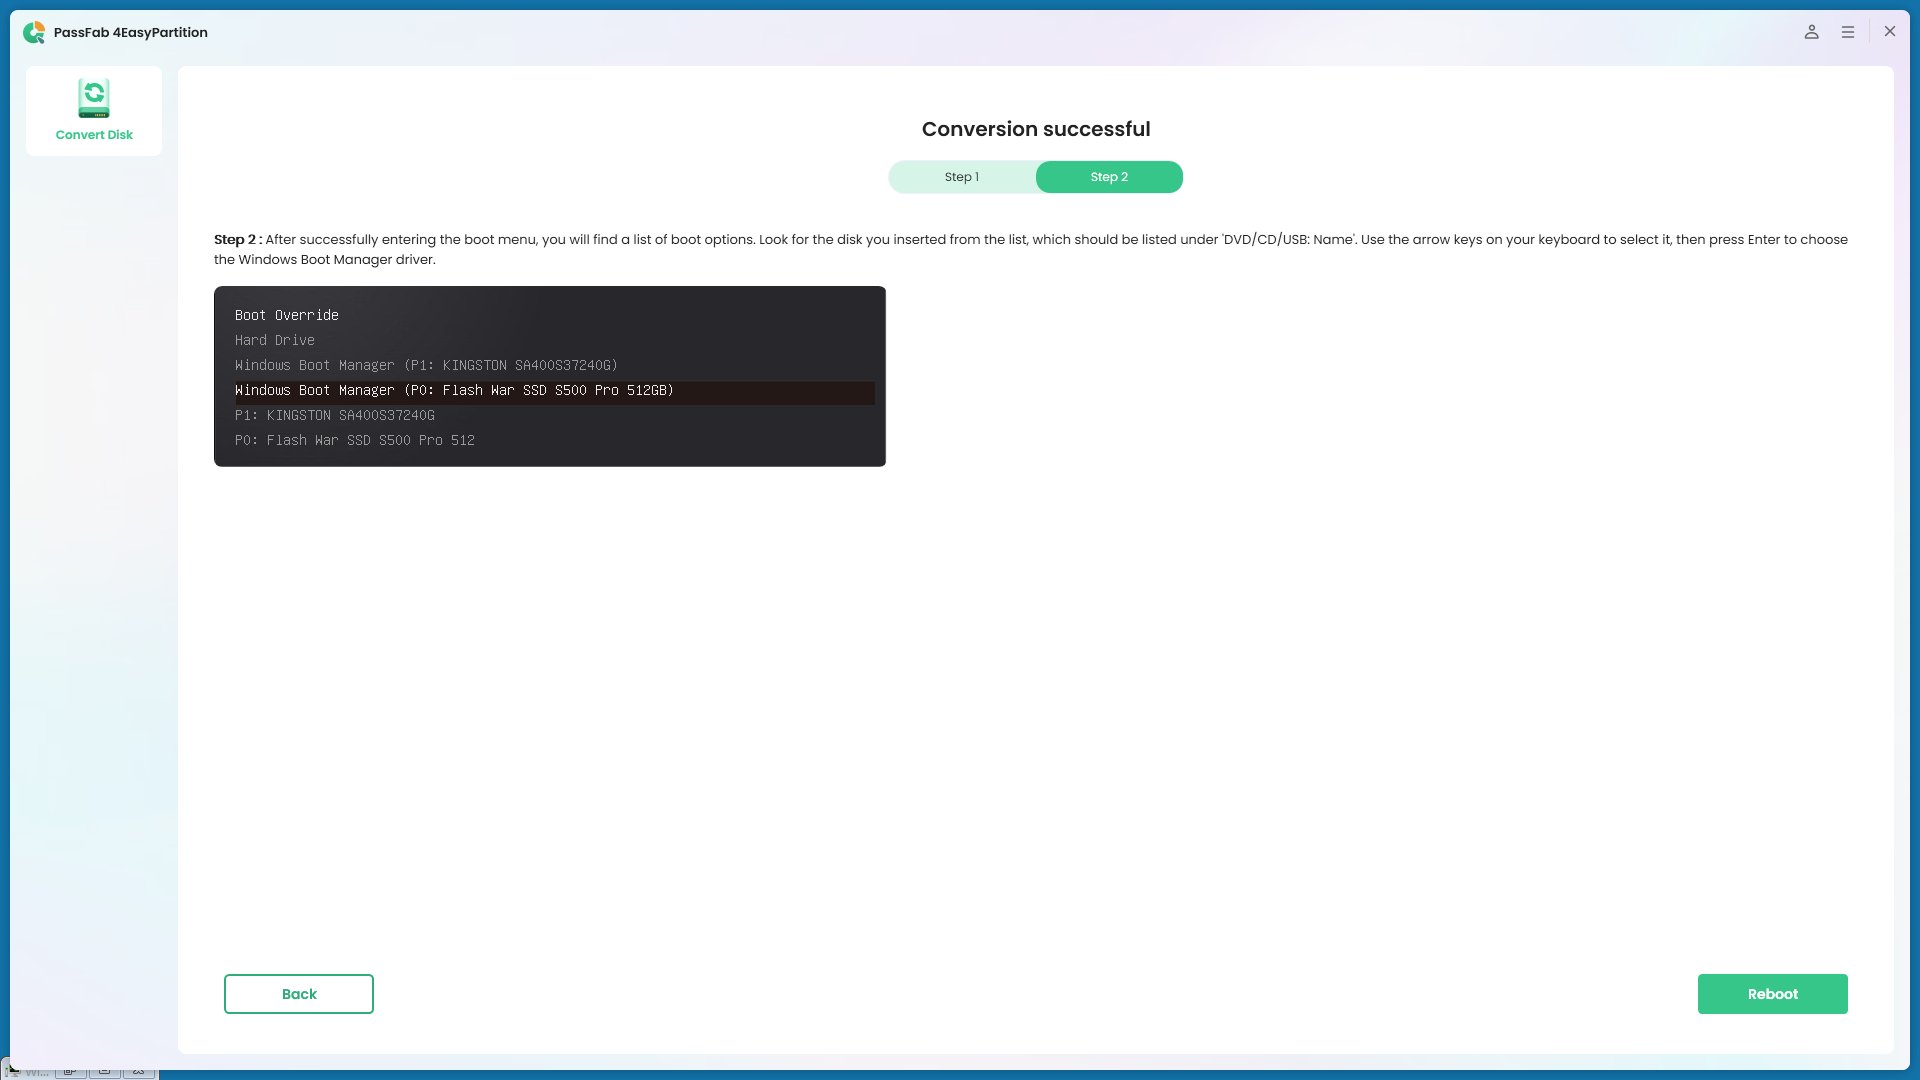
Conversion successful! Please follow the steps below to start your computer,otherwise your computer may not start properly.


Tips:
If the disk to be converted is an external disk, the program will convert it automatically without restarting and entering the PE environment.
Tips:
Please note that users in the PE environment can only see their own system disk.
2. Convert GPT to MBR
-
Download and install PassFab 4EasyPartition on your computer. Then launch the application, select "Convert Disk" in the left navigation panel and click on "Convert GPT to MBR" to proceed.

-
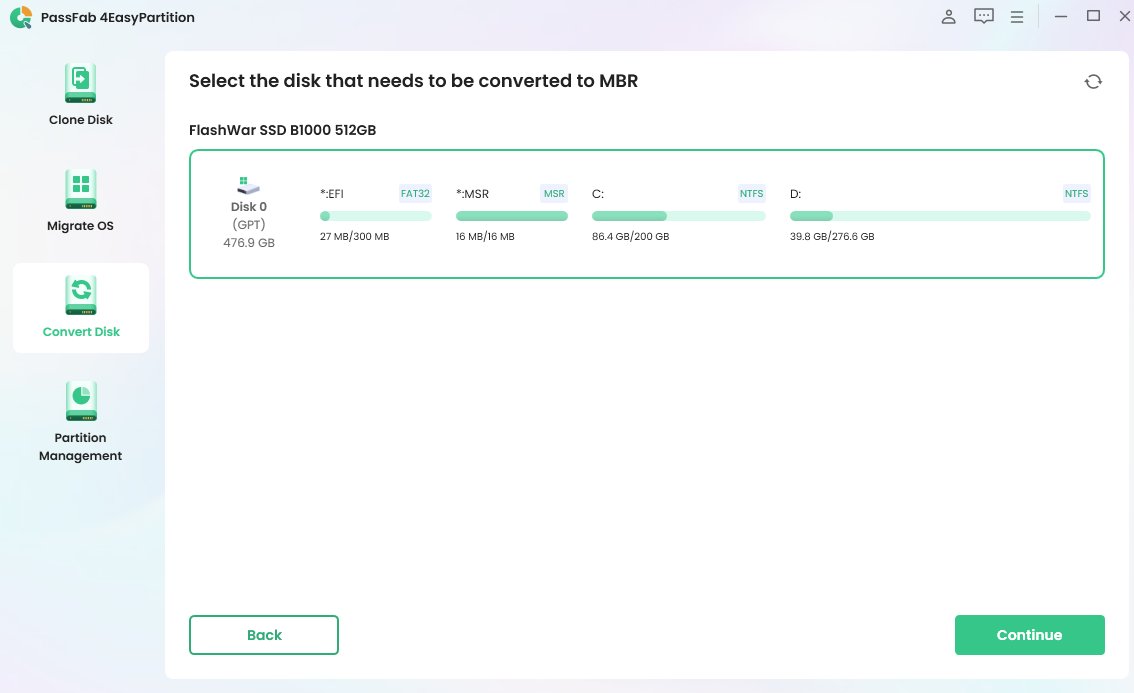
Select the disk you want to convert, click "Continue" to access the execution interface.

If the selected disk is the system disk, the program will download the PE components. After successful download, a prompt window will appear. Make sure to save all unsaved files and prevent power failure. Check that everything is in order and then click "Sure". The computer will restart and automatically enter the PE environment.

-
After the program starts in the PE environment, select "Convert GPT to MBR" to continue.

Select the disk you want to convert, click "Continue".

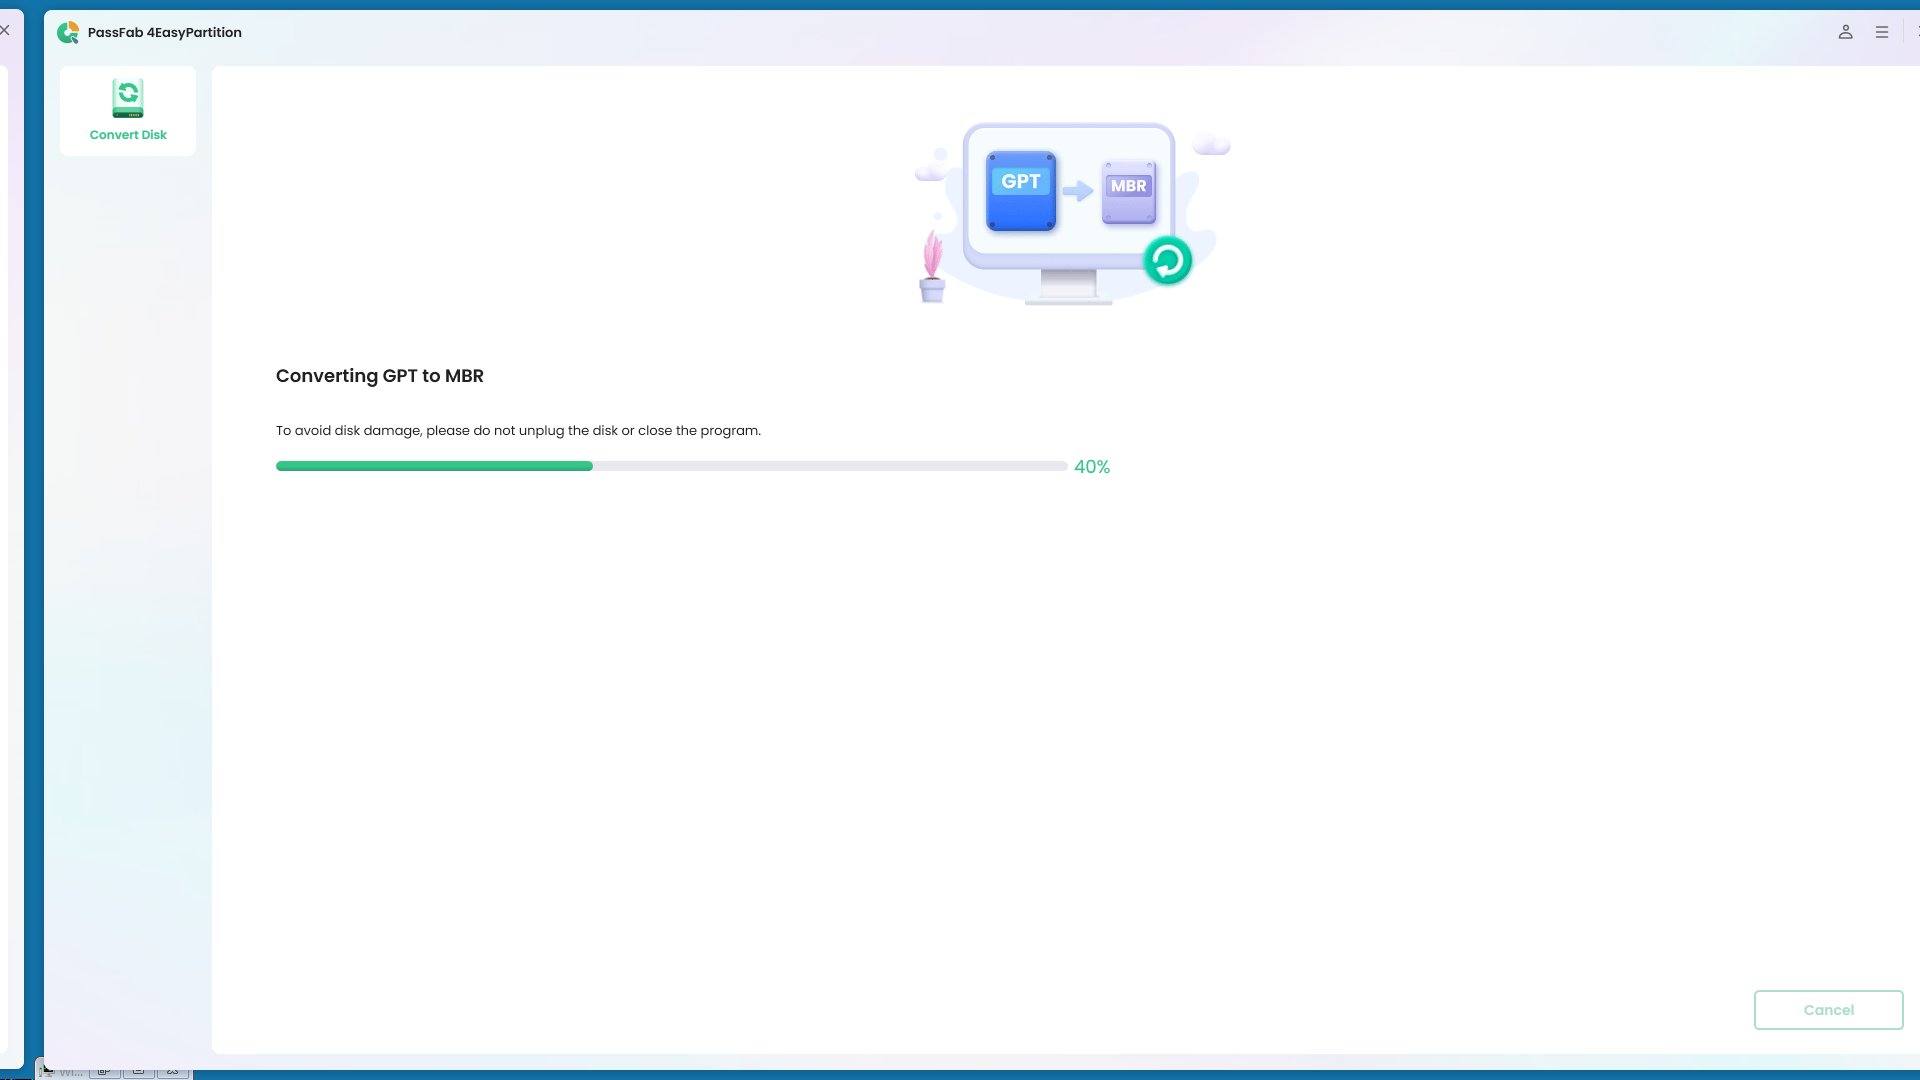
PassFab 4EasyPartition is converting MBR to GPT. The speed of disk conversion depends on the number of partitions on the disk.

Conversion successful! Please follow the steps below to start your computer,otherwise your computer may not start properly.


Tips:
If the disk to be converted is an external disk, the program will convert it automatically without restarting and entering the PE environment.
Tips:
Please note that users in the PE environment can only see their own system disk.
Part 5. How to Recover Partitions
PassFab 4EasyPartition is reliable partition recovery software. It offers a comprehensive solution that enables you to recover deleted partition, restore formatted partition, repair raw partition and repair boot easily and safely.
1. Recover Partition(s)
-
Install and launch PassFab 4EasyPartition. If you need to recover partition on an external hard drive, please connect your external hard drive to your computer. Select "Partition Recovery" in the left navigation bar, then select "Recover Partition(s)" to continue.

-
Select the disk where the partition you want to recover is located and then click on "Quick scan" to continue.

If you can't find the partition you're looking for, please try a deep scan.

If you are still unable to find the partition(s) you want, you can try performing a full scan.

-
The full scanning process will take some time, so please be patient. Once you find the partition you want to recover, you can click the Stop button to pause the scan at any time.

Choose the partition(s) you want to recover. Please noted that this operation will overwrite existing partition(s), so you need to confirm whether you want to perform the operation. After that, click on "Sure" and then click on "Start recovery" to continue.

Click Finish when the partition is successfully recovered.

2. Restore Partition(s)
-
Install and launch PassFab 4EasyPartition. If you need to recover partition on an external hard drive, please connect your external hard drive to your computer. Select "Partition Recovery" in the left navigation bar, then select "Restore Partition(s)" to continue.

Select the disk where the partition you want to restore is located and then click on "Quick scan" to continue.

-
If you can't find the partition you're looking for, please try a deep scan.

If you are still unable to find the partition(s) you want, you can try performing a full scan.

The full scanning process will take some time, so please be patient. Once you find the partition you want to recover, you can click the Stop button to pause the scan at any time.

-
Choose the partition(s) you want to restore. Please noted that this operation will overwrite existing partition(s), so you need to confirm whether you want to perform the operation. After that, click on "Sure" and then click on "Start recovery" to continue.

Click Finish when the partition is successfully restored.

3. Repair Partition(s)
-
Install and launch PassFab 4EasyPartition. If you need to repair partition on an external hard drive, please connect your external hard drive to your computer. Select "Partition Recovery" in the left navigation bar, then select "Repair Partition(s)" to proceed.

-
Select the disk where the partition you want to repair is located and then click on "Repair now" to continue.

-
Click Finish when the partition is successfully repaired.

4. Repair Boot
-
Install and launch PassFab 4EasyPartition. Select "Partition Recovery" in the left navigation bar, then select "Repair Boot" to continue.

-
Select the boot disk and then select the system partition that needs to be repaired.

-
It will take some time to repair the corrupted boot, please be patient. To avoid disk damage, please do not unplug the disk or close the program.

Click Finish when the corrupted boot is successfully repaired.

