Everyone wants to change in their life and a positive change is good for life. Similar is the case with your operating system. Using same operating system over and over again you might think of upgrading or updating it. But the problem is with the machines of this era. DVD/CD ROM has been removed from it and USB has taken its place. So if you want to install new Windows you will be needing Windows ISO to USB.
Installations from a USB flash drive have become one of the easiest ways to update your computer with a new operating system. A USB installation is quick, extremely portable, and has the bonus of reverting to a storage device following the install. Creating a bootable USB from an ISO file is easy if you have the right tools. So here we will discuss top rated Tools used to make Windows bootable USB. Before that, you should be having an ISO image of Windows either 7, 8, 10, Linux or UNIX. So, if you have it, then you are good to use one of the following tools:
- Method 1: Burn ISO to USB with PassFab for ISO
- Method 2: Windows Burn ISO to USB via ISO-to-USB
- Method 3: Create Windows ISO Bootable USB Using Rufus
- Method 4: Windows Write ISO to USB with Windows USB/DVD Download Tool
- Method 5: Burn Windows ISO to USB with Command Line without 3rd-party Software
Method 1: Burn ISO to USB with PassFab for ISO
You can find multiple other methods as well for Windows bootable USB using third-party software. But are they trustworthy and secured? Do they provide a 100% success rate? Are they providing other facilities as well? PassFab for ISO answers all these questions. Here is a short guide for booting Windows from USB:
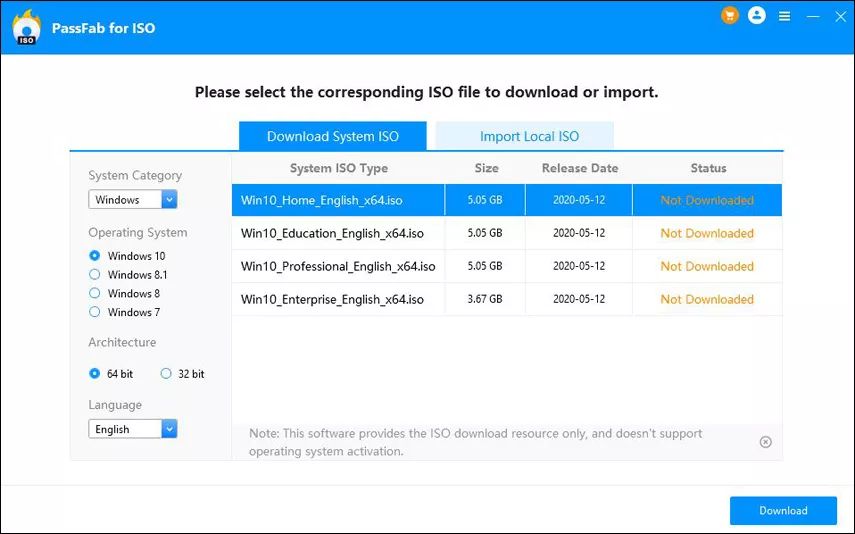
Step 1. Launch this ISO burner, 2 options will appear either "Download System ISO" or "Import Local ISO". Here we will select "Download System ISO".
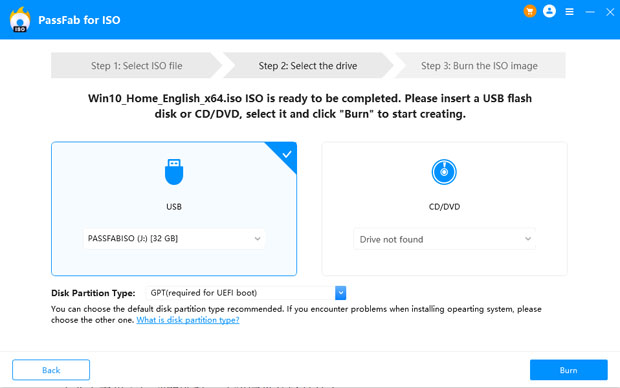
Step 2. Now you need to plug a USB flash drive and click "Burn" button. The program will start making your USB bootable. It will take couple of minutes. Sit back and relax.
Note that all your USB data will be formatted after clicking continue button. If you have any important data on USB backup it somewhere.
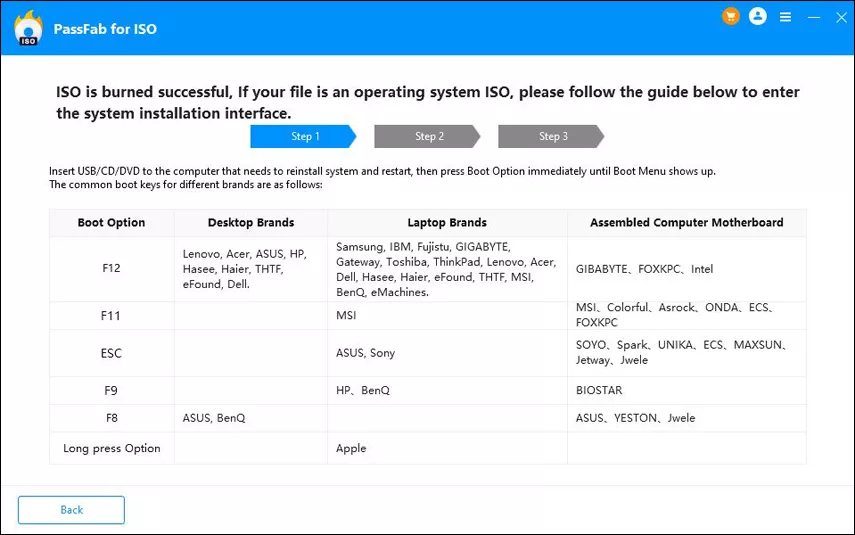
Step 3. After successful completion of process, a process complete prompt will appear.
You can also watch this video tutorial about how to burn ISO to USB in Windows 10:
Method 2: Windows Burn ISO to USB via ISO-to-USB
ISO-to-USB is one of the popular third-party software that facilitates its users with bootable functionality. The software is free to download from the internet. Once downloaded and installed on your computer, follow the user guide below:
Step 1. Launch the program at once.
Step 2. It will ask you about your Windows ISO file. Click on "Browse" and locate your Windows ISO file.
Step 3. Just below ISO file field, you will be asked to select your USB Drive if multiple are attached.
Step 4. Choose files system either FAT32 or NTFS. If no sure let it be FAT32.
Step 5. If you want to change the name of your USB you can write in Volume Label Field and Click "Burn".
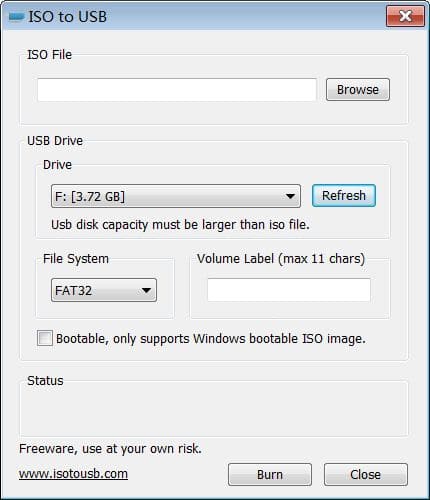
The process will take some time and if no error it will finish successfully. Your USB will be ready to install Windows on any of the computer.
Method 3: Create Windows ISO Bootable USB Using Rufus
Whenever we talk about creating Windows bootable USB, we can never forget Rufus. Rufus has widely used software around the globe that are only made for one purpose, i.e., making Bootable devices. You find Rufus on the internet as it is a freeware. For a detailed usage guide, follow the procedure:
Step 1. Download and install the program on your Computer system. After that, launch the program.
Step 2. Connect the device to your computer. Latest Rufus software will detect your external device if not then choose from the dropdown.
Step 3. No need to change any other setting just check the "Create a bootable disk using" and locate your Windows ISO file.
Step 4. After setting all up click "Start" button.
Now Rufus will start converting your ordinary USB to Windows Bootable USB. It will take a couple of minutes, and after successful completion of the process, a success dialogue box will be shown to you. After that, you are good to go and install Windows using that USB.
Method 4: Windows Write ISO to USB with Windows USB/DVD Download Tool
Microsoft Windows USB/DVD Download Tool is another program that takes ISO image file and create a Windows bootable USB. Along with its user-friendly interface its usage is also easy. Use the following guide to create your bootable USB:
Step 1. After installation of USB/DVD Download Tool execute the program.
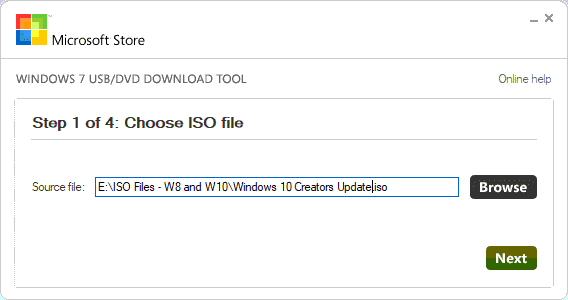
Step 2. As your first step it will ask you about the ISO file path. You can either type or locate by clicking browse button and click Next.
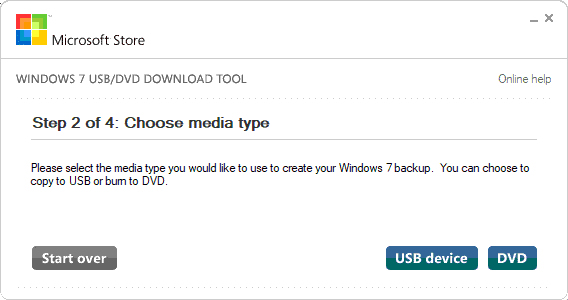
Step 3. You will be given 2 choices either use DVD or use USB for making bootable device. For this session we will chose USB.
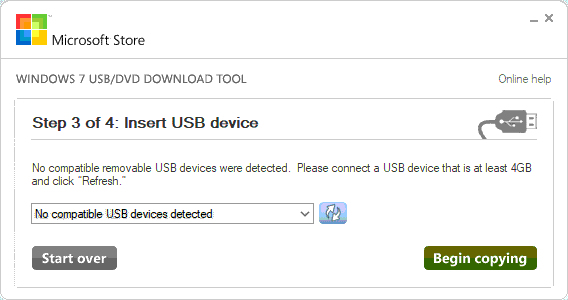
Step 4. Your USB will be detected automatically but if you have multiple devices attached choose the required one from the list and click "Begin Copying".
The process of creating bootable device will start and will be completed in littler time. Once completed, you are free to install Windows on your computer system.
Method 5: Burn Windows ISO to USB with Command Line without 3rd-party Software
If you are little possessive, regarding third-party software Windows by default gives the option of creating bootable USB, but for that, you should be a little bit aware of Command Prompt. If you have some know-how, get along with the procedure:
Step 1. Run command prompt with admin privileges.
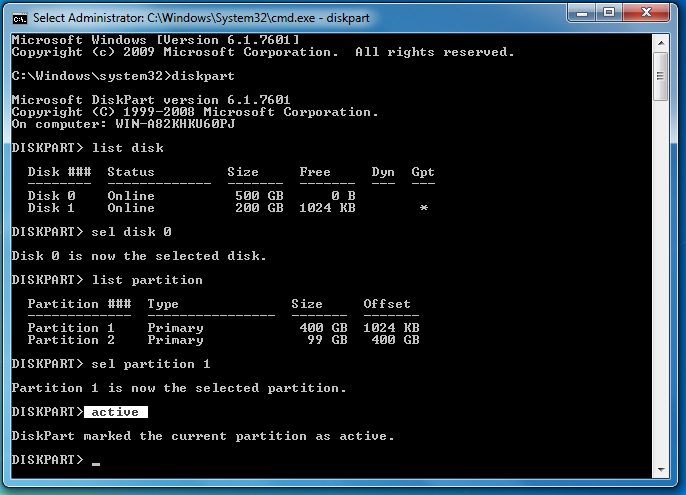
Step 2. Now type "Diskpart" and hit Enter. Sit back and let it proceed with the command.
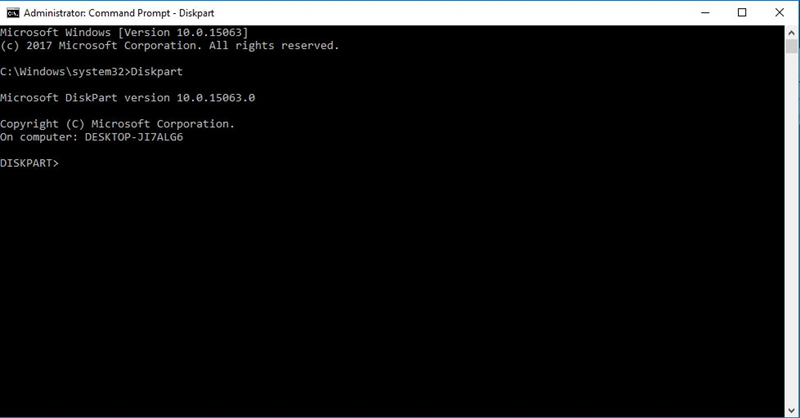
Step 3. Now type "list disk" to view active disks on your machine. Note that Disk 0 is hard drive and disk 1 is external devices.
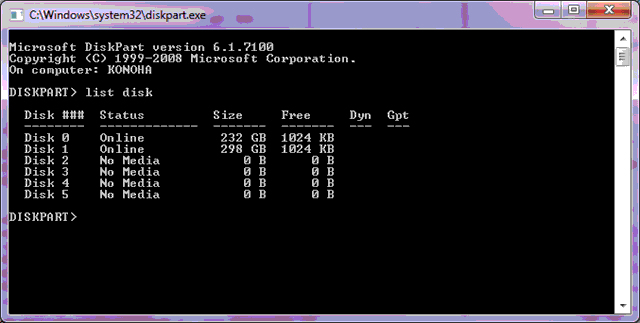
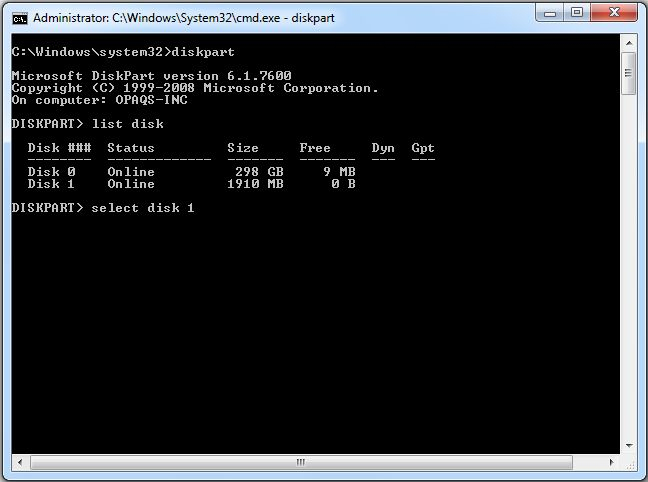
Step 4. Type "select disk 1" for its further use.
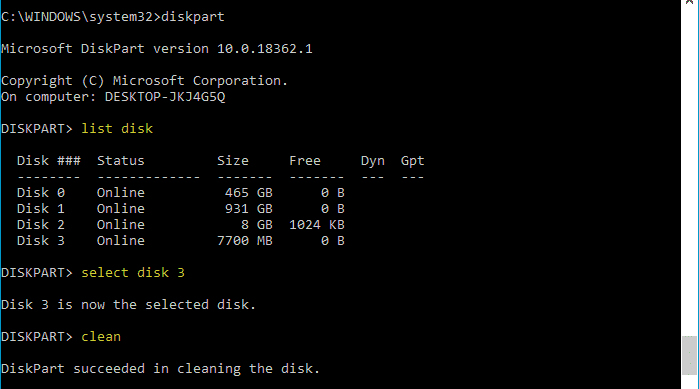
Step 5. Remove all the data typing "clean" command.
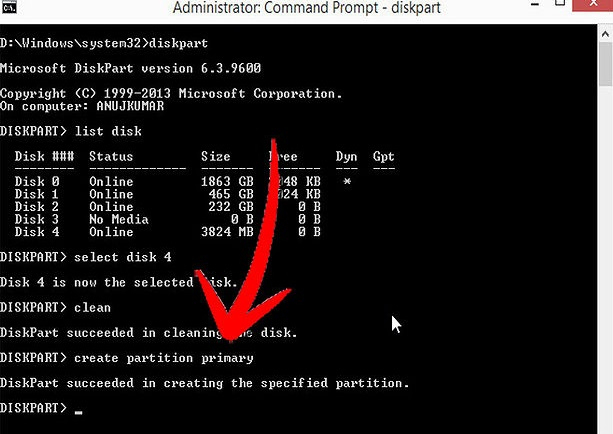
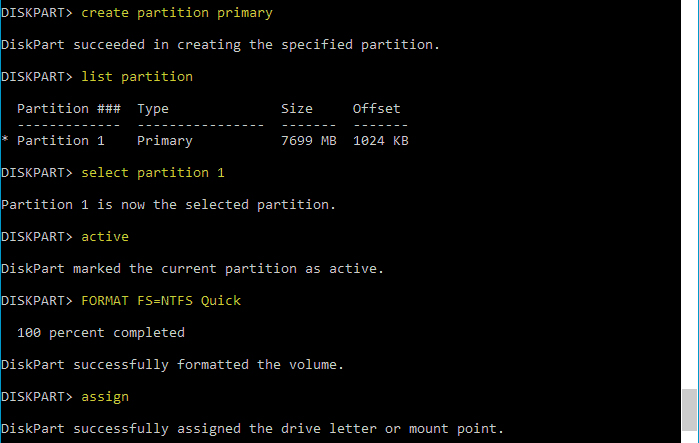
Step 6. Now create primary partition by typing "create partition primary" and hit enter.
Step 7. Type 'select partition 1' and hit Enter. Choosing the 'partition 1' for setting up it as an active partition.
Step 8. Type 'active' and hit Enter. Activating current partition.
Step 9. Type 'format fs=ntfs quick' and hit Enter. Formatting current partition as NTFS file system quickly.
Step 10. Type 'exit' and hit Enter. When you finish preparing your custom image, save it to the root of the USB flash drive
This will create your USB bootable. You can easily rely on this built-in procedure.
Botton Line
After reading the user guide of multiple tools, you must be thinking that making Windows bootable USB is not a big deal. But if you want numerous facility pack, you should go for PassFab for ISO. All other tools are also good, but they don't offer multiple facilities, it is the only solution on which you can count on 100%.
