You may more effectively organize your files and data by partitioning an external hard disc. Utilizing the Disc Management tool, the procedure is simple if you're using Windows 10.
We'll walk you through every step of how to partition an external hard drive in this step-by-step tutorial, from attaching it to your computer to making a new basic volume and assigning a drive letter. This article will make it simple for you to partition your external hard drive, whether you want to segregate your operating system and files or you just want a better method to organize your data.
Part 1.What does it mean to partition an external hard drive?
Part 2.Why and When Need to Partition an External Hard Drive?
Part 3.Things to Consider Before Partitioning an External Hard Drive
Part 4.How to Partition External Hard Drive without Losing Data?
- Method 1: Partition external hard drive with PassFab 4EasyPartition Hot
- Method 2: Partition External Hard Drive with built-in Disk Management
- Method 3: Partition External Hard Drive with Diskpart Utility
Part 5. Partition External Hard Drive FAQs
- Q1: Is it good to partition my external hard disk?
- Q2: Is it important to partition a hard drive?
- Q3: How to remove partition on external hard drive windows 10?
- Q4: How to fix unallocated external hard drive?
- Q5: How to partition an external hard drive on mac?
Conclusion
Part 1. What does it mean to partition an external hard drive?
Can you partition an external hard drive?An external hard drive can be divided into several portions that can be utilised as independent storage units via the partitioning procedure. Each newly formed partition can be given a distinct drive letter and its own file system, such as NTFS or FAT32. This procedure can help you manage and organise your data more effectively.
Creating partitions on an external hard drive can also be useful for data security. The other partitions and the data on them are unaffected if one partition becomes corrupted. Additionally, by lowering the chance of data fragmentation, partitioning an external hard drive can aid in speed optimization.
Part 2. Why and When Need to Partition an External Hard Drive?
An external hard disc can be divided into two or more logical portions that function as independent storage units by partitioning it. You might need to partition an external hard disc for several reasons.
- Efficient data organization.
- The creation of a unique bootable partition for system installation or recovery.You may simply recover your system or install a new operating system without losing your data by making a separate bootable partition.
- Isolation of possibly dangerous programmes or data.You may separate your vital data from other files and safeguard it from being mistakenly destroyed or corrupted by establishing different partitions.
- On an external hard drive, partitions can be created by specifying multiple file systems, such as NTFS, FAT32, exFAT, etc.
- Your external hard drive should work with many operating systems. You may format them in various file systems that work with various operating systems by making distinct partitions.
- Your external hard drive's performance must be improved. You may more effectively allocate space and enhance the functionality of your external hard drive by making distinct partitions and formatting them with various file systems.
- You wish to let other people or things access your external hard disc. You may give different users or devices different access rights by making distinct partitions.
Part 3.Things to Consider Before Partitioning an External Hard Drive
Several important considerations need to be carefully taken into account while partitioning an external hard disk.
- Before partitioning, make a backup of all the data on the external hard drive.
- Select a partitioning tool that is trustworthy and functional.
- Plan your partitioning plan, taking into account the size, quantity, and file system type.
- Ensure device and operating system compatibility.
- Observe the step-by-step guidelines that the selected partitioning tool provides.
- Before making modifications, double-check the partitioning settings.
- Recognize that partitioning will rearrange the drive and could have an impact on how data is organized.
- Check the freshly partitioned drive's accessibility and operation.
Part 4. How to Partition External Hard Drive without Losing Data?
Method 1.Partition external hard drive with PassFab 4EasyPartition
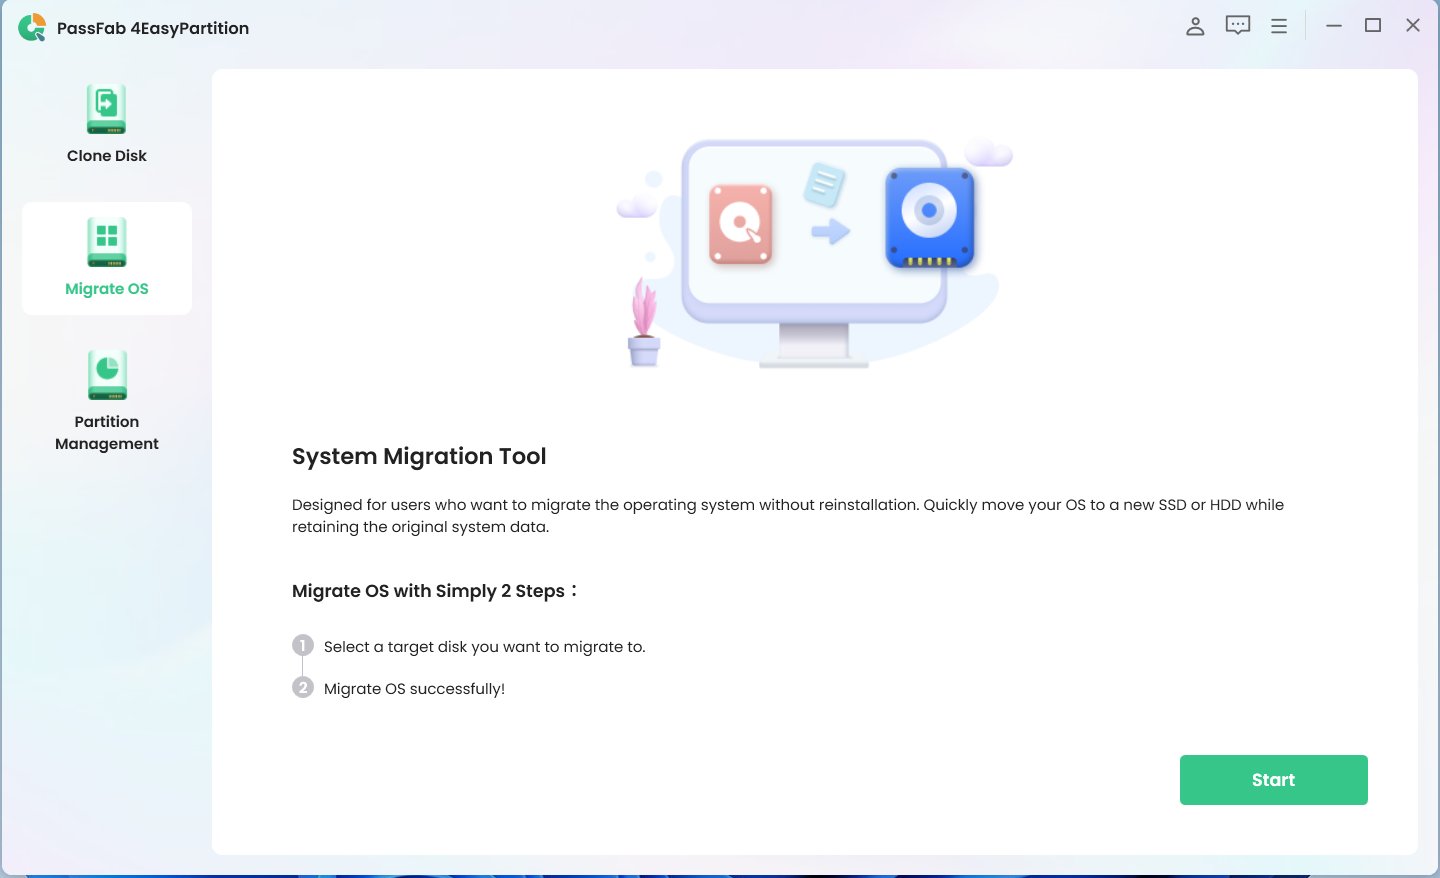
You may partition your external hard drive without losing any data with PassFab 4EasyPartition, an effective and user-friendly partition management program. Even inexperienced users can quickly create, resize, and format partitions on their external hard drives thanks to its user-friendly interface and step-by-step instructions.
-
Launch PassFab 4EasyPartition after downloading and installing it, then choose your external hard drive from the list of supported drives.

-
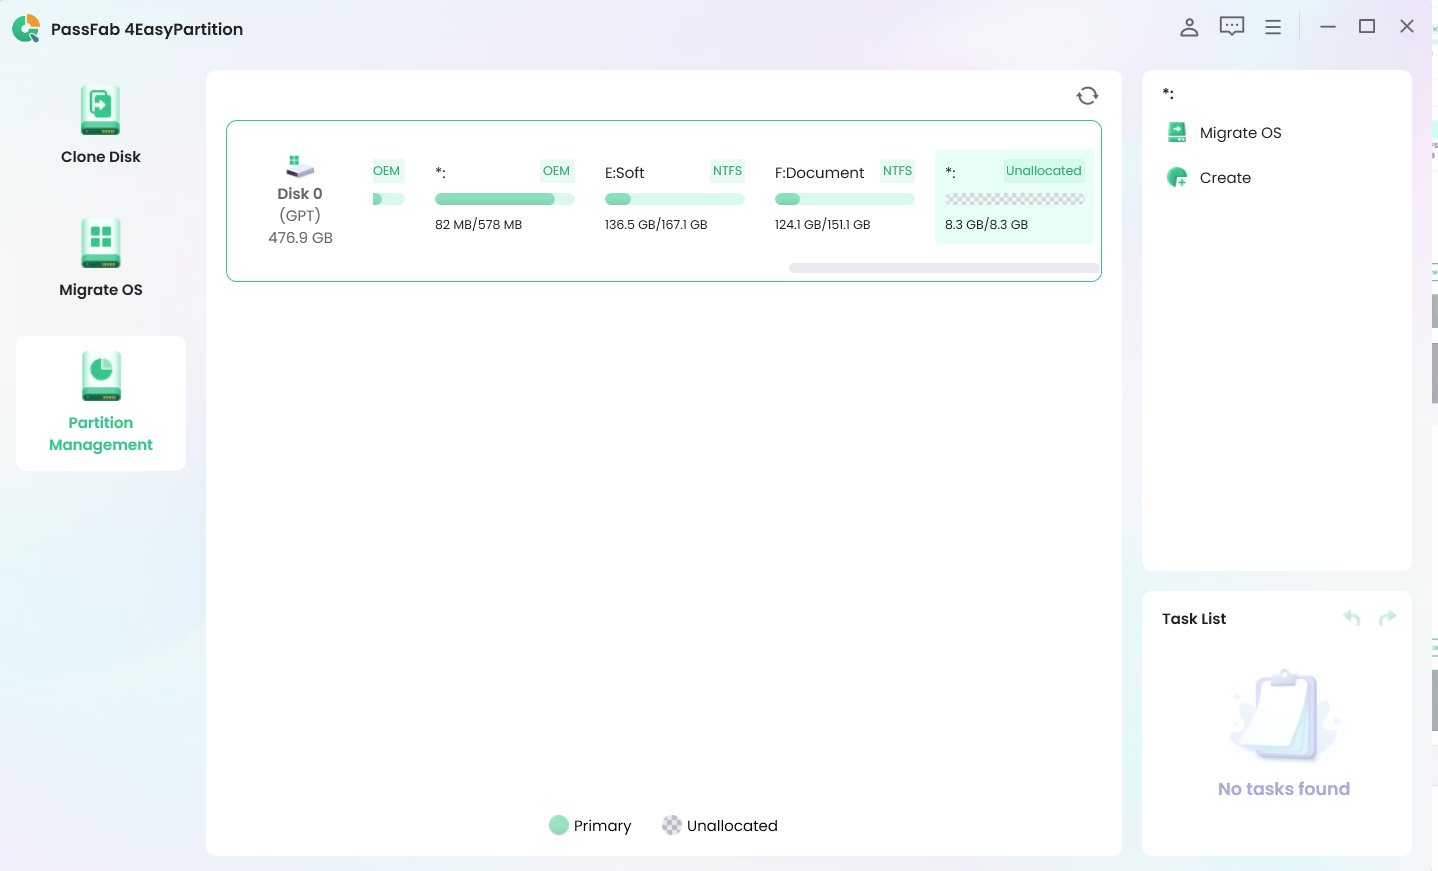
Select the "Partition" button from the toolbar. Select an unallocated space from the list, then click Create.

-
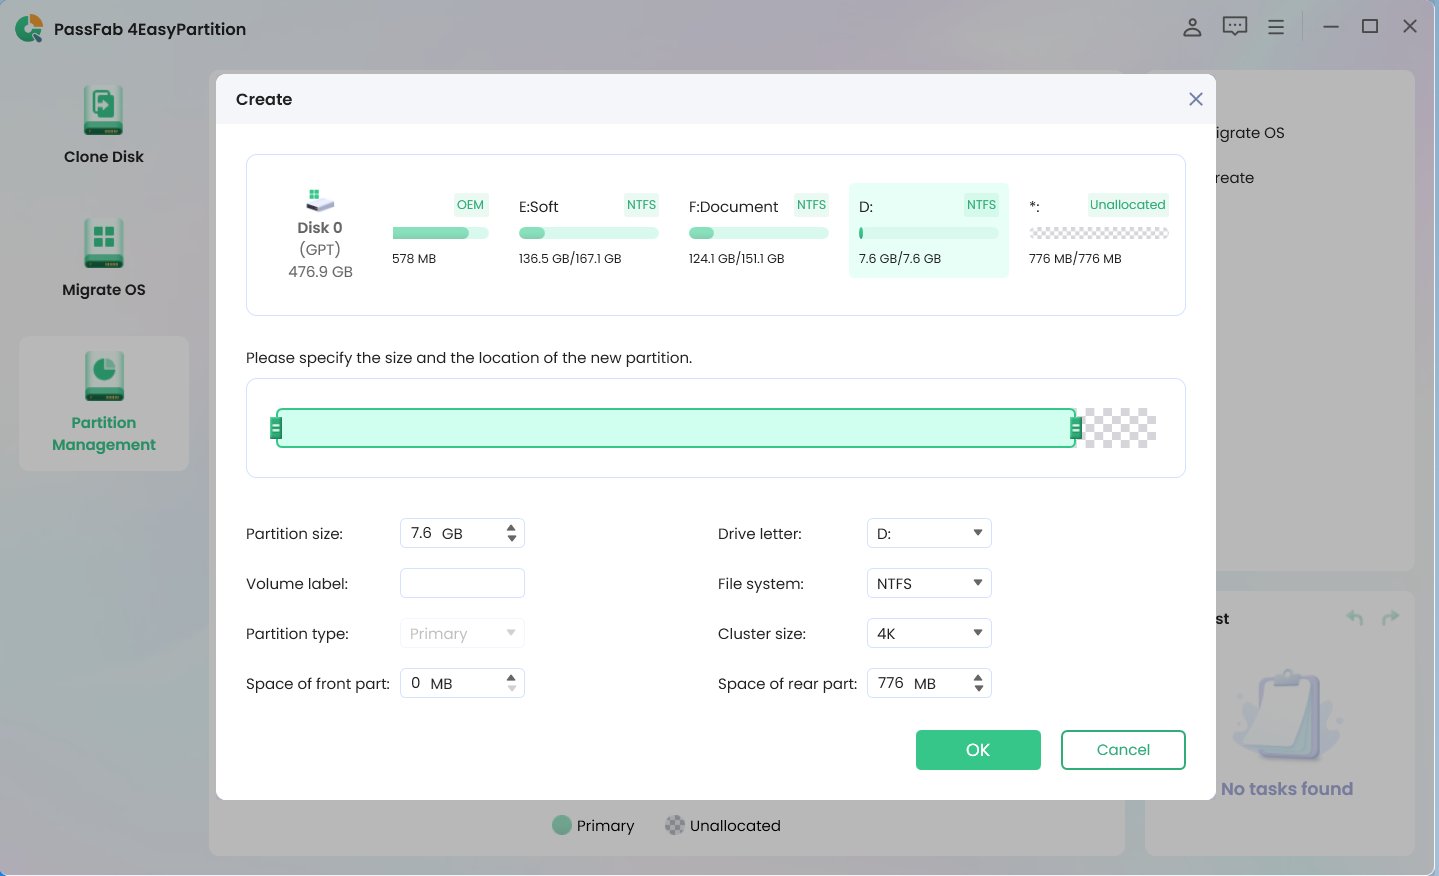
In the pop-up window Set the new partition's size using the slider. Additionally, you may use detailed information about the new partition, such as the file system, cluster size, driver letter, volume label, and front- and rear-part space.

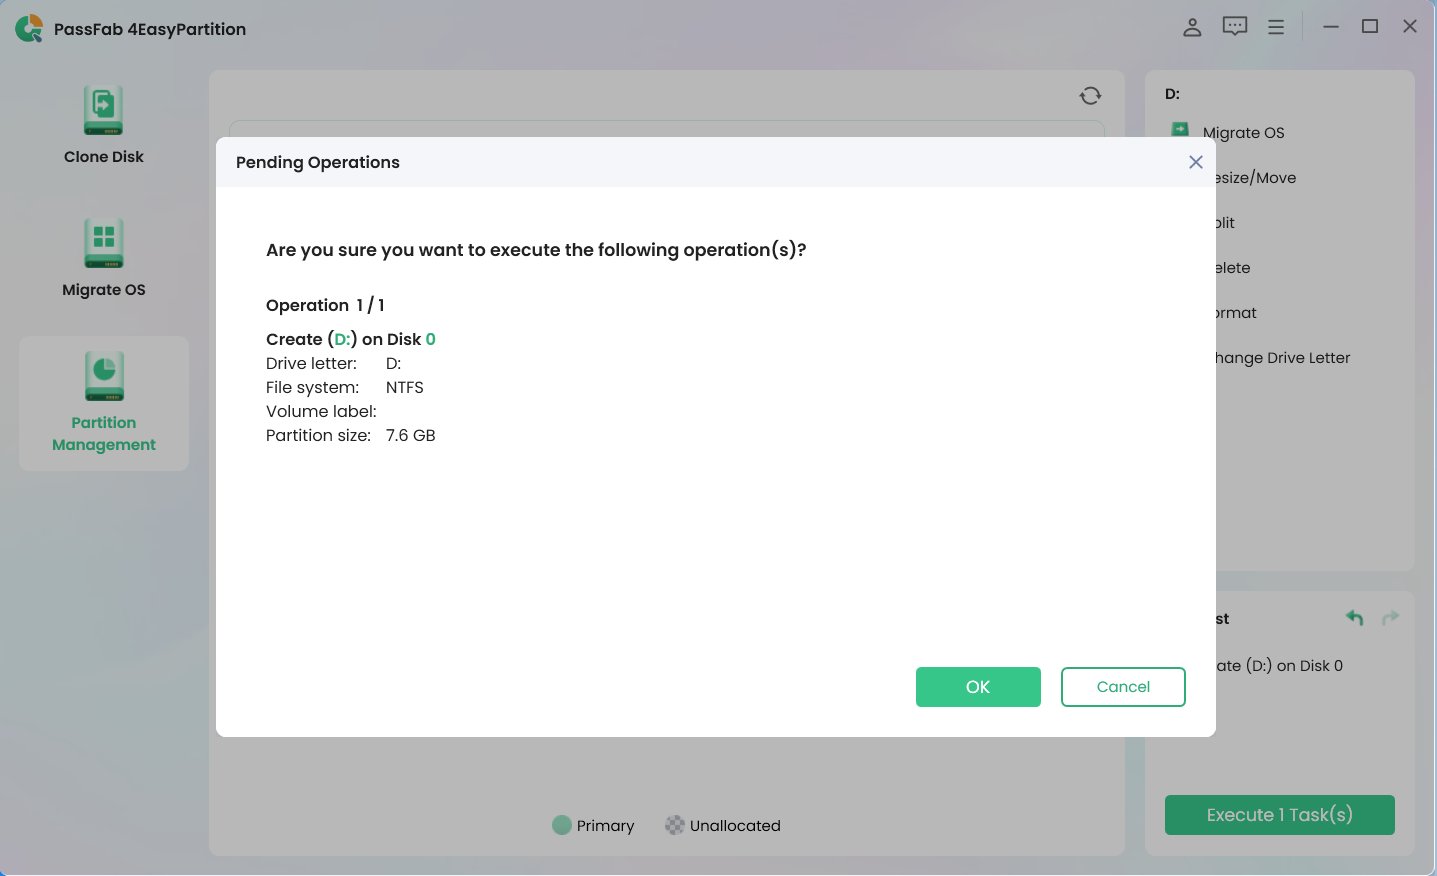
After verifying your execute activity, click "OK" to proceed.

Once the partitioning process is complete, you will see the new partition in the disk management window.
Method 2: Partition External Hard Drive with built-in Disk Management
It is simple to partition an external hard disc using built-in Disc Management. The steps are as follows:
-
Connect the external hard drive to your computer.
-
Select Disc Management by pressing the Windows key + X.
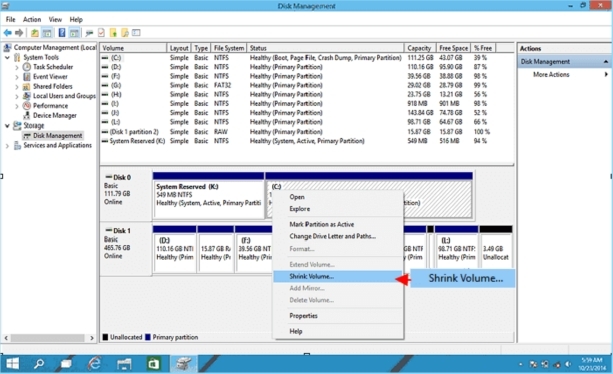
Locate the external hard drive in the list of discs, then choose Shrink Volume from the context menu.

Click Shrink after entering the MB value of the space you wish to provide for the new partition.
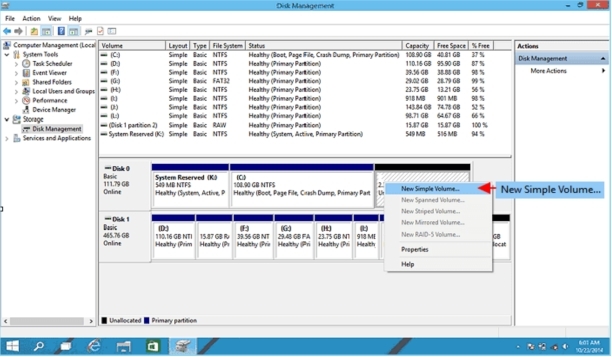
Right-click the free space and choose New Simple Volume from the menu.

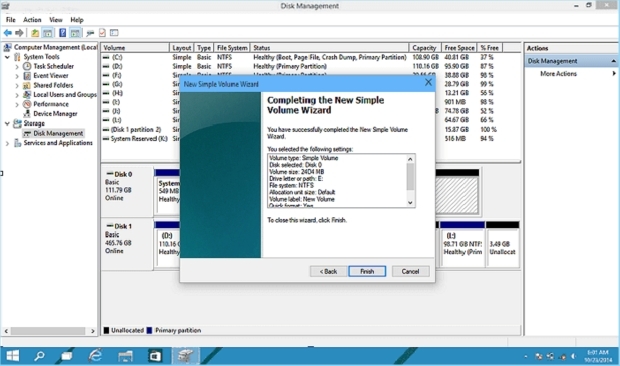
Follow the wizard's instructions to format the partition and create a new one with a drive letter.

Method 3: Partition External Hard Drive with Diskpart Utility
Diskpart Utility's partitioning of an external hard disc is a somewhat complex process that calls for command-line skills. The following are the instructions for using Diskpart to partition an external hard drive:
-
Connecting the external hard disc to your computer. As an administrator, launch Command Prompt.
-
Enter "diskpart" once you have typed it. To view the list of discs, enter the command "list disc" and hit Enter.
-
To choose the external hard drive, type "select disc [number]" and hit Enter. To completely wipe the disc of all data, type "clean" and hit Enter.
To establish a primary partition, type "create partition primary" and press Enter. To format the partition, enter "format fs=ntfs quick" and hit Enter. To assign a drive letter, type "assign letter=[letter]" and hit Enter.
Finally, type exit to close DiskPart.

Part 5.Partition External Hard Drive FAQs
Q1: Is it good to partition my external hard disk?
Yes, there are a number of reasons why partitioning your external hard disc might be a good idea. You may divide your data into distinct portions using partitioning, which makes it simpler to identify and manage files. As you can more effectively allocate resources and space, it can also help your hard drive perform better. By isolating crucial files from system files and transitory files, partitioning can also aid in data security.
Q2: Is it important to partition a hard drive?
A hard drive might benefit from being partitioned for several reasons. You may use it to organize your data and files, so they are simpler to manage and access. Separating vital files from system files and transient files can also aid in data security. Additionally, by more effectively allocating resources and space, partitioning can help your hard drive perform better.
Q3: How to remove partition on external hard drive windows 10?
To delete a partition external hard drive Windows 10, use the Disk Management tool, right-click on the partition you wish to remove, choose "Delete Volume," confirm your choice and the partition's assigned space will go. Then, by selecting "Extend Volume" with the right click on that partition, you can assign this space to another partition.
Q4: How to fix unallocated external hard drive?
Partition an external hard drive by creating a new partition and formatting the drive, you may repair your external hard drive if Windows is presenting it as unallocated. You may accomplish this by using the Disc Management tool, selecting "New Simple Volume" from the context menu when you right-click on an empty area, and then following the on-screen directions to format the drive and create a new partition. After doing this, you should be able to access your files on the external hard drive.
Q5:How to partition an external hard drive on mac
On a Mac, launch the Disk Utility application, choose the external hard drive you wish to partition, click the "Partition" button, choose the number of partitions and their sizes, give each partition a name, choose a file system format, and finally click "Apply" to create the partitions and format the drive.
Conclusion
This article explains how to partition an external hard drive. You may create new partitions without erasing any data from the disc using a variety of methods, including utilizing third-party software like PassFab 4EasyPartition. Partitioning an external hard drive may be a quick and practical method if you have the correct tools and skills.
