A USB device may be partitioned to keep your data organized and protected. If your USB drive has a big storage capacity, you may divide it into two or more partitions, each with its drive letter. This will make it simpler for you to access and manage your files while enabling you to keep various sorts of data apart. It only takes a few simple steps to partition USB drive in Windows 10 or Windows 11 operating systems. We'll walk you through partitioning a USB drive in Windows 10/11 and give you some pointers on how to make the most of your partitioned USB drive in this article.
Part 1.What is partitioning USB drive?
Part 2.Why do you need to partition USB drive?
Part 3.How to Partition a USB Drive in Windows 10
- Way #1:Partition USB Drive Using PassFab 4EasyPartition
- Way #2: Partition USB Drive Using Diskpart
- Way #3: Partition USB Drive Using Disk Management
Part 4.Partition USB Drive FAQs
- Q1: Can I partition a USB drive?
- Q2: How do I partition a USB drive in Windows 10?
- Q3: How to Partition a Flash Drive on Mac?
- Q4: How to create multiple partitions on a USB flash drive in Windows 10?
Conclusion
Part 1. What is partitioning USB drive?
In partitioning a USB drive, different sections or partitions are created. The partitions of the USB drive act as separate entities, each with its own file system and storage space. Using partitioning, you can create multiple logical drives within a single physical USB drive, improving data organization and management. Different file systems, applications, and bootable configurations can coexist on the same USB drive since each partition can be treated as an independent storage unit.
Part 2. Why do you need to partition USB drive?
A useful method for data management, partitioning USB drive has several advantages.
- To keep your information organized and safe, partitioning a USB drive is one the main reasons to do so.
- By making it easier for you to swiftly and effectively access your files, this can also aid to enhance your workflow. You may keep your sensitive data distinct from non-sensitive files by establishing various partitions to isolate your files from your work-related ones.
- Making the most of a USB drive's storage capacity is another incentive to split it. For instance, if you have a 64GB USB drive, you may divide it into two partitions of 32GB each to make managing and organizing your content simpler.
- Partitioning your drive can also make it simpler to do activities like making a bootable USB drive or installing an operating system if you wish to use your USB drive for several purposes.
- Additionally, partitioning a USB drive might help to safeguard your data. Your files won't be lost or destroyed even if one disk is corrupted or infected with malware since the other partitions can still be unharmed.
Part 3. How to Partition a USB Drive in Windows 10
Way #1:Partition USB Drive Using PassFab 4EasyPartition
One of the simplest and most efficient ways to partition a USB drive in Windows 10 is by using the PassFab 4EasyPartition application. Regardless of your level of experience, PassFab 4EasyPartition can assist you in quickly and easily completing your partitioning tasks so that you may fully utilize the capabilities of your USB drive.
Thus, in addition to offering several advanced functions, PassFab 4EasyPartition also allows users to resize partitions, erase partitions, and change file systems. As a result, it may be used in a variety of ways to manage and enhance the performance of your USB devices. Let's see how to partition USB drive.
-
On your Windows 10 PC, download and install PassFab 4EasyPartition.
-
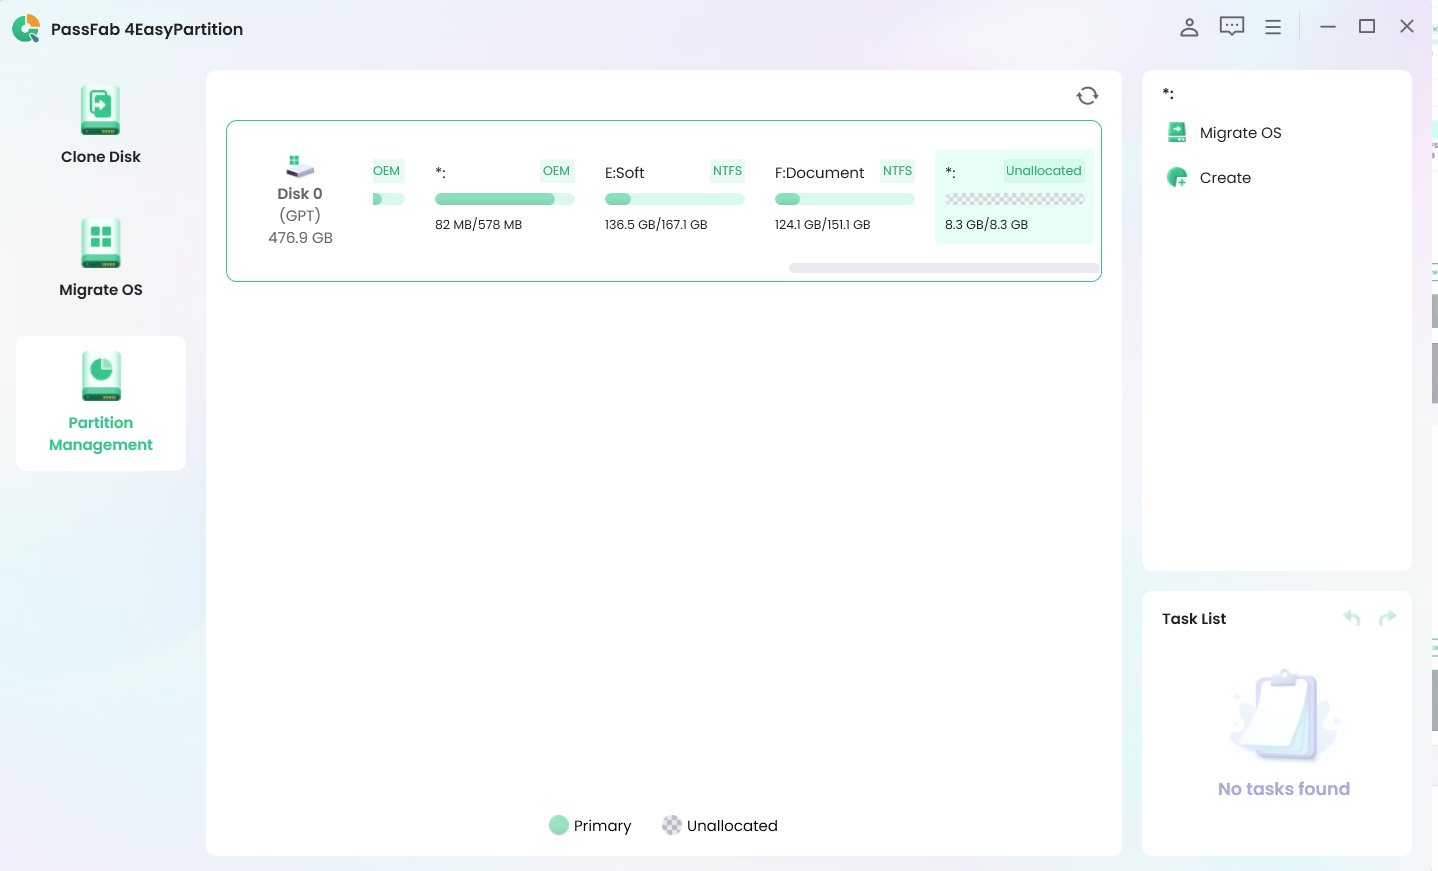
Connect your USB drive to the USB port on your computer. Select your USB device from the list of possible drives after starting PassFab 4EasyPartition.
-
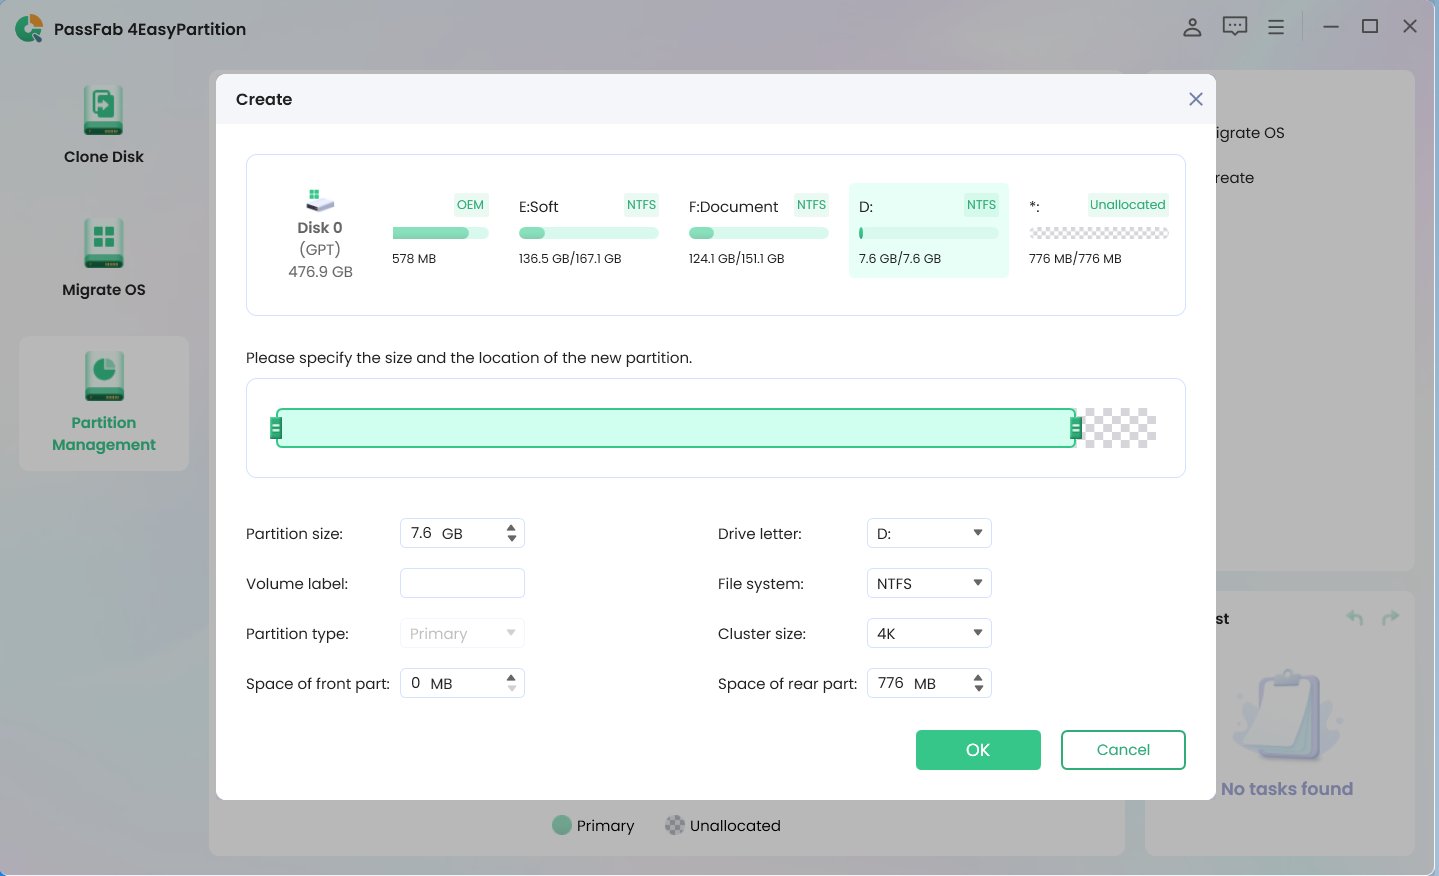
To create a new partition, click the "Create" button in the toolbar.

Define the new partition's size and choose the file system you wish to employ. To create the new partition, click the "Create" button.

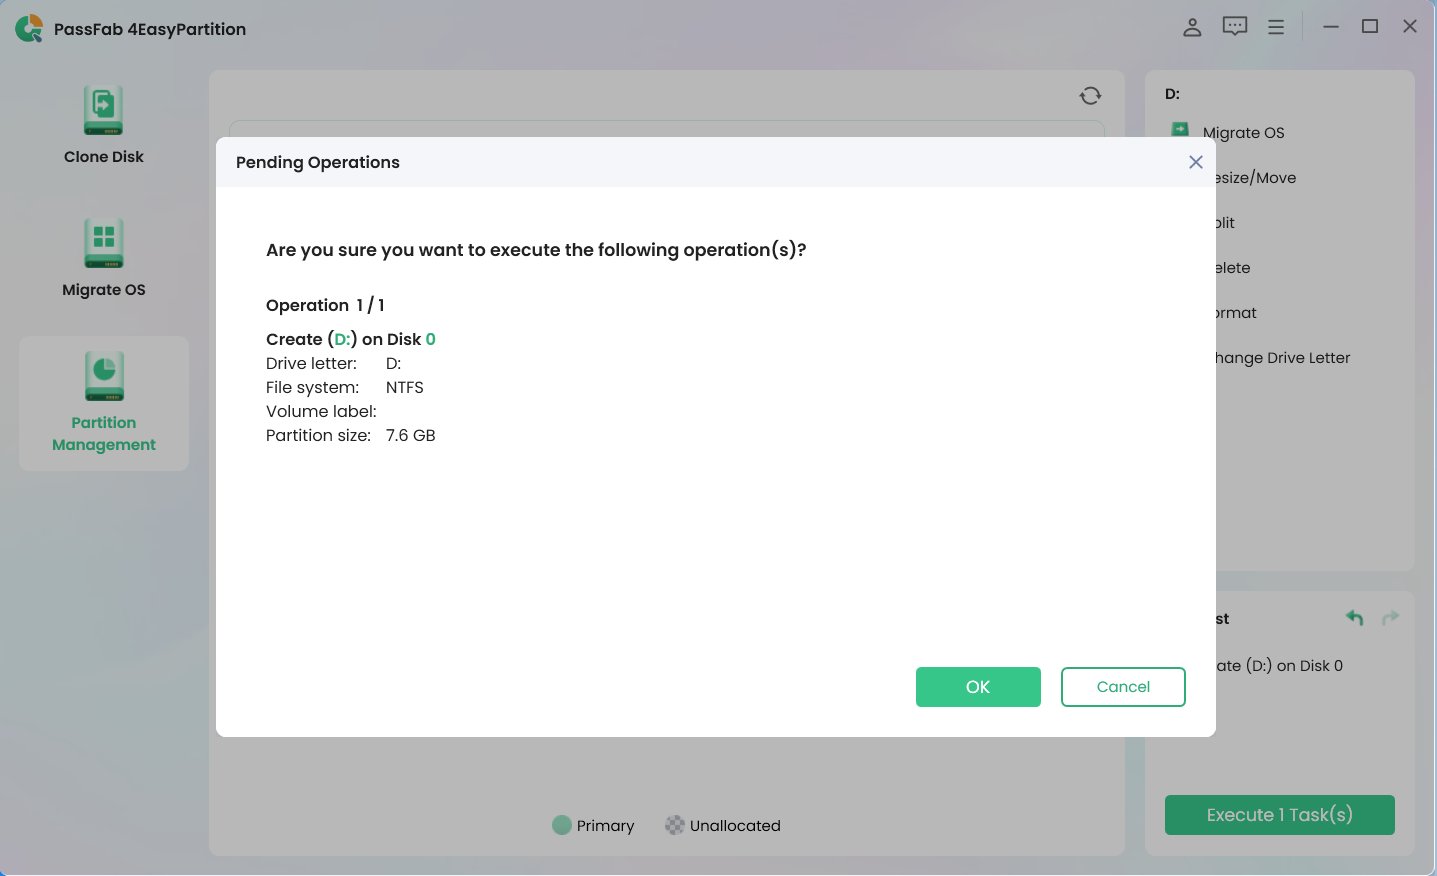
If more divisions are required, repeat the above steps. Once all of the necessary partitions have been established, click "Apply" to save your changes.

Way #2: Partition USB Drive Using Diskpart
-
Join your USB drive to the USB port on your computer.
-
To launch a Command Prompt window with administrator rights, press Windows key + X and choose "Command Prompt (Admin)".
-
To start the Diskpart utility, type "diskpart" and click Enter. To view a list of all the discs attached to your computer, type "list disc" and hit Enter.

Find your USB drive in the list, then write down the disc number. To choose the drive, enter "select disc X" (where X is the disc number of your USB drive). To delete all of the data on the USB device, type "clean" and hit Enter.
To establish a main partition, type "create partition primary size=Y" (where Y is the size of the partition you want to create) and hit Enter.

To format the partition using the NTFS file system, type "format fs=ntfs quick" and press Enter. Enter the word "exit" to end Diskpart.

Way #3:Partition USB Drive Using Disk Management
-
Join your USB drive to the USB port on your computer.
-
To launch the Disk Management software, press the Windows key + X and choose "Disc Management."

-
Find your USB drive in the list of discs and do right-click. To open the "Shrink" dialogue box, choose "Shrink Volume".

To generate unallocated space, enter the amount of space from the USB device you wish to shrink in the "Enter the amount of space to shrink in MB" section and click "Shrink".

Click "New Simple Volume" from the context menu of the right-clicked area to launch the "New Simple Volume Wizard." To continue with the wizard, click "Next".

Follow the steps in the wizard to create a new partition on the USB drive. You can choose the partition size, assign a drive letter or path, and format the partition with a file system.

Select the partition's file system and give it a volume label. To finish creating the partition, click "Finish".
Part 4. Partition USB Drive FAQs
Q1: Can I partition a USB drive?
Yes, a USB disc can be partitioned. You may maximize the storage capacity of your USB drive by partitioning it, improving security, or better organizing your data. It gives you greater freedom and control over how you use your USB drive by enabling you to divide the storage space into a number of parts or partitions, each with its own structure and purposes.
Q2: How do I partition a USB drive in Windows 10?
With Windows 10, you may partition a USB drive using Disk Management, Diskpart, or dependable third-party partitioning software like PassFab 4EasyPartition. You may make new partitions, change their sizes, and format them as necessary using these tools.
Q3: How to Partition a Flash Drive on Mac?
How to partition a usb drive on a Mac, you may partition a flash drive using the Disc Utility programme. Connect your flash drive to your Mac, launch Disc Utility, choose the drive from the list of devices on the left, and then pick "Partition" from the top toolbar. Click the "+" button to add a new partition, modify its size and format, and then click the "Apply" button to save the changes in the Partition window.
Q4: How to create multiple partitions on a USB flash drive in Windows 10?
Use Disk Management or Diskpart in Windows 10 to divide a USB flash drive into numerous partitions. Simply choose the USB drive, reduce the volume's size to free up some space, and then make new partitions in that area. For a quicker and more effective partitioning USB drives, you may also utilize third-party partition software.
Conclusion
In conclusion, partition usb drive is a practical solution to safeguard and effectively manage your data. Partitioning your USB drive in Windows 10/11 may be done using a variety of methods, whether you need to differentiate between personal and professional information, make bootable partitions, or just organize your data more efficiently.
PassFab 4EasyPartition stands out among the applications as a stable and user-friendly alternative, providing simple functionality for creating, resizing, and formatting partitions. Consequently, don't be reluctant to give PassFab 4EasyPartition a try and discover how it may help you get the most out of your USB drive.


