“Previously I had applied a password in order to protect my presentation. But I want to remove it for the moment. But whenever I am opening the presentation the password box is greyed out. Even after, typing the correct password. How do I fix it?”
Protecting the presentation created by you with a password is the wisest move. The document will be secured, and it will be safe from any outside interference. But sometimes this additional security may force you to remove password protection from PowerPoint. It is possible for you to forget the password and it will force your hand to eliminate it. So, this article is all about password removal from a PPT. Check it out.
Although, we have established the need to remove password from PowerPoint 2016. We are yet to figure out the best possible ways to do it.
The MS PowerPoint may not be an exceptionally secure software but in the latest edition, the encryption is quite eligible. So, you need to learn the most effective and easiest ways to execute the procedure. Let’s take a look.
Solution 1. PowerPoint Remove Password using PowerPoint
In this part, we will be using the MS PowerPoint itself to remove the password. The procedure is simple enough but in order to execute this method, you need to remember the password.
There are 2 different procedures available for unlocking the PPT. Each method is distinguished below in detail.
Remove Password to Open
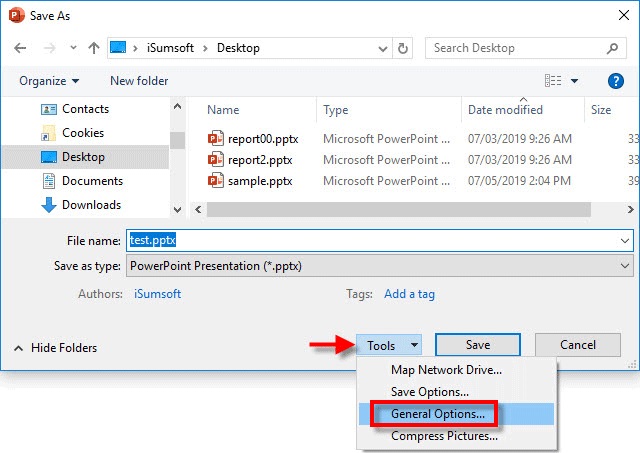
- Step 1: Navigate to the office button and click on ‘Save As’.
- Step 2: Then go to the bottom left panel and click on ‘tools’.
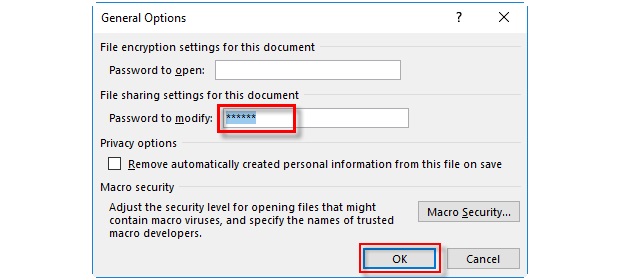
- Step 3: Choose "General Options" from the list. After that, select the password and delete it.
- Step 4: Lastly, click ‘OK’ and save the presentation.
Remove Password to Modify
This is a PowerPoint remove password method but used for a different purpose. Check it out.
Step 1: Open the PPT, type the correct password and click ‘OK’.

Step 2: After that, save the file and navigate to ‘General Options’ via ‘Tools’.

Step 3: After the panel is opened, find the ‘Password to Modify’ option and remove the password using the ‘Backspace’ on your keyboard. Then, click ‘OK’.

- Step 4: After that, save the file.
After you follow through this procedure, you won’t be asked for any password next time you modify the said PPT.
Solution 2. Remove Password from PowerPoint Presentation via PassFab for PPT
In this part, we are going to be using a 3rd party software called PassFab for PPT in order to remove the password. The use of this professional software makes the process extremely easy. You will be able to execute the password removal procedure without any difficulty. Here’s how to remove password from PowerPoint:
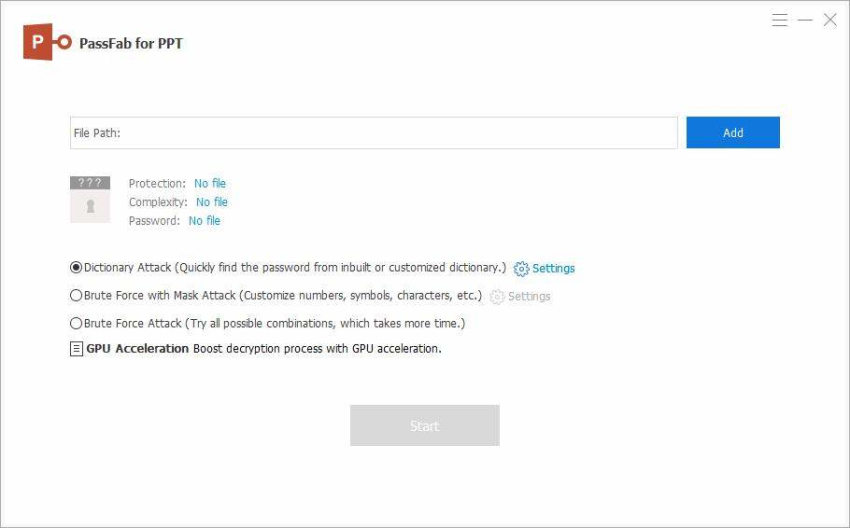
Step 1: Download and install PassFab for PPT on your computer. After that, launch the program, the main interface will be displayed on the screen.

Step 2: Then, click the ‘Add’ button and import the locked PowerPoint file.

-
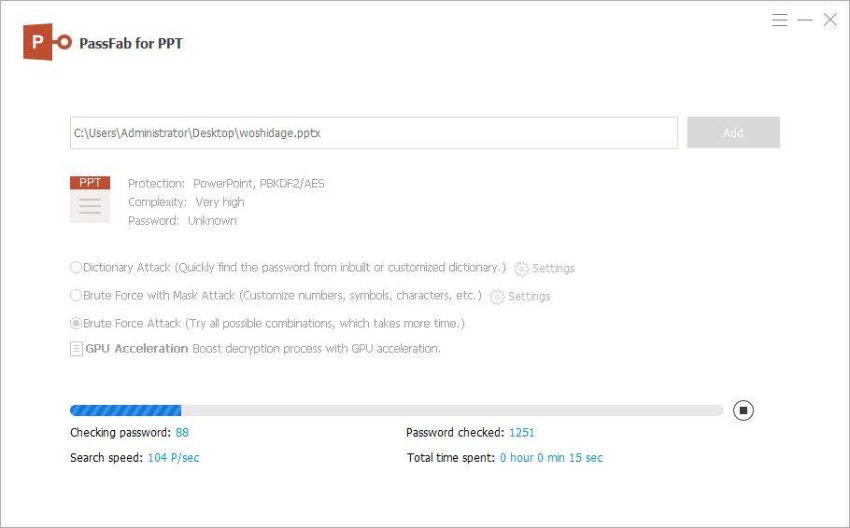
Step 3: You will be introduced with 3 types of attacks. The Dictionary Attack, the Brute Force Attack and the Brute Force with Mask Attack. Each type of attack comes with different capabilities. You have to select the method accordingly.

Step 4: After selecting the attack method, click ‘Start’ and PassFab will start unlocking the PPT.

You can also watch this video about how to use this PowerPoint password recovery tool:
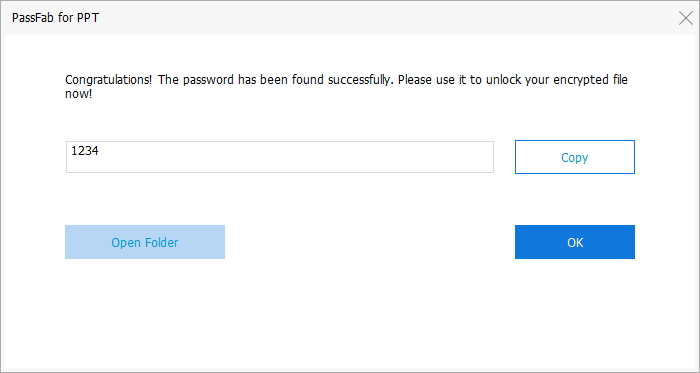
Now, you just have to wait for a while for the procedure to get finished. Once completed, exit the program and use the recovered password to unlock the encrypted PPT.
Solution 3. Remove Password Protection from PowerPoint using ZIP File Extension
In this following part, we will be using a ZIP file to remove the password from an encrypted PPT.
If you have forgotten the password for your PPT and you are unable to open or modify it and it has turned into a read-only file; then check out the details below.
- Step 1: Make sure that the PPT file is closed and WinRAR or WinZip program is installed on your computer.
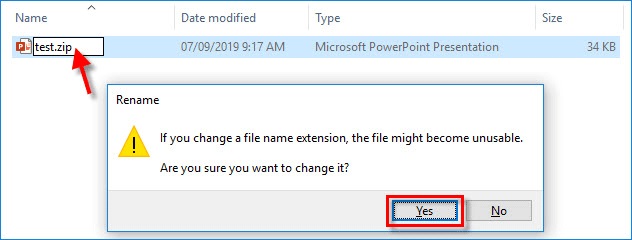
Step 2: Now, change the extension of the PPT to ‘.zip’. A dialog box will appear on the screen. Click ‘Yes’.

Step 3: Now, open the ‘.zip’ using WinRAR or WinZip.

Step 4: The contents will be displayed on the screen. Open the ‘PPT’ folder and locate the ‘presentation.xml’ file.

- Step 5: Copy the file and paste it on the desktop. Open it with ‘Notepad’.
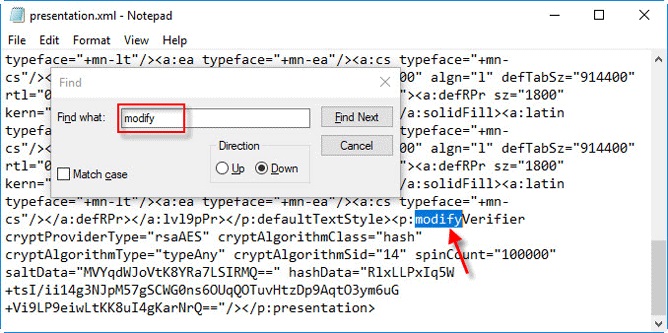
Step 6: As the Notepad is open, press ‘Ctrl + F’ to open a dialog box. Type ‘modify’ in the box and click ‘Find Next’. The file with the ‘modify’ word will be displayed immediately.

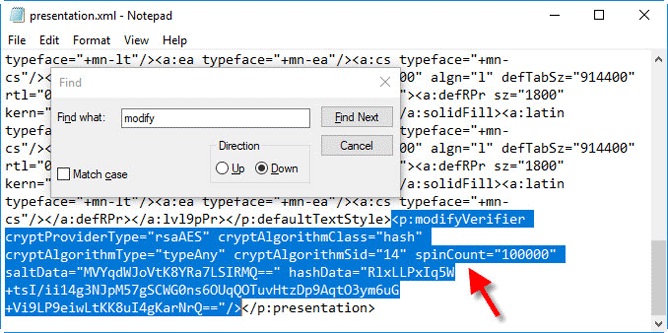
Step 7: Then, delete the entire file ‘
<p:modifyVerifier……/>’. Then, save and close it.
- Step 8: Now, copy ‘presentation.xml’ file back into the .zip folder. Replace it with the existing file. After that, change the extension back to ‘.pptx’.
The steps are long and elaborate, but after performing them properly, the encryption will be removed, and you will be able to use PPT without any hassle.
Summary
Therefore, it is very probable for anyone to forget the password for their PPT. But the methods we have detailed in the article will effectively remove the encryption, making the PPT completely accessible to you. But we do recommend the use of PassFab for PPT as it is the simplest way to remove the encryption.

