Have you ever wondered why your Windows 10 PC boots so fast even after you shut it down? Do you know that your PC is not fully shutdown when this happens? Does it affect your PC's life in any way? The answer to these questions is the Fast Startup settings on Windows 10. This article will teach you about the fast startup and different ways of disabling it. If you want to know how to turn off fast boot on Windows 10, give this article a read and solve all the issues related to fast boot:
Part 1: What is Fast Startup?
The fast startup, as its name depicts, is a feature that lets your computer turn on fast after getting shut down. This feature was originally introduced in Windows 8 but is turned on by default in Windows 10. When you shutdown the computer, Windows saves some system data on the disk. Later, when you restart the system, it resumes with the stored data instead of starting everything anew.
This way, the fast startup feature improves the startup time. It might seem like hibernation mode, but it is different from that. When you know the drawbacks of the fast startup, you might want to disable it. So here is why you should disable Windows 10 fast startup:
Part 2: Why Disable Fast Startup?
The Fast Startup feature does not let your PC fully shut down, affecting the battery power. Secondly, you might want to save the disk space occupied by the hibernation file. It also affects the working of some hardware on your PC, such as the power button on the keyboard not working, fans spinning continuously, etc.
Although these problems do not bother you, sometimes they become frustrating. The fast startup mode also disturbs the Windows updating process. So to void all these issues and shut down your PC when you shut it, you might need to disable the Windows fastup feature.
Part 3: How to Disable Fast Startup?
There are various ways to disable the fast startup in Windows 10, the best of which are as follows:
Way 1: Turn Off Fast Startup Via Settings:
Settings application in any PC controls and manages the basic and advanced features. You can disable fast boot through Settings as follows:
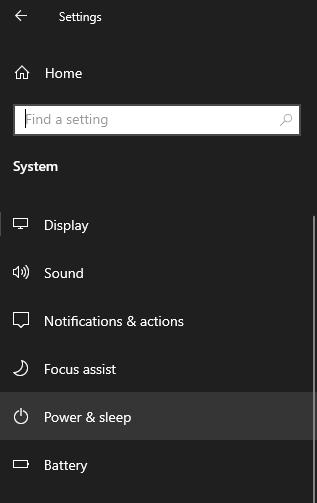
Open the Settings application.

Click on System Setting.

Choose Power and sleep from the left menu.

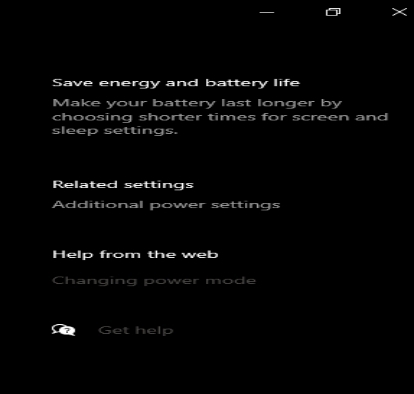
Click on the Additional Power Settings link on the right hand side.

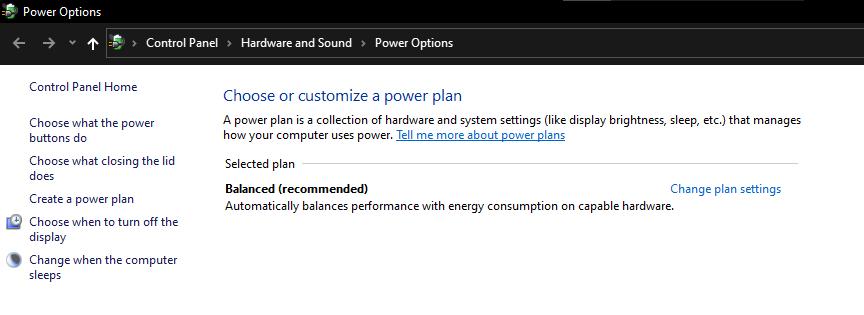
You will see the following screen appear:

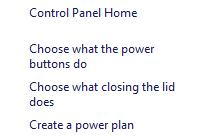
Click on Choose what the power buttons do link from the left navigation menu.

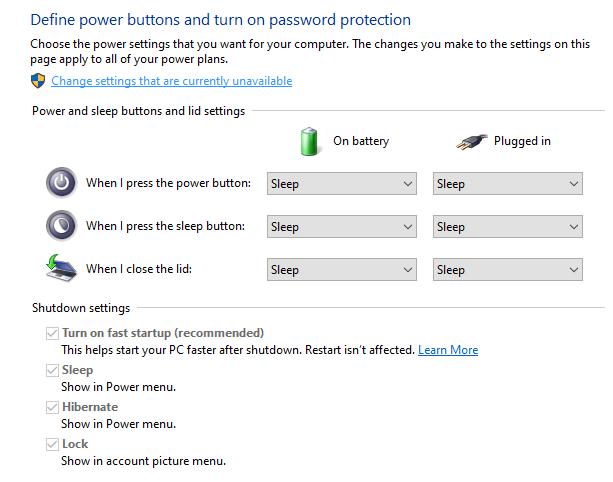
Click on the "Change settings that are currently unavailable" link on the following screen:

You will see that the Shutdown settings be enabled.
Now, uncheck the checkbox in front of the "Turn on fast startup (recommended)" option.
Click Save Settings.
After following the above steps, the fast startup feature will be disabled on your PC. You can turn it back on by following the same steps while checking the checkbox in front of the Turn on fast startup (recommended) option.
Way 2: Disable Fast Startup via Command Prompt
You can also disable Windows 10 fast startup through command prompt if you know the proper running commands. Here is how to turn off fast boot on Windows 10 with command prompt:
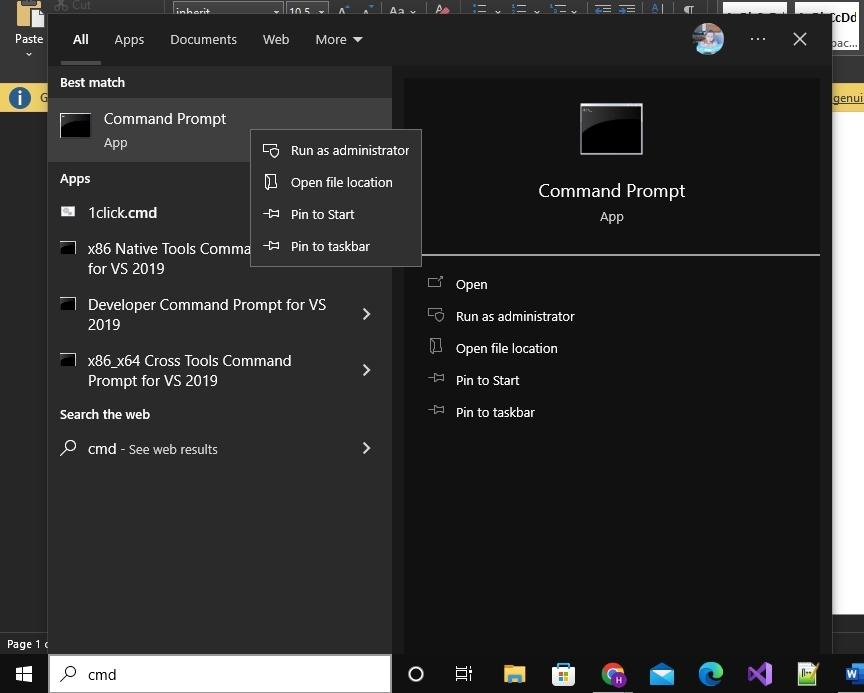
- Type cmd in the search bar.
When the Command Prompt appears, right-click on it and choose Run as administrator.

Type in the following command and press Enter:
powercfg -h off
After the command has run, the fast startup will automatically be disabled without much effort.
Way 3: Turn off Fast Startup Via Registry:
The registry editor is another option to disable Windows 10 fast startup. Here is what you need to do to disable this feature permanently:
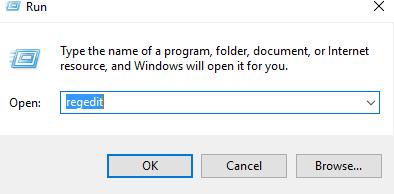
- Press Windows + R key simultaneously to open the Run dialogue.
Type regedit and press Enter.

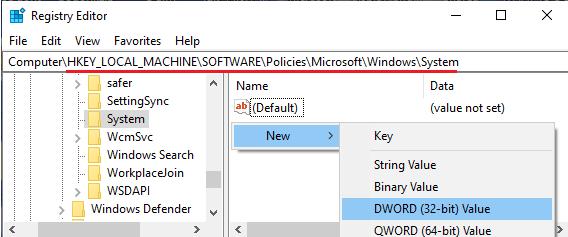
- With the help of the left navigation menu, navigate to :
HKEY_LOCAL_MACHINE\SOFTWARE\Policies\Microsoft\Windows\System
Right-click in the window, go to New and choose the DWORD (32-bit) Value option.

- Name the DWORD as "HiberbootEnabled" and set its value as 0 (it will be 0 by default).

- Exit the Registry Editor and restart your computer to implement the changes you have made.
When your PC restarts, the Windows fastup will be disabled permanently, and your PC will shut down normally from now on.
You have seen the simplest yet most effective ways to disable Windows 10 fast startup. There are other ways, too, but they do not work as effectively as the three mentioned above.
Bonus Tip: How to Reset Password on Windows 10?
Once you turn off the fast startup, your PC will turn on with a little more delay as the system will have to load everything into memory from scratch. But what if you turn your Windows 10 PC on one day and realize that you can no longer log into it due to a forgotten password? What are you going to do? Here is a bonus tip for resetting the login password on Windows 10 using a password recovery tool, i.e. PassFab 4WinKey!
About PassFab 4WinKey:
PassFab 4WinKey is a password recovery tool designed to rescue you from situations where you get stuck on the login screen. This is a powerful tool that enhances your accessibility and lets you control the user accounts on your PC without even logging in to it. Besides resetting the lost password, you can create/delete the user accounts or remove the password from any accounts. Supported by a range of operating systems, this is the perfect tool for anyone looking to break into a locked PC for any reason.
Here is how to use PassFab 4WinKey to access your locked account:
- Download PassFab 4WinKey from the official site, install and launch it on any other accessible PC.
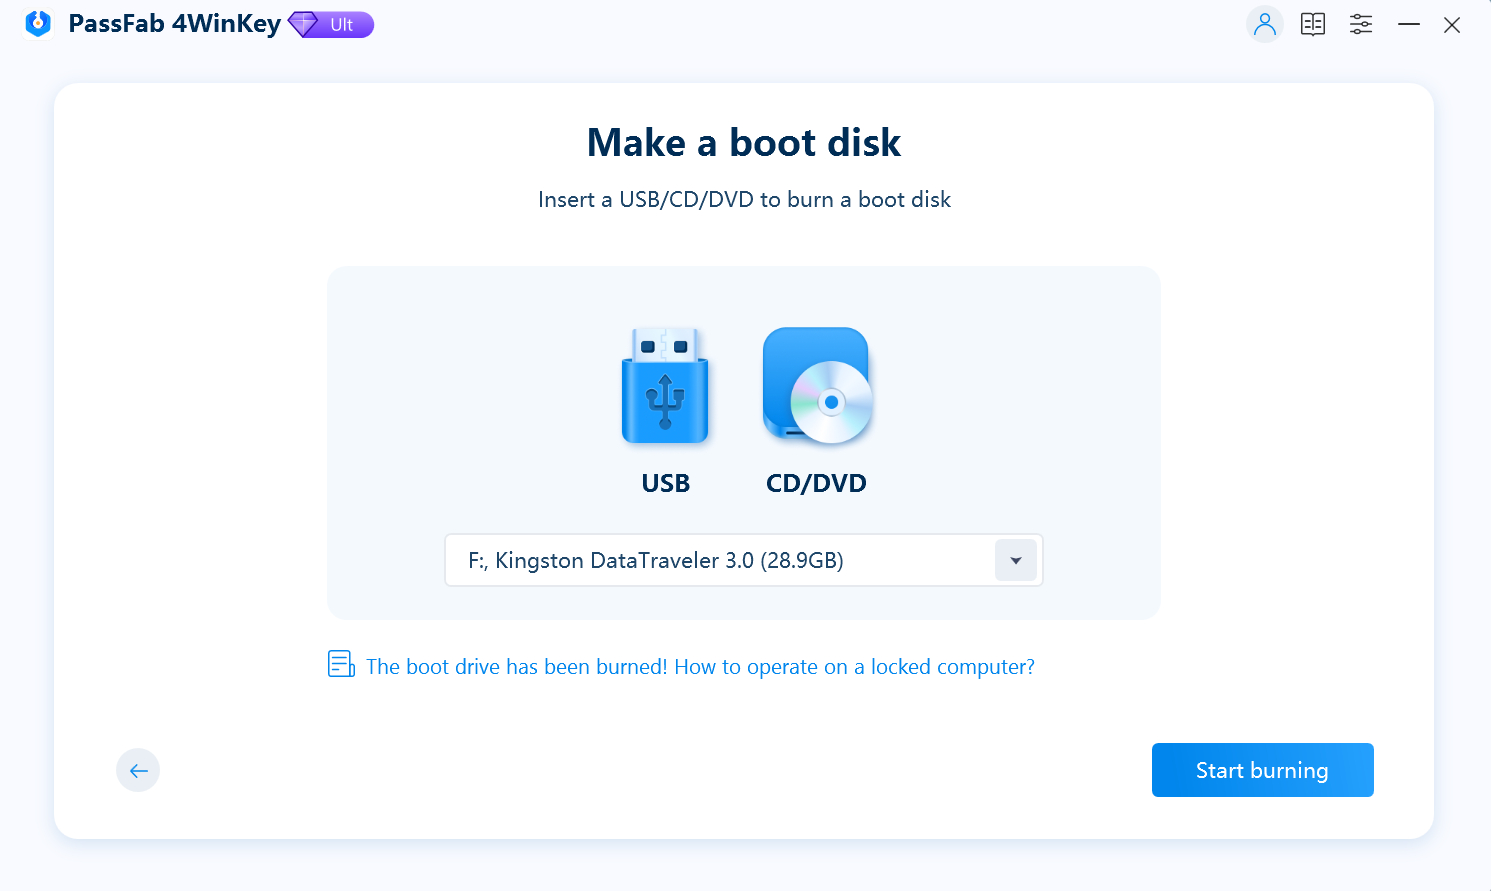
Plug a USB device and choose it to burn instructions by clicking Next.

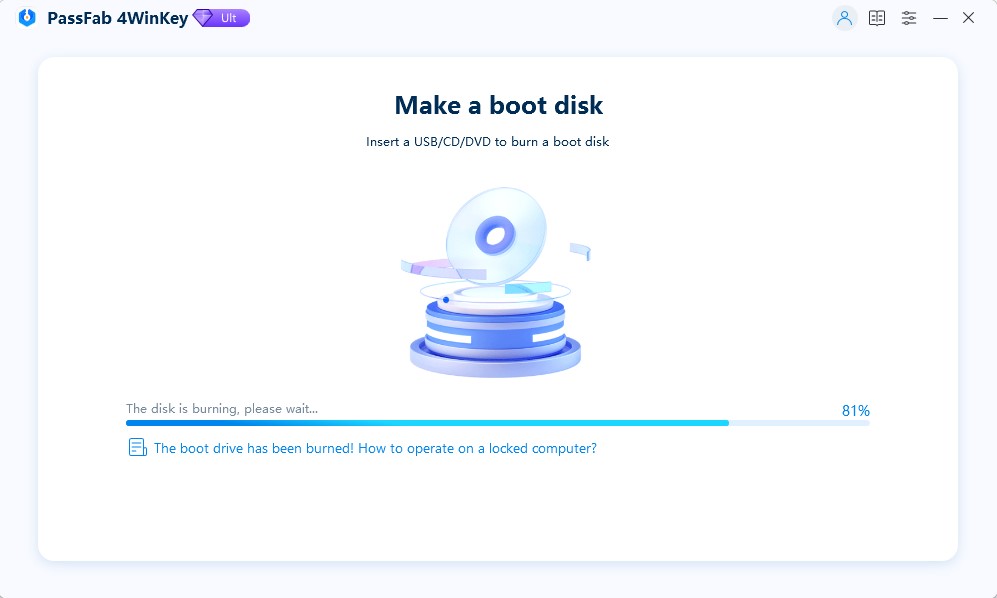
After the instructions have burnt successfully, plug the USB out and switch to the locked PC.

- Plug the Bootable USB into the locked PC. And start/restart your PC and press the Boot key to enter the Boot Menu.
- Choose your USB device to boot the PC. And press F10 to exit boot menu. Meantime, let your PC boot from the bootable media. You will see PassFab's interface.
- Let your PC boot from the bootable media. You will see PassFab's interface.
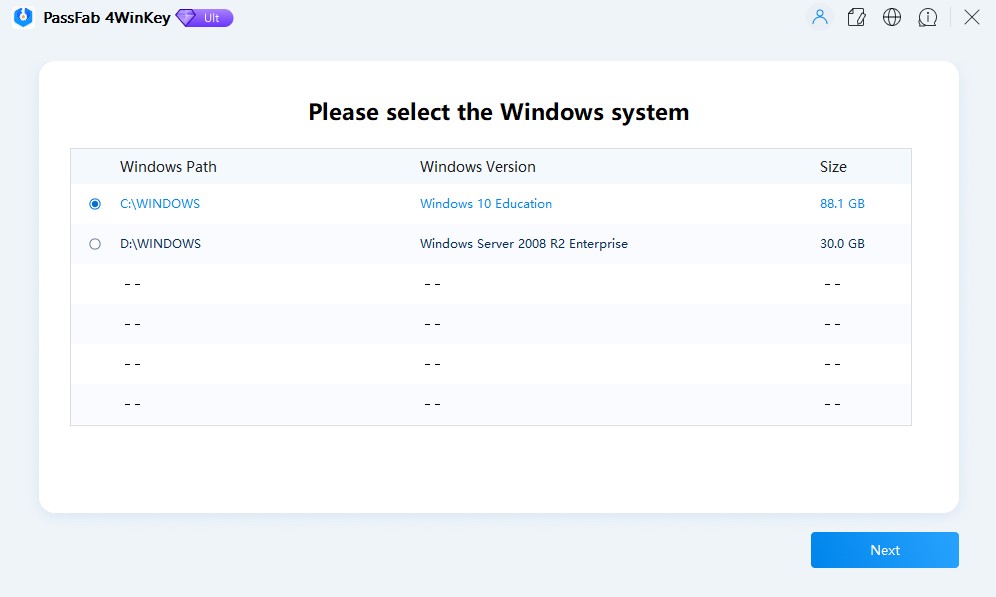
- Choose Windows system, and click Next.

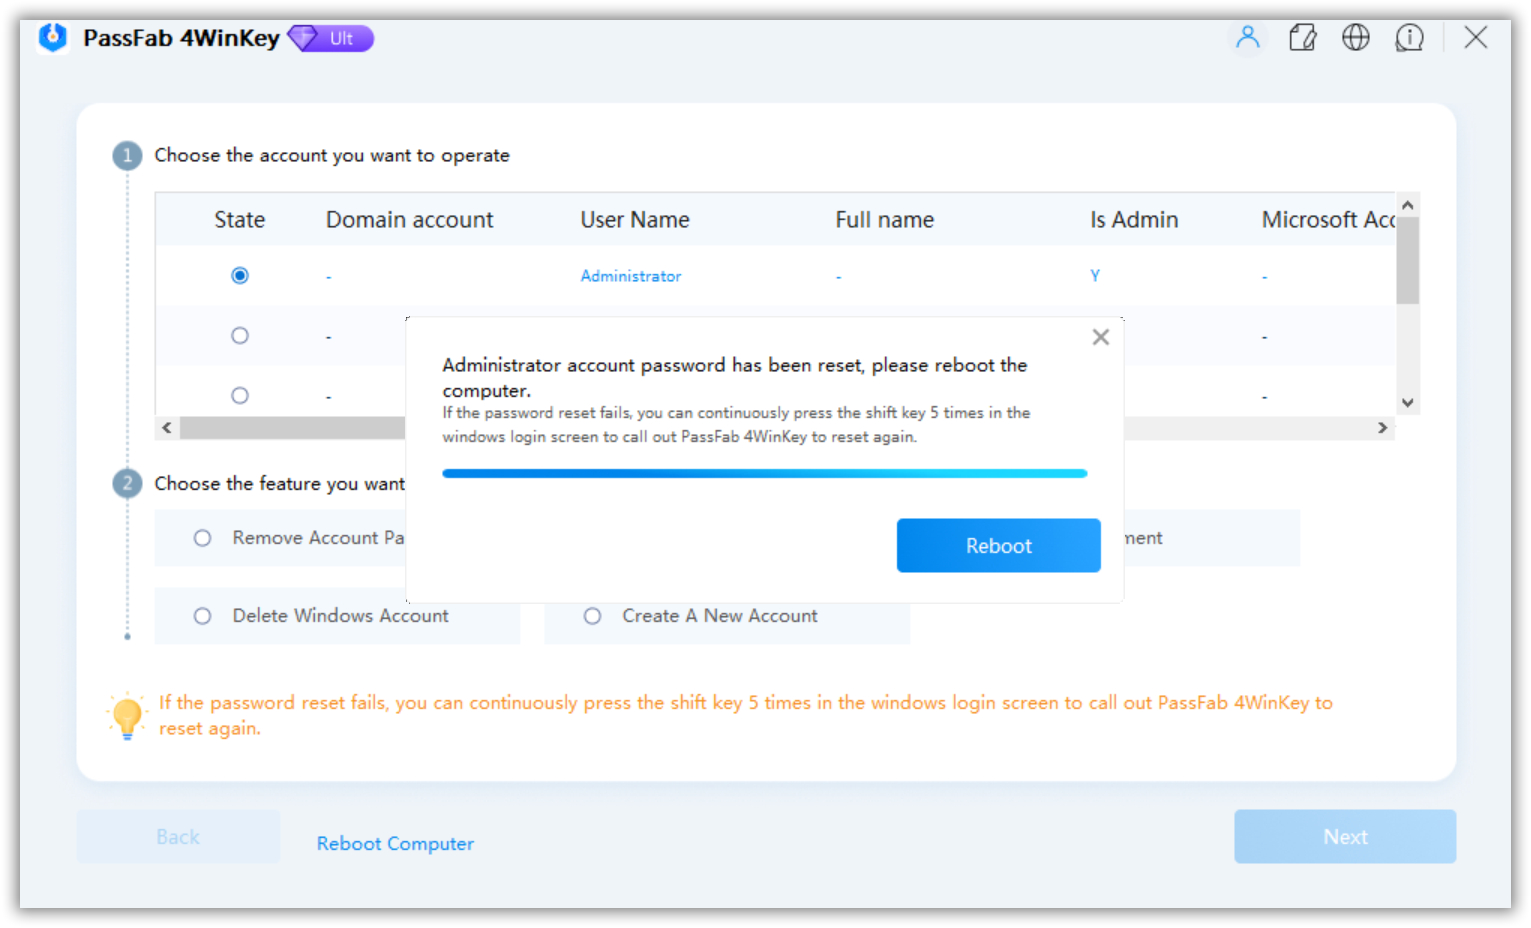
Choose the user account you want to unlock and select Reset Account Password from the list of features. Click Next.

- Enter the new password and click Reset. And click reboot.

When your PC restarts, enter the new password when the login screen appears. You can log in to your account without any more difficulties. This is how PassFab 4WinKey has made it easy to recover the locked user accounts in Windows.
Final Words:
The fast startup feature speeds up the startup process in Windows 10 and is enabled by default. Although this feature does not harm your PC in any way, you might get into some trouble, such as Windows updates may not get installed properly due to fast startup, etc.
In this article, you have learned about the fast boot option, how it works, why you may need to disable it and the best ways to disable this feature. This article also presents a bonus tip to rescue you from situations where you lose access to your PC due to a lost password. We suggest using the PassFab 4WinKey tool for any user account's easy, fast and reliable recovery. We hope our "How to turn off fast boot on Windows 10" article will help you solve your problems. Thank you for reading!


