There is no doubt that Windows is more flexible, adaptable, and have massive features, unlike other operating systems. When it comes to the convenience, Windows has features like automatic shutdown and much more. Getting engaging with Shutdown feature, you can schedule the system turn off as per your needs. Win 10 auto shutdown feature is mainly used in company and organization in order to effective power management and reduce the carbon footprints. Automatic shutdown function also let the user turn off the system at the time of inactivity.
But, it is very irritating when you are performing some work and computer shut down as you already scheduled the Win 10 auto shutdown function. This is one of the major disadvantages of the auto shutdown feature in Windows.
Part 1. 3 Ways to Manage Windows 10 Auto Shutdown
Since the inception of Windows, Microsoft has made tons of things in their Windows operating system. If you are using Windows 10 then, you will find various ways to manage the Win 10 auto shutdown feature. Well, without further ado, let's talk more to 3 ways to manage Windows 10 Auto Shutdown.
Way 1. Manage Windows 10 Auto Shutdown using command prompt
Managing the Windows OS through command prompt is one of the popular ways. Similarly, Win 10 Auto Shutdown is possible through command prompt. The command prompt is a command line tool used to operate a computer by executing commands.
Step 1. At the very first step, you have to click on the "Start" button and search for Command prompt.
Step 2. Hit on the "Enter" button to launch the command prompt.
Step 3. Command prompt interface will appear, simply enter the following command and click on the "Enter" button: shutdown -s -t -30
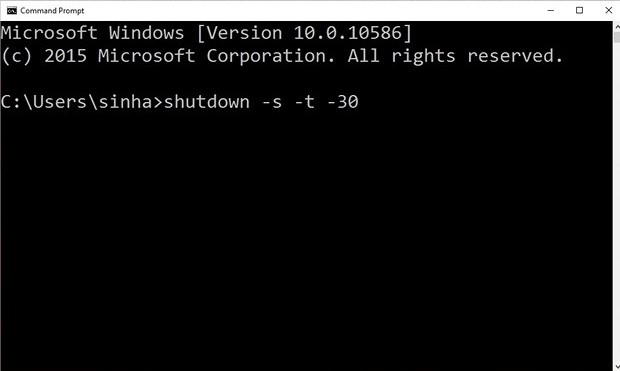
Step 4. You can change the -s with -r if you want to perform an auto restart. Where -30 refer to 30 minutes, you can change it as per your needs.
Way 2: Manage Windows 10 Auto Shutdown using Run
Run is a very popular function in Windows OS. Getting engaging with Run program, the user can directly open the program and perform certain types of operations. Like you can manage Win 10 auto shutdown using Run. If you don't know how to then, follow the below step by step guide.
Step 1. Simply click on the "Start" button and search for RUN or simply press "Windows" key + "R" to launch Run.
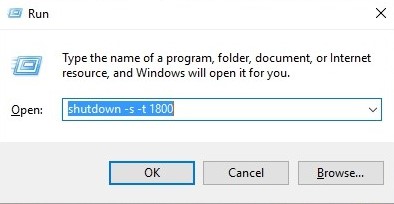
Step 2. Once Run interface will appear, enter the following text on it and hit on the "OK" button: shutdown -s -t 1800
Way 3: Manage Windows 10 Auto Shutdown using Task Scheduler:
Task Scheduler is a Windows integrated function that is responsible for task processing on time and much more. Using Task Scheduler, you can easily change the auto shutdown as per your need. Here, below is the guide to managing Win 10 auto shutdown using task scheduler.
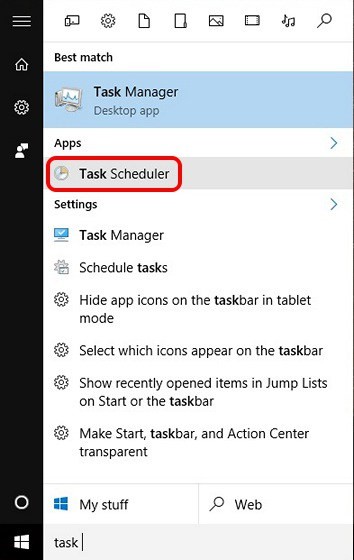
Step 1. First of all, you have to search for "Task Scheduler" in the search bar and click on it to open.
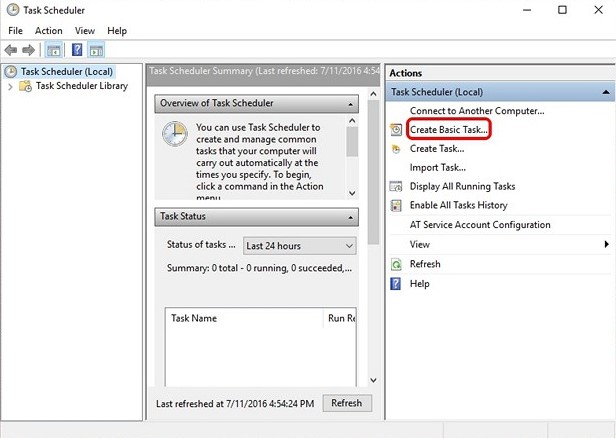
Step 2. Task Scheduler interface will appear, click on the "Create Basic Task...".
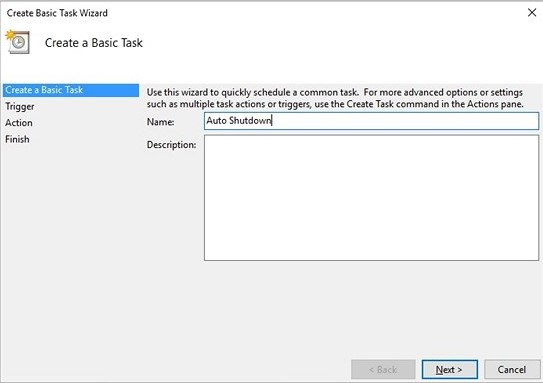
Step 3. Create Basic Task Wizard will appear on the screen, simply enter the name for the task and add a description and hit on the "Next" button.
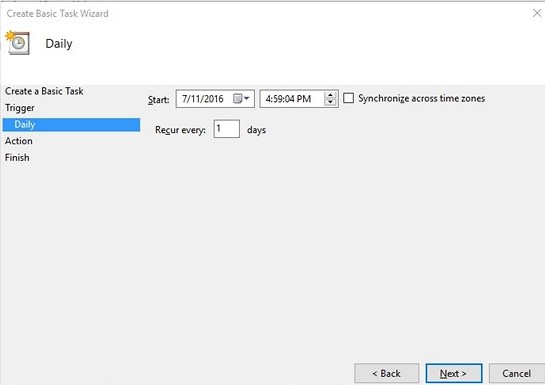
Step 4. Choose when do you want the task to start and hit on the "Start" button.
Step 5. Now, choose the exact time for a task and tick on the "Synchronize across time zones".
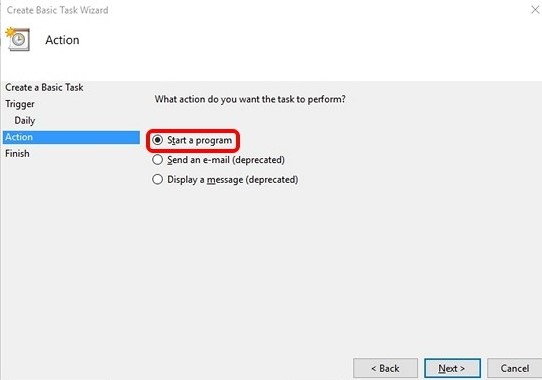
Step 6. After that, click on the "Start a program" radio button and click on the "Next" button. Choose a program by clicking on the /powse and select the following path: C:\Windows\System32.
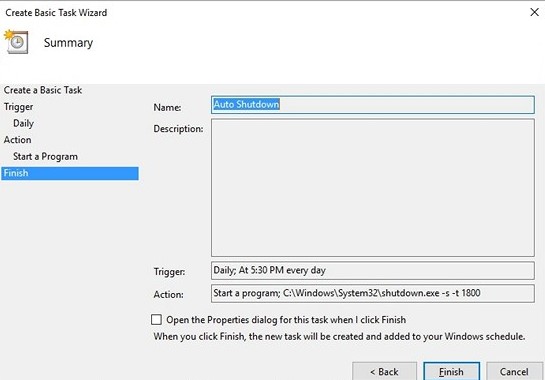
Step 7. Hit on the "Next" button and "Finish" button to confirm the win 10 auto shutdown.
Part 2. Useful Tips for Windows 10
There is no doubt that Windows 10 is a powerful operating system with tons of features, unlike its predecessor. Do you know, there are plenty of amazing hidden features that most of the users are not familiar?
Windows Timeline:
Windows Timeline is one of the hidden features that most of the user doesn't know. Using this, you can view your timeline in an organized way. In the timeline, you will find activities like office document and much more. You can click on the "Task View" on the taskbar to open the "Windows Timeline".
Near Share:
Sharing the file on Windows 10 is very easy. You can use Near Share function to share the selected file to other user on the same network or any social media network.
Part 3. Remove Windows 10 Password Using PassFab 4WinKey
Want to protect your file from digital attackers or unauthorized users? Well, you can protect it using the password. Once you apply the password on your Windows PC, it is not possible for any unauthorized user to gain access to your computer. Recently changed the computer password but don't know what was the new password? Well, you can try PassFab 4WinKey in order to reset the Windows password. This is the amazing tool which let you easily reset any type of password on Windows.
How to reset forgotten Windows password using PassFab 4Winkey?
Step 1: Visit the official website of PassFab to download the PassFab 4Winkey on another computer. After the download process, install it on the same computer.
Step 2: Launch the PassFab 4Winkey and go to the "Advanced Recovery Wizard" as showing in the image below.
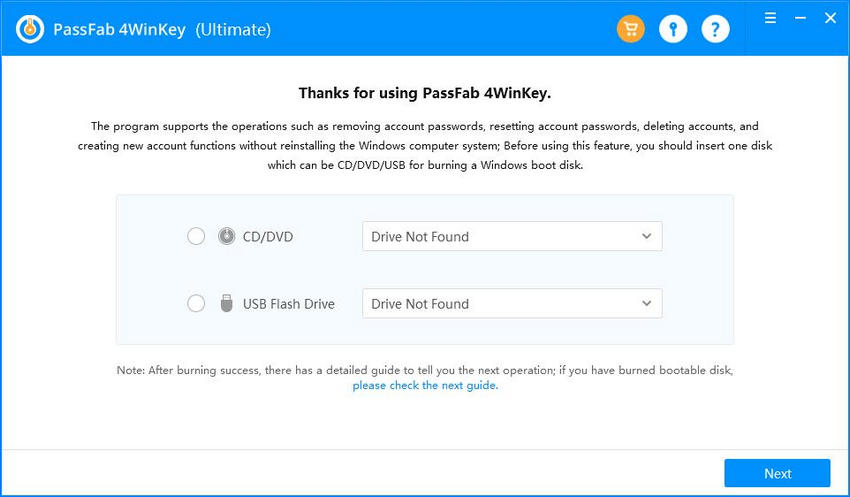
Step 3: Choose the operating system of your locked computer. If you don't know then, simply choose the last one and click on the "Options" button.

Step 4: Options dialog box will appear, click on the Add WinPe drivers and choose "Specify WinPe Version" and hit on the "OK" button.

Step 5: Choose the "Boot media selection" and hit on the "Burn" button to start creating password recovery disk.
Boot the locked computer using password recovery disk:
Step 1: Simply, connect the password recovery disk to the computer and restart your computer.
Step 2: Press the "F12" or "Esc" button to open boot menu.
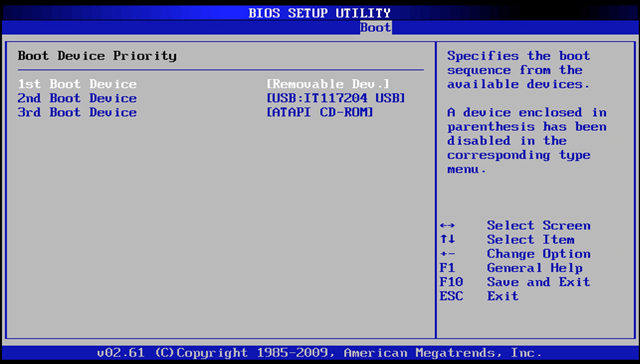
Step 3: From the Boot Menu, choose the password recovery disk by selecting "UEFI: [Disk Name]".
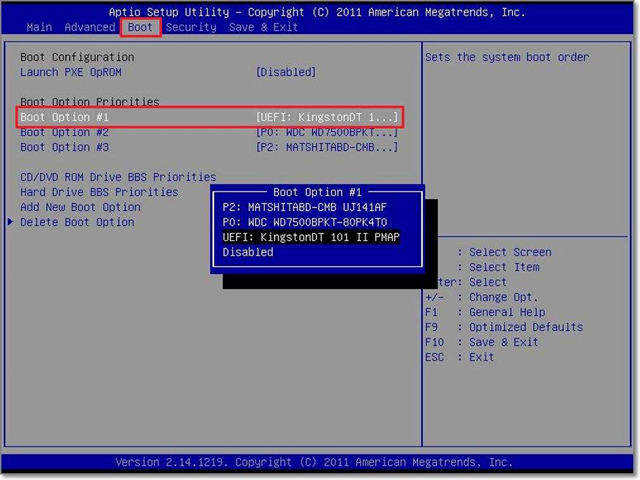
Step 4: This will redirect you to the Windows password recovery tool interface.
How to reset the password using Windows Password Recovery tool?
Step 1: In the very first step, choose the Windows version of your computer and choose a task and click next button to proceed.
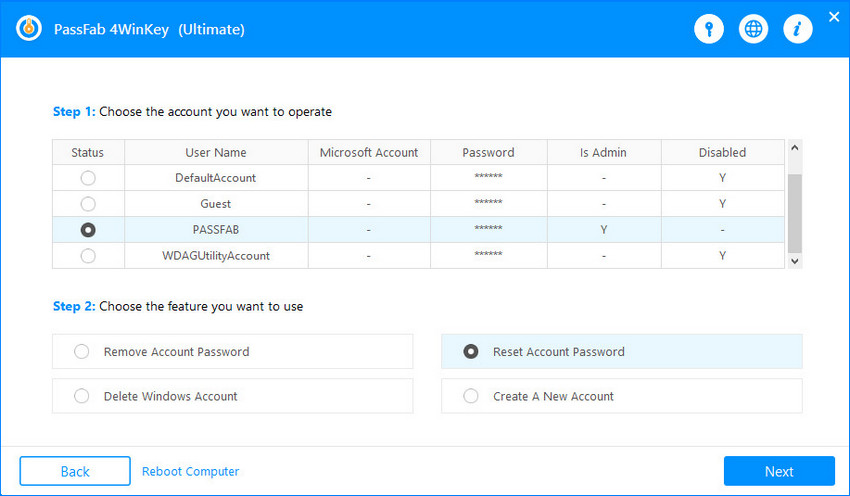
Step 2: Select the username and enter the new password in the text field. Click on the next" button to start resetting process.
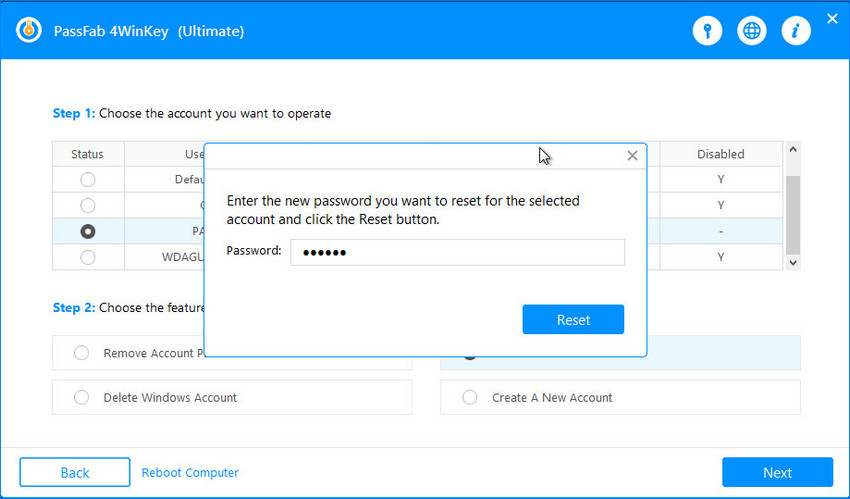
Step 3: Once the rest process completed, click on the "Reboot" button.
Summary
Windows 10 automatic shutdown is the great feature that let the user schedule the shutdown as per needs. In this article, we have talked about 3 different ways to manage win 10 auto shutdown. We also find PassFab 4WinKey is an ultimate tool when it comes to resetting the password on Windows computer.
