There can be many types of files on your Windows 10 computer like Images, audio, video, archives, etc. But you may notice that some files are hidden on the Windows by default, for example, System files. Windows 10 hides OS related files on your computer to prevent accidental damage to the file or worse deletion. If these files are moved or deleted, your operating system may stop working properly and you may need to reinstall Windows. So, to prevent these problems, these files are hidden by the operating system.
But, if you ever hide personal files, then you will need to know how to use Window 10 show hidden files. If you don't know how to how to show Window 10 hidden files, follow this article. Here, we will tell you how to use Windows 10 show hidden files feature to show hidden files.
Part 1. How to Show Windows 10 Hidden Files
Hiding files on Windows OS is a very simple process. You just need to select the files you want to hide and then enable hidden attribute from files properties. But, once the files are hidden, you can't unhide them the same way. You need to use Show Hidden files option on Windows to unhide the hidden files. Below we are going to provide you some common ways to use Windows 10 show hidden files feature to unhide hidden files.
Method 1: From View menu
Windows 10 file explorer window has several menus on below the status bar like File, Home, Share and View. It provides users access to various settings on Windows 10. The View Menu contains several options to customize the file explorer navigation pane, file, and folders icon size and other options. It also has a Show/hide submenu that allows you to hide and unhide hidden attribute files and folders. Follow the steps to learn Windows 10 show hidden files file explorer method -
Step 1: Open a file explorer Windows through Start or just open My Computer.
Step 2: Now, go to the View menu and then check the "Hidden items" checkbox under Show/hide tab.
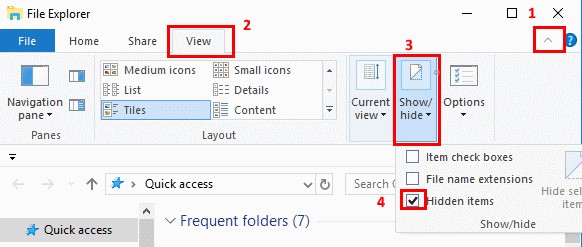
Step 3: To access more show/hide settings, click on Options and then go to View tab on the dialog box.
Method 2: From Control Panel
You can also use the control panel to change show/hide settings on your Window 10 computer if you don't know how to use Windows 10 show hidden files. Follow the below steps to unhide hidden files with Windows 10 show hidden files through Control panel -
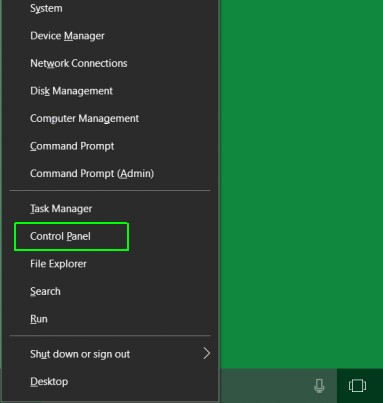
Step 1: Press Windows + X and select Control Panel to go to control panel.
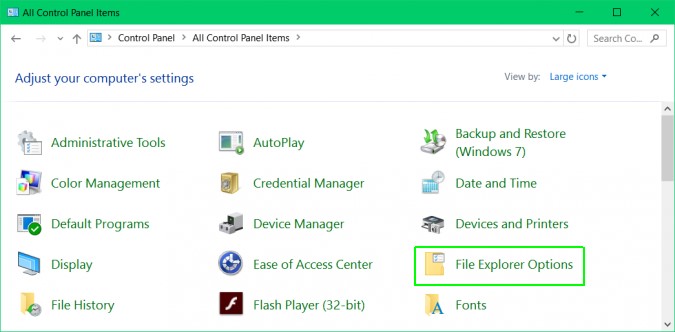
Step 2: Then, click on Appearance and Personalization and then select File Explorer options. If "View by" option is set to Large or small icons, click on File Explorer option directly.
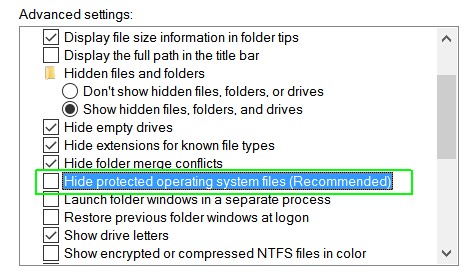
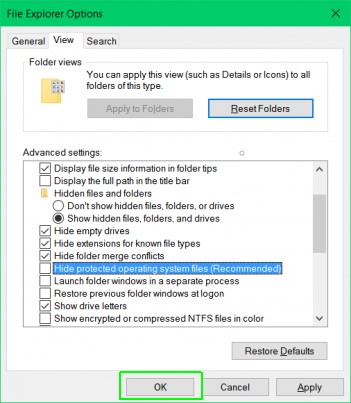
Step 3: At the File Explorer dialog box, go to the View tab and check the Show hidden files, folders and drives radio button.
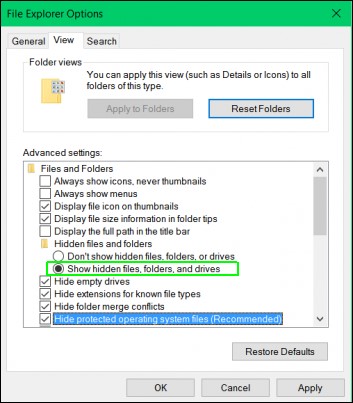
Step 4: To see hidden OS files, uncheck the "Hide protected operating system files" checkbox.
Step 5: Press Yes at the confirmation prompt and then click OK at the file Explorer options to save the settings and close the dialog box.
Part 2. How to unlock Windows Password
The main motive behind hiding personal files on Windows 10 computer is to protect them from unauthorized people. you can hide your personal files beforehand to protect them. Then you can use Windows 10 show hidden files to unhide the hidden files. Though, you can protect your important and private files by using a password to restrict access to your computer. But, if you forgot Windows password, then you may risk losing your files, especially if they are stored on OS partition when you try to reset the password by resetting/reinstalling Windows.
But a better alternative to this will be to take assistance from a third party password recovery tool to reset Windows password. One such tool is PassFab 4WinKey, which is the best Windows password recovery tool. It allows you to reset or remove Windows admin/local/Microsoft account password easily. It also supports a wide range of Windows OS including Windows 10/8.1/8/7/Vista/XP etc. Using PassFab 4WinKey, you can not only reset Windows admin or local account password but also set a new password or remove it without risking data loss. So, it is the best solution when it comes to resetting forgotten Windows password.
Steps to reset Windows password using PassFab 4WinKey
Step 1: Install and run PassFab 4WinKey your computer and select the Advanced Recovery Wizard link.
Step 2: Select the version of Windows on the target computer from the available options.

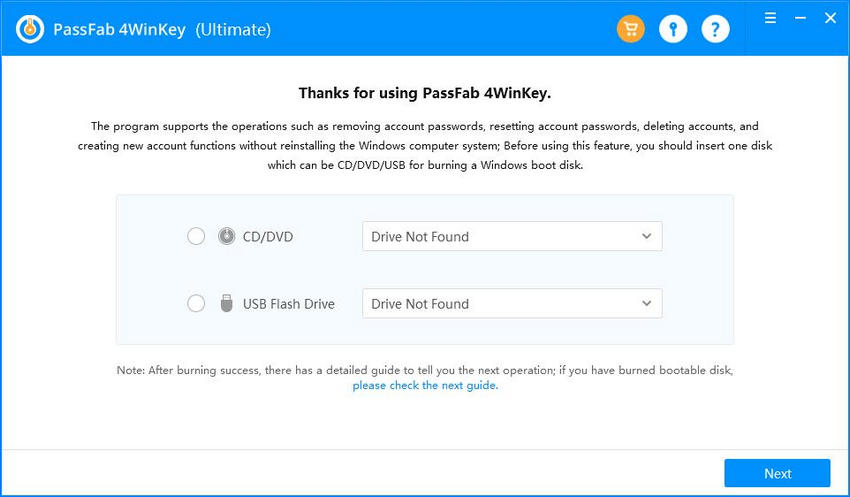
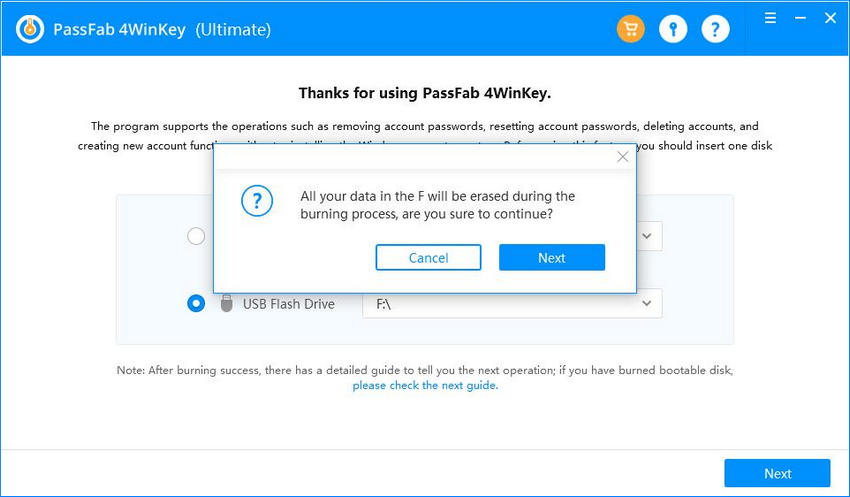
Step 3: Next, you need to specify the Boot media on which you will create the password recovery disk. You can select from USB or CD-DVD and then click "burn" to create a recovery drive.
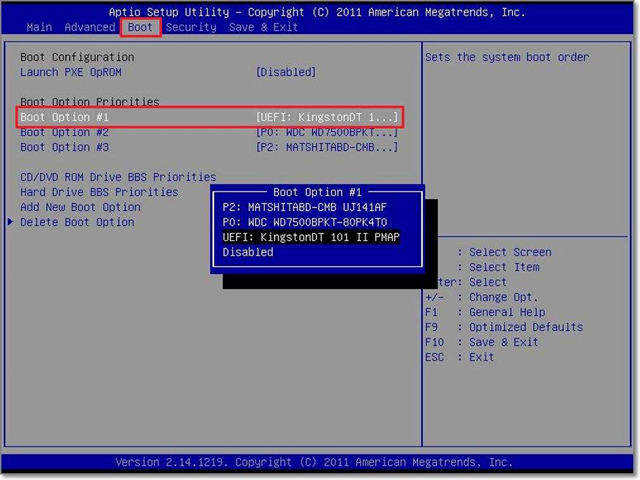
Step 4: Now, insert the recovery disk into the locked Windows 10 computer and restart it. Press F12 or ESC to enter Boot menu and select boot from the recovery disk that you created earlier.
Step 5: At PassFab 4WinKey interface, select Windows installation on the computer and select "Reset your password" option.
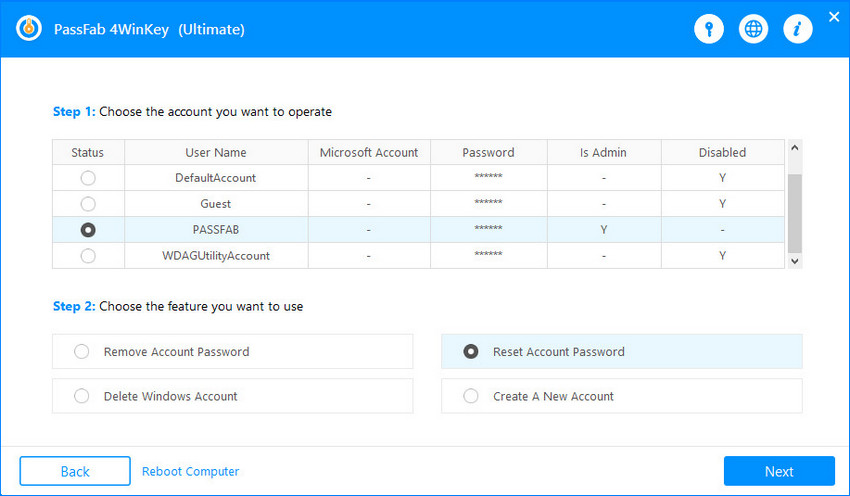
Step 6: Then, select user account whose password you want to reset and enter the new password.
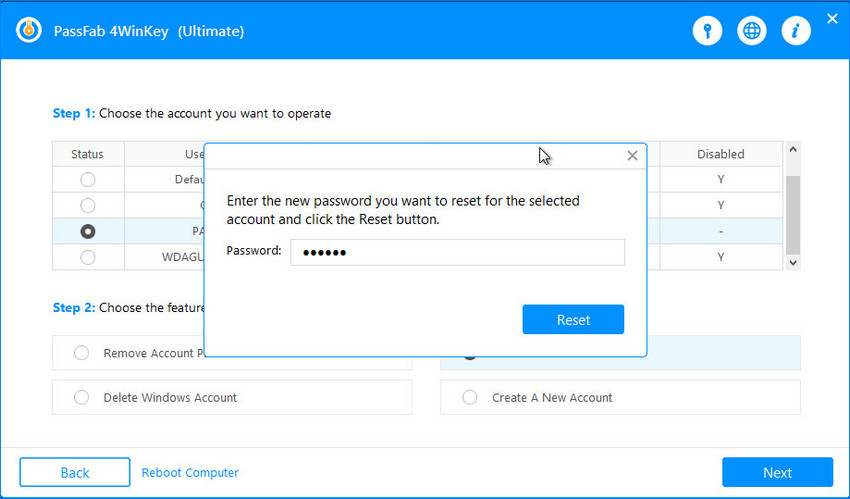
Step 7: Click Next to start the password reset process. After the process completes, restart the computer and log in to Windows using the new password.
Summary
Data security and privacy are the main reason that people hide their files or use a password on the computer. Though Windows hides some important files by default, you can also hide personal files and then unhide them using Windows 10 show hidden files options. Here, we have shown you some simple ways to show hidden files on Windows 10. But, if you forgot Windows password, we have found PassFab 4WinKey as the best tool to reset Windows password.
