Built-in administrator account is a built-in account that is created automatically when you install Windows. It has a password and access to all the system files that cannot be removed or disabled.
Built-in administrator accounts are useful in cases where you need to perform tasks like running an update or installing software without having to work through the user interface.
The built-in administrator account has many benefits such as being able to install and uninstall programs, but it also comes with a few downsides. For example, if someone unauthorized gains access to your computer, they could easily become the administrator without your knowledge and use that account for malicious activities.
So if you want to enable or disable the built-in administrator account in Windows 11, keep reading as this article will take you through each step thoroughly.
Part 1: The Importance of Built-in Administrator Account
In Windows 11, there are two types of accounts: user accounts and administrator accounts. User accounts have limited privileges while administrators have full access to all settings and apps on the computer. The built-in administrator account is useful for troubleshooting problems that might occur as well as making sure that your computer is secure from any threats or malware.
There are many reasons why you should have a built-in administrator account in your software. Some of these reasons are listed below:
- It can help to protect your data from malicious users.
- If you need to update or upgrade your software, it helps if you do it from an admin account.
- You can use an admin account for troubleshooting purposes.
Part 2: How to Enable or Disable the Built-in Administrator Account in Windows 11
Wondering how to disable the built-in administrator account in Windows 11?
Windows 10 has a built-in Administrator Account which allows quick access to settings and software installation. But if you do not want someone else to have access to your computer, you can disable the Administrator Account by following these steps.
Well, there are two ways to enable or disable the built-in administrator account in Windows 11. The first is by using the CMD, and the second is by using the PowerShell disable administrator account.
Way 1: Using Powershell to Enable or Disable the Built-in Admin Account
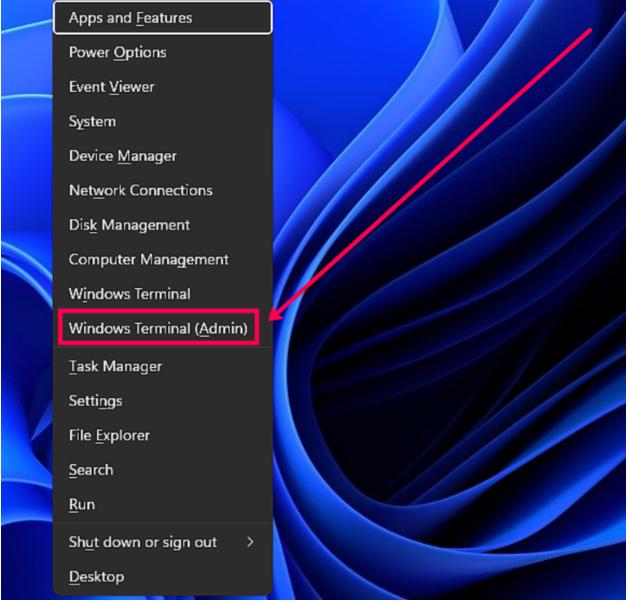
The first step when you use the Powershell disable administrator account is to use the keys “Win + X” from your keyboard to access the Windows Terminal (Admin).

You will then be displayed the User Account Control. Once the prompt appears, click on YES.
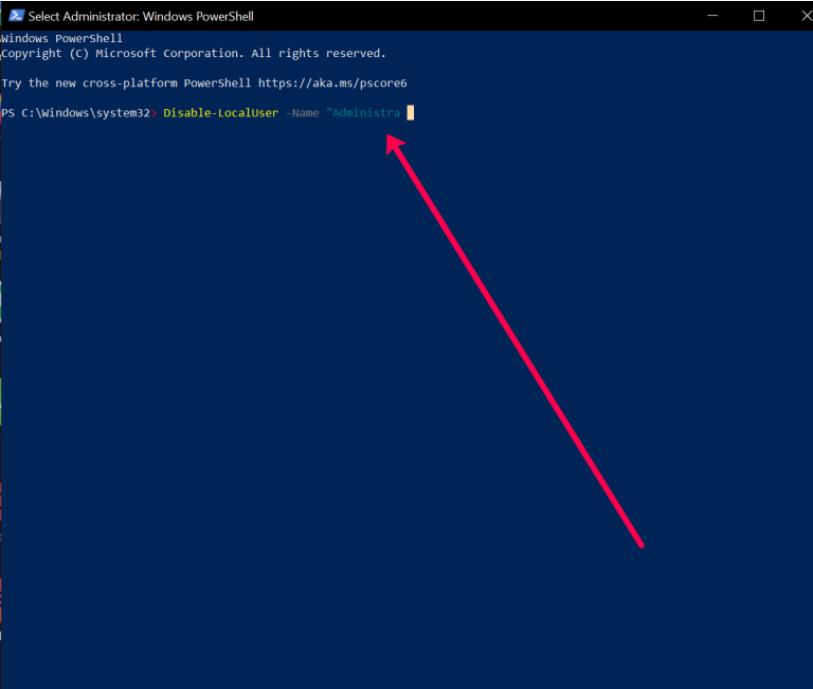
There, type Disable-LocalUser -Name “Administrator and click ENTER.

Once done, restart your computer to enable the changes.
Way 2: Using CMD to Enable or Disable the Built-in Admin Account
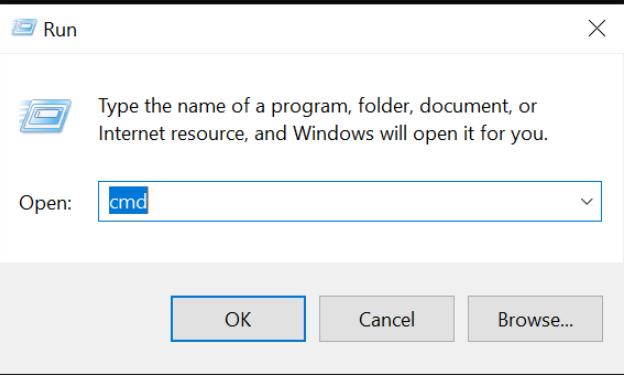
- Again, use the “Win + R” key from the keyboard and then type “cmd” in the search option.
Next select Ctrl+Shift+Enter on your keyboard. This will open the Command Prompt. Once the prompt pops up, click YES in the appeared dialogue box.

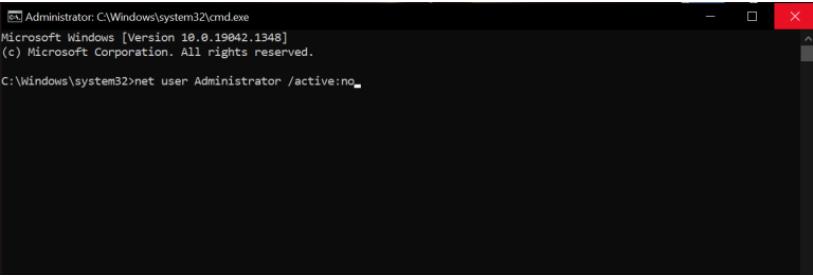
- Next, type “net user Administrator/active:no” in the appeared Command Prompt. Then click on ENTER.
If the name entered shows error, this means that the account you want to disable is not named Administrator. Replace the account name with the correct name and press ENTER.

- Next, close the Command Prompt and restart your machine.
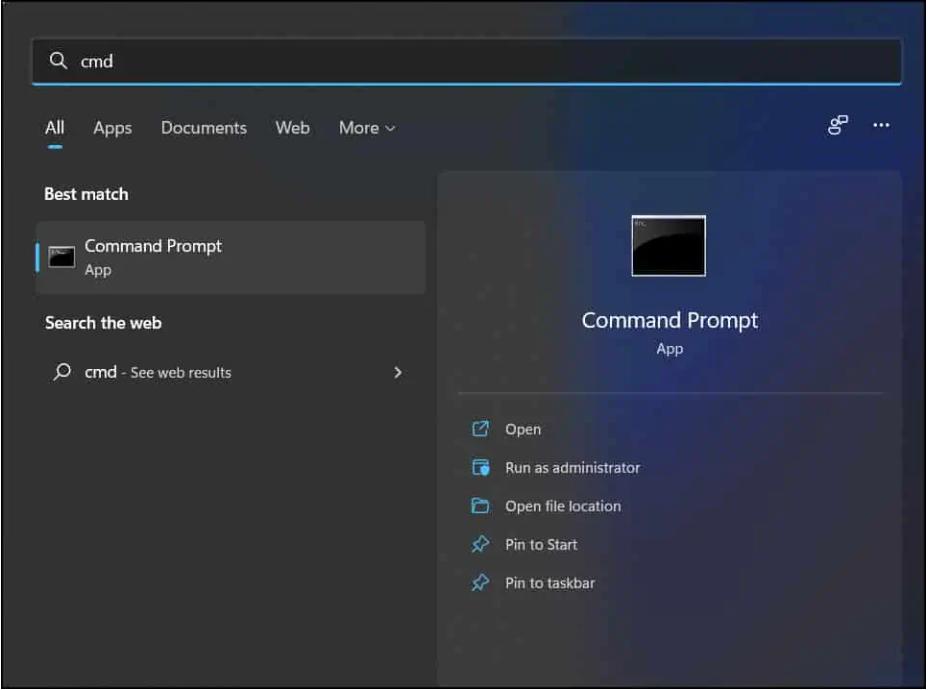
The first step is to type command prompt on the Windows search box. Then select run as Administrator.

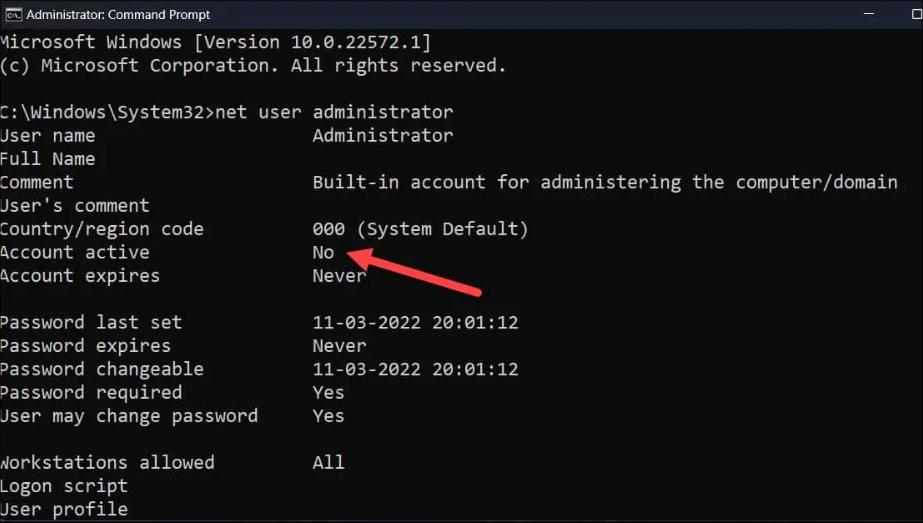
To verify the status of the Administrator account, type net user administrator into the CMD prompt window.

The Administrator Account is Disabled if Account Active = No is set. To enable the account, go to the next step.
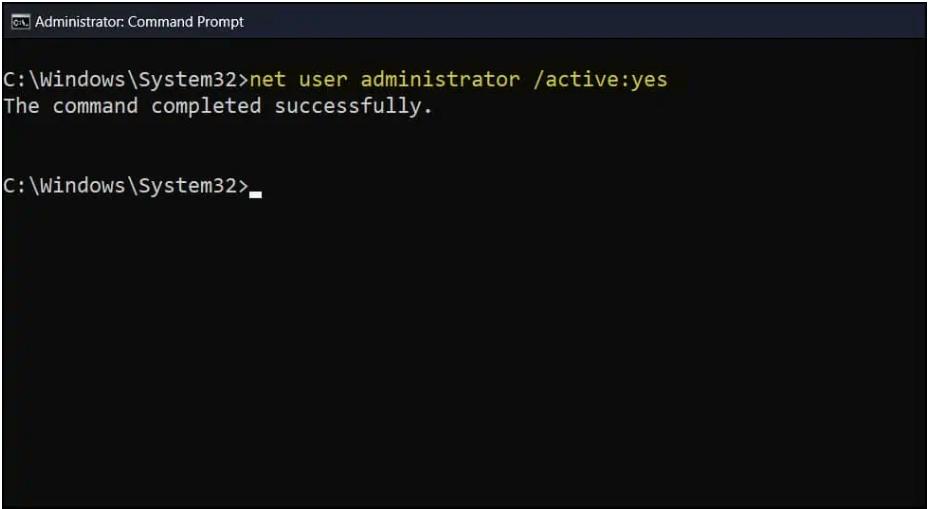
- Now type net user administrator /active:yes into the command prompt. On a Windows 11 PC, this command activates the administrator account. The command was successfully executed.

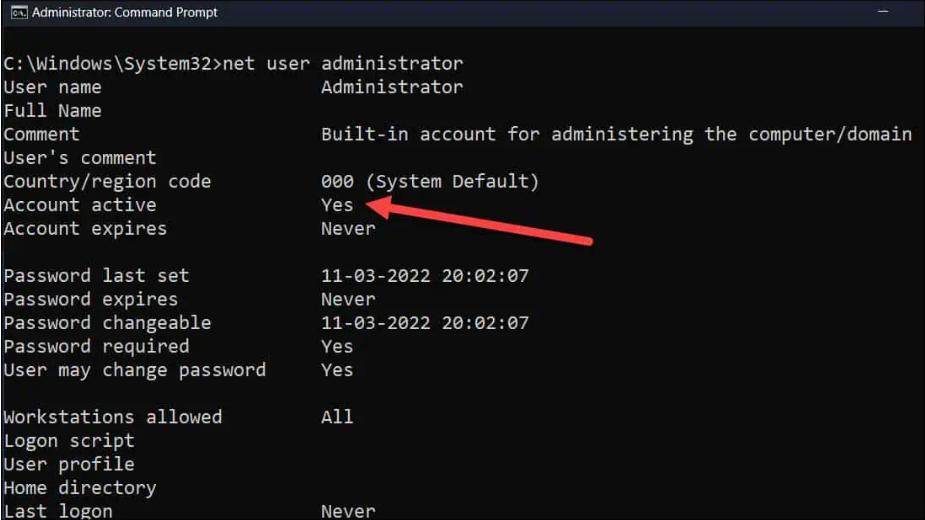
- Now use the command net user administrator to check the status of the Administrator account. The Administrator account is now enabled on the Windows 11 PC if Account Active = Yes is set.

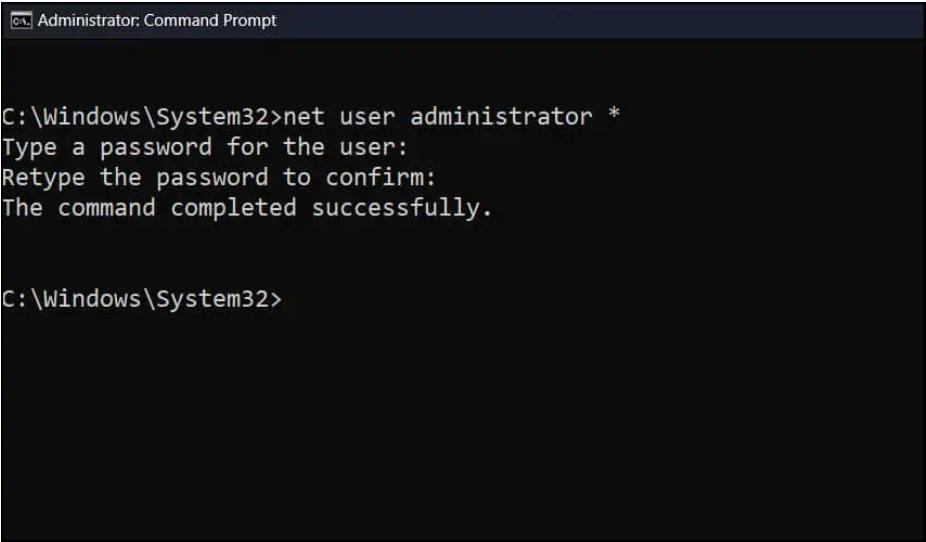
- Next you will have to Run the following command to reset the Administrator account password because even though you have successfully activated an Administrator account, the password for this account is unknown to you. Run net user administrator*

Part 3: How to reset forgotten Admin Password?
There are various ways to reset forgotten passwords, but the most common way is to use a brute-force method. This involves trying out all possible combinations of letters and numbers until you find the right one. But this method can be time-consuming and tedious, which is why many companies have turned to PassFab's reset feature instead.
PassFab 4WinKey is a password reset tool that helps you to easily and quickly reset forgotten passwords for your admin login accounts.
Step 1: Launch PassFab 4Winkey on a computer device that is accessible
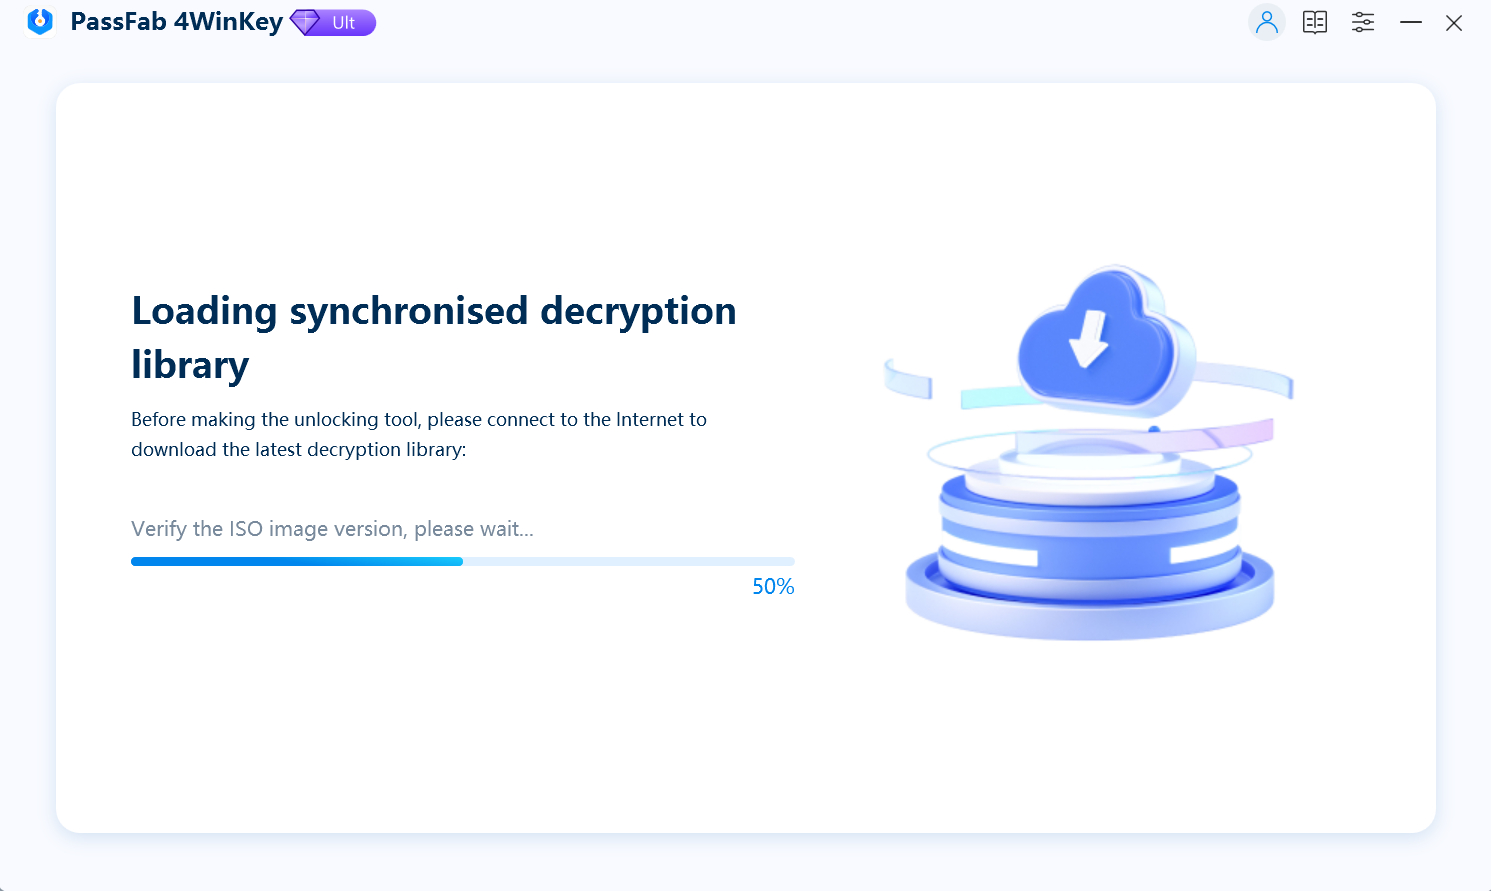
Download and install PassFab 4Winkey on an accessible computer.Next, begin the downloading of your iso file(required to make a bootable disk) by selecting “start”.

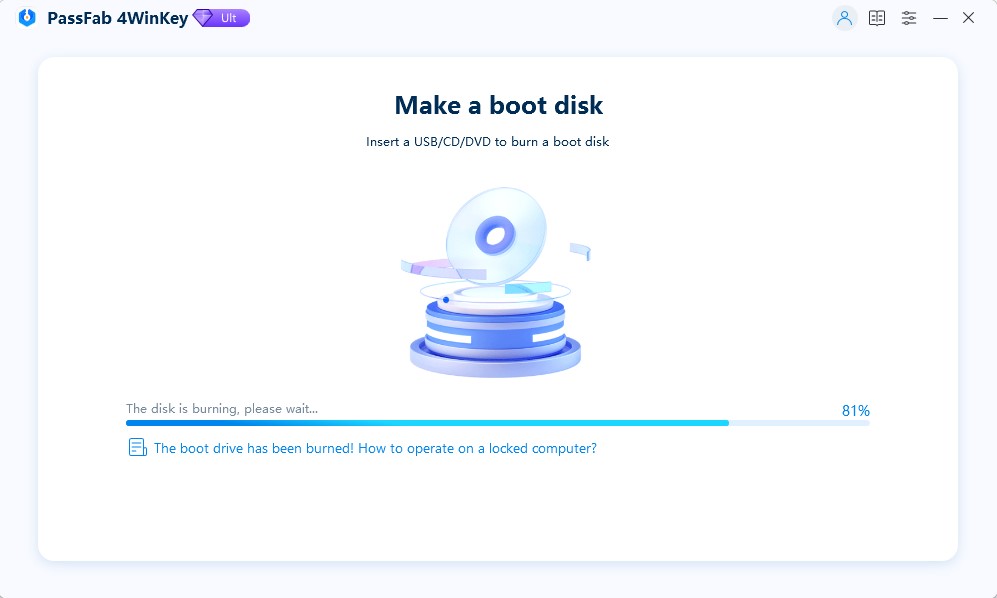
Select a boot media and burn a bootable disk on your USB/CD/DVD.

Step 2: Create a password reset disk
- Insert the bootable USB/CD/DVD into the locked computer.
- Then restart the computer. Next, press F12 or ESC to enter the boot menu.
Step 3: Reset Forgotten Admin Password
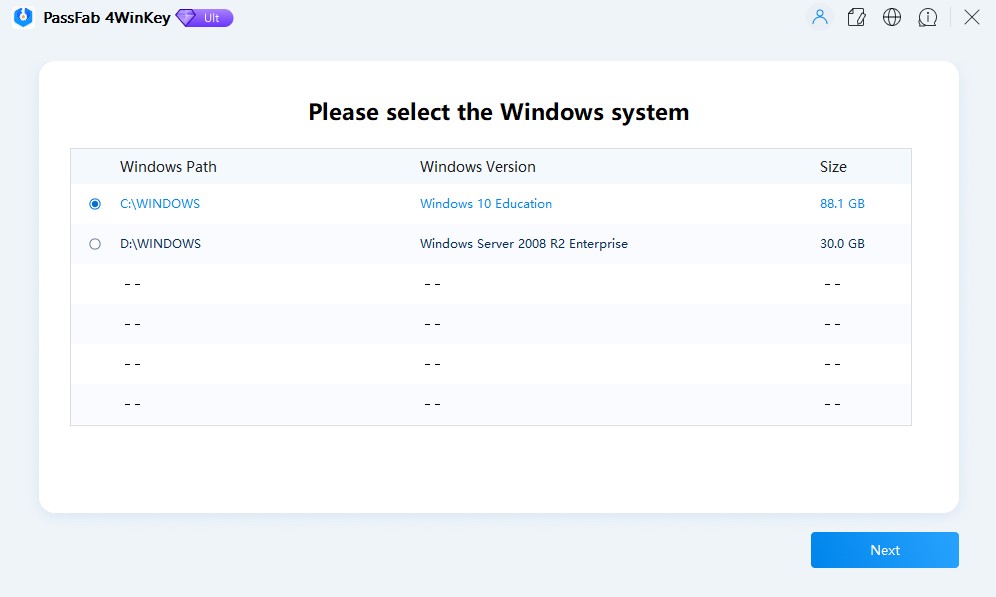
Select your Windows system.

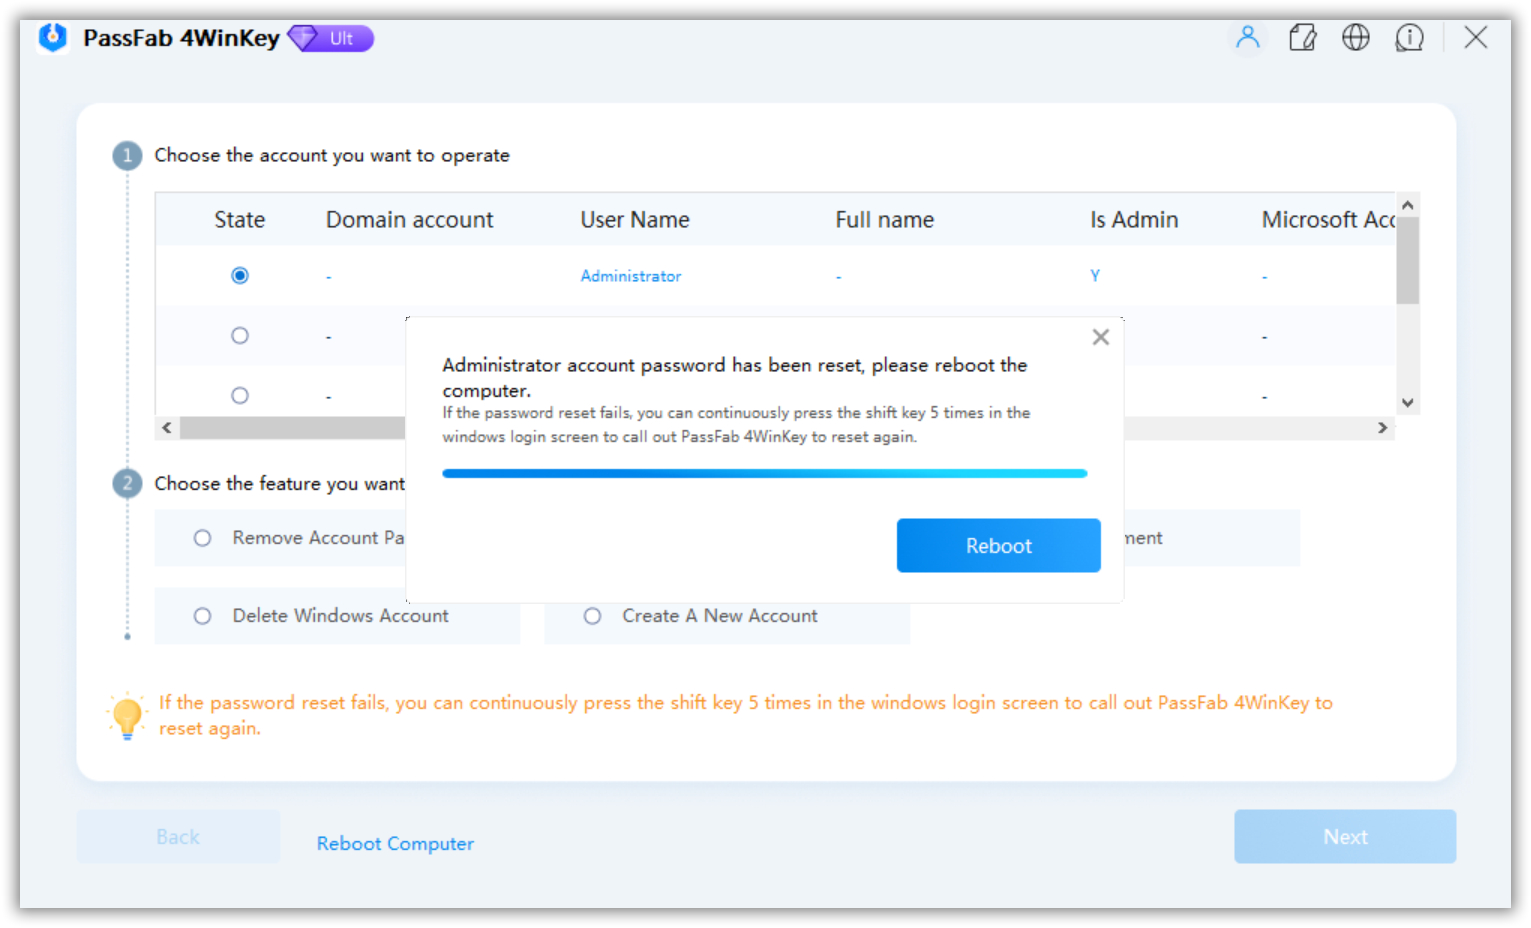
Choose the account and reset password.Then restart your PC, you will find the password has been set successfully.

Final Notes
Many people may not know that Windows 11 has an administrator account built-in and it is turned on by default. This account can be used to access the computer and make changes to the settings. If you are looking for ways to disable the built-in administrator account in Windows 11, this is just the right guide for you.
