"I bought a refurbished laptop and came up with Window 7 home premium, it's been working OK since month but yesterday after sudden failure its boot is not normal and always showing up a black screen so please let me know is there any way to repair Windows 7 without disk, because I don't have an actual disk so please help!"
A big YES! To all those who want to know how to repair Windows 7 without disk? Now repairing Windows 7 without having disk is no more difficult. Just follow below content we have covered amazing solutions to repair Windows 7.
Part 1. What You Need to Do Before Windows 7 Repair
First thing that we will strongly recommend to all of you to check before Windows 7 repair, is to run System File Checker (SFC) to verify the corrupted file. To run System File Checker, sfc scannow option is the most commonly used method. It will find out all the Windows files, if there will be any issue with these files it will replace it.
Guide to verify corrupt files via System File Checker
Step 1: First you need to open a Command Prompt.
Step 2: Make sure it is open with Administrator rights.

Step 3: After opening you need to type sfc /scannow in CMD.
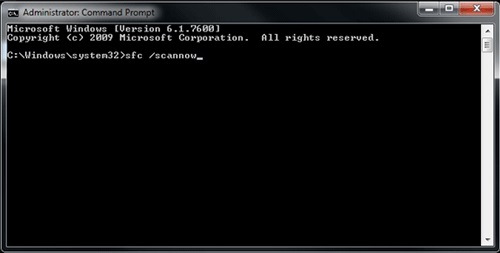
Note: System checker files will automatically replace all corrupt files with correct ones.
If you are still not satisfied and want to verify that either your files has been corrected or not then follow below command.
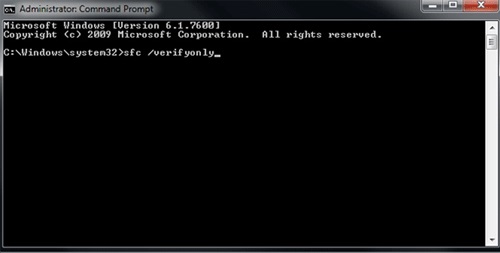
In CMD, type sfc /verifyonly and push Enter. It will show comments in the CMD stating files are corrupted or not.
If still Window is not repair then follow below solution for Windows 7 startup repair without disk
Part 2. Step-by-Step Guide to Repair Windows 7 without Disk
Is it possible to repair Windows 7 without disk? A big YES! AOMEI Partition Assistant Standard is amazing disk manager software that helps in repairing Windows by re-building MBR.
- It is free to use
- Supports almost all OS
- If you want more up gradation then you can use its pro version too
Guide to use AOMEI Partition Assistant Standard
Step 1: First download and run AOMEI Partition Assistant Standard
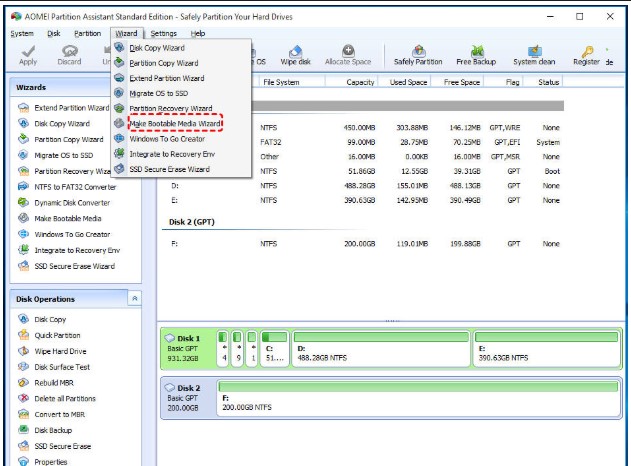
Step 2: After launching this tool, you will be able to see a menu, on the top side choose "Wizard" and then select "Create Bootable Media Wizard".
Step 3: Now you need to Load the bootable USB to Computer
Step 4: Now restart PC and in order to enter into BIOS make sure to keep pressing Del (F2 or another specific key).
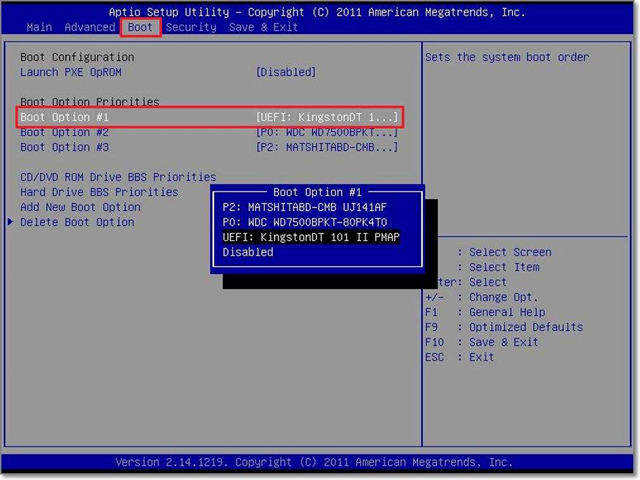
Step 5: Now you need to select BOOT priority in order to boot from USB Drive.
Step 6: Now you need to Rebuild MBR because we all knows very well that damaged MBR can be the first reason that doesn't let the Windows Boot. So let's fix it first.
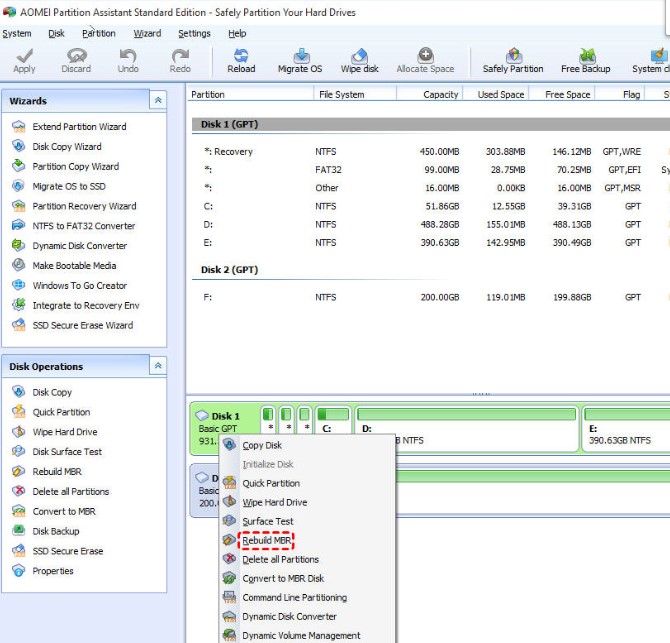
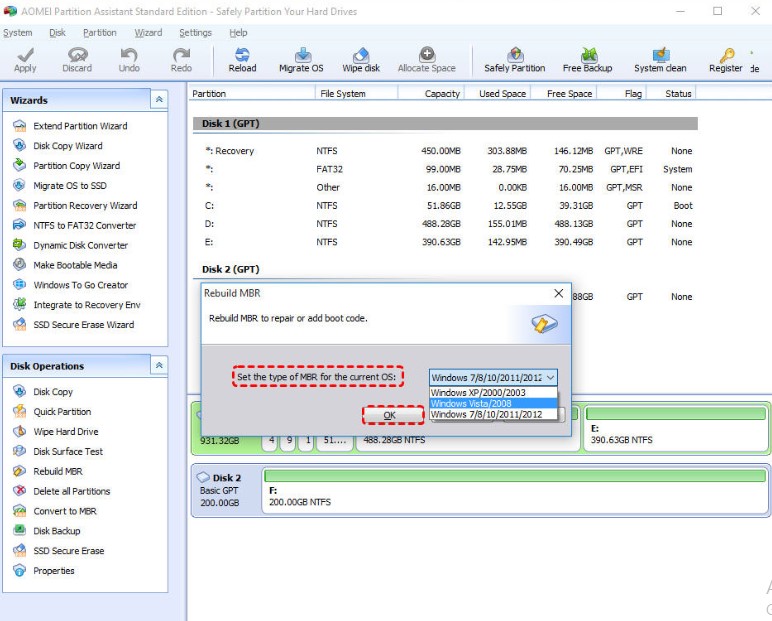
Step 7: We can fix it by log-in AOMEI Partition Assistant Standard. You just need to right click the system disk and choose "Rebuild MBR".
Step 8: Now you need to select an appropriate MBR style and then choose OK.
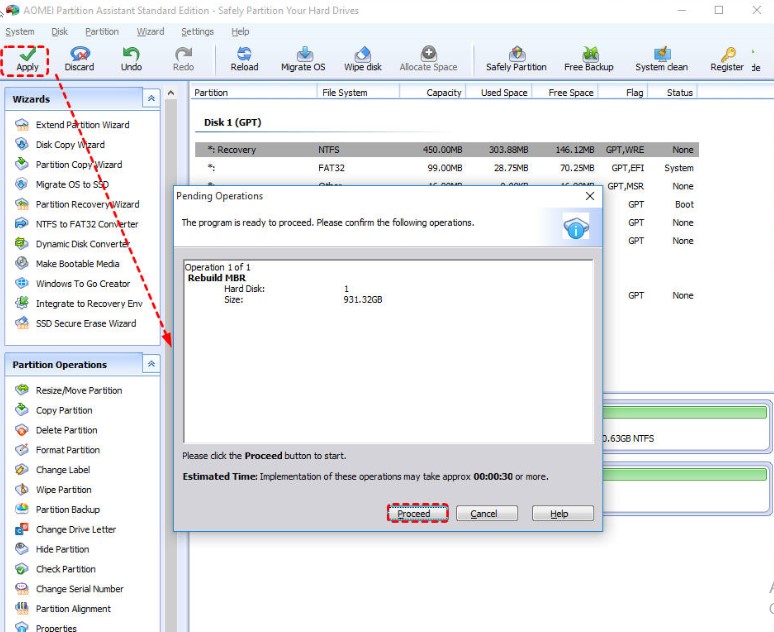
Step 9: Now you need to choose "Apply" and then click "Proceed"
Now you need to check bad sectors on system partition.
Step 1: Now you need to right click the system partition from there choose "Advanced" and then "check partition"
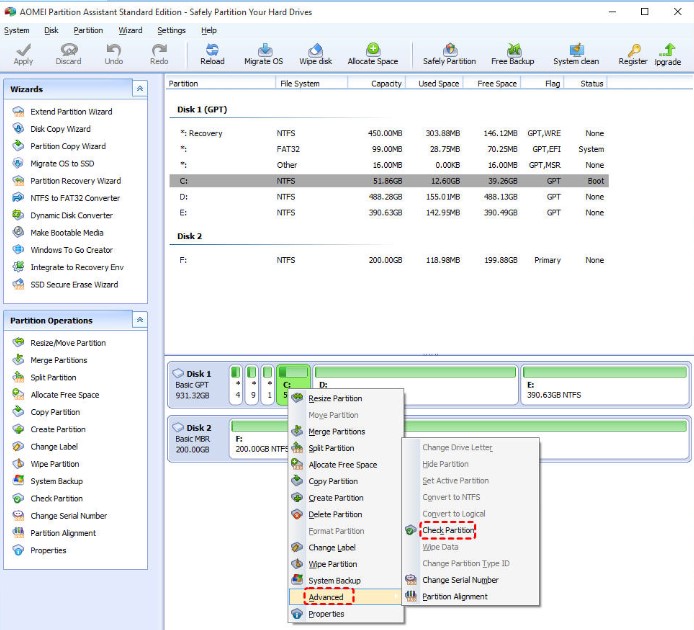
Step 2: Now you need to select "Check partition and fix errors in this partition by using chkdsk.exe." and at the end press "OK". After few minutes, partition checking and fixing process will be completed.

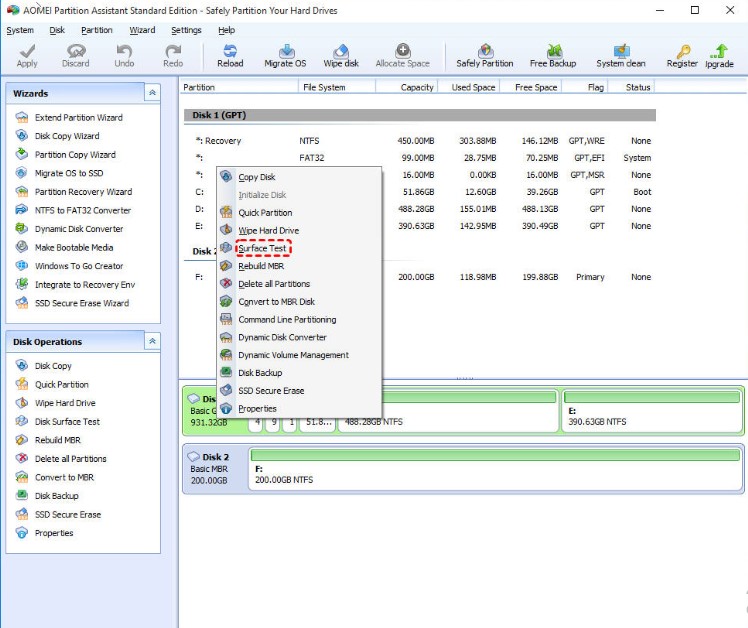
Now if you want to do a disk surface test you can do it by right clicking the entire system disk and then by selecting "Surface Test".
Bonus Tips: How to Reset Windows 7 Password without Disk
PassFab 4WinKey is an ultimate solution with high recovery rate. This software will always be our first choice if you want Windows 7 boot repair without disk. It is compatible with almost all operating systems. Best part of this tool is that its resetting process is so smooth you will not find a single error while resetting.
Here is the guide of PassFab 4WinKey:
Step 1: Run PaasFab 4WinKey. After running, open it and choose Boot Media. Best choice is USB flash drive.
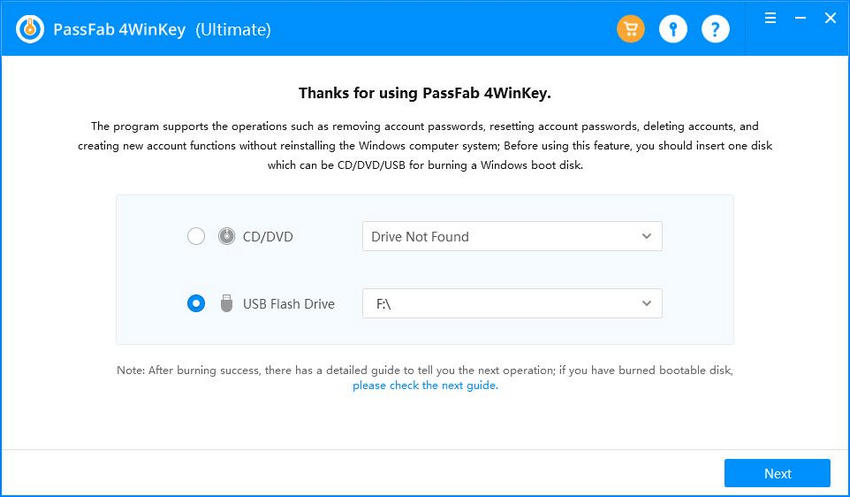
Step 2: After selecting USB Flash Drive, burn USB.
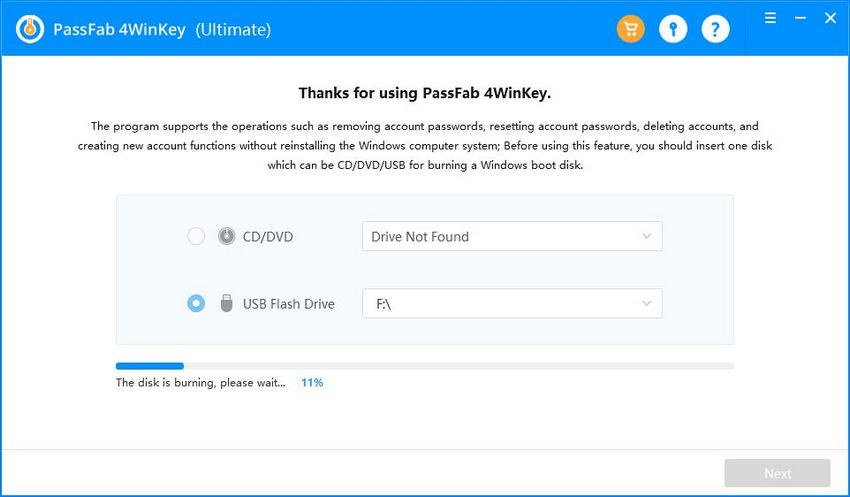
Step 3: A pop-up will appear that USB is burn successfully.
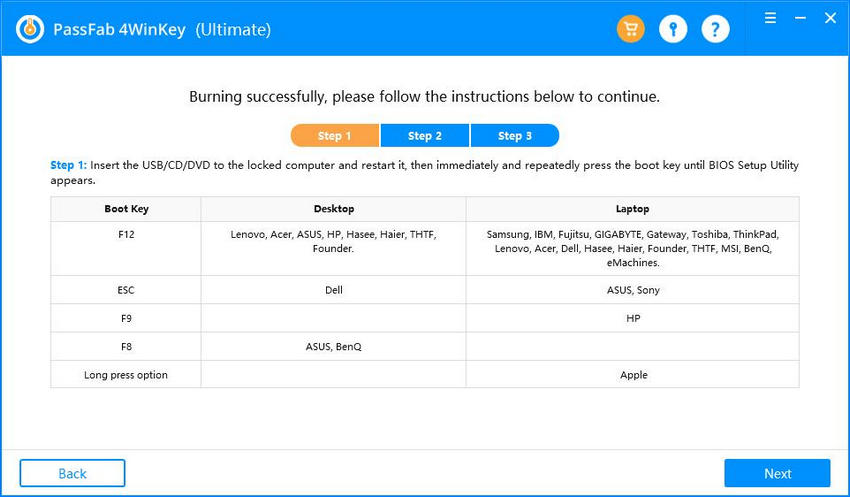
Step 4: Now put USB to laptop for which you want to reset password. Reboot Laptop and press key "F12" continuously. Now choose Soon one Boot option.
Step 5. Choose Windows system and set a task "reset password or remove password".
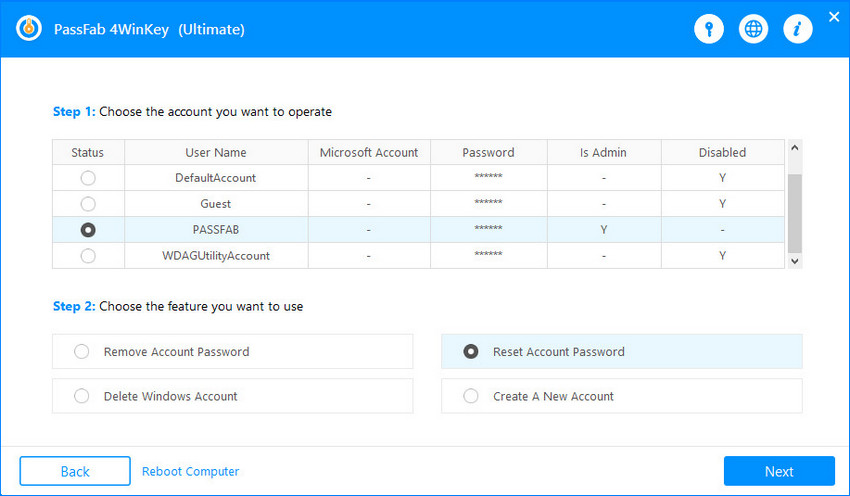
Step 6: After selecting reset password option choose User Account.
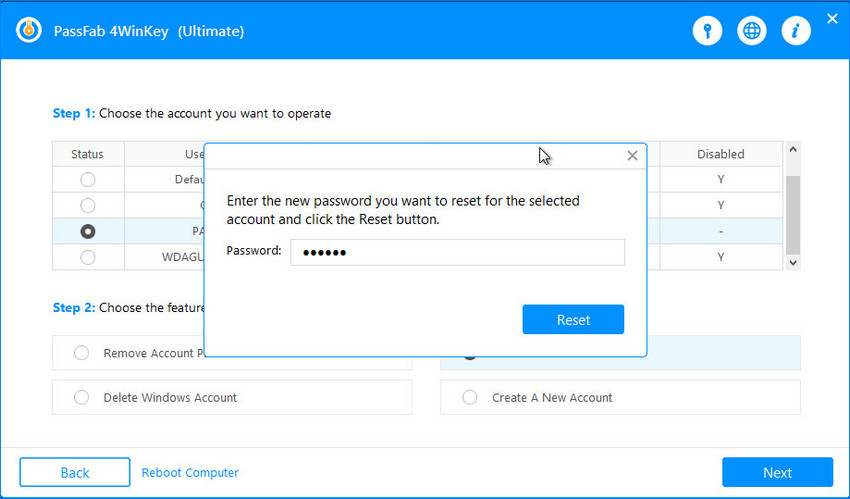
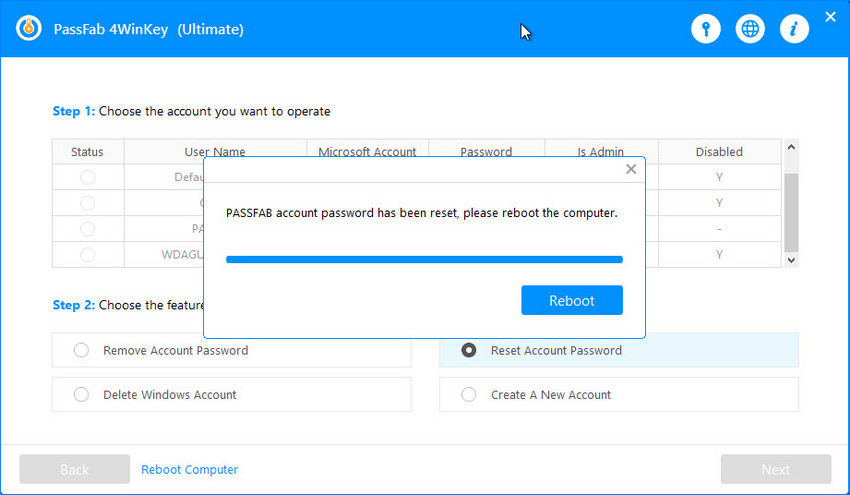
Step 7: It's end. Select "Next". Finally, you can reset a password.
Final Verdict
The short conclusion of this Article is that we have come up with repair Windows 7 installation without disk you can see amazing solution on this. We have also mentioned an amazing guide for things that need to do before Windows 7 repair. Moreover you will find an extra bonus tip for resetting Windows 7 password. So on a lighter note, this article is a complete package for Windows 7 repairing issues. If you like share and comment below. Soon we will come up with more informative knowledge so make sure to bookmark us.
