Reportedly, some people with HP laptops encountered the problem of power on password. If you're one of them with HP laptops or any other facing this issue and also, when HP support just becomes unresponsive in nature, disabling the power on password turns to be a better option. Without taking much of your time, we will now head on to understand how to disable power on password in Windows 7/8/10 systems.
Part 1: How to Disable Power on Password
Many people confuse the Windows login password with the Boot Screen Password/BIOS Password. Before we proceed to understand how to disable power on password on your Windows 7, 8 or 10, it is important to understand what power on password is. Essentially, there are 2 kinds of Power on Password, the one we set as Windows User Account, which you use to login to your operating system. The other one is useful in shielding security to your computer that boots with a blue screen for "Enter Power on Password".
In order to disable power on password on HP or other laptop or computers, it is crucial to first bypass power on password and gain back access to your computer and then disable it. As, the Power on password is very much secured, bypassing it is one heck of a task. However, we will first understand how to disable power on password on HP/Windows 7/Windows 8.
Step 1: Prepare Windows installation disc.
Ensure the Windows 10 installation disk should be handy, make due preparations for Windows 10 installation disc.
Step 2: Start Locked Windows 10 from installation disk.
Just ensure to plug in the installation disk to Windows 10 computer. Then hit on "Esc"/"F12" key to enter Boot screen. From here, you need to boot your computer with the boot media you just inserted.
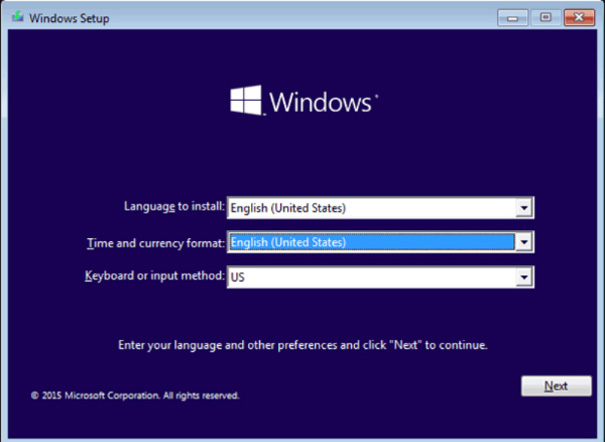
Step 3: Replace Utility Manager via Command Prompt.
Once computer boots from installation disk, just press the "Shift+ F10" to launch command prompt.
Execute the following command to replace utility manager. Ensure to hit Enter after every command line. (Note: d:\ denotes system drive)
- move d:\windows\system32\utilman.exe d:\
- copy d:\windows \system32\cmd.exe d:\windows\system32\utilman.exe
Now eject the disk and reboot Windows with command "wpeutil eboot".
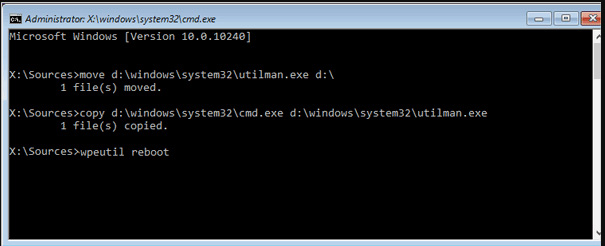
Step 4: Reset Windows local admin password with command prompt.
After Window goes to sign-in-screen, click on the "Utility Manager" at the right-bottom side and Command prompt will be launched. Then, take the "net user" command to reset Windows 10 local or admin password.
- net user space username * and hit enter.
- It will then ask you for a new password. Do not make any keystroke and simply hit the enter key twice. That's it you've successfully bypassed and disabled the power on password.

Just shut down the command prompt and add in the installation disk into the PC.
Tap on the "Power" icon and tap on "Restart" at the right bottom of the login screen.
While Windows boots up from installation disk and the "Window Setup" window, just press the "Shift+F10" to launch Command Prompt.
Key in the "copy d:\utilman.exe d:\windows\system32\utilman.exe", hit the "Enter" key.
Part 2: How to Disable Power-on Password
PassFab 4WinKey is vital program in disabling power on password on HP or any other laptop or desktop effortlessly. This is one of the handy means of gaining access to your Windows account. This tool is highly effective in disabling the power on password and perform several other functions like removing any kind of login password, be it Admin account or Microsoft account password. Moreover, one can enjoy the leverage of creating an admin account much easily.
In this guide below we will understand how to disable power on password Windows 8.
Step 1: Download PassFab 4WinKey.
The very first step is to download the PassFab 4WinKey software from the official site. Open the program and opt for "USB Flash Drive" option on the program interface. In the interim, add-in an empty USB drive into your PC and hit the "Burn" button. After the process gets completed, you should eject the USB drive.
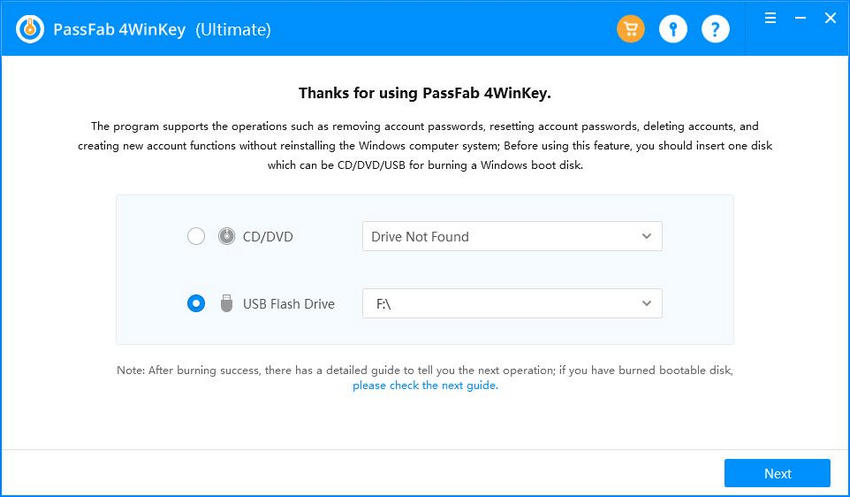
Step 2: Plug the Bootable USB.
Now on your locked PC, insert the bootable USB and prompt a restart. You must use the "Esc/F12" key during the first boot of your PC to get on the "Boot Menu". Then, select the "Removable device" option and set USB drive as the preferred boot media.

Step 3: PassFab 4WinKey boot up.
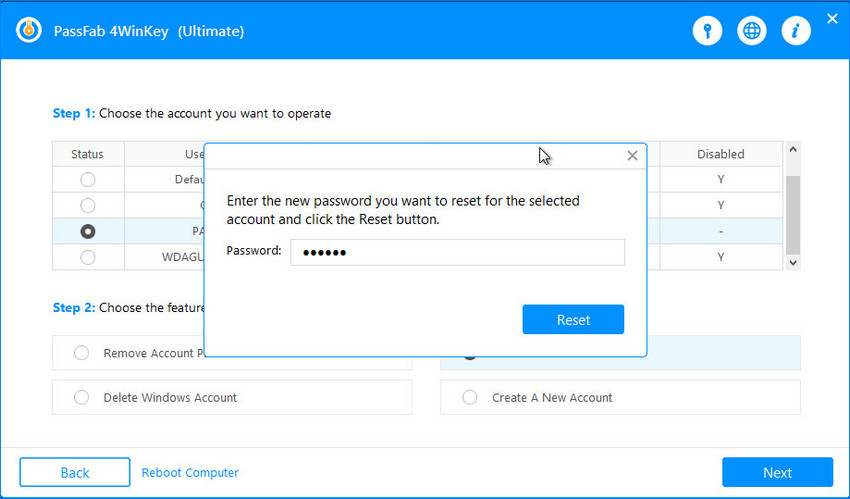
You will now witness PassFab 4WinKey booting up on your PC screen. Just opt for Windows OS installed over your PC. Then, opt for the "Reset your password" option and click on "Next" option.
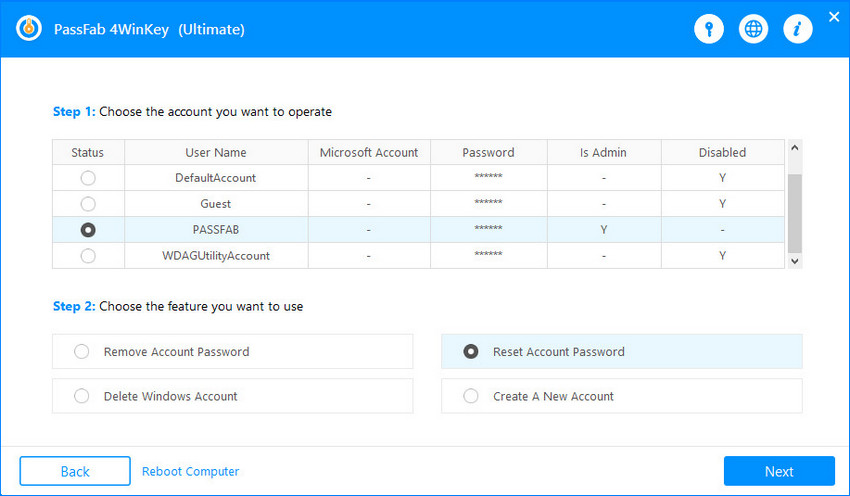
Step 4: Disable Power on Password.
Opt for the preferred Admin/User account whose password needs to be reset. At last, don't key in anything in the "New Password" field below to disable the power on password. Now, hit "Next" and you're done.
Conclusion
In this article, we have now understood most efficient ways on how to disable power on password in HP/Windows 7/8/10 that you can make use of. These fixes are proven methods and certainly helps to get through the power on password issue in a hassle free way.
