To send 500 files, we'll need to attach every one by one; this is where zip file comes to help. Instead of sending 500 files individually, you can compress all of them into a zip file and send it as a single file. The zip file will not just combine all files into a single one but also reduce the file by applying compression algorithms. Now that you have an idea of what is a zip file and how exactly they can help you should learn how to zip a file. Following are methods that will help you generate zip file using Windows, Mac OS, and Linux.
- Method 1: How to ZIP A File on Windows
- Method 2: How to Make Zip with Ribbon Menu in Windows
- Method 3: How to Create A ZIP File on Mac OS
- Method 4: How to Create Zip File in Linux with Terminal
- Method 5: How to Create Zip File in Linux with GUI
- Method 6: How to Create ZIP File Online
Method 1: How to ZIP A File on Windows
There are a lot of ways to zip a folder or a file on Windows OS, easiest among all is using Windows File Explorer.
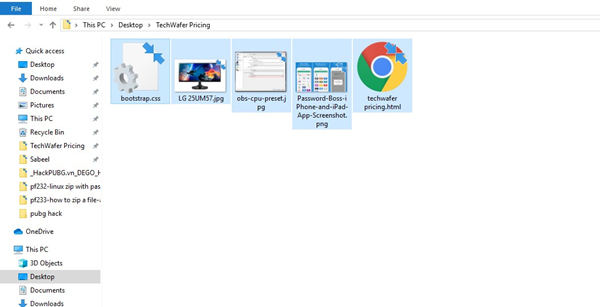
Step 1. Choose the file or folder that you want to add to the zip.

-
Step 2. Now Right-click on the file or folder, select Send To and then select Compressed (zipped) folder.

- Step 3. A new zipped folder with the same name is created in the same location. To rename it, press and hold (or right-click) the folder, select Rename, and then type the new name.
Method 2: How to Make Zip with Ribbon Menu in Windows
Open any folder where you have files or folder and want to make a zip file. It is easier than going for a Right-click method to create a zip file in Windows:
Step 1. Select your file and folder (press Control and use Mouse Click) to choose/select files and folder.

-
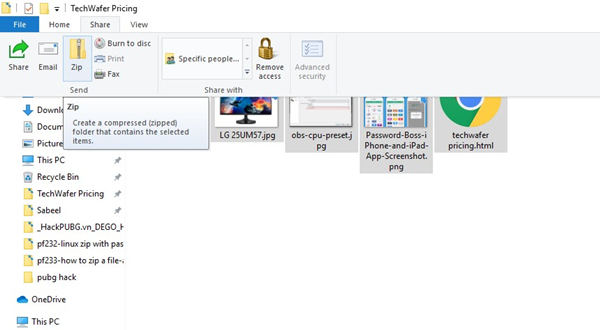
Step 2. Navigate to the Share tab in File Explorer.
Step 3. Now all you have to do is to click the Zip button.

That's it, and you have files/folders added into a zip file.
Note: You can rename the file as per your choice/project.
Method 3: How to Create A ZIP File on Mac OS
You can follow this method to make a zip file of files, folders, or both in Mac OS:
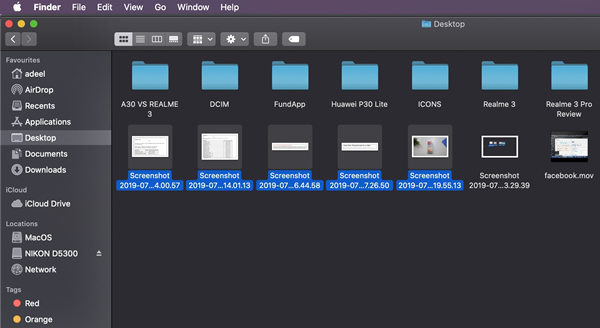
Step 1. Locate the items to zip in the Mac Finder (file system)

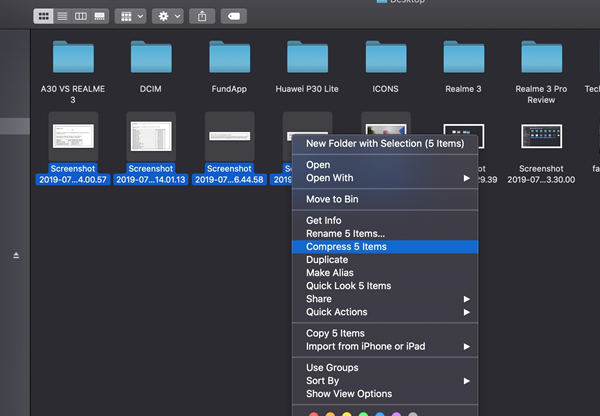
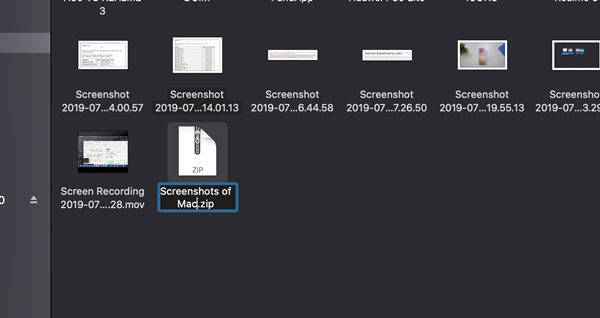
Step 2. Choose files and folders that you want to add in the zip file. Then Right-click on a file, folder, or files you want to zip.
Step 3. Select "Compress Items" from the menu

Step 4. Find the newly created .zip archive and rename it as per your requirements.

Note: This method works in all versions of Mac OS, and you can access the compress item option with a right-click through a mouse, control-click with keyboard, and even with two-finger click on a trackpad from the Macbook.
Method 4: Create Zip File in Linux with Terminal
Linux is mostly about typing commands as commands are mighty and become useful. To make a .zip file from files and folder in Linux most robust method is doing it with the terminal.
zip -r allfiles.zip All_Files
The -r flag enables recursive reading of files directory structure. The -r flag helps you allow the recursive reading of files and directories. That means if there is any folder or file inside that folder you are going to zip; recursion process will not just zip the folder but also the insider folders.
Method 5: Create Zip File in Linux with GUI
Compressing a file or folder in Linux is quite similar to as doing it in Mac OS. Zipping files compresses them so, and compressed files take less space on your hard drive, and the ZIP files can be shared with others or transferred to other computers easily. So if you are really into making a compressed zip file with Linux GUI here is how you can do it.
- 1. Select all files and folders you want to turn into a .zip file.
- 2. Now Right-Click of "Selected files and folder" and choose "Compress".
- 3. Now you can name whatever you want to the newly created .zip file.
Method 6: Create ZIP File Online
Making a zip file online is another thing to go for if you want to have access to computer software. Here are few steps that's help you create zip online:
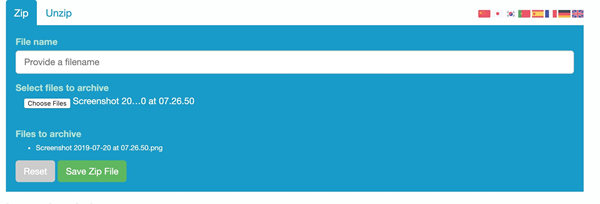
- 1. Open ezyzip.com
2. Choose files you want to add in zip and press "Zip Files" button.

3. After files are uploaded and processed into zip; click on "Save Zip File" button to save zip file.

That's it and you are done creating a zip file online.
Extra Tips: How to Unlock Password Protected ZIP
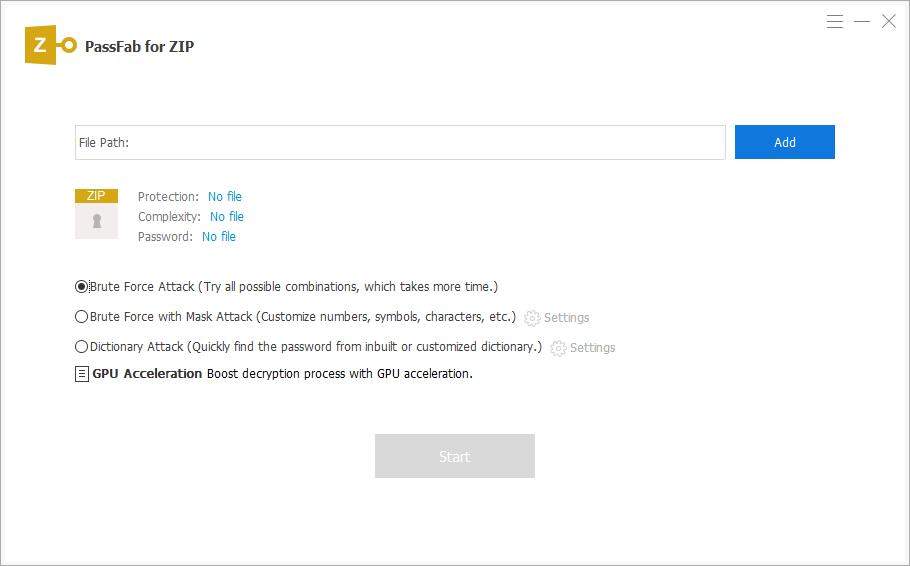
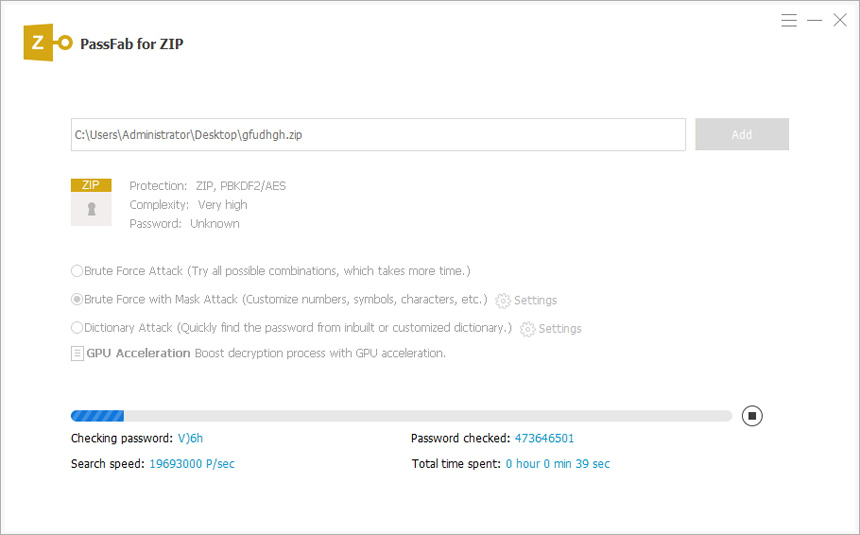
Well here comes the question of unlocking, if you somehow forget the password that protected your zip file from unzipping, and it has crucial data inside. Don't worry too much because PassFab for ZIP is a tool that'll come handy unlocking password-protected zip files because it performs:
- Brute-force Attack
- Brute-force with Mask Attack
- Dictionary Attack
To decrypt your zip file password by using PassFab for ZIP, you need to follow these simple steps.
Step 1: Download and run the software on your computer. You can download this fantastic password recovery software for zip folder from the button below.

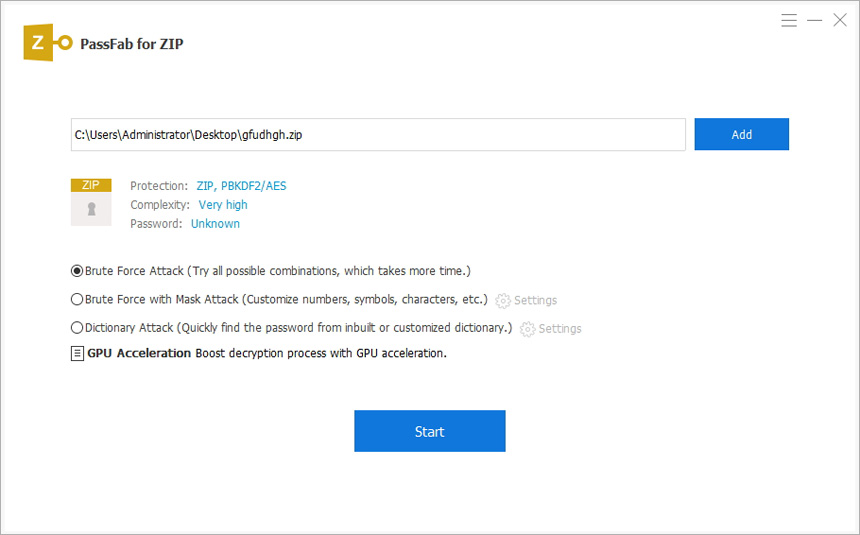
Step 2: Import the password encrypted zip file that you want to decrypt using the software.

- Step 3: Select the type of attack through which you want to decrypt your zip file.
-
Step 4: Press the "Start" button, and the software will start doing its work.

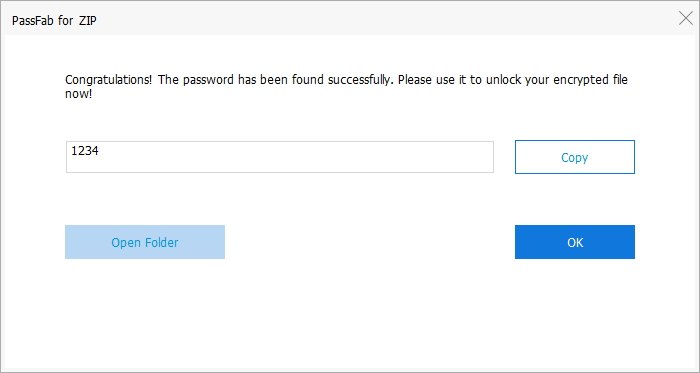
Step 5: After a few moments, depending on your password's length and complexity; it will be displayed.

- Step 6: That's it, now use your password, to unlock your password-protected zip file.
Summary
In this article I covered everything about making a zip file using Windows, Linux, and also Mac OS. This article also helps you unlock a password protected file with the best zip password recovery software; which helps in just three easy steps. First of all it teaches how you can create a zip file with Windows, if you don't have a Windows PC don't worry later I've added procedure to make zip through Linux OS and also with Mac OS.
