Now, there are quite a few reasons behind a sluggish smartphone in general. For instance, it may be because of low storage, a glitch, or some kind of malware. Whatever the case is, a factory reset can resolve pretty much all your issues. Other than this, you may need to factory reset your Google Pixel in case you are selling your phone or simply giving it to someone. This way, you can be sure that the phone doesn’t have your personal data. In this article, we are going to guide you on how to factory reset your Google Pixel 2, 3, and even the latest model. So, without further ado, let’s dive into it.
- Part 1. How to Back Up Pixel Data Before Factory Reset
- Part 2. How to Factory Reset Google Pixel Using Settings App
- Part 3. How to Hard Reset Google Pixel Using Recovery Mode
- Part 4. How to Restore Pixel Data After Factory Reset
- Bonus Tip: How to Unlock Google Pixel Lock Screen Password
Part 1. How to Back Up Pixel Data Before Factory Reset
As the name suggests, the factory reset takes back your phone to the initial factory settings. This means, performing a factory reset on your Google Pixel will remove all its data. As we know, we are living in a digital age. This means data is one of the most precious elements in today's world. Most importantly, nobody likes to lose his/her data, right? Therefore, it's important to back up all the data on your Google Pixel before opting for a factory reset.
As Pixel is a smartphone by Google, it allows us to back up all our data on Google Drive automatically. All you need to do is turn on the backup feature, and you are good to go. Having said that, let’s see how to back up your data before performing a factory reset on Google Pixel 2 and 3.
- First of all, tap on the settings icon to get into the settings of your Pixel phone.
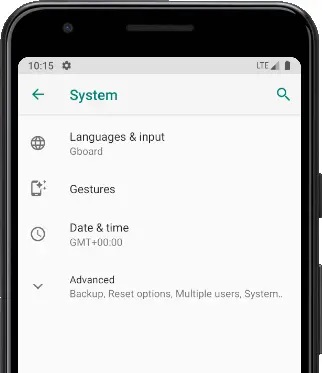
- Next, tap on the “System” option and navigate to the “Advanced” option.
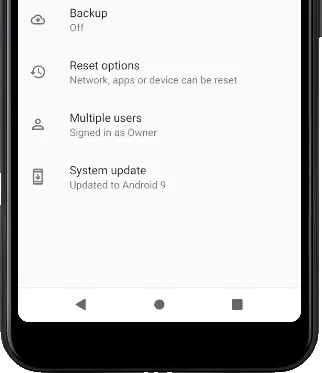
- There, you will see the “Backup” option. Simply tap on this option.
- Finally, you will see the “Backup Service” option. Make sure it’s turned on for auto backup.
- You will also see a “Back Up Now” button. You can tap this button in case you want to initiate the backup process manually.
Part 2. How to Factory Reset Google Pixel Using Settings App
Google launched its first smartphone in the Pixel series back in 2016. Since then, this smartphone series has come a long way and becoming popular with every passing day. Google Pixel comes with stock android and features one of the best if not the best camera. However, even with all its qualities, there are times when your phone gets sluggish and leave you annoyed with the delayed response. On paper, it seems like a difficult problem. However, a simple factory reset can resolve the lagging issue in your Google Pixel phone.
Now that you have backed up your data, it’s time to reset your Google Pixel to factory settings. You do this by using the built-in function in your settings. So, let’s see how to factory reset a Google Pixel 2, 3, or any other version using Setting App.
- First of all, click on the "Settings" icon to head into the settings of your Google Pixel.
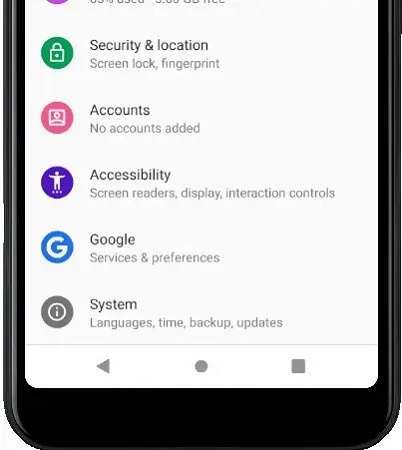
- Once you are in the settings menu, scroll down to the bottom until you see the "System" option. Now, tap on the "System" option.

- You will see multiple options on the next screen. Here, select the “Advanced” option.

- Then, tap on the "Reset options" from all the options on the next screen.

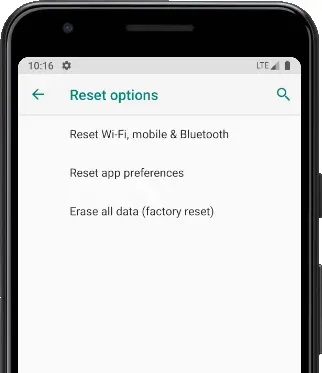
- Once you are in the reset menu, you will be presented with different reset options. Here, you need to select the "Erase all data (factory reset)" option.

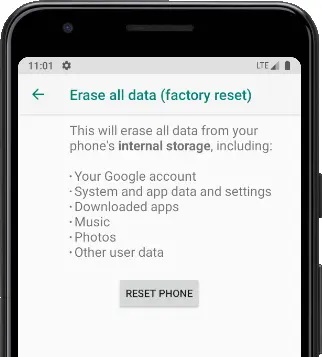
- Finally, you will see a message highlighting that all your data will be lost if you choose the factory reset option on your Google Pixel. Simply click on the “RESET PHONE” button to proceed further.

-
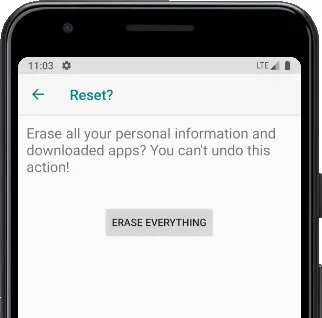
Now, you will see a confirmation message on the screen to confirm if you really want to reset your Google Pixel to factory settings. Here, click on the “ERASE EVERYTHING” button to finalize the process.

That's it! Now, your phone will restart and will be restored to the factory settings.
Note: If you have set a password, your phone will ask you to enter your password for authentication.
Part 3. How to Hard Reset Google Pixel Using Recovery Mode
I hope all your problems have been sorted out after performing a factory reset on your Google Pixel using the Settings App. However, if the problem still persists. You can perform a hard factory reset on your Google Pixel. Hard reset can usually fix the problems that normal reset couldn’t. So, let’s have a look at the step-by-step instructions on how to perform a hard factory reset on your Google Pixel 2, 3, or any other model.
- First of all, turn off your phone.
- Once your phone is off, press and hold the volume down button and power button simultaneously until you see the Google logo.
- Now, you will be presented with a menu offering different options. You can browse through these options using the volume up and down buttons. Simply navigate to the "Recovery Mode" option using the volume keys, and once you are on it, press the power button.
- On the next screen, navigate to the "wipe cache partition" option in the same way and press the power button to activate the "wipe cache partition" menu.
- Moments after, the phone will redirect you to the previous screen. Now, once again, use the volume keys option to navigate to the "wipe data / factory reset" and select it using the power button.

- Then, select the "Yes--delete all user data" option on the next screen in the same manner.
- Finally, select the “reboot system now” option. Using this option will restart your Google Pixel, and while restarting, it will reset your phone to the factory settings.

Part 4. How to Restore Pixel Data After Factory Reset
Now that you have reset your Google Pixel to the factory settings, all your data on the phone will be lost. So, if you have backed up your data just like we suggested in the first part, it’s time to restore it. So, let’s see how to restore data on Google Pixel 2, 3, or any other model after a factory reset.
- Once your phone turns on after the resetting process is complete, you will see a welcome screen to set up your phone.
- Now, you need to connect to a stable internet connection using mobile data or WiFi.
- After connecting to the internet, you will see the “Copy apps & data” option. Here, you need to tap on the “Next” button.
- Then, select the “Can't use old phone” option.
- Next, tap OK under the "Copy another way" option to begin the restoring process.
- Now, simply sign in to the Google Account that you used previously on this device or the one that has your data backup.
- Finally, follow some simple on-screen instructions until your data is restored. That’s it!
Bonus Tip: How to Unlock Google Pixel Lock Screen Password
From performing a factory reset on your Google Pixel to restoring data, each step requires your password for authentication. But what if you don’t remember your password? Don’t worry, we have a perfect solution for this as well. All you have to do is use an efficient tool named PassFab Android Unlocker. It's an amazing tool that effectively removes your screen lock, including password, PIN, pattern, fingerprint, etc. It's easy to use, fast, and reliable. So, let's have a look at the step-by-step instructions on how to unlock the Google Pixel lock screen using PassFab Android Unlocker.
- First of all, download and install PassFab Android Unlocker on your PC.
- After successful installation, run the program using administrator privileges.
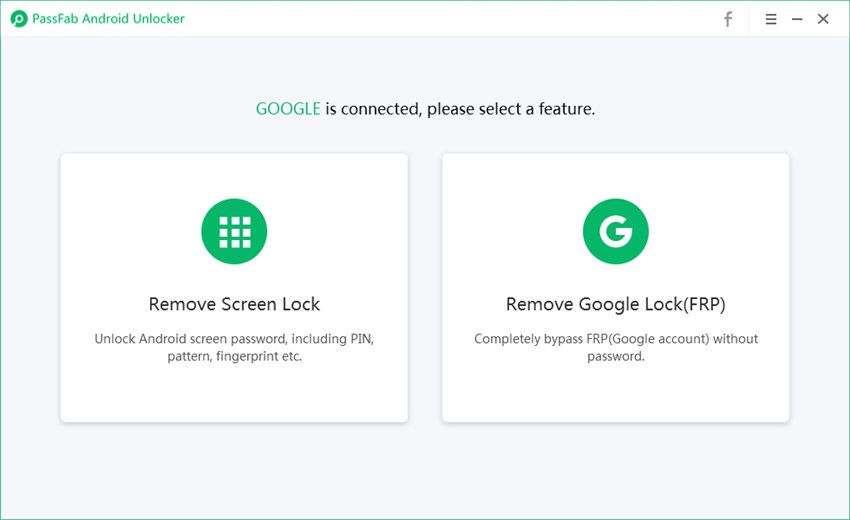
- Once you are on the main interface, select the "Remove Screen Lock" option and connect your Google Pixel to the PC using a USB cable.

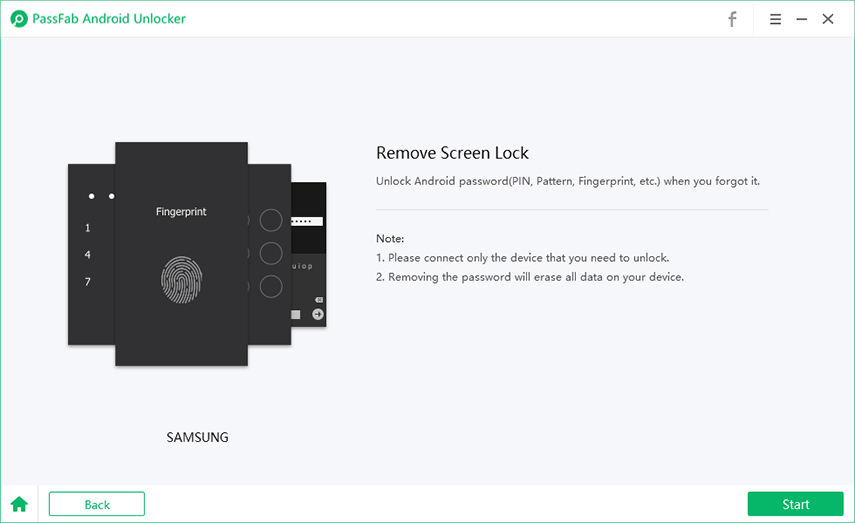
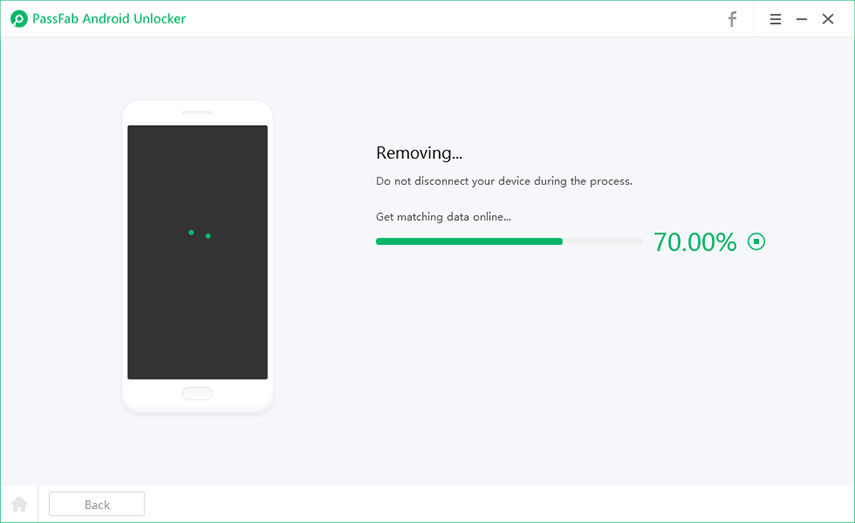
- On the next screen, simply press the “Start” button at the bottom right corner to initiate the lock removal process.

- Now, the program will give you a confirmation message that the lock removal process will erase all your data on your phone. Simply click on the "Yes" button and wait for some time.

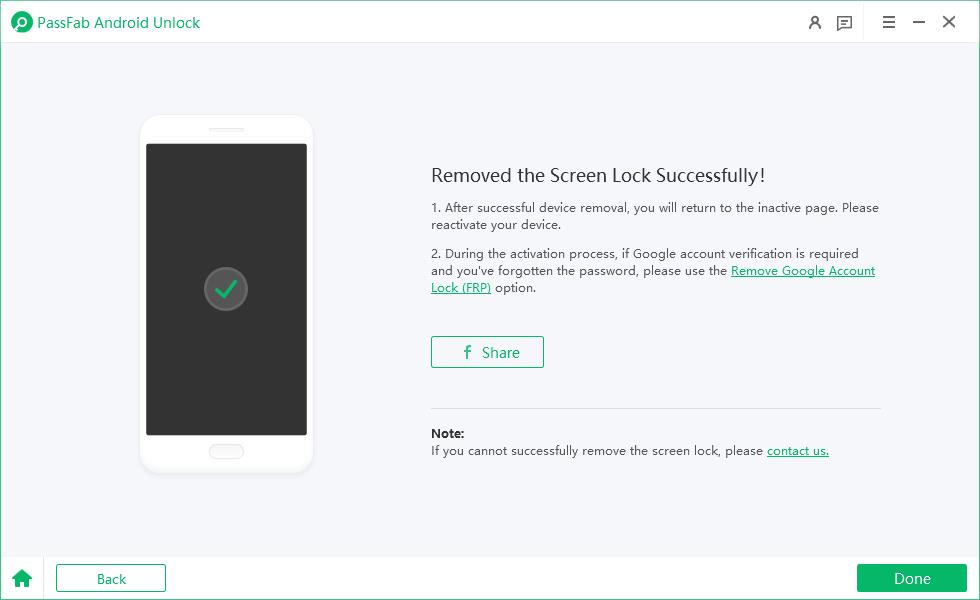
- After some time, you will get a confirmation message that your screen password has been removed successfully.

Final Thoughts
That's pretty much it, guys. To sum it all up, this article covers a comprehensive guide on how to perform a simple factory reset and hard reset on Google Pixel 2, 3, or any other model. We also disused how to back up and restore data on Google Pixel before performing a factory reset so that you don’t lose your precious data. Lastly, we covered an excellent Android lock screen removal tool to remove your lock screen password on Google Pixel in case you forget it. We hope this article helped you. Let us know if you have any further questions. We will try our best to answer your queries as soon as possible.
