“SedLauncher is using a high disk rate… can it be ended?”
Just after installing the Windows 10 update KB4023057, you will find a program; sedlauncher.exe. This program occupies too much disk space, which makes your system perform slow. But if you go inside the folder, you will also find several strange programs like rpmpl.exe, sedsvc.exe, and more.
So, the Windows 10 SedLauncher high disk error is disappointing, and more importantly, it makes your computer slow by consuming too much space. So, disabling it is the best possible way to proceed.
Part 1. Sedlauncher.exe Overview
We often see ‘sedSvc.exe’ and ‘SedLauncher.exe’ in the Task Manager. These are visible when we are updating the Windows. But most of the users have no idea what they are.
They can be found under the ‘Rempl’ folder. The service and the launcher of the SedLauncher are related to Windows Remediation Service. This particular service is responsible for the installation of Windows 10 updates.
But they are often accompanied by certain security patches and additional features. If you want these security patches and additional features, then everything is okay as it is. But if you don’t want the security patches and the added features, then you can disable SedLauncher.
Part 2.How to Fix High Disk Usage by SedLauncher
Here’s a list of a few ways to reduce SedLauncher high CPU usage. Check out the steps carefully.
- Fix 1. Stop the Sedlauncher in Task Manager
- Fix 2. Uninstall Sedlauncher in Windows Settings
- Fix 3. Disable the Sedlauncher from the Windows Services Management
- Fix 4. Block Sedlauncher with Antivirus Program
- Fix5. Delete the Windows Task Scheduler
Fix 1. Stop the Sedlauncher in Task Manager
In this first fix, we will be using SedLauncher disk usage via Task Manager. You can check out the steps below.
Step 1: Run Task Manager.
Step 2: Once, Task Manager panel is opened, you need to scroll down and locate the ‘Windows Remediation Service’.
Step 3: Right-click on the option and select ‘End Task’.
As you have disabled, Windows Remediation Service, the performance of your system should increase. As Windows Remediation Service includes SedLauncher.exe, Rempl.exe, Sedsvc.exe, and WaaSMedic.exe, and they have stopped functioning.
Fix 2. Uninstall Sedlauncher in Windows Settings
You can also uninstall SedLauncher from Windows 10 settings to fix SedLauncher high disk usage. Let’s check out the steps.
Step 1: Go to ‘Apps & Features’ from ‘Start’.
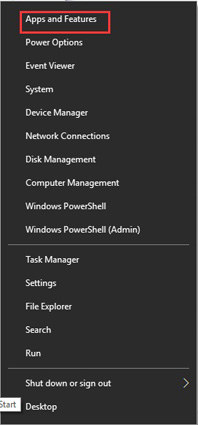
Step 2: In the Settings window, locate ‘Windows Setup Remediation’ or the ‘Update for Windows 10’ option.
Step 3: Make a right-click on this program and choose ‘Uninstall’.
This is an easy way to make SedLauncher from functioning.
Fix 3. Disable the Sedlauncher from the Windows Services Management
You can also disable SedLauncher from Windows Services Management directly, to fix Sedlauncher high disk.
Step 1: Launch ‘Run’ and type ‘service.msc’ and execute.
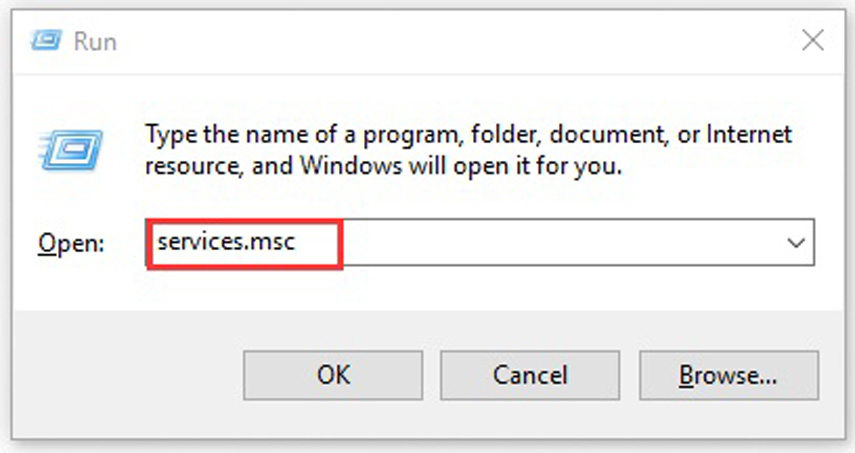
Step 2: A pop-up window will appear, locate the ‘Windows Mediation Service’ there.
Step 3: Make a right-click on it, choose ‘Properties’.
Step 4: Then, choose the Startup type and click ‘Disable’ in the drop menu.
If this seems too complicated for you, then you can check the next method.
Fix 4. Block Sedlauncher with Antivirus Program
The SedLauncher has a very important role when installing Windows update KB4023057 but after the installation, it has no work. It stays idle and consumes space.
So, it is best to disable and stop it from consuming too much CPU. We have already spoken of several methods of disabling or removal of this program but this one is different.
You can actually, use your anti-virus or the Windows firewall to stop SedLauncher.exe.
Fix5. Delete the Windows Task Scheduler
Last but not least, we recommend deleting Windows Task Scheduler. The download and the installation done by the SedLauncher is scheduled by Task Scheduler. So, if the scheduler is gone, there would be no problems.
Step 1: Open ‘Run’ prompt and type ‘taskschd.msc’ and execute.
Step 2: The Task Scheduler window will open, enter the ‘Task Scheduler Library’.
Step 3: Then, go to ‘Microsoft’ and then navigate to ‘Rempl’ via ‘Windows’.
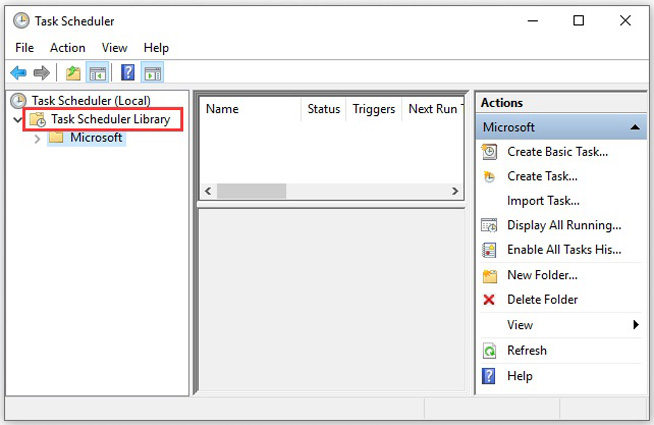
Step 4: Make a right-click on ‘Rempl’ and choose ‘Shell’.
Lastly, press the ‘Delete’ key and click on ‘yes’ to confirm your action.
Read Also: Everything You Need to Know about sedlauncher.exe
FAQs About Sedlauncher
Here are answers to some frequently asked questions regarding SedLauncher.
Q1. Can I end Sedlauncher?
Yes, you can end SedLauncher using the Windows Task Manager.
Q2. How do I stop Sedlauncher?
We have detailed multiple ways of stopping sedlauncher.exe in the article. If you want to stop it, then select sedlauncher.exe on the Task Manager Panel and click on the ‘End Task’ button below.
Q3. How do I fix high disk usage?
You can End it using Task Manager, or you can disable it. We have detailed a few ways in the above article.
Q4. What is Sedsvc in Task Manager?
It is a program that is used to install a specific Windows 10 update. Update KB4023057. It installs additional features and security measures that consumes CPU and makes your system slow.
Final Words
Hence, if you think SedLauncher is completely unnecessary for your needs, then simply disable it. Or stop it from the Task Manager. The launcher simply installs additional features which are not appreciated by most of the users.
Additional Tips: How to Reset Windows Password
This is an additional tip for the users who have forgotten the password for their Windows account.
This sounds like an impossible feat. But it happens a lot. Unfortunately, Windows OS has very high-security measures, and it is close to impossible to login without the password.
But Windows has a few measures for this situation, but most users find them too complicated. So, we will introduce a better option.
Use a professional password reset program called PassFab 4WinKey. It is easy to operate, and the use is very simple. So, let’s reset the Windows password without data loss in 3 simple steps.
Step 1: After installing 4WinKey on a different computer create a bootable disk with it. Elect the USB option and burn it.
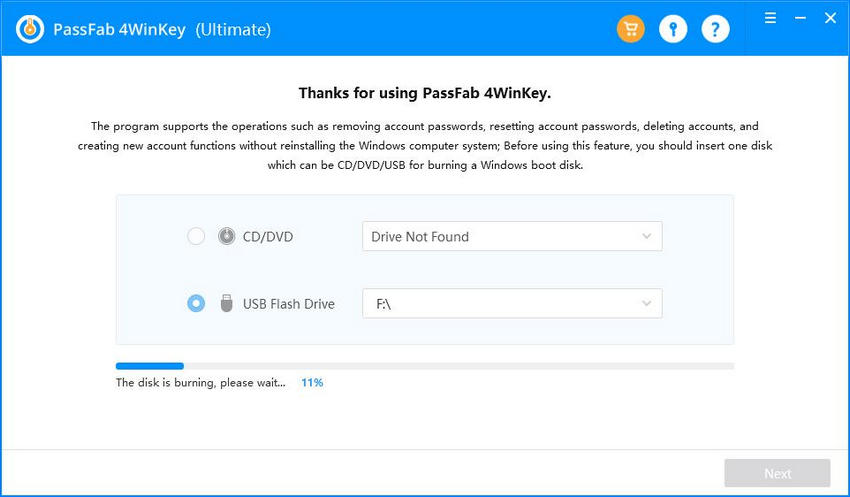
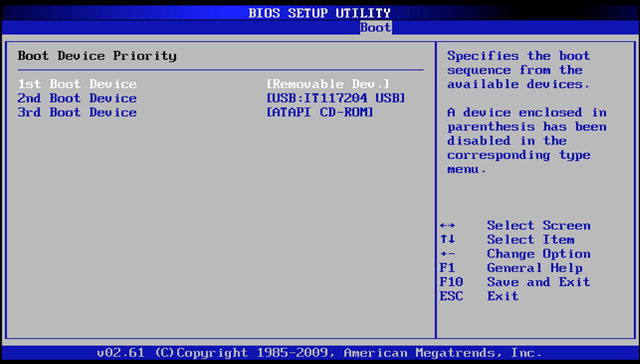
Step 2: Use the created bootable USB and connect it to the locked computer. Make sure that you boot the computer from the said USB. The program interface will load.
Step 3: On the program interface, select the “Reset Account Password’ option, and proceed.
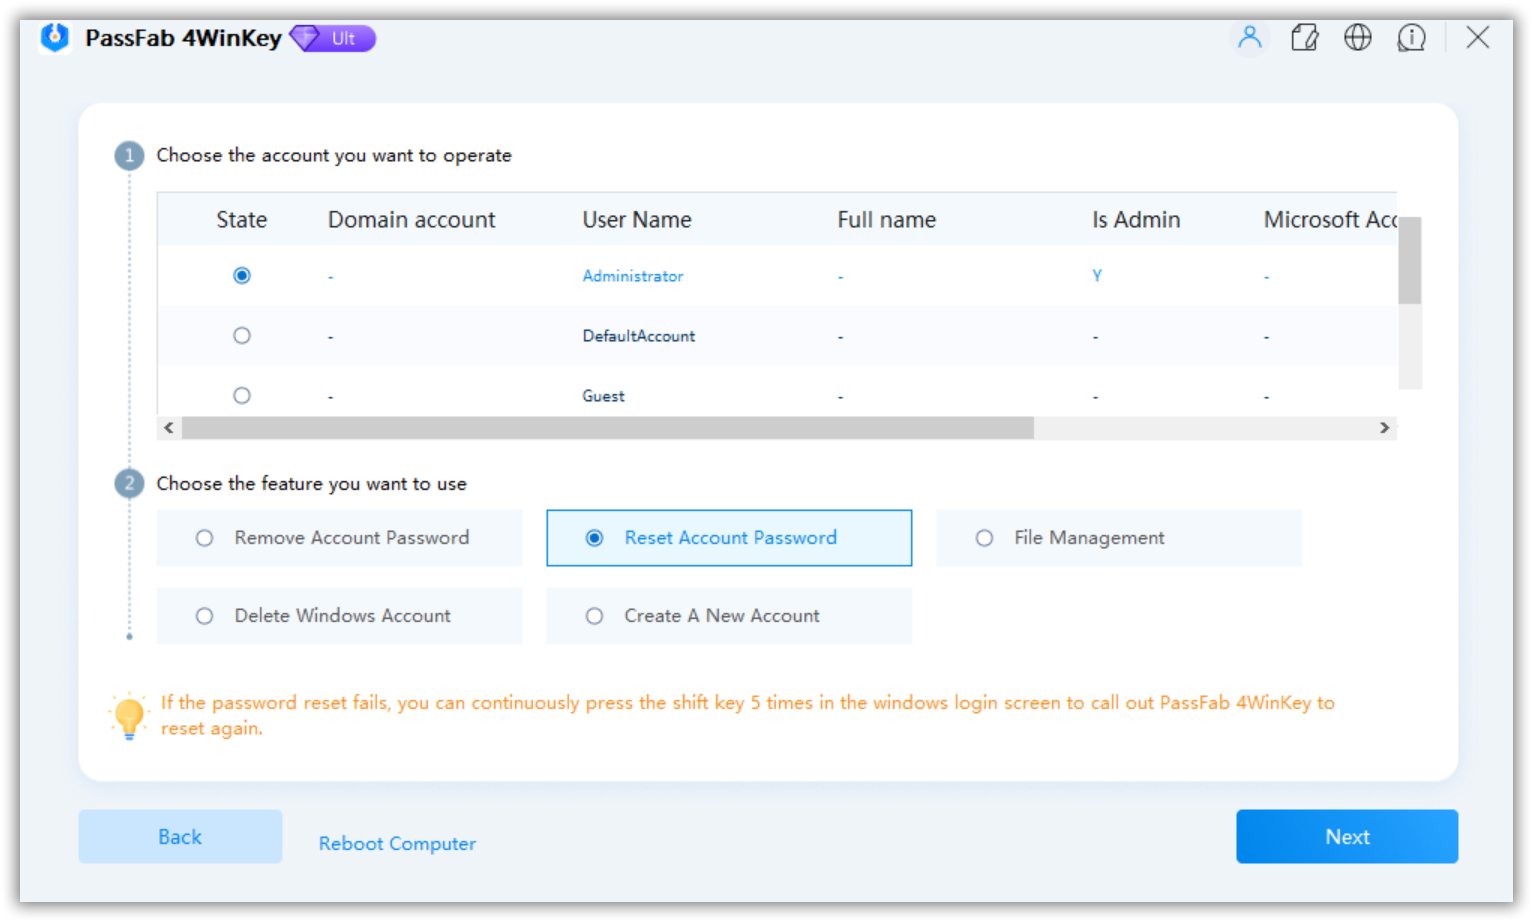
A few minutes later, you will be notified that your Windows user account has been reset. Click “Reboot’ to restart your computer.
