Stuck on blue screen while upgrading system? Desire to create a bootable disk or reinstall Windows operating system? PassFab for ISO will help you solve these problems. It offers one-step downloading ISO file, and helps create bootable disk and mount iso image file in one click.
Part 1: Select Function
At present, Passfab for ISO has two large functional modules: burning and reading.
Burning: You can download the system image files of various versions of windows series for free, and quickly create a bootable disk through USB flash drive or CD / DVD to help you install the system.
Reading: You can quickly mount ISO image file with one click and read the file.
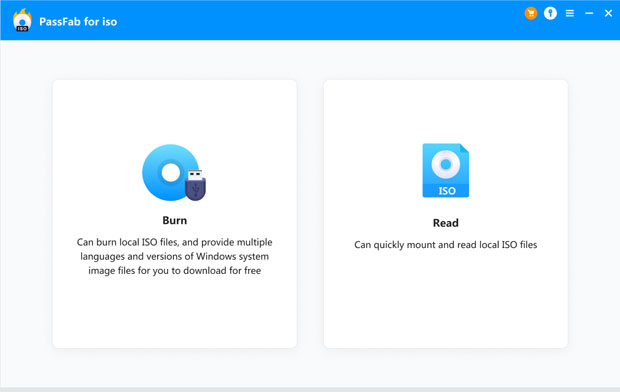
Part 2: Burning Function
You can create a bootable disk by importing the local system image file or downloading the system image file provided by us in the burn function interface. Here is a detailed guide for the burning function using PassFab for ISO.
-
Download or Import ISO File
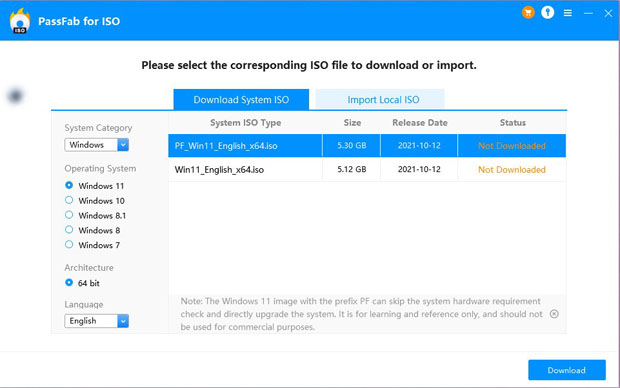
Select the file you need to burn to import. After importing, you can enter the burning interface. Or, you can also complete the burning by downloading the image file provided by us.


Tips:
Multiple system images are generated by one file, that is, one image file contains multiple system images.
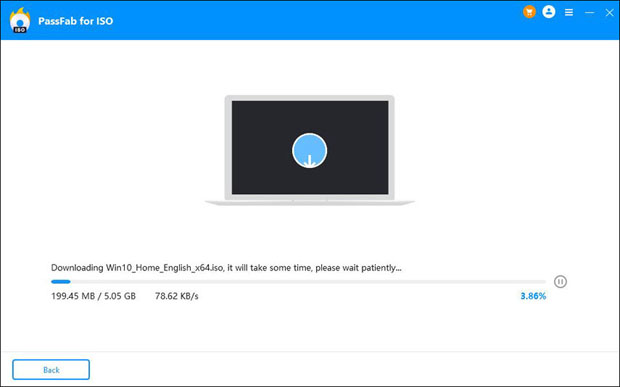
It will take a while for downloading the ISO file. Please wait.

-
Choose USB/CD/DVD
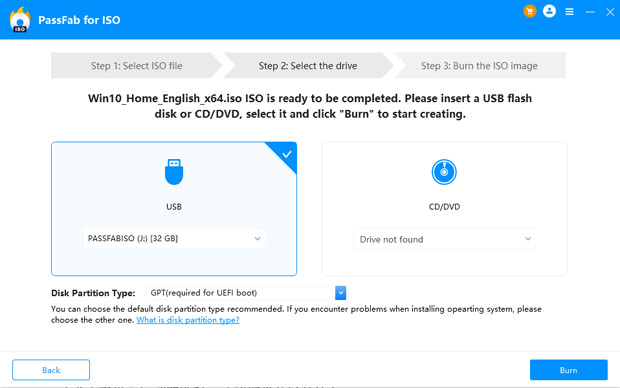
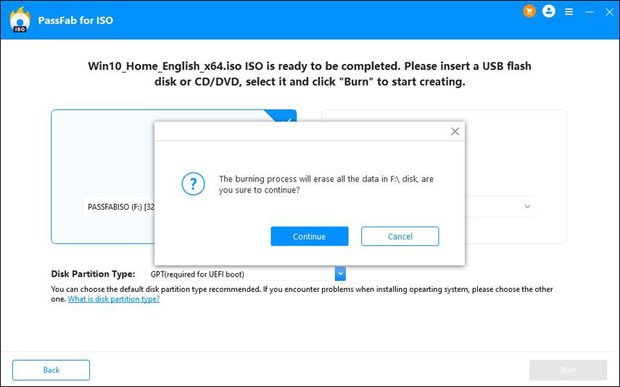
Insert your USB flash drive or CD/DVD and select it. Here we choose USB as an example. Then, in Disk Partition type options, select one. And click the Burn button.

Tips:
If you don’t know your disk partition type, you can choose the default disk partition type recommended. Or click the link at the bottom of the interface to know what disk partition is.
It will pop up a window to remind you that all data in your USB will be erased, click Yes to confirm.

-
Burn ISO File to the Disk.
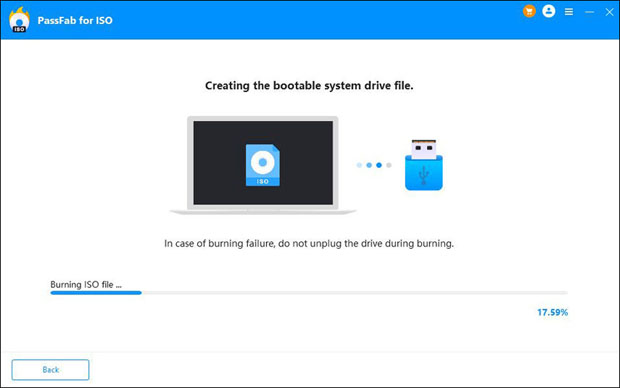
It will spend some time to burn ISO file, please wait.

Now, you have created a bootable disk successfully!
-
Reinstall Windows System.
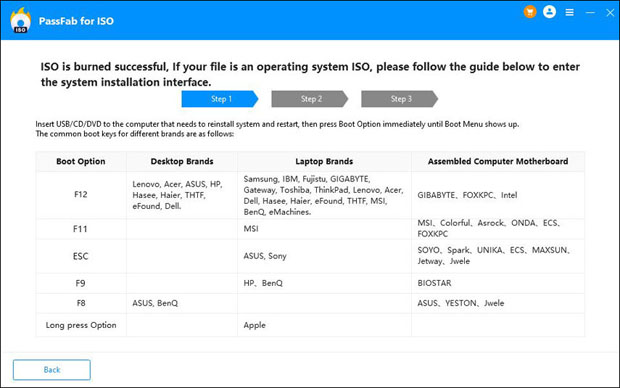
Insert the USB to the computer that needs to reinstall Windows operating system. Restart the computer and press Boot Option to show up Boot menu.
The keys to enter Boot menu are different for various brands. Here are some common boot keys:

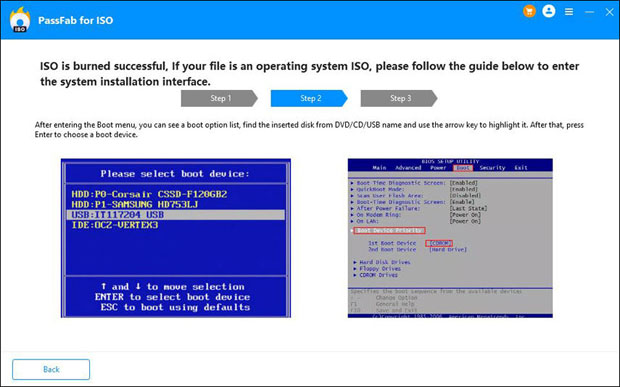
Follow the guide on the interface to choose a boot device.

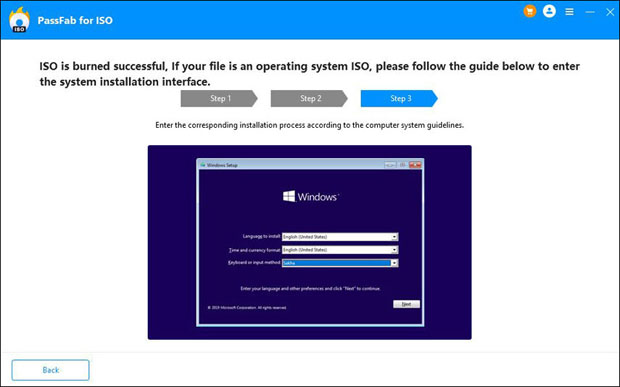
Enter the system installation process and follow the system guide to install.

Part 3: Mount and Read Function
The system image file can be mounted quickly through the read function. The following is a detailed operation guide for the read function.
-
Mount ISO Image Files.
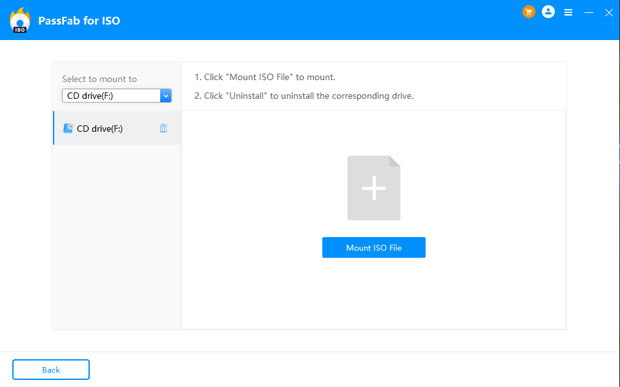
When it is detected that there is no virtual disk in the device, it will create one for you by default. Click the mount button to mount the selected ISO image file.

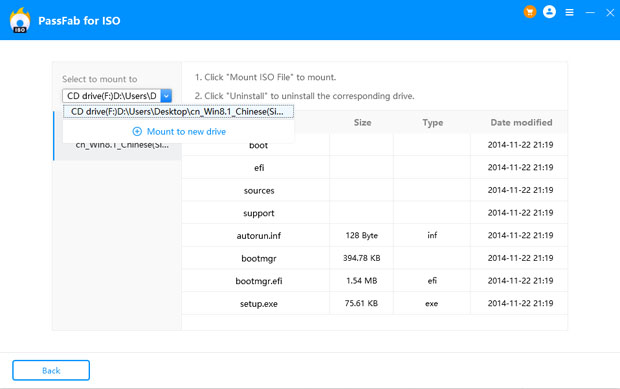
When there are multiple virtual disks in the device, you can click the option at the top left of the interface to mount to an existing virtual disk or to a new disk, and then click to select a file to mount.

-
View ISO Image Files.
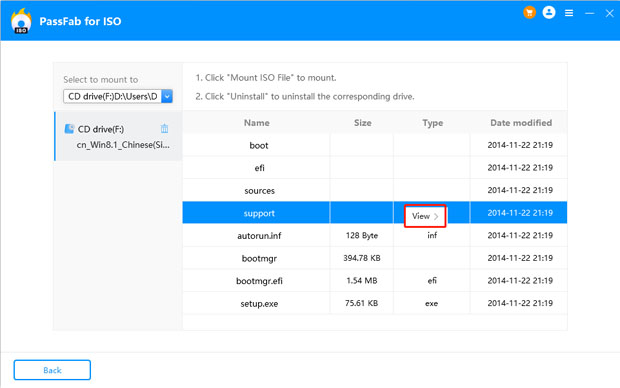
Enter the virtual disk to view after successful mounting, or right-click the pop-up option to enter the virtual disk to view the file.

-
Uninstall ISO Image Files
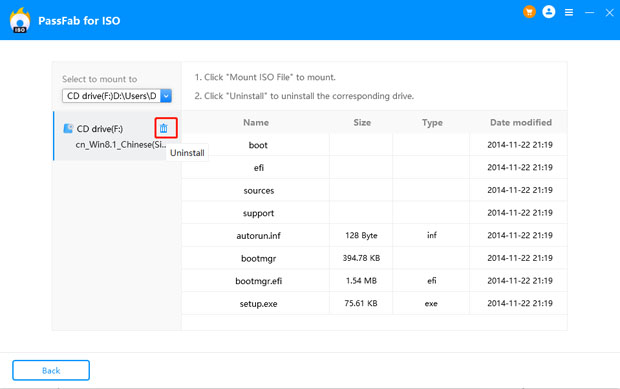
Select the corresponding virtual disk and uninstall the virtual disk.

Tips:
The last virtual disk does not support uninstalling the disk, only uninstall the files.
