It is an unpleasant experience if your iPhone displays the message “iTunes Could Not Connect To This iPhone. You Do Not Have Permission.” It is a common issue that arises when you try to sync iTunes with your iPhone.
There are multiple reasons behind this issue. You can get this message when restoring a backup from iTunes to set up a new iPhone, a damaged cable, or an outdated version of iTunes. Let’s have a look at the solutions below to fix an “iTunes Could Not Connect To The Device” issue.
Part 1. Troubleshoot: Why does iTune Keep Saying iTunes could not Connect to this iPhone. You do not have Permission?
Part 2.[Solved] How to Fix iTunes could not Connect to this iPhone. You do not have Permission Error
- Way 1: Examine USB Ports And Cables
- Way 2: Reboot Your iPhone
- Way 3: Recharge Your iPhone And Unlock It Again
- Way 4: Trust The Computer
- Way 5: Ensure The Stability Of Wi-Fi Or Network
- Way 6: Update Your iOS To The Latest Version
- Way 7: Upgrade The iTunes App To The Latest Version
- Way 8: Disable Your iPhone’s Restrictions
- Way 9: Upgrade The Drivers Of Apple’s USB Cable
- Way 10: Restart Your System
Part 3.Extra Tip: iTunes Could not Connect to this iPad/iPhone because it is Locked with a Passcode?
Part 4.Other Errors Concerned with iTunes cannot Connect to this iPhone
Part 1. Troubleshoot: Why does iTune Keep Saying iTunes could not Connect to this iPhone. You do not have Permission?
There are several reasons why iTunes keep saying iTunes could not connect to this iPhone. You do not have permission. Let’s have a look at the list of reasons behind this issue.
- iTunes Version Is Outdated
- Broken Apple USB Cable
- iPhone’s Low Battery
- Bad Internet Connection
- iPhone Access Restrictions
An outdated version of iTunes is one reason you see this issue. Also, some minor bugs in the software can raise this issue.
You will face a connectivity issue between your iPhone and computer if you use a damaged Apple cable. This also results in iTunes failing to connect to your iPhone.
iPhone's low battery is another reason for the above-mentioned issue. It is because a low battery makes some features unavailable and slows down the performance of your device.
Connection to iTunes is unsuccessful if your iPhone is connected to an unstable or poor network.
Your iPhone cannot connect to iTunes if you have turned on its parental controls.
Part 2. [Solved] How to Fix iTunes could not Connect to this iPhone. You do not have Permission Error
Here are some of the fixes you can implement to solve the "iTunes Could Not Connect To This iPhone. You Do Not Have Permission" error. Let’s have a look at them briefly.
Way 1: Examine USB Ports And Cables
USB cables and ports might be the reason behind this issue. For this reason, you must check the USB ports and cables to have a stable connection between your iPhone and iTunes. If the cable you are using to connect your iPhone to iTunes is damaged, it will not connect your iPhone to iTunes.
Similarly, the ports can also be at fault and are responsible for the connection failure between your iPhone and iTunes. You should clean the ports on your iPhone and computer and then try reconnecting them. Also, try using the new cable on a different computer. You will get to know if the cable is damaged or the ports are.
Way 2: Reboot Your iPhone
Restart your iPhone if you are still facing connectivity issues. Restarting is the most simple way to solve any issue. It is also capable of fixing several issues in software as well.
Way 3: Recharge Your iPhone And Unlock It Again
The charging factor is also important behind the “iTunes Could Not Connect To This iPhone You Do Not Have Permission” issue. iPhone won’t connect to iTunes if it doesn’t have a battery capacity of 50% at least. For this reason, charge your iPhone to at least 50% and unlock it again to try connecting it to iTunes.
Way 4: Trust The Computer
You should connect your iPhone properly to the computer. It will enable you to sync your iPhone to iTunes successfully. Plugging your iPhone cable into the computer will pop up a message “Trust This Computer” on your iPhone. Choose “Trust.”
Doing this will fix the connectivity issue between your iPhone and iTunes if it was due to an improper connection.
Way 5: Ensure The Stability Of Wi-Fi Or Network
You will also face trouble syncing your iPhone with iTunes if your network connection is weak or unstable. You must ensure that your iPhone is connected to a stable network to connect to iTunes successfully.
Way 6: Update Your iOS To The Latest Version
An outdated version of iOS is also a reason behind “iTunes Could Not Connect To This iPhone An Unknown Error Occurred.” issue. Try updating your iOS to the latest version to fix this error. Follow the steps to do so:
Follow the steps to do so:
Step 1: Go to iTunes App > Help > Check For Updates.
Step 2: If available, Download and Install it.
Step 3: If yes, Download and Install it.
Way 7: Upgrade The iTunes App To The Latest Version
An outdated version of the iTunes app on your computer is also the reason behind “Itunes Cannot Connect To This iPhone You Do Not Have Permission.” Upgrade your app to the latest version and then try reconnecting your iPhone to it.Take a look at the steps to do so:
Step 1: Go to iTunes App -> Help -> Check For Updates.
Step 2: If available, Download and Install it.
Way 8: Disable Your iPhone’s Restrictions
You must disable the Content and Privacy Restrictions from your iPhone’s settings. It is because there are default restrictions on your iPhone, which results in the connectivity failure of iTunes with your iPhone. Take a look at the steps to do so:
Step 1: Go to Settings>Screen Time > Content & Privacy Restrictions.
Step 2: Choose Disable.
Way 9: Upgrade The Drivers Of Apple’s USB Cable
Upgrading your Apple’s USB cable is another way of fixing “iTunes Cannot Connect To This iPhone. Could Not Send a Message To The Device.” It is a complicated solution but effective. Take a look at the steps to do so:
Step 1: Connect your iPhone to your computer.
Step 2: Go to Device Manager on your computer.
Step 3: Select Portable Devices -> Apple iPhone.
Step 4: Right-click on Apple iPhone and choose Update Driver.
Step 5: Select 'Search Automatically for Updated Driver Software.
Way 10: Restart Your System
Restarting your computer is the last way to fix this issue if no other method works. It might fix the iTunes sync issue.
Part 3. Extra Tip: iTunes Could not Connect to this iPad/iPhone because it is Locked with a Passcode?
You might fail to fix the “ iTunes Could Not Connect To This iPhone You Do Not Have Permission” issue when your iPhone screen was locked. But don't worry, PassFab iPhone Unlocker can help you trounleshoot this problem quickly. Let's take a look at what PassFab iPhone Unlock can do for you first.

PassFab iPhone Unlocker
- Instantly unlock all screen lock with 3 steps
- Delete Apple ID without password
- Bypass screen time/MDM lock without Data Loss
- High-Quality Tech Support
PassFab iPhone Unlocker has Recommended by many medias, like macworld, makeuseof, appleinsider, etc.


How fix the “iTunes could not Connect to this iPad/iPhone because it is Locked with a Passcode” error using PassFab iPhone Unlock?
-
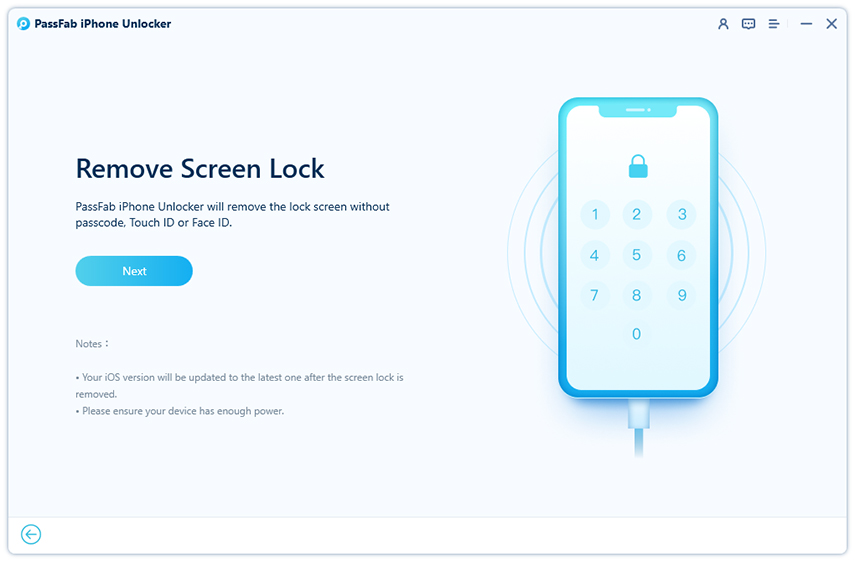
Launch PassFab iPhone Unlock and click"start" to remove screen lock

-
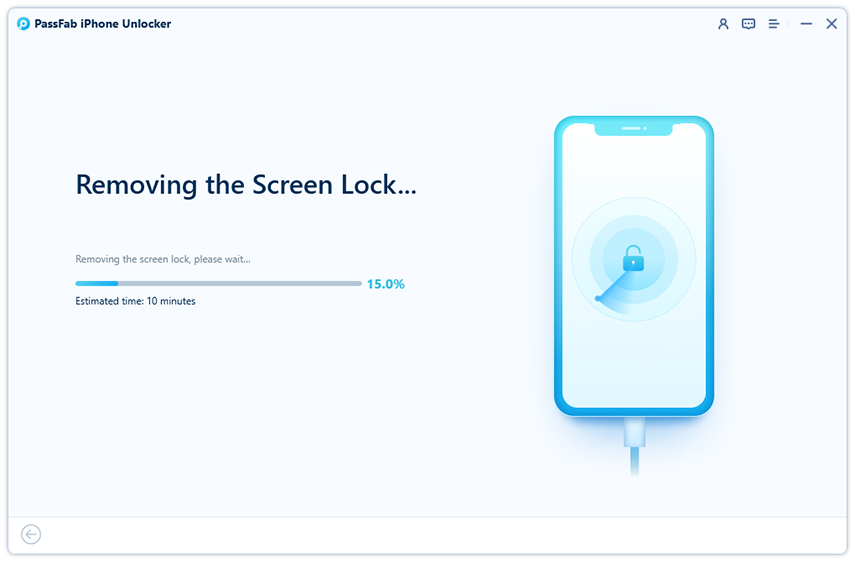
Removing the screen lock

-
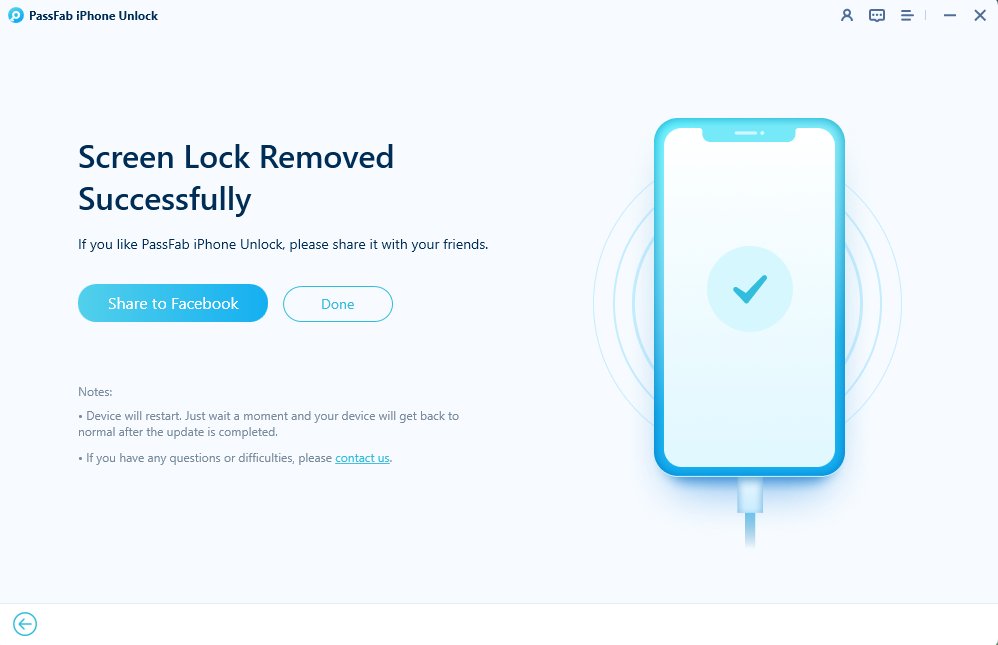
Remove Lock Screen Passcode Successfully

Part 4. Other Errors Concerned with iTunes cannot Connect to this iPhone
We explored and discovered that there are some other problems that are concerned with the “iTunes could not connect to the device” error. Let’s have a look at them.
- iPhone Cannot Connect To Itunes Because The Value Is Missing.
- iTunes Could Not Connect To This iPhone. Could Not Save The Pairing Record.
- iTunes Cannot Connect To This iPhone. Could Not Send a Message To The Device.
- iPhone Cannot Connect To iTunes Unknown Error.
- iPhone Cannot Connect To Itunes Invalid Response.
We have discussed several fixes earlier that you can use to avoid these errors.
Final Words
“iTunes Could Not Connect To This iPhone. You Do Not Have Permission” is one of the most common errors that you fill face when syncing your iPhone to iTunes. And we have discussed 11 proven solutions that can help you troubleshoot this issue effectively. What’s more, if you failed to fix “itunes could not connect to this iphone you don't have permission” error because your phone is locked, you can turn to PassFab iPhone Unlocker,a powerful unlocking tool.


