How to set up & activate iPhone 17 ? You’ve just picked up your brand-new iPhone 17 and can’t wait to explore its exciting features. But if you’re unsure how to properly set up and activate your device, there’s no need to worry. Setting up a new iPhone 17 should be exciting, not confusing.
This complete, step-by-step guide walks you through everything from unboxing and charging to activating your SIM, transferring data, signing into iCloud, and customizing essential settings for privacy and performance. Plus, if your iPhone 17 is unable to activate, we’ve also shared several proven solutions to help you troubleshoot.
Part 1: How to Set Up & Activate Your iPhone 17
Before you can start exploring all the powerful features of your iPhone 17, you’ll need to complete the initial setup process. Here is how to set up & activate iPhone 17.
Power on Your iPhone 17
Press and hold the side button until the Apple logo appears. Once powered on, you’ll see the “Hello” screen in multiple languages. Swipe up to begin.

Choose Language and Region.
Select your preferred language and then choose your country or region to ensure accurate settings for time, date, apps, and features.

Connect to Wi-Fi or Mobile Network
Select a Wi-Fi network and enter the password. Additionally, if you have an active SIM, you can activate iPhone 17 using mobile data.

Set Up Face ID or Passcode
Now, use the front camera to set up Face ID for secure unlocking. Alternatively, set up a passcode for device security.

Restore or Transfer Data
Choose the “Set Up as New iPhone” if you prefer starting fresh with a new device. Users can also choose one of the other options to restore data from their previous devices.

Create or Sign into Apple ID
Enter your existing Apple ID and password. If you don’t have one, tap on “Create Apple ID” and follow the on-screen instructions to complete the process. Finally, your iPhone has been successfully activated.

Part 2: Other Standard Activation Methods for iPhone 17
A common way to activate an iPhone is by using Wi-Fi or Cellular data. However, if you don’t have access to Wi-Fi, you can still activate your iPhone 17 through alternative methods. Here are the options explained below:
Method 1: Using Finder on Mac

If Wi-Fi or cellular activation isn’t possible, you can activate your iPhone 17 with a Mac using Finder. This method is simple and reliable. Here is how to activate iPhone 17 with Finder on Mac:
- Use a Lightning-to-USB-C cable to connect your iPhone 17 to your Mac and launch the Finder.
- On your iPhone screen, you may see a prompt asking to “Trust This Computer.” Tap “Trust” and enter your device passcode.
- In Finder’s left sidebar, under “Location,” click on your iPhone name. Finder will automatically detect that your iPhone 17 needs activation.
- Ensure your Mac is connected to the internet. Finder will connect to Apple’s servers to verify your iPhone.
- Once activation is confirmed, you can continue with the initial setup on your iPhone screen.
Note:
Make sure your Mac is running macOS Catalina or later, as only these versions use Finder for device management. Keep the Mac connected to a stable internet network and avoid unplugging the cable during the process to prevent activation errors.
Method 2: Using iTunes on Windows

Users can also activate their iPhone 17 using iTunes on a Windows PC. Follow the instructions below to learn how to activate iPhone 17 using iTunes on Windows:
- Connect your iPhone 17 to a computer with iTunes installed using a Lightning to USB-C cable. Then, if asked, tap “Trust This Computer” on your phone and enter your passcode.
- Launch iTunes on your Windows. Your iPhone should appear automatically. Select “Set up as a new iPhone and click on the “Continue” button,
- Next, enter your Apple ID or create a new one. Wait while Apple verifies your device. Once done, you can continue with the initial setup process on your iPhone.
Note:
Make sure you know the Apple ID and password previously linked to the iPhone. If Find My iPhone (Activation Lock) is enabled, you must enter those exact credentials to complete the activation.
Part 3. Troubleshooting Activation Problems on iPhone 17
Activation issues can occur due to network errors, SIM problems, or server outages. If your iPhone 17 doesn’t activate, then don’t worry, here are some common issues and quick fixes:
Common Issues
iPhone 17 won’t activate over Wi-Fi: Try connecting to a different Wi-Fi network or restarting your iPhone and router. Ensure the internet connection is stable.
SIM card not recognized: Remove and reinsert the SIM card, or re-scan your eSIM QR code. If the issue persists, then use the “Set up iPhone 17 without SIM card method.”
Stuck on Apple logo or “It may take a few minutes to activate”: Perform a force restart on iPhone 17 to solve this activation issue. To force restart iPhone 17, press and release the Volume Up and Volume Down buttons. Press and hold the Side button until the Apple logo appears on the screen.
Apple Activation Server Down: Check Apple activation server status iPhone 17. Sometimes activation fails because Apple’s servers are temporarily unavailable.
Advance Fixes
Here are some advanced fixes that you can use to solve the “iPhone 17 SIM card not Recognized” activation problem:
1.Recovery Mode Activation
If your iPhone 17 can’t activate normally or get stuck during the process, you can use Recovery Mode with Finder to complete activation. Here is how to do it:
- Connect your iPhone to a PC using a USB cable.
- Press and release the Volume Up and Volume Down buttons.
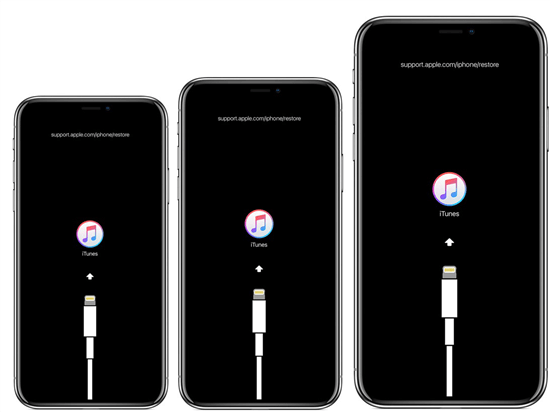
- Press and hold the “Side Button” until you see the Recovery Mode screen.
- Open Finder on a Mac, and your iPhone will be detected in “Recovery Mode.”
- Choose the “Restore” option to reset the device. Once done, follow the on-screen instructions to complete the activation process.
Note:
Before using Recovery Mode, back up your iPhone 17 if possible, as choosing “Restore” will erase all data.
2.DFU Mode
If iPhone 17 Recovery Mode activation is not working, then the final option left for you is DFU mode. DFU allows your iPhone to completely reload its firmware and iOS, making it the deepest type of restore. This method can easily fix serious activation issues. Here is how to enter DFU Mode on iPhone 17:
- Use a USB cable to connect your iPhone to a Mac or Windows PC.
- Press and release the Volume Up and Volume Down buttons.
- Next, press and hold the Side button until the screen goes black.
- While holding the Side button, press and hold the Volume Down button for 5 seconds, then release the Side button but keep holding the Volume Down for 10 seconds.
- Your iPhone 17 screen will remain black, but Finder or iTunes will detect the device in DFU mode.

Note:
Before entering DFU mode, make sure your iPhone 17 has at least 50% battery and that you’ve backed up all important data, as this process will erase everything. Also, keep the USB cable firmly connected and ensure your computer has a stable internet connection throughout the restore.
Bonus Tip: Unlock iPhone 17 Easily with PassFab iPhone Unlock
If you’re still having trouble accessing your iPhone 17 after activation — such as being stuck on the lock screen or forgetting your passcode- then PassFab iPhone Unlock is the best solution. This tool allows users to quickly remove screen passcode, Face ID, or Touch ID, so you can regain access to your device without hassle.
Key Features of PassFab iPhone Unlock
- Unlock iOS Device: PassFab iPhone Unlock removes all types of iOS restrictions, such as iPhone Passcode, Activation Lock, or Face ID, in minutes.
- Remove MDM Lock: The program bypasses Screen Time/MDM lock without data loss.
- No Jailbreak Required: PassFab enables users to remove iCloud Activation Lock without jailbreak.
- Compatible: Works seamlessly with the latest iOS 26, iPhone 17 series, and iPhone Air.
Step-by-Step Guide:
Download and install PassFab iPhone Unlock
Launch PassFab iPhone Unlock on your PC and click on the “Start” button. Connect your iOS device to your PC and click “Next.”

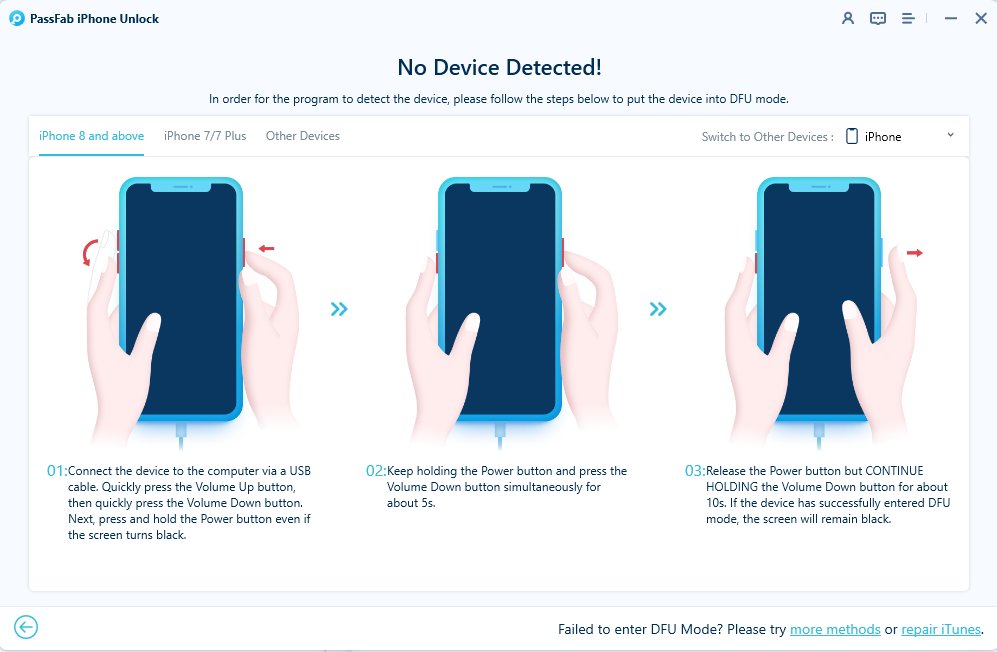
Follow the on-screen instructions to put your iOS device into Recovery Mode.

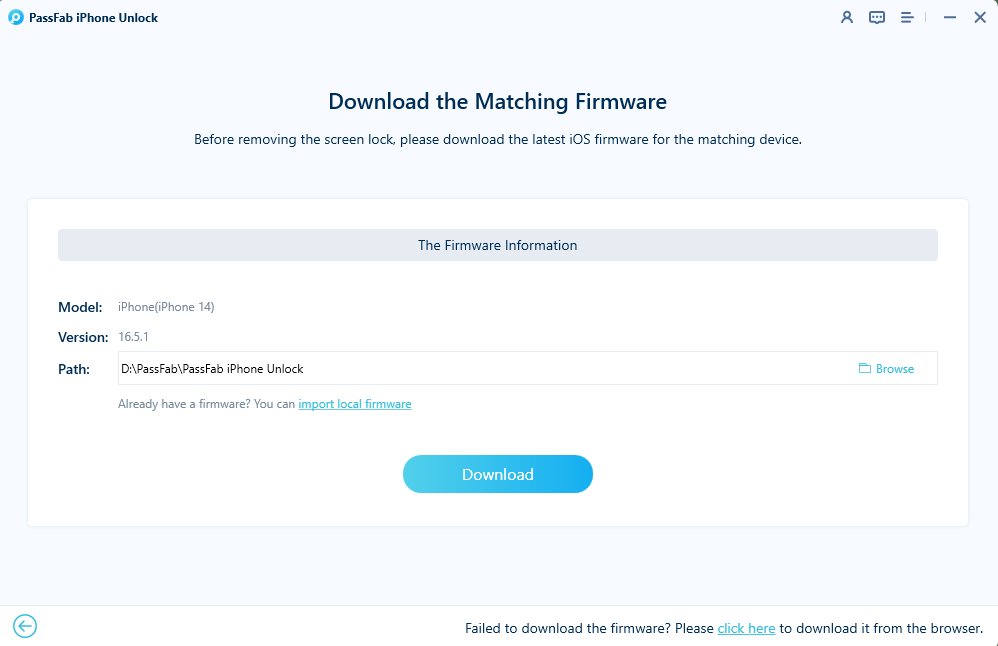
Click on the “Download” button to download the matching Firmeare. Wait for a few minutes until the download is complete.

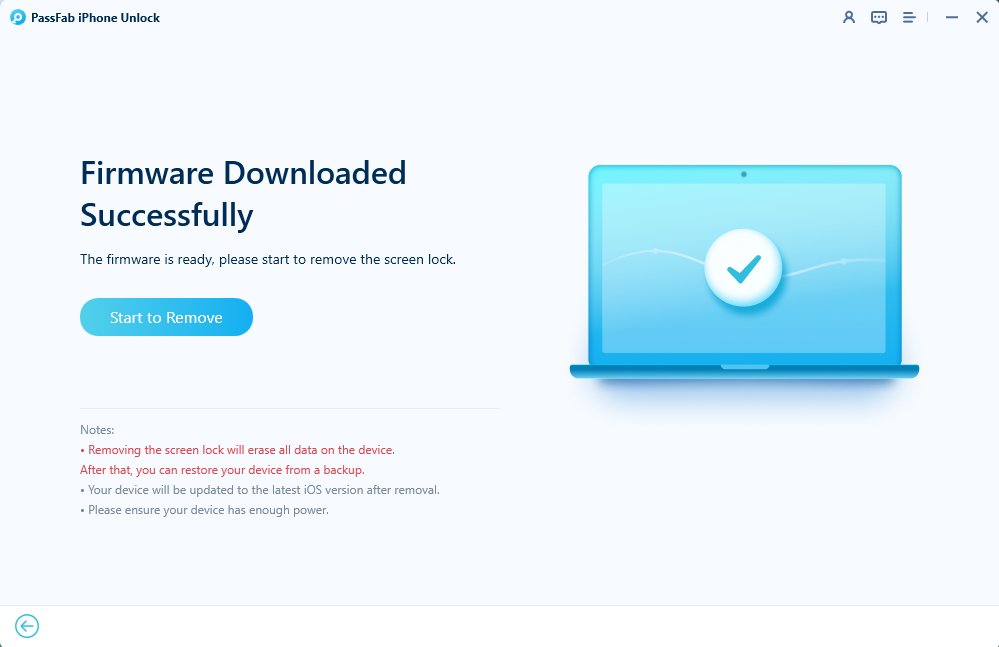
Finally, click on the “Start to Remove” option to begin the unlocking process. Within a few seconds, your device will be free from the passcode.

Conclusions
Knowing how to set up & activate iPhone 17 ensures a smooth start with your new device. Whether using Wi-Fi, Finder, or iTunes, or applying troubleshooting methods like Recovery and DFU Mode, you can quickly resolve issues. Plus, PassFab iPhone Unlock allows you to remove the passcode from iPhone 17 with a single click.
PassFab iPhone Unlock
- Fast - Remove screen lock/iPhone Passcode/Activation Lock in minutes
- Secure - Bypass screen time/MDM lock without data loss
- Easy to operate - Unlock by yourself at home without hassle
- No Jailbreak Required - Easily remove iCloud Activation Lock without jailbreak
- Compatible - Compatible with the latest iOS 26, iPhone 17 series, and iPhone Air
PassFab iPhone Unlock has Recommended by many medias, like macworld, makeuseof, appleinsider, etc.


FAQs
Can I Set Up iPhone 17 without Wi-Fi?
Yes. You can use your SIM card’s cellular data or activate your iPhone through Finder or iTunes.
What Should I do if my iPhone is stuck on activation?
Try restarting your device, switching networks, or using Finder for activation.
Can I activate iPhone 17 without a SIM card?
Yes. You can activate iPhone 17 without a SIM card by using Wi-Fi.


