“Does anyone know how to do a screen recording with audio on Windows"
We have done a comprehensive research and come up with the 3 best screen recorders for Windows. All you need to do is read the article till end to learn how to screen record with audio using these tools and find out which one best meets your requirements.
- Can You Record Screen, Speaker and Microphone Simultaneously?
- How to Record Screen with Audio (Computer Speaker and Microphone) - 100% Free & Easy
- 2 Best Professional Recording Screen with Audio Tool in 2026 - Professional Use
- Comparison Table: How to choose recording with audio tools?
Can You Record Screen, Speaker and Microphone Simultaneously?
Yes, you can record your screen along with voice from speaker and microphone simultaneously. All you need is a professional screen recorder having the ability to perform this task.
The good news is the internet is ripe with such tools but choosing the best of them is not an easy task.
That’s why we have handpicked the best screen recorder that sets itself apart when it comes to recording screen, speaker, and microphone at the same time.
So, stick to reading if you want to know how to record PC screen with audio.
How to Record Screen with Audio (Computer Speaker and Microphone) - 100% Free
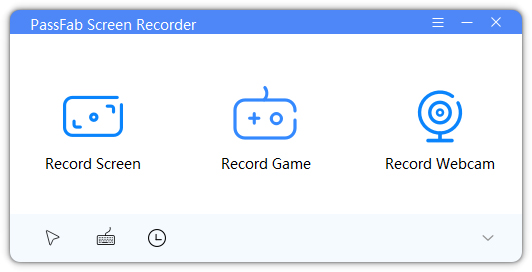
If you want the most advanced and comprehensive tool to record your screen and voice, then PassFab Screen Recorder is your perfect choice. Equipped with three superior recording modes, this multi-featured tool lets you capture your screen + audio in high-quality.
Pros of PassFab Screen Recorder
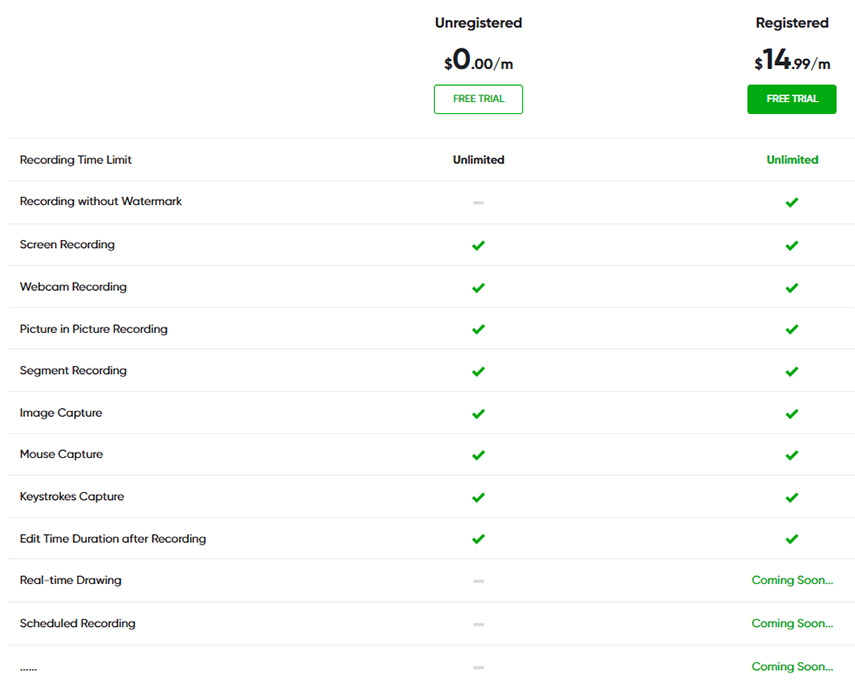
- It’s 100% free
- No time limit for recording
- Ability to record both speakers and microphone voice
- Ability to record Windows screen and webcam simultaneously
- Advanced picture-in-picture mode
- Universally work with existing microphones,webcam, and speaker devices
Important: this tool is still at its nascent stages and soon, the developers will update it to add some amazing tools to its arsenal of already stellar features. It includes
- Real-time drawing while recording
- Scheduled recording
Video Guide
Refer to this video if you want a detailed, step-by-step video tutorial on how to use all three modes of PassFab Screen recorder.
Text Guide
Check out yourself how easy it is to use this software:
- After installing, launch PassFab Screen Recorder on your computer.
-
On its Home interface, hit the Record Screen option.

-
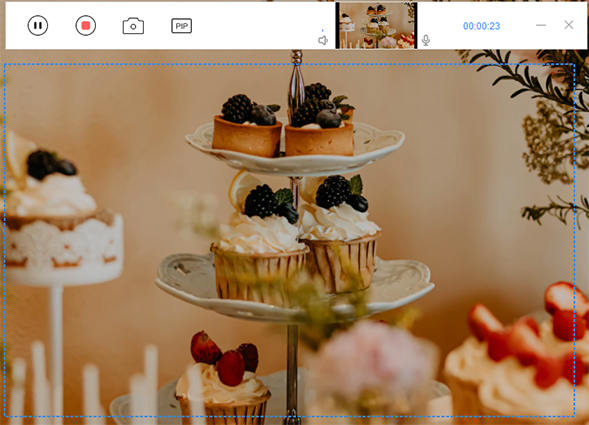
Now, select the specific area of the screen you want to capture by aligning the rectangular box.

-
After that, click on the Start icon to begin screen recording.

-
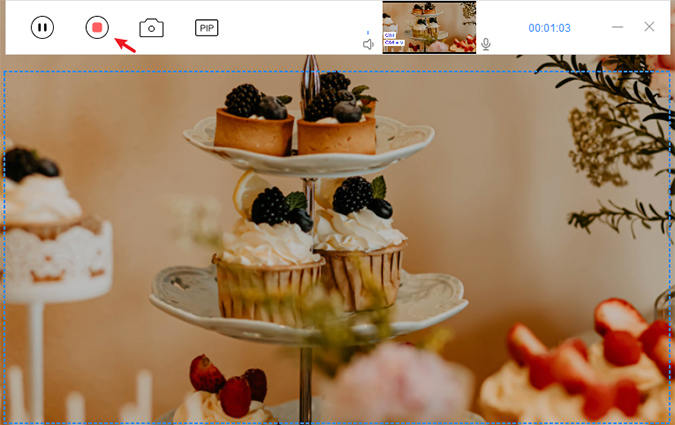
Click on the Stop icon to finish recording and the program will automatically save the output file on your computer.

-
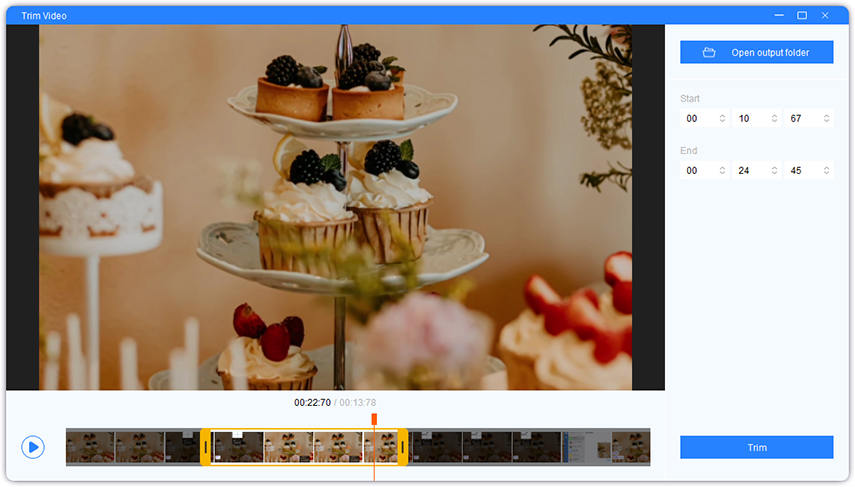
Use the Trim option if you want to remove any parts of the file.

How to record my screen with speaker and microphone?
If you want to capture your screen with speakers and microphone, then make sure the Volume option and the microphone option (top-right corner) are enabled.
Just hover your cursor over them to confirm if they are enabled or not.
How to record Windows screen without speaker and microphone?
If you want to capture your screen without any audio or voice, then disable both Volume and Microphone options before starting to record.
A simple click on the respective icon will disable it.
Note: you can use all these features for free, but the free version will include the official watermark. So, it’s better to purchase this tool to get a watermark-free experience of exploring its exciting features.
Starting from $14.99, it’s still the cheapest professional screen recorder available to you.
2 Best Professional Recording Screen with Audio Tool in 2026 - Professional Use
Mentioning just one tool in this guide wouldn’t be justified. Given this, we have summarized the two top-ranked screen recorder with audio tools, along with their pros and cons, and how to use them.
1. Bandicam
Bandicam is one of the most popular software that allows users to record the Windows screen with audio in high-quality. It’s light-weight, easy to use and lets you capture whole or a specific part of the screen.
- Real-time drawing feature.
- Easy to record flash game, steaming videos, and webcam videos.
- 3 different recording modes, including Gaming Mode, Screen Recording and Device Recording.
Having three different recording modes, namely: “Gaming Mode”, “Screen Recording” and “Device Recording”, Bandicam has made it ridiculously easy to record flash games, steaming videos, and webcam videos. What makes it a worth-installing tool is the real-time drawing feature it offers while recording the computer screen.
Why It Is Not Recommended for Basic Use
However, it doesn’t offer any advanced or professional video editing tools which discourage many users. Its biggest pitfall is it compresses the video and generates low-quality output files. So, it’s not a good choice if you want to record screen or games in high-quality.
Text Guide
In any case, using bandicam is as easy as it can get. Follow the below steps to capture a particular area of the screen using Bandicam.
- Once installed, launch Bandicam on your computer.
-
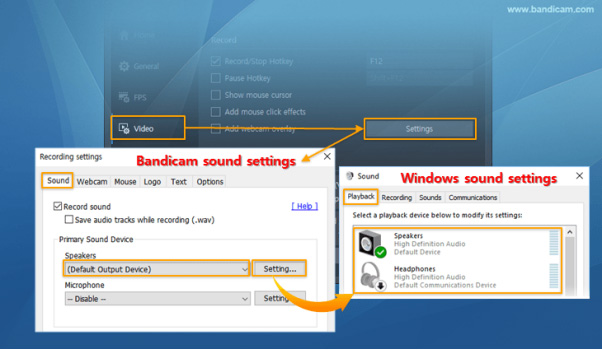
On its Home interface, navigate to Video > Settings and confirm if the Record Sound option is ticked and hit OK.

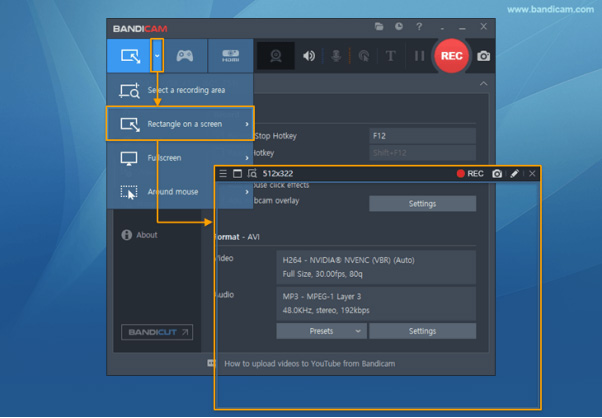
- Now, use the drop-down arrow option to select the 'Rectangle on a screen' mode.
-
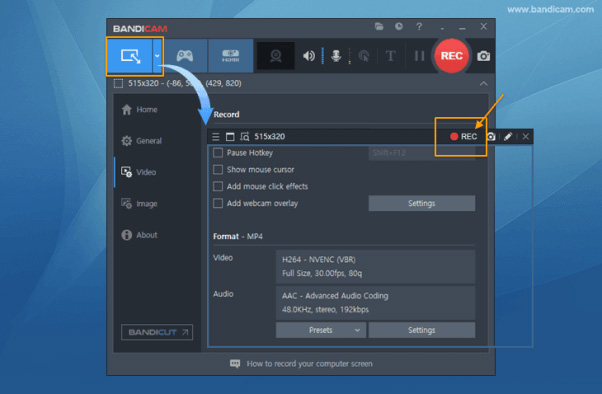
Now, select the screen area that you want to capture and hit F12 key to start recording.

-
Use the same F12 key to stop and start recording. When it’s done, save it to your computer.

Video Guide
Watch this video to learn how to record laptop screen with audio using Bandicam.
2. OBS
Open Broadcaster Software (OBS) is another open-source, powerful tool for screen recording with audio. It is stacked with many useful features that help you do a lot more than video recording and live streaming.
Why It Is Not Recommended for Basic Use
The biggest disadvantage of OBS is it doesn’t come with a built-in video editor. Moreover, it crashes too often and has a non-intuitive interface. For these reasons, it’s not suited for quick screen recording.
-
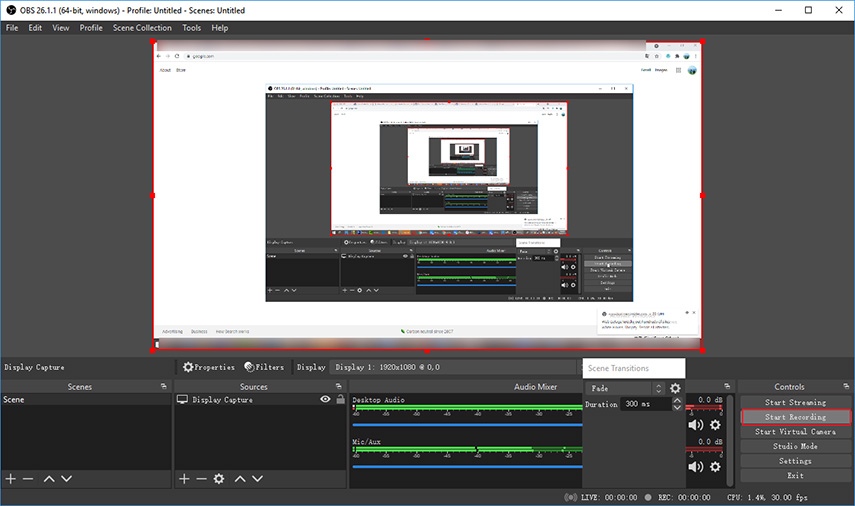
Install OBS and launch it. The Welcome screen will be completely black.

-
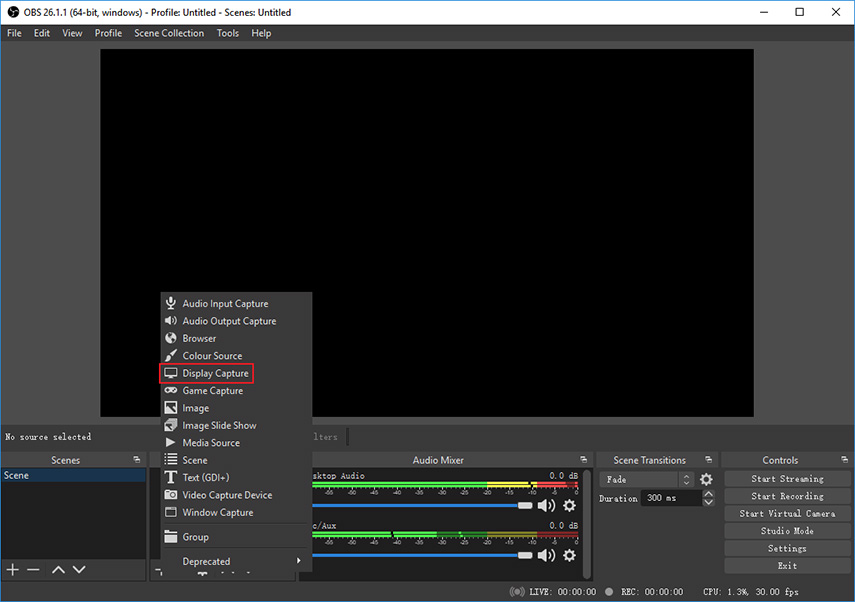
Hit on the plus (+) icon on the Sources window at the bottom of OBS and select the "Display Capture" option.

-
You’ll now see the preview. Hit on Start Recording option to begin capturing your screen with voice.

-
Finally, click on Stop Recording and your file will be saved in the Videos folder in Windows library.

Video Guide
Watch this video to learn how to record laptop screen with audio using OBS.
Comparison Table: How to choose recording with audio tools?
| Tool | Review | Ease of Use | Video Editing |
|---|---|---|---|
| PassFab Screen Recorder | 5 | Very ease | Yes |
| Bandicam | 3.5 | Complex | Yes |
| OBS | 3.8 | Very complicated | No |
Conclusion
This blog post summarized the most popular screen and audio recorders. Hopefully, you will never face any complications in how to screen record with audio.
What’s best about the aforementioned tools is that you can use most of their features for free. And if you want additional powers and output without watermark, you can always buy the premium package.
We recommend users to install PassFab Screen Recorder to get the Windows capture screen with audio in high-quality.

