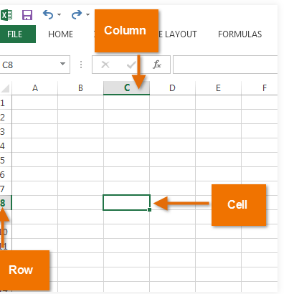
If you’ve used Microsoft Excel, then you must be aware that it comprises Excel sheets that are combinations of rows and columns. A cell is basically an intersection of a row and a column in an Excel sheet.
You can protect certain cells for security or integrity purposes. The worksheet protection allows users to open and read the contents of the cells but can’t modify them without entering the protection password. In this article, find an answer on how you can eliminate Excel worksheet protection and unlock cell Excel.
Why Are Cells Locked in Excel?
Top 4 Ways to Unprotect Cells in Excel
- Way 1: Excel Unprotect Cell with PassFab for Excel - [No Password]
- Way 2: Excel Unprotect Cells with Known Password
- Way 3: How to Unprotect a Cell in Excel via Zip
- Way 4: How to Unlock Protected Cells in Excel through VBA [2010 and Lower]
- Table: Which Method is Fast and Safe, and 100% No Data Loss
- FAQs about Excel
Why Are Cells Locked in Excel?
When users enable Excel sheet protection, by default, all of the cells in the worksheet are protected using the set password. This is done to ensure the safety and integrity of data stored in the Excel sheet. Users can access the file to read its contents but can’t alter data in any cell.
This means that the cells can neither be deleted nor formatted or edited in any way. However, in some cases, users might forget the protection password. This is where we come in! We will guide you on how to unlock cells in Excel with a known password as well as with a forgotten password.
Top 4 Ways to Unprotect Cells in Excel
How do I unprotect a cell in Excel? We’re here to answer this question for you! If you remember the password that you used while enabling Excel worksheet protection, then you can manually unlock Excel cells with ease and without encountering any hassle; however, if you don’t remember the protection password, then you are recommended to use trusted third-party software to unprotect Excel cells. Fortunately, we’ve got just the right tool for you!
Way 1: Excel Unprotect Cell with PassFab for Excel - [No Password]
The simplest solution for how to unlock cells in Excel without password is by using reliable third-party software. For this purpose, we recommend you use PassFab for Excel. PassFab for Excel is a simple Excel decryption tool that offers the feature ‘Remove Restrictions’ that users can utilize to unprotect Excel cells.
Pros of PassFab for Excel
- It removes the Excel cell protection in minutes and 99% success rate.
- It removes Excel cell protection without damaging or losing the contents of the cells.
- It removes the Excel sheet protection password by creating a new Excel file .
Price of PassFab for Excel
PassFab for Excel can be bought with any of the packages listed below.
- 1 Month License for $15.95.
- 1 Year License for $19.95.
- Lifetime License for $39.95.
Feel free to visit the PassFab purchase page to buy PassFab for Excel.
Video Guide
Text Guide
-
Download and install PassFab for Excel.
-
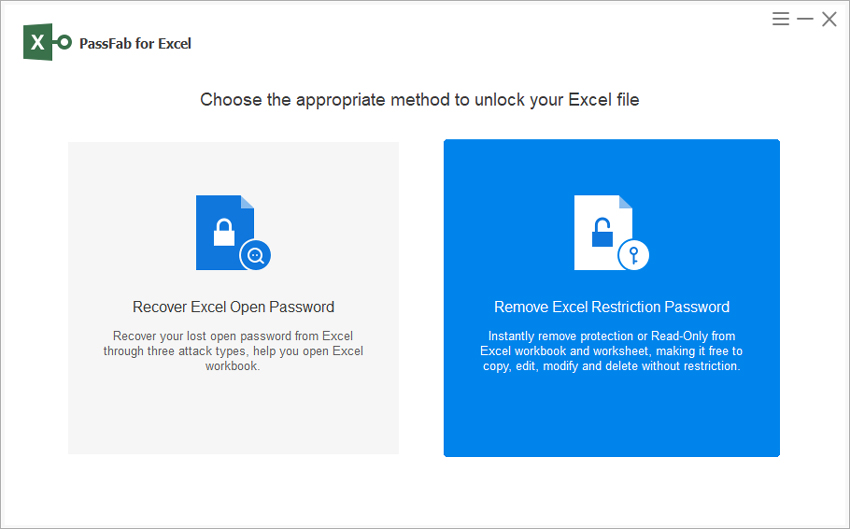
Launch the software. Select the “Remove Excel Restriction Password” option from the home page.

-
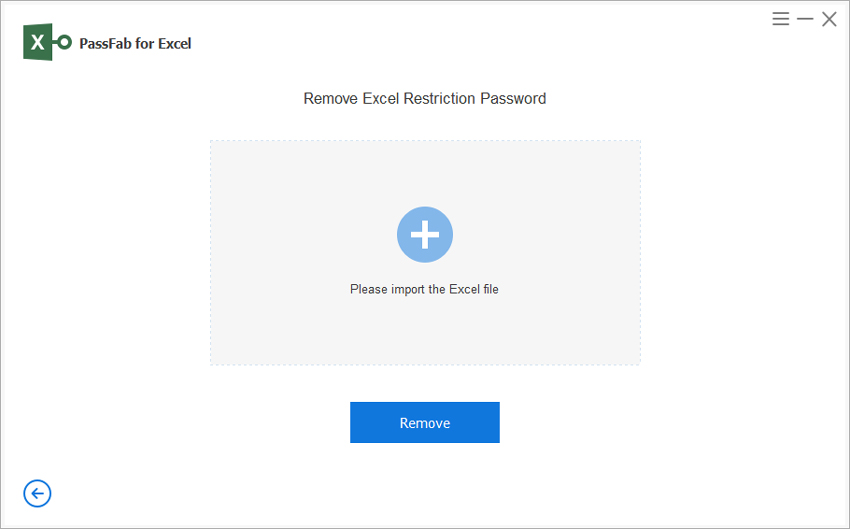
Drag and drop the Excel file into PassFab for Excel to import it. Afterward, hit “Remove”.

-
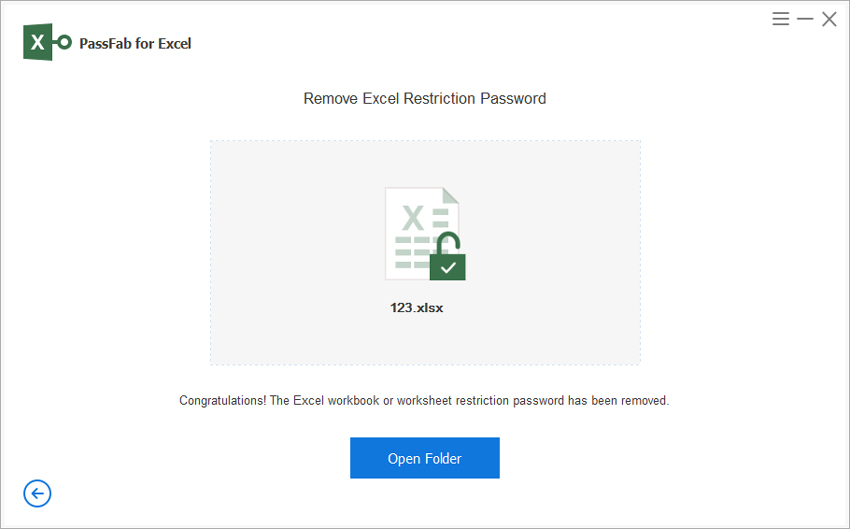
Wait for a few second as PassFab for Excel unprotects the Excel cells. After removing, you can tap on the “Open Folder” option to check out the new Excel sheet with the same contents and without protection.

Way 2: Excel Unprotect Cells with Known Password
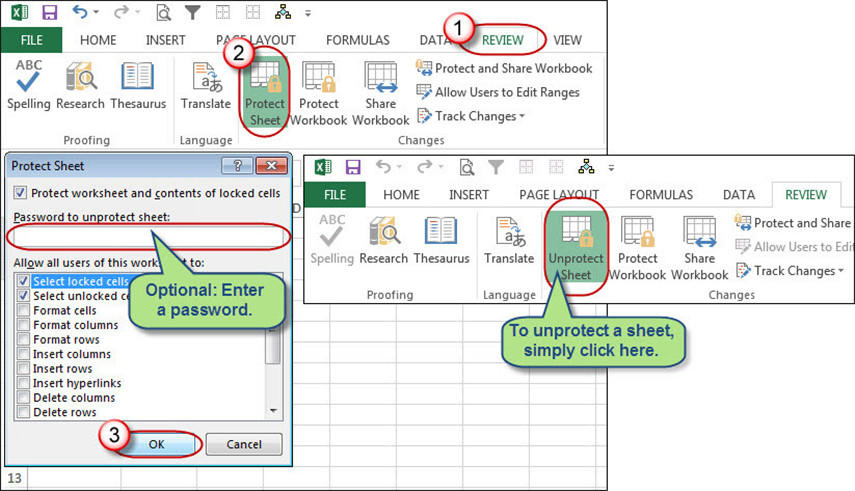
If you remember the Excel sheet protection password, then it should be very easy for you to unlock cell Excel with password. Simply follow the steps listed below to do so.
Text Guide
-
Select the cell that you want to unprotect.
-
If you want to select multiple cells, simply press the “Ctrl” key from your keyboard and drag your mouse to highlight all the required cells.
-
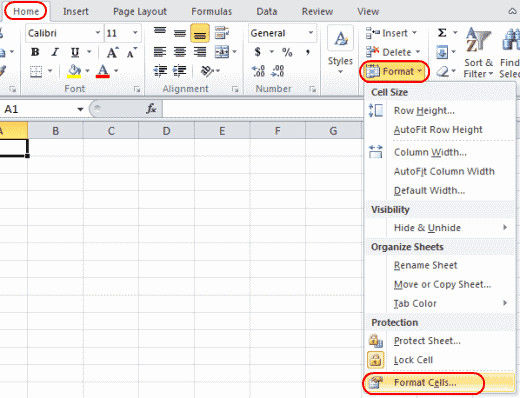
Go to the “Home” tab from the top taskbar.
-
Under the “Cells” section, select “Format” and click on “Format Cells”.

-
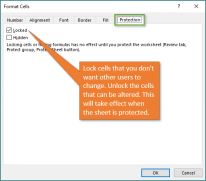
Go to the “Protection” tab and uncheck the “Locked” option.
-
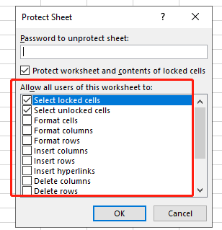
Next, go to the “Review” tab and select the “Protect Sheet” option. Enter the password and hit “OK”.
-
Right-click on the sheet tab at the bottom of the page and select “Protect Sheet”. Hit “OK”.

Way 3: How to Unprotect a Cell in Excel via Zip
Another simple solution for how to unlock protected cells in Excel is by converting the file into .zip format. This method only works for .xlsx files so if your Excel file is in .xls format, simply open it and rename it to .xlsx before continuing with this method.
Text Guide
-
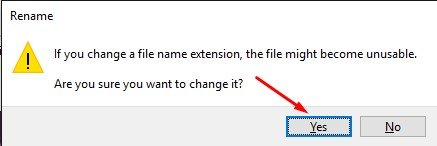
Rename the Excel file and change it from .xlsx to .zip. Hit “Yes” on the following prompt.

-
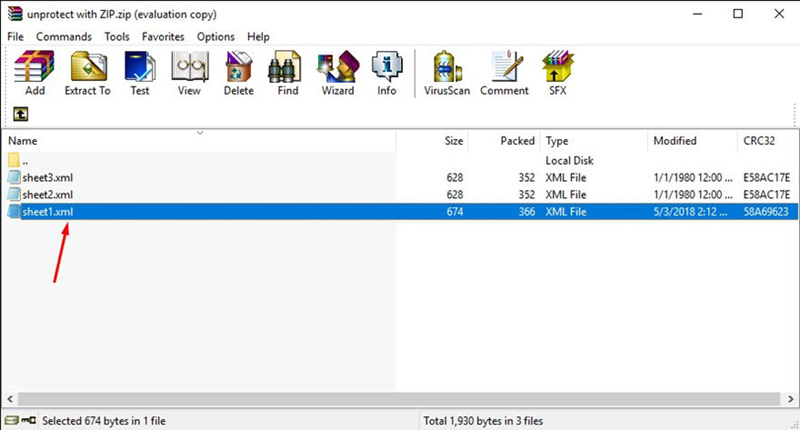
Open the .zip file with 7-ZIP and locate the folder “xl”, and then “worksheets”. Select the sheet that you want to unprotect. Right-click on it and select Edit and open the file with Notepad.

-
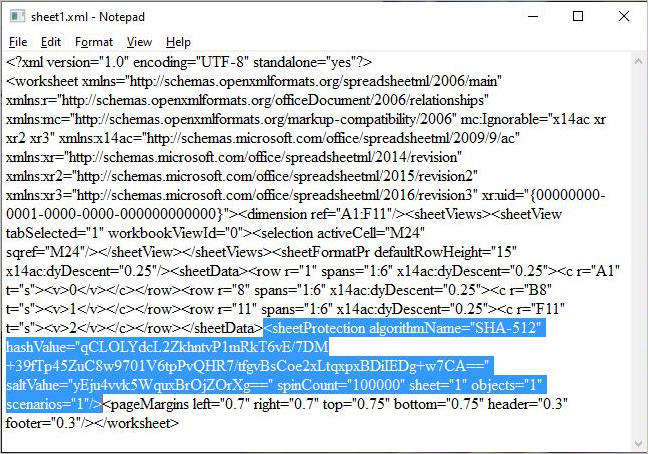
Delete the tag shown below and save the file.

-
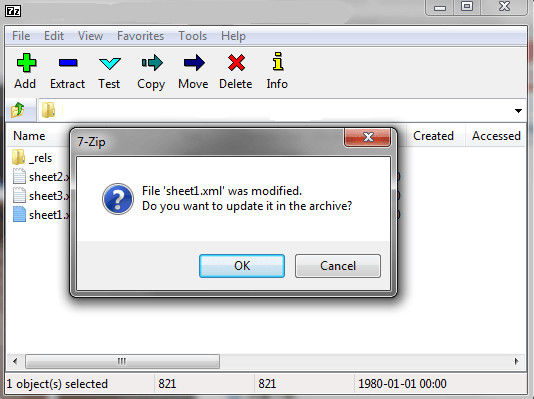
You will receive a prompt asking you to update the file. Select “Yes”.

-
Rename the ZIP file and change it from .zip back to .xlsx. Now, cell protection is removed from the selected Excel sheet.
Way 4: How to Unlock Protected Cells in Excel through VBA [2010 and Lower]
Lastly, you can try using Visual Basic for Application or VBA to understand how to unlock cells in Excel. However, this method only works for Excel versions 2010 and lower.
Text Guide
- Open the Excel file and switch to the password-protected sheet.
- Press Alt + F11 keys from your keyboard to launch Visual Basic Editor.
-
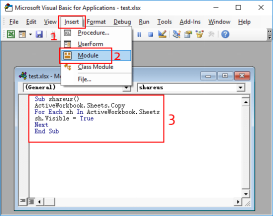
Next, select the workbook name from the left pane. Go to “Insert” from the top taskbar and select “Module”. Paste the following code in the window that appears.

- Finally, hit “F5”. A new workbook pops up which is similar to the original one but without Excel sheet protection.
Table: Which Method is Fast and Safe, and 100% No Data Loss
| PassFab For Excel | With Known Password | Via ZIP | Visual Basic for Applications (VBA) |
|---|---|---|---|
| Protection password is not required | Protection password is required | Protection password is not required | Protection password is not required |
| 96% success rate | 100% success rate | 85% success rate | 95% success rate |
| Incredibly easy to understand | Easy to understand | Easy to understand | Difficult to understand |
| No data loss | No data loss | Minor data loss expected | Minor data loss expected |
FAQs
Q1: How to lock only certain cells in Excel?
- Select the cells that you need to lock.
-
Go to Home>Format>Format Cells.

- On the Protection tab, select the “Locked” check box and hit “OK”.
-
Go to the “Review” tab and select “Protect Sheet”.

Q2: Can you lock cells in Excel without protecting sheet?
- Right-click after selecting the cells and press “Format Cells”.
- Go to Protection and check the Locked option.
-
Hit “OK”.

Conclusion
On that note, we would like to conclude our today’s topic of how to unlock cells in excel without password. Lastly, we would like to mention that if you want this done with minimum effort, then you are highly recommended to use PassFab for Excel for this task.
