“My C-drive is full, but iTunes consistently attempts to store device backups on C: regardless of where it is installed. I need to change this location in order to backup devices to my PC. How do I change iTunes backup location?”
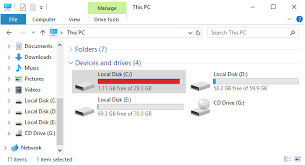
Do you meet the same problem that iTunes keeps the iOS backup folder directly on the system drive, usually the C disk, despite its capacity. If so, no need to search for iTunes change backup location, just go through this article.
- Part 1: Change iTunes Backup Location in Windows
- Part 2: Change iTunes Backup Location on Mac
- Part 3: FAQs about iTunes Backup
- Bonus Tips: How to Retrieve iTunes Backup Password
Part 1: Change iTunes Backup Location in Windows
Changing the location of iTunes backup is an urgent desire for users who don’t have sufficient space in their C drive. Next is a detailed guide to change iTunes backup location.
Step 1: Locate your current iTunes backup folder.
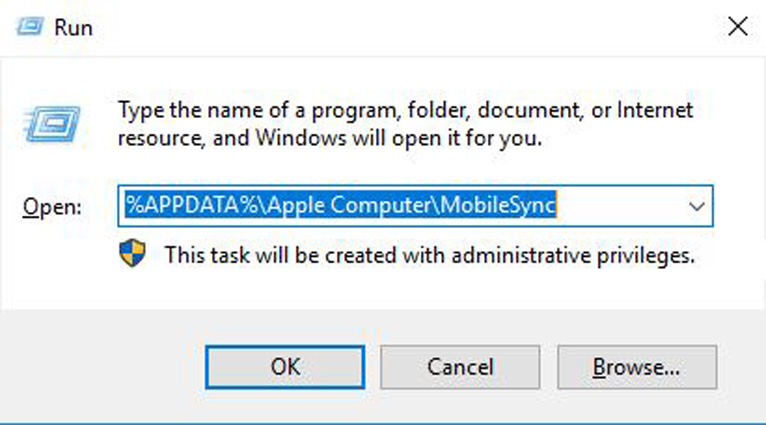
1. Press Win+R to open the Run box.
2. Type %APPDATA%\Apple Computer\MobileSync and click OK. Or you can type it in the searching box of Windows Start Menu and click the folder.

3. Locate current backup folder.
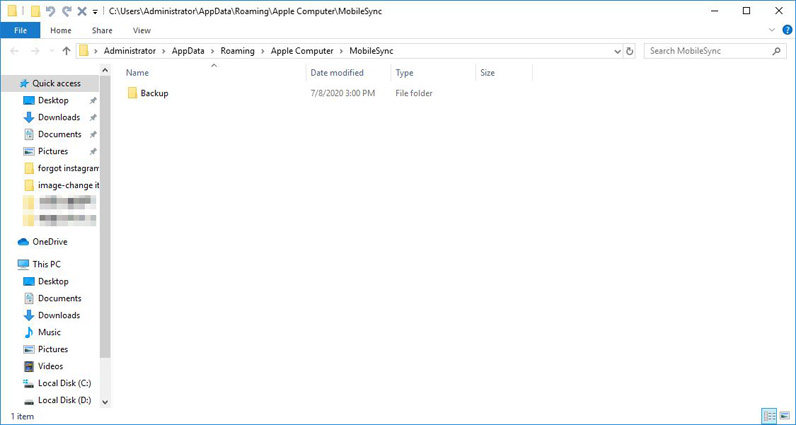
Step 2: Move the original backup folder to your desired destination, and clean the original backup folder.

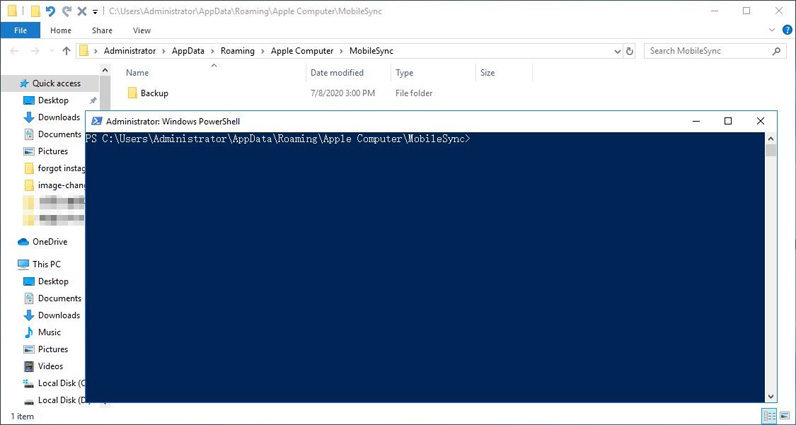
Step 3: In the original backup folder, press Shift key and right click a vacant area at the same time, then choose “Open PowerShell window here”.
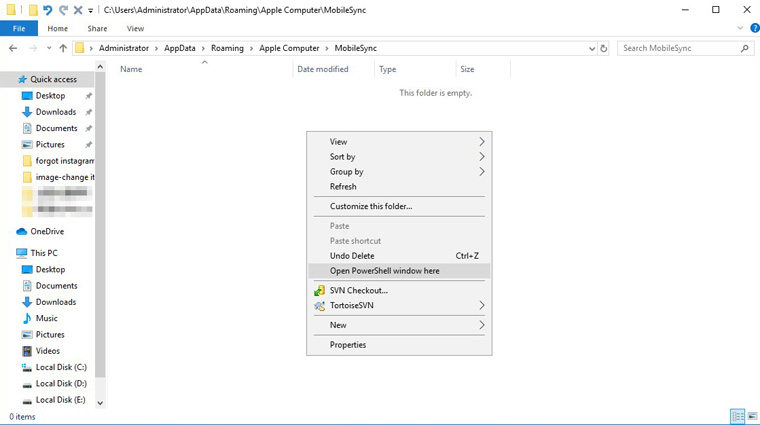
Then here will pop up a command window.
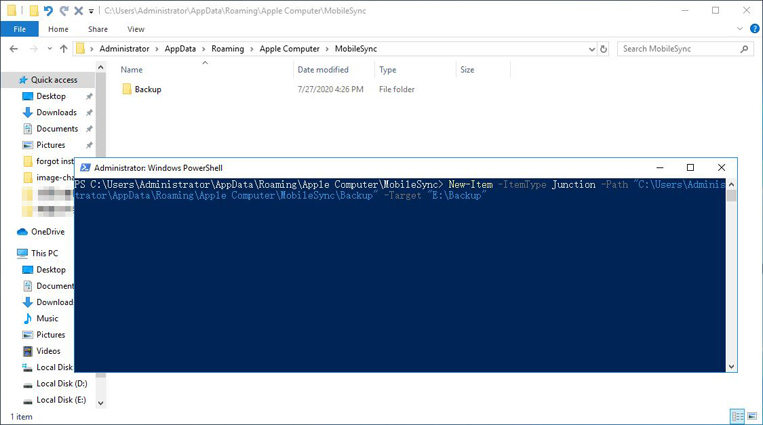
Step 4: Type New-Item -ItemType Junction -Path "C:\Users\Administrator\AppData\Roaming\Apple Computer\MobileSync\Backup" -Target "E:\Backup" and press Enter.
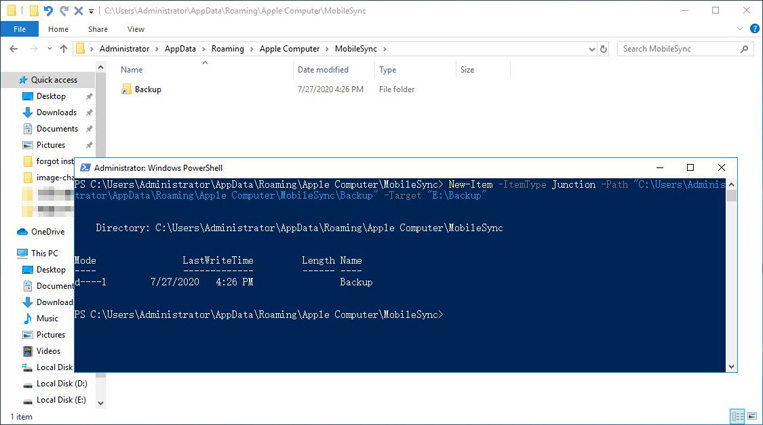
Then, you will create a junction successfully and a new shortcut folder named Backup will appear replacing the original backup file.
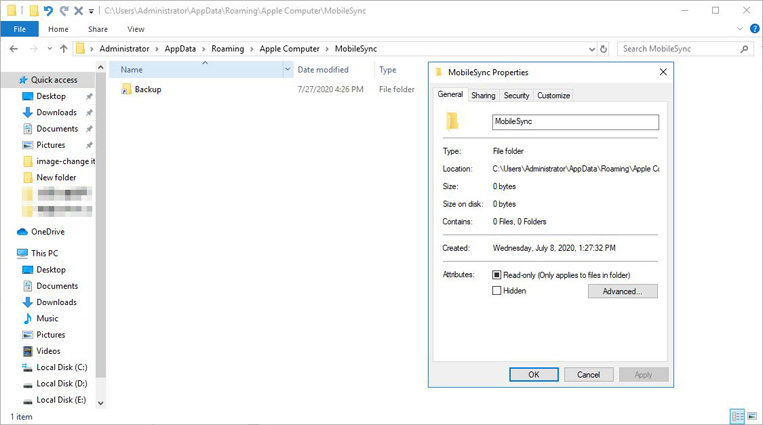
iTunes change backup location successfully! Now, you can back up your device to your desired location without occupying your C drive.
Note: This guide is how to change iTunes backup location Windows 10. For users of Windows7 and Windows 8, you need to choose “Open command window here” and type mklink /J “%APPDATA%\Apple Computer\MobileSync\Backup” “E:\Backup” for classic iTunes or mklink /J “%USERPROFILE%\Apple\MobileSync\Backup” “E:\Backup” for Microsoft Store iTunes in the pop-up window.
Read Also: 7 Things You May Not Know About iTunes Backup
Part 2: Change iTunes Backup Location on Mac
In the former, we introduced how to change backup location iTunes in Windows. Now, we will introduce how to change location of iTunes backup on Mac. Follow below steps.
Step 1: Locate current backup folder.
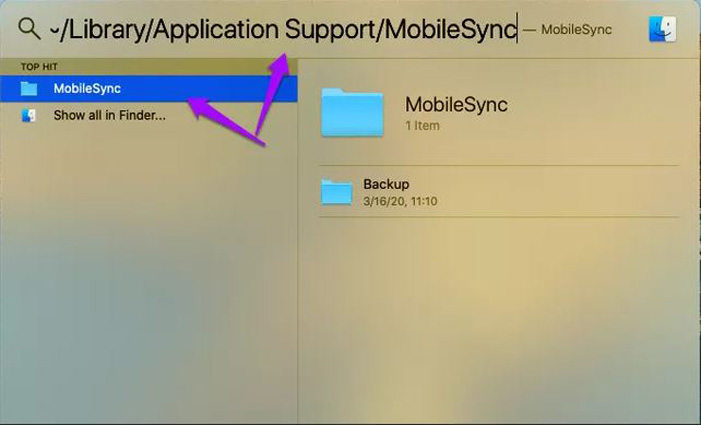
1. Press Cmd+[Space] to open Spotlight.
2. Type ~/Library/Application Support/MobileSync and press Enter.
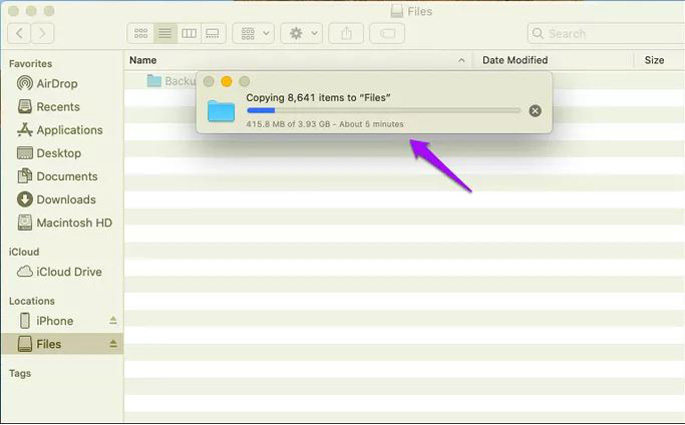
Step 2: Copy your backup folder to where you want to change its location.
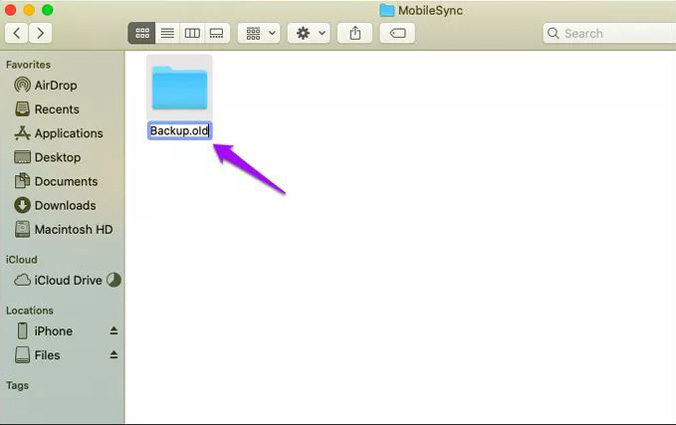
Step 3: Go back to original location of backup folder, and rename it or delete it.
Step 4: Grand Full Disk Access to Terminal.
1. Click System Preferences in Apple menu.
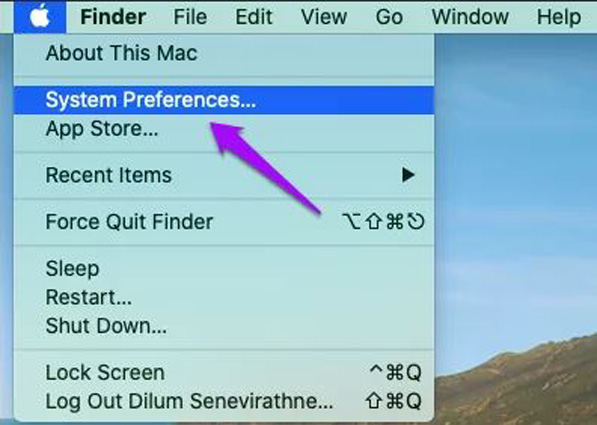
2. Choose Security & Privacy in System Preferences.
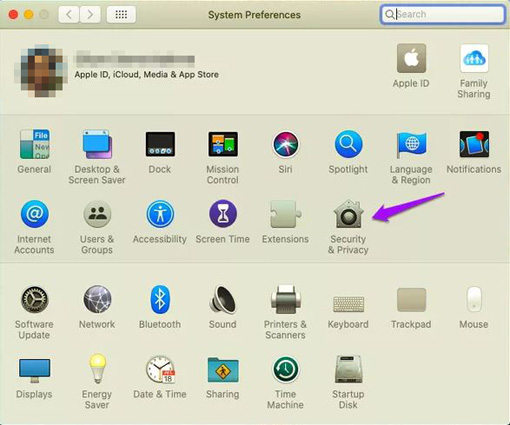
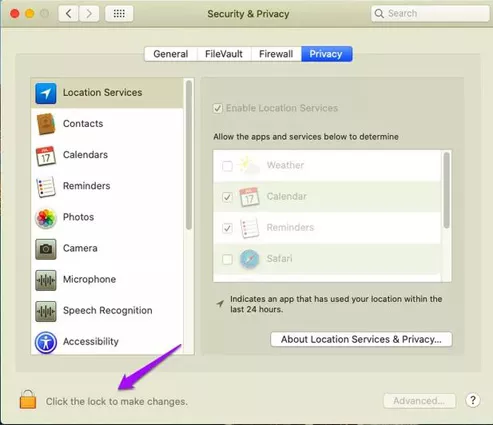
3. Tap Click the lock to make changes at the bottom.
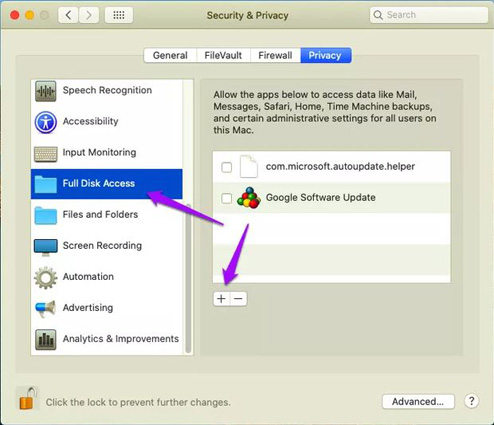
4. Choose Full Disk Access and click +.
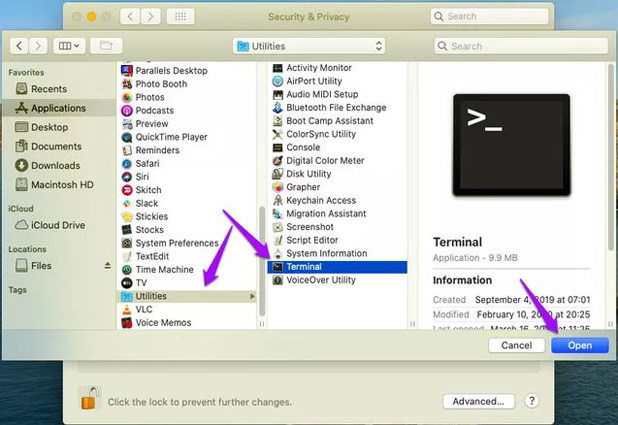
5. Select Terminal in Utilities and click Open.
Step 5: Launch Terminal.
You can find and click Terminal under Utilities of Applications, or press Cmd + [Space] and type Terminal then press Enter to launch it.
Step 6: Type ln -s [desired-new-backup-path] ~/Library/Application\ Support/MobileSync/ and press Enter.
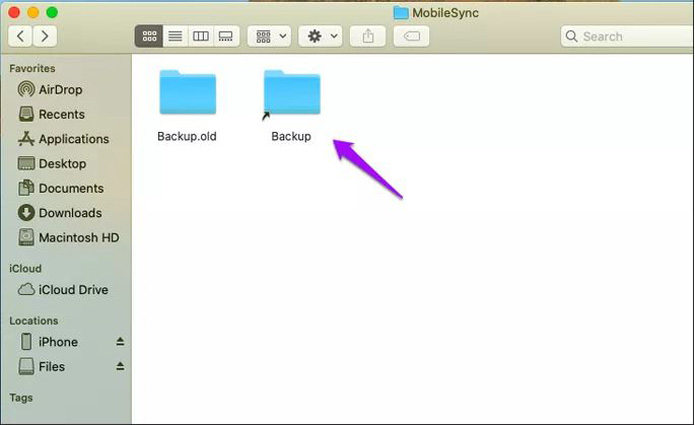
Once the symbolic link command run successfully, a new shortcut folder named Backup will appear in the original location of backup folder. Congratulations, succeed to change backup location iTunes!
Part 3: FAQs about iTunes Backup
Q1: Where is iTunes backup stored?
In Windows, iTunes will store backups under \Users\[USERNAME]\AppData\Roaming\Apple Computer\MobileSync\Backup, while Microsoft Store version of iTunes will store backups under \Users\[USERNAME]\Apple\MobileSync\Backup. On Mac, iTunes backups will be stored in /Users/[USERNAME]/Library/Application Support/MobileSync/Backup.
Q2: How do I restore files from iTunes backup?
1. Launch iTunes and connect your iDevice to the computer.
2. Click the icon of your device in iTunes.
3. Click Restore From Backup.
Q3: How do I know if my iTunes backup was successful?
Connect your iDevice to your computer, click the icon of your device. You will see time of last backup. Click Edit and choose Preferences, if back up successfully, you will see your backup in Device.
Bonus Tips: How to Retrieve iTunes Backup Password
Have you set a password for your iTunes backup? Forgot iPhone backup password or being locked out of your backup? If so, we sincerely recommend PassFab iPhone Backup Unlocker to you. Follow below steps to recover your iTunes backup password.
Step 1: Install and launch this iPhone backup unlocker on your computer.
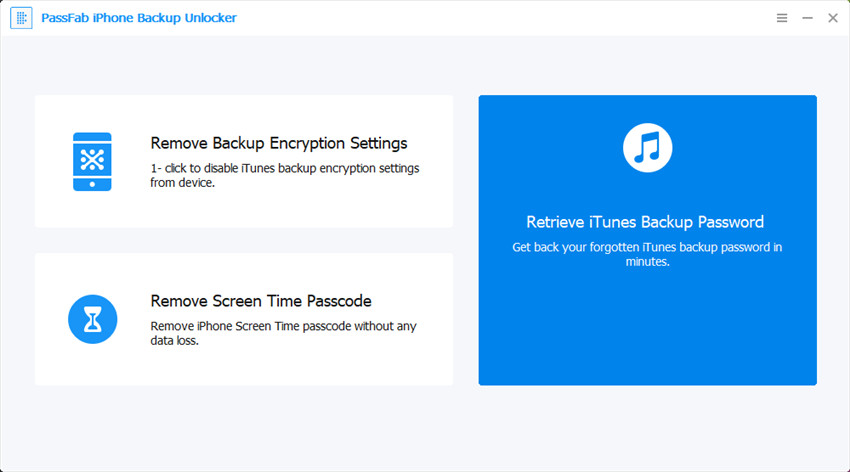
Step 2: Click Retrieve iTunes Backup Password.
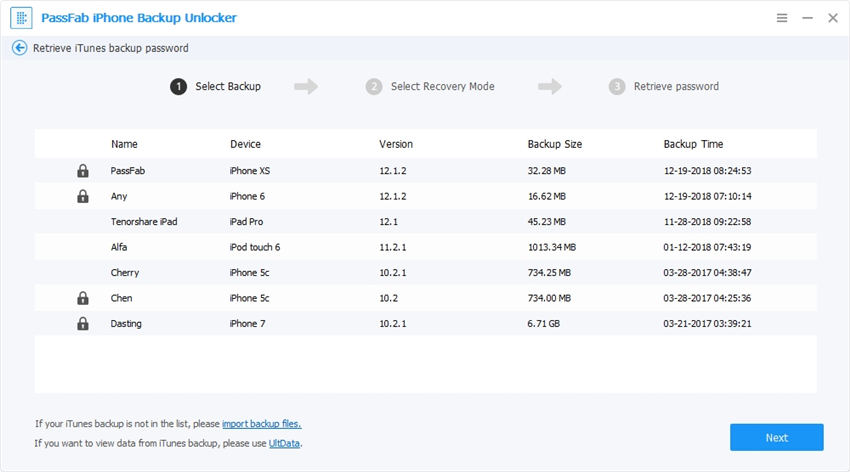
Step 3: Choose one backup file you want to recover password among the list of your backup files.
Step 4: Select a password attack mode. Then hit the Start button.
Here we provide three password attack modes: Dictionary Attack, Brute-force with Mask Attack, Brute Force Attack.
You can choose Dictionary Attack if you remember passwords you have used, or Brute-Force with Mask Attack if you have clues about your password, or Brute Force Attack if you remember nothing about your password.
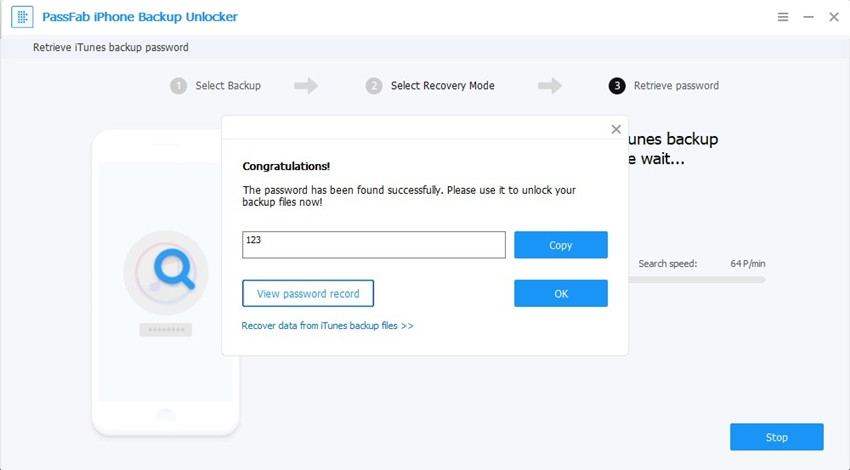
Step 5: After that, the software will show your password.
Final Words
We have introduced how to change iTunes backup location in Windows and Mac in this article, and recommended a wonderful iPhone backup unlocker to you. If this article works for you, please share it with others.
