One of the features the iTunes app provides you with is the ability to create encrypted backups of your iOS-based devices. Using the feature, you can create secure backups that can contain your sensitive information such as your photos and videos. However, there are users who may not want to create such backups and therefore this guide will teach you about how to turn off encryption on iPhone or iTunes backup.
- Part 1: Steps to Turn off iTunes Encryption from iOS Device
- Part 2: How to Disable Encrypt iPhone Backup in iTunes
- Part 3: How to Remove Backup Encryption Settings without iTunes
Part 1: Steps to Disable Encrypted Backup from iOS Device
Officially, Apple does not provide you with an option to disable encryption right from your iOS-based device. However, there is a workaround that allows you to accomplish the task using the very basic steps. One of the ways you can disable encrypted backup from your iPhone or iPad is by resetting all the settings on your device and then setting it up as a new one. If you are not sure how you can do it on your iPhone or iPad, the following guide has got all the steps you need to do the task. Let's check it out:
Step 1. On your iPhone or iPad, launch the Settings app and tap on the option that says "General".
Step 2. On the screen that follows, scroll all the way down and tap on "Reset". That is where your reset options are located.
Step 3. When the reset device screen appears, find and tap on the option that says "Reset All Settings".
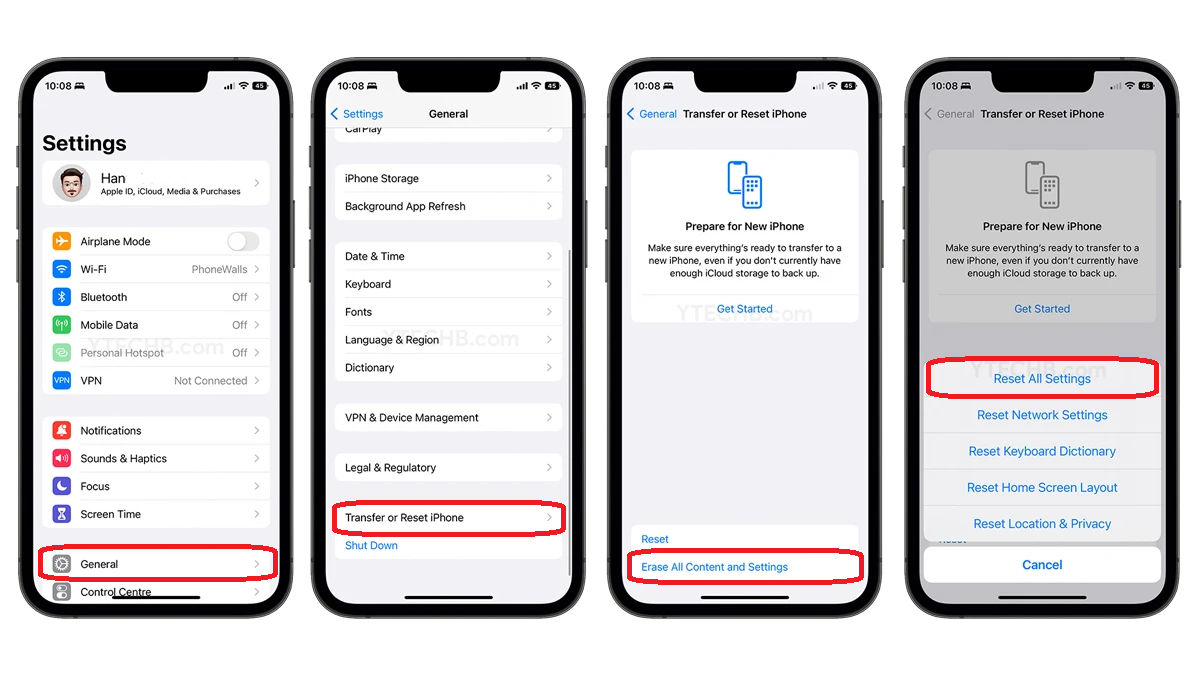
You are all set. You have disabled encryption from your iOS-based device. Although the steps may seem like they are not leading to the task you want to do on your device, they get the job done for you as you can see on your device.
Part 2: How to Disable Encrypt iPhone Backup in iTunes
If you often create backups of your iOS devices using the iTunes app on your computer, you might want to completely disable the encryption option. That way the backups you make in the future will not ask you to enter a password to open them. Fortunately, the iTunes app comes with the option to let you enable and disable encryption for your iOS backups. Once you have chosen an option, it will create your backups accordingly.
The following steps show where to find that option and how to disable iOS backup encryption:
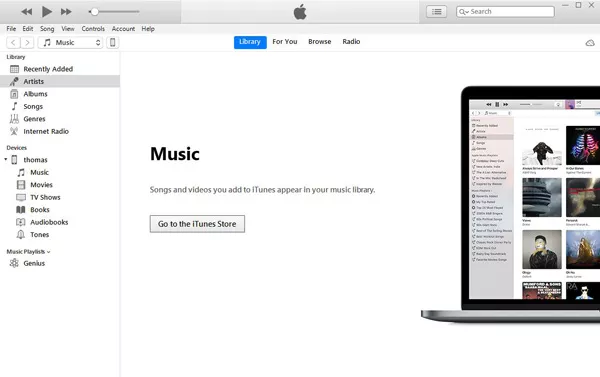
Step 1. The first thing you will need to do is open the iTunes app on your computer. If you are a Windows user, double-click on the iTunes icon on your desktop and the app will launch. Mac users can launch the app from their Dock or Launchpad.
Step 2. When the iTunes app opens, connect your iOS-based device to your computer using a compatible cable. iTunes should recognize your device. Click on your device in the app.
Step 3. Click on the "Summary" tab, and then uncheck the option that reads "Encrypt iPhone backup". The app will ask you to enter your backup password to remove encryption. Do so and it will let you continue.
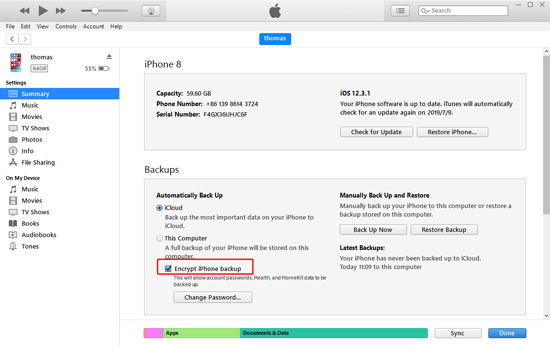
Note: When the setting on iTunes are reset, you can also click on "Back Up Now" in iTunes to create a new backup of your device without backup password.
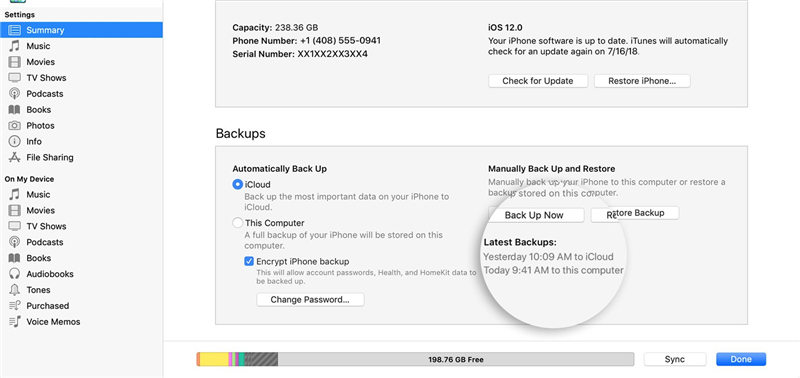
You are done. The encryption feature of iTunes has been successfully disabled and your future iOS backups will no longer be encrypted. It also means you will not be able to store your confidential information in your backups. You can enable the feature at any time when you want to do it.
Related Read:
Part 3: How to Remove Backup Encryption Settings without iTunes
If you have noticed, the above procedure of disabling backup encryption in iTunes requires you to enter your backups password. What if you have forgotten the password? Well, officially, that means you cannot use your backups as those are protected by the password.
There is a program, though, that allows you to recover or remove the passwords for your iTunes backups. The software is called iPhone Backup Unlocker and it has been developed by PassFab. The aim of the application is to help you quickly decrypt or delete the password of your iTunes backups.
If you wish to use the software but are not quite sure how it works, the following will help you out.
Step 1: Head over to the official website of the software and download and install the software on your Windows or Mac computer.
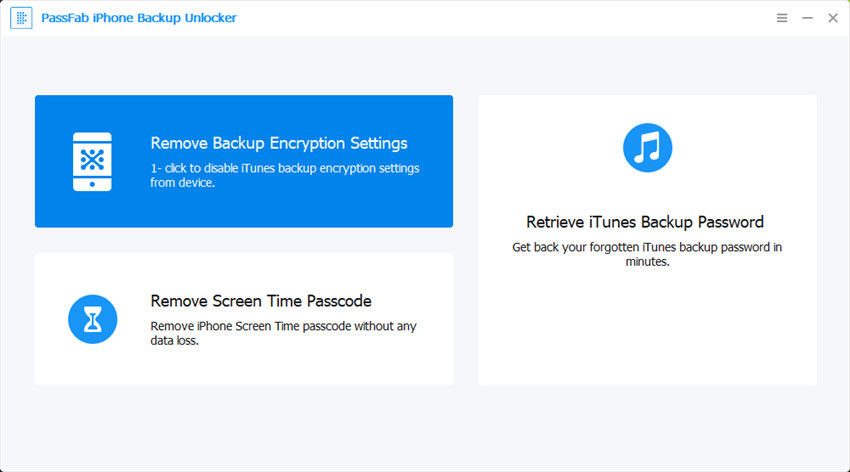
Step 2: Launch the software and click on the option that says "Remove Backup Encryption Settings". It will let you remove your encrypted backup password without entering password again.
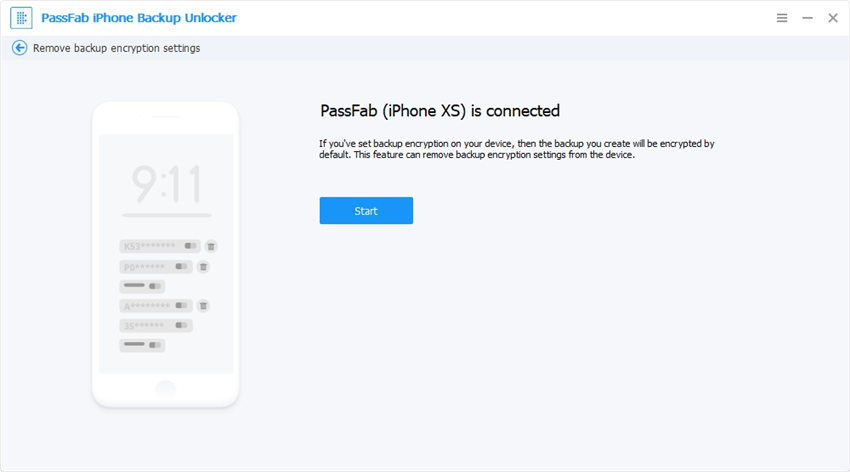
Step 3: On the following screen, connect your iPhone or iPad device to this software. Then, click on the button that says "Start" to continue.
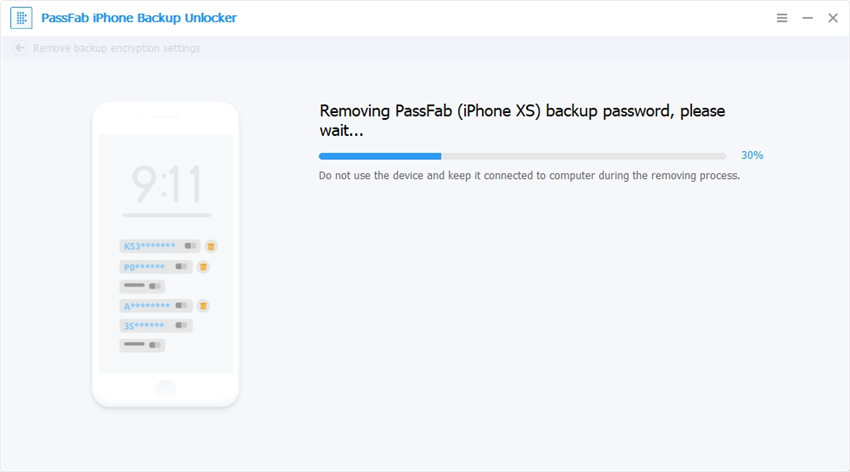
Step 4: Just wait for a moment until this iPhone backup password remove tool gets rid of your backup password.
Step 5. Finally, your encrypted iPhone backup password will be removed successfully.
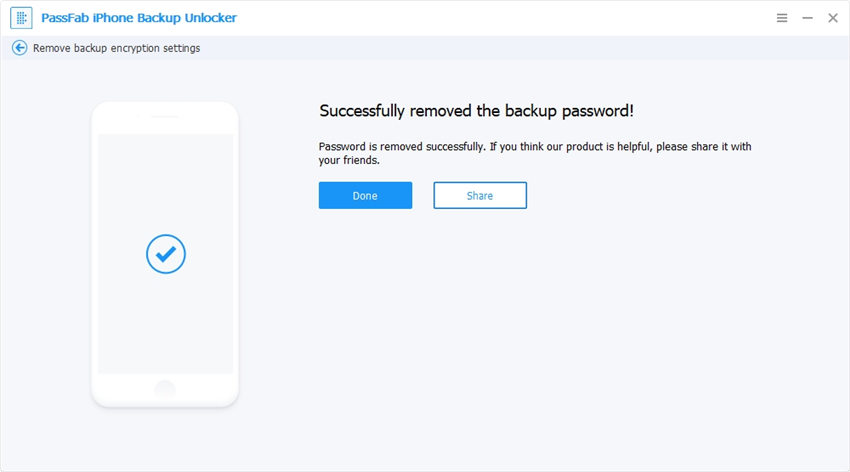
You may now use the recovered password to disable encryption for your backups in iTunes. By the way, here is a simple video tutorial that shows how to remove backup encryption using PassFab iPhone Backup Unlocker:
Conclusion
If you wish to disable encrypted backup from device, our guide above should help you do it using a workaround as there is no official option available to do the task. We hope it helps you remove encryption from your future iOS backups.
