Almost every account over the internet is prone to being hacked. For this purpose, Two-Factor Authentication is an extremely necessary feature to make your account safe and sound. So, if you are wondering what is Two Factor Authentication then you are at the right place. Keep reading to learn more about it!
Part 1: What Is Two Factor Authentication and How Does It Work?
Before learning what Two-Factor Authentication is, let’s talk about one-factor authentication. Basically, in One-Factor Authentication, you have to enter only username and its relevant password to log into an account. In simple terms, there is only one security measure to secure your account. On the other hand, Two Factor Authentication provides a second layer of verification.
Basically, Two-Factor Authentication (also commonly referred to as 2FA) is an extra security measure that secures your account. This process makes it harder or even impossible for hackers to gain access to your personal online accounts. 2FA ensures that only you can access your account even if someone knows your password. There are three types of credentials used for 2FA that makes it work.
- The first is a quite common one that includes a PIN, pattern, or a password. It is basically something that you have memorized by heart.
- The second one is something that you own. For example; your mobile phone or an ATM card.
- Lastly, it includes something that you actually are. For instance, a fingerprint, retinal scan, voice print.
Part 2: Is Two Factor Authentication Necessary?
I can imagine that for some people 2FA might seem like a bit of a hassle as it requires an additional step in order to log onto your social accounts. But it is extremely important to know that without 2FA you will always stay at risk. When you know you have enabled it to your accounts, you will eventually remain calm and patient that your accounts are safe.
It is true that since a long time, passwords have been the only security measure for us. But it is high time we move along with the modern world. Passwords are extremely vulnerable and this leaves us no choice but to acquire two factor authentication. The reason why it is so necessary is because with its extra layer of security, it makes sure that your information is protected at all costs.
Privacy has become a big issue as technology grows. So, if you think that the process of 2FA requires a lot of your time, just know that it is worth a shot. And if you don’t do this, your information is definitely going to be at a huge risk. Therefore, I am sure your answer to what is two-factor authentication and why it is an effective access control technique is perfectly answered.
Part 3: How to Turn on 2 Factor Authentication
Now that you know that password-only accounts are quite vulnerable to hackers, it is time we learn how to use two-factor authentication on our accounts. These days, almost every social application has the 2FA feature and every user must acquire it by turning it on. If you have the question can I turn off two factor authentication, then the answer is yes, you definitely can if you feel like.
Wondering how to turn on two factor authentication, then worry no more because we have got you all covered! We are going to tell you how to enable this second level of security to your accounts across the internet. To learn more about this, keep reading:
- Case 1: Turn on 2 Factor Authentication on iPhone/iPad
- Case 2: Turn on 2 Factor Authentication on MacOS
- Case 3: Turn on 2 Factor Authentication on Google
- Case 4: Turn on 2 Factor Authentication on Facebook
- Case 5: Turn on 2 Factor Authentication on Twitter
- Case 6: Turn on 2 Factor Authetication on Microsoft
- Case 7: Turn on 2 Factor Authentication on WhatsApp
- Case 8: Turn on 2 Factor Authentication on Instagram
Case 1: Turn on 2 Factor Authentication on iPhone/iPad
What is two factor authentication like on Apple? It makes sure to add an extra level of security to the already existing password. To enable two-factor authentication on your iOS device (iPhone or iPad), you need to go through a bunch of instructions. Just follow these simple and easy steps and you are good to go:
- To make sure you turn on 2FA, simply go to ‘Settings’ on your iPhone/iPad. Click on the ‘Apple ID banner’ then tap ‘Password and Security’.
Click on ‘Turn on Two Factor Authentication’ and then select ‘Continue’.

- Then, it will ask you to enter your passcode. After you do that, tap ‘Done’.
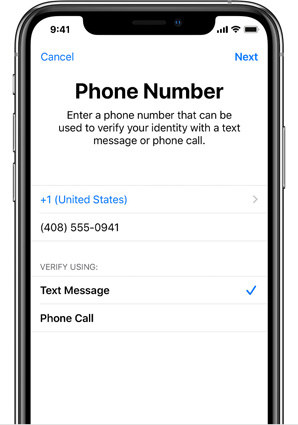
Now, you need to enter your trusted phone number where you wish to receive all verification codes whenever you want to log in. You can either select ‘text message’ or ‘phone call’ to set how you want to verify your credentials.

- Lastly, just enter the verification code that you received and you are good to go!
Case 2: Turn on 2 Factor Authentication on MacOS
You can turn on two-factor authentication on Mac by following these simple steps:
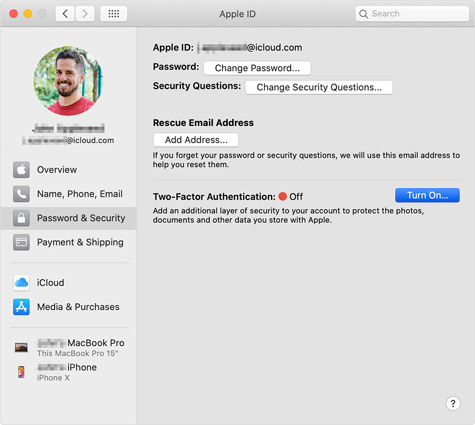
- Simply, click on the Apple menu and direct to ‘System Preferences’. After that, click on your Apple ID.
- Select ‘Password and Security’ option that is displayed under your name.
At last, just click on ‘Turn on Two Factor Authentication.’

Case 3: Turn on 2 Factor Authentication on Google
Securing your Google account should be your first priority. Almost all of our other accounts are linked to Google so make sure to turn 2FA on by using these steps:
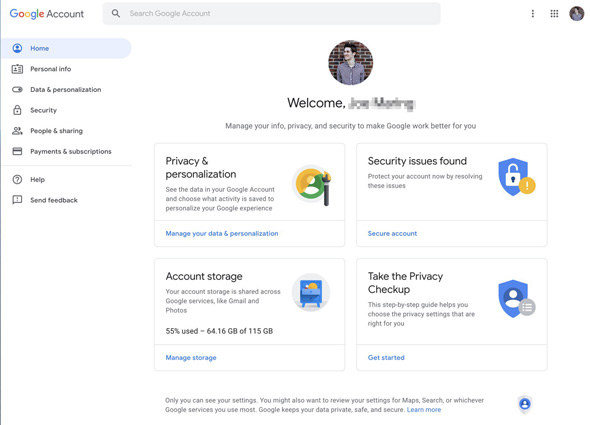
Firstly, go to myaccount.google.com on your PC and log in to your Google account.

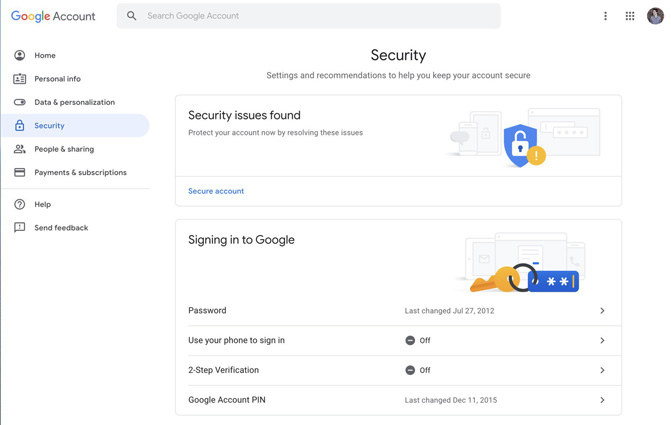
Select ‘Security’ tab that is displayed on the left side.

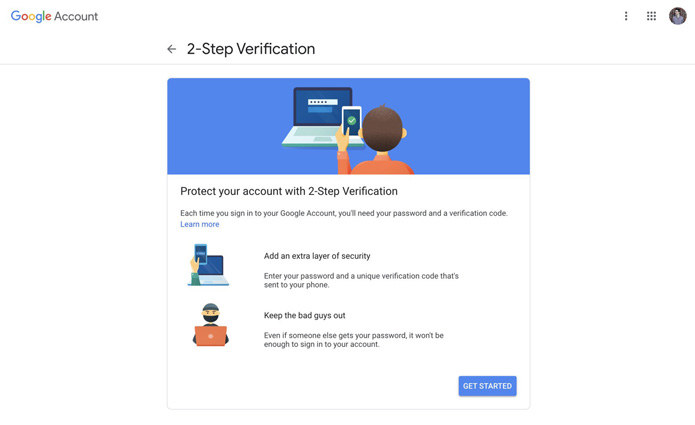
Now, click the ‘2-Step Verification’ and then click ‘Get Started’.

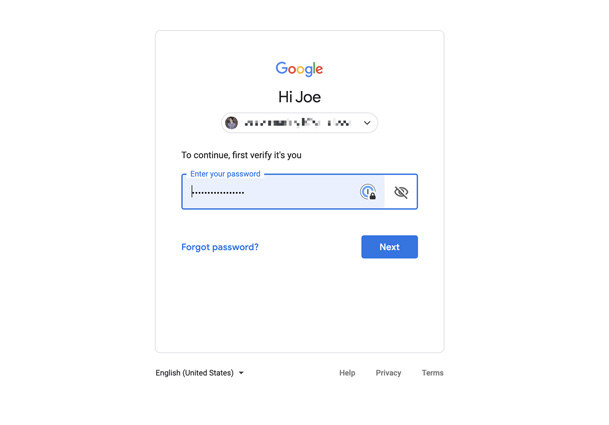
Enter your Google password for further confirmation.

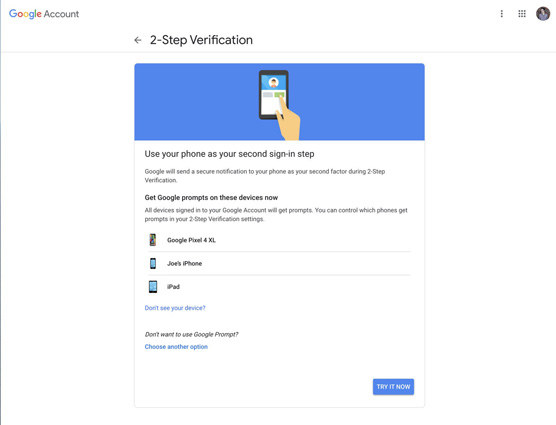
Simple, click ‘Try it now’.

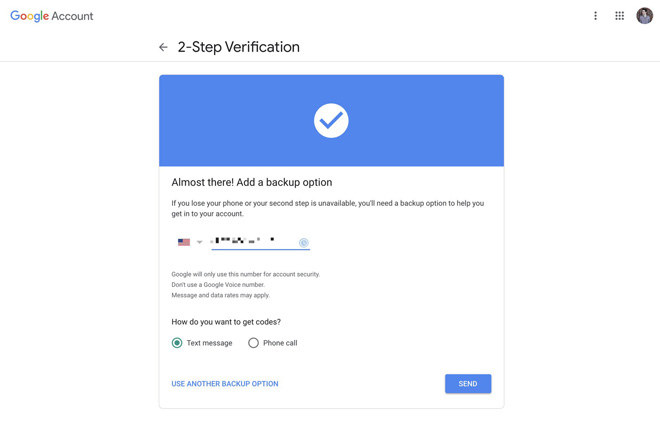
Now, tap ‘Yes’ on the google pop up and then confirm your phone number as a backup option.

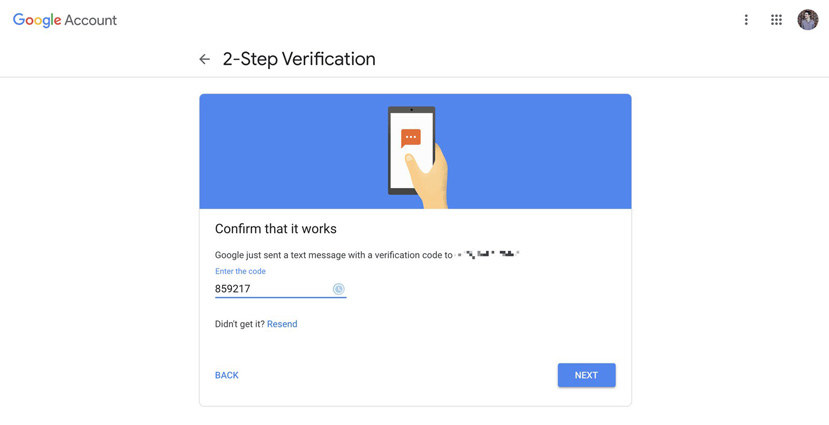
Enter the verification code that you received on your phone and click Next.

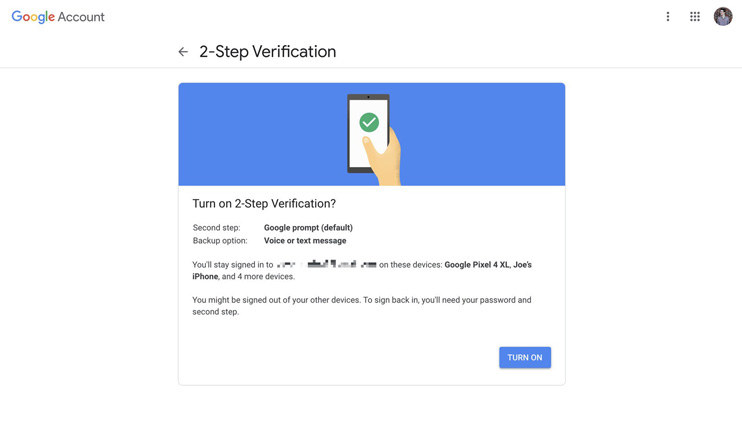
The last step is to click ‘Turn on’ so that 2FA is enabled on your Google account.

Read Also: Turning off Two Factor Authentication on Google
Case 4: Turn on 2 Factor Authentication on Facebook
Facebook has got to be everyone’s favorite social site. Right? To make your personal information save and secured, follow these instructions:
- Go to your Facebook homepage and click on Settings and then select Security and Login.
- Go to the ‘Two Factor Authentication’ feature and select Edit.
- Now enter your Facebook password and select Continue.
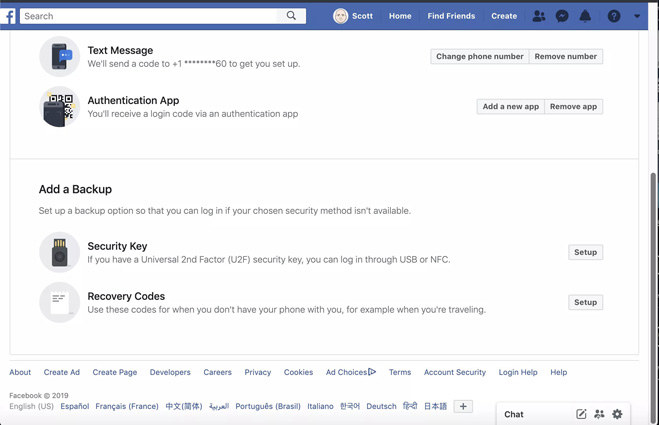
Follow the instructions to activate 2FA and then choose your desired credential (receiving code or using third party app) to be verified by.

Case 5: Turn on 2 Factor Authentication on Twitter
Twitter is possibly the best site for every trending news. To turn on 2FA on Twitter, just follow this guideline:
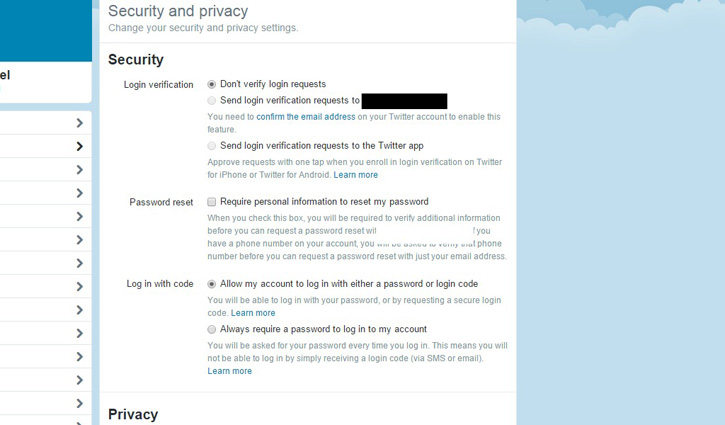
- Go to ‘Security and Privacy’ settings and click on ‘Send login verification requests to my phone’.
- Click on ‘Okay, send me a message.’
If you have received the verification message, then click Yes. And that’s it!

Case 6: Turn on 2 Factor Authetication on Microsoft
Following are the steps to activate Two-Factor Authentication if you wish to secure your Microsoft Account:
- Open your Microsoft account and sign in with your username and password.
- Click the Security tab and then select Two Step Verification option. From there click on “Set up Two Step Verification” link and click Next.
- Save a Pdf copy of this link.
At the end, specify your password again and then click on Sign in.

Case 7: Turn on 2 Factor Authentication on WhatsApp
WhatsApp being one of the most important communication network deserves to be secured with Two Factor Authentication. Follow these simple steps to enable it:
- Open your WhatsApp app. Tap the three dots that are displayed in the upper right side.
- Then click Settings and after that click Account.
- Tap on Two Step Verification and enable it.
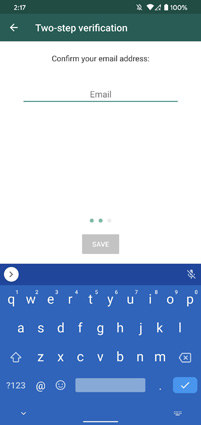
- Then add your custom PIN, re -add it for confirmation, and then enter your email address.
Click on Save and you are done.

Case 8: Turn on 2 Factor Authentication on Instagram
Instagram is definitely the new cool social platform in the world. It is one of the most popular social apps and users share their personal pictures and content on it. To make sure you have 2FA enabled on it, follow these steps:
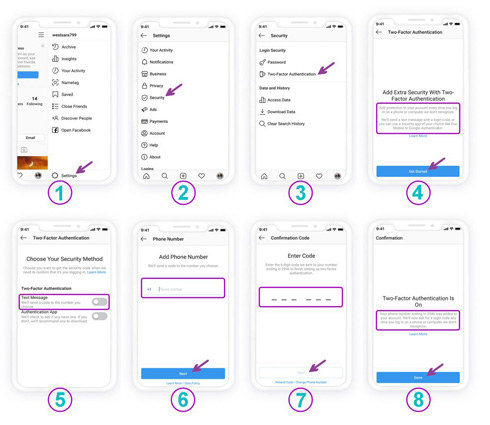
- Go to Settings and tap Security
- Click on Two Factor Authentication and then get started.
- Turn the text message option on and enter your phone number.
You will receive a recovery code on your phone. Enter it and you are done. (Pro tip: take screenshot of the recovery code so that you have it saved)

Bonus Tips: How to Bypass iCloud Activation Lock
Unfortunately, at times your iOS device can get locked because of iCloud Activation Lock. This can be easily removed or bypassed but to make it happen, you need to have some software installed.
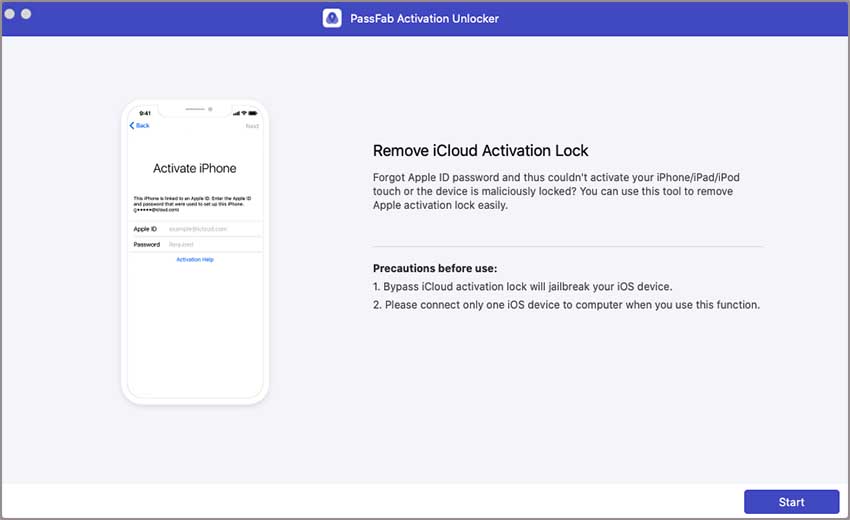
For this purpose, PassFab Activation Unlocker is highly recommended. It is a brilliant tool that successfully unlocks your device in a secure way. You don’t need any additional knowledge for it because it is extremely user-friendly. Follow this detailed guide to learn how to do it.
The first step is to connect your iDevice with your mac. Then click on “Start” to start the process.

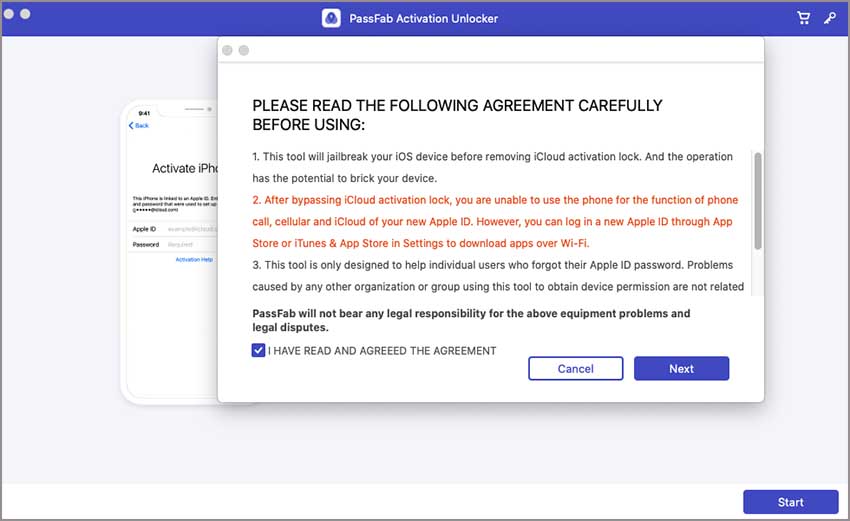
Before using the program, make sure you have read the entire agreement. Then click on Next.

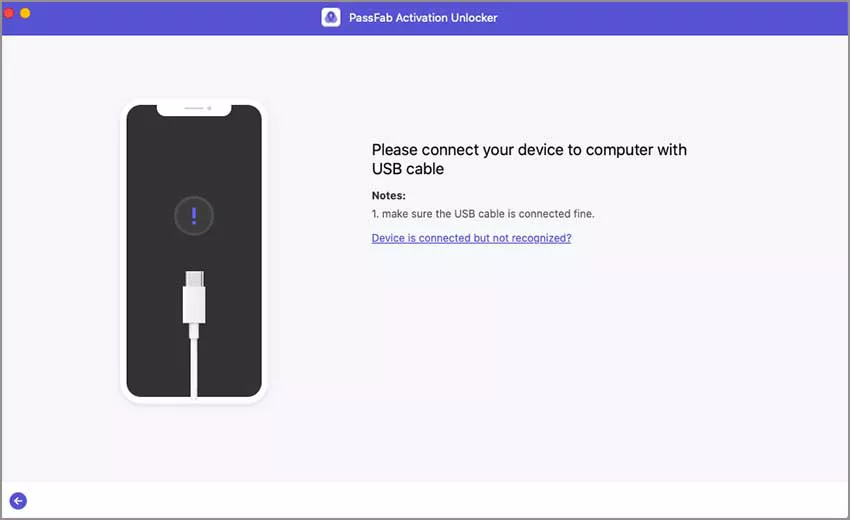
Now connect your locked iDevice via a USB cable.

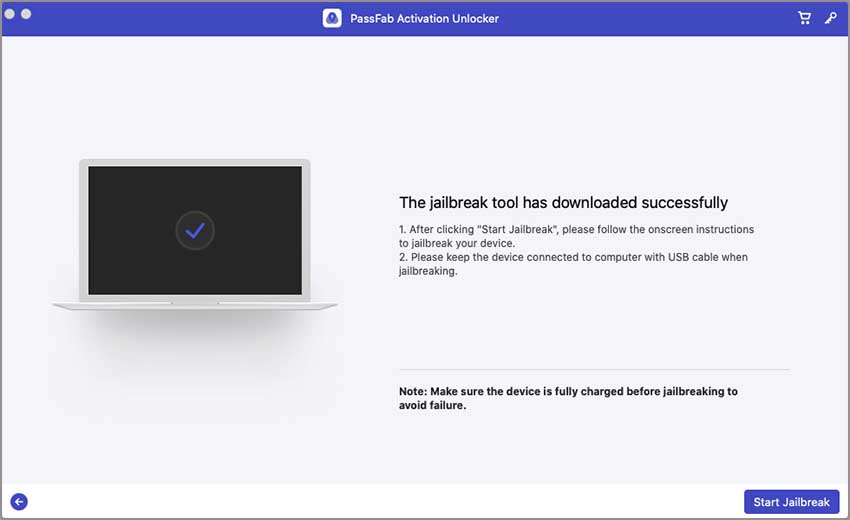
When your device is connected, the program will automatically download jailbreak tool. When it is done, simply click Start Jailbreak and follow the steps given.

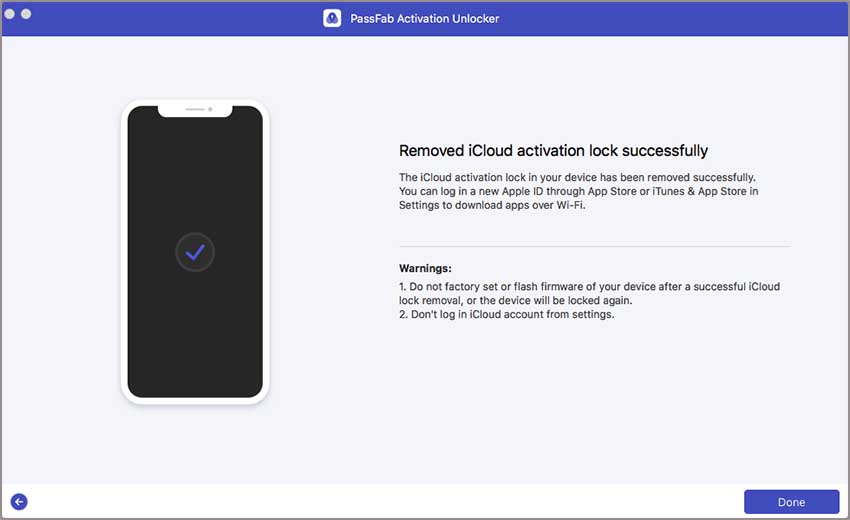
Now just wait for some time while the program removes the iCloud Activation lock. Once it’s done, you have successfully removed the lock from your iDevice!

Summary
After reading this article, I am pretty sure turning on Two Factor Authentication will be your top most priority. Enable it on all of your accounts so that they are secured and 100% saved from hackers. Also, don’t forget to check out iCloud Activation Lock Removal if you wish to unlock your iDevice.
