You may get an excellent lock screen in Windows 11 but keep in mind that the lock screen is there for far more than just looking good. It safeguards your computer and prevents any unasked and unauthorized access by a user. The moment your screen boots up, or you log in to your computer, the lock screen pops first as per default settings.
There are all kinds of users; some wish their lock screen remains, some users have gotten used to it, and there are others who want to to disable the lock screen windows 11. So if you are among those who do not turn off log in windows 11, you are in luck! We have a guide here that will show you How to turn off windows 11 lock screen!
To disable lock screen windows 11, you have to follow a few steps and these are very important. These steps will easily help you get the job done in no time. Let’s delve in and find out wat they are.
Part 1: Why Do you Disable the Windows 11 Lock Screen?
Quite a few people do not like the Windows 11 and want to disable it. There are many reasons for this, which includes not liking the password protected feature. They just wish to quickly open their laptops and get to work.
Some just hate how it takes time to reboot. Rebooting at some point can get very annoying because it takes a lot of time to open the laptop if the lockscreen is present. So to avoid all the fiasco and wait people just tend to disable lock screen windows 11. But the question is how is it disabled?
Part 2: How to Disable the Windows 11 Lock Screen?
For those who are wondering how to disable their windows 11 lockscreen. We have here three ways that can help you easily turn off login windows 11. Let’s find out!
Way 1: Turn Off the Lock Screen from the Settings
To turn off the windows 11 auto lock screen, you can follow simple methods using the Settings option.
- To disable lock screen windows 11, you need to click on the Start. Then select the settings option.
- Now, select the personalization from the menu displayed on the left and then click on the lock screen shown on the right.
- Now on the lock screen, under the related settings. Click on the screen time out.
- Now choose the settings that is suitable for you. Now if you want to disable lock screen windows 11, click on the Never option.
- Now using the battery, adjust the timeout period for your windows 11 auto lock screen or when it goes to sleep.
- These settings are automatically saved as soon as you are done.
Way 2: Using Edit the Registry
It doesn’t matter if you are using the Windows 11, education, pro and even business. The lock screen can be modified and even disabled using the registry. You can disable lock screen windows 11, by following the steps below:
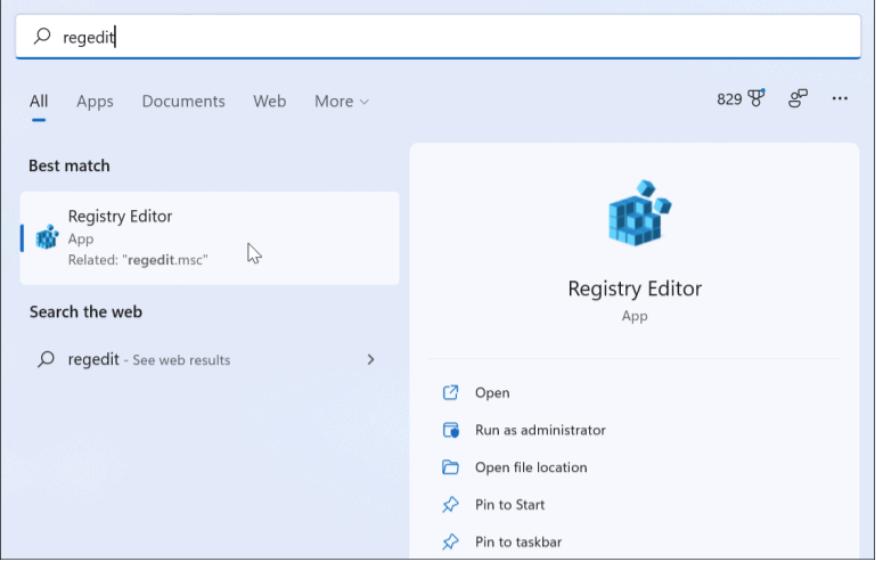
Tap on the start button and hit the windows key, now type regedit. Now click on the top result.

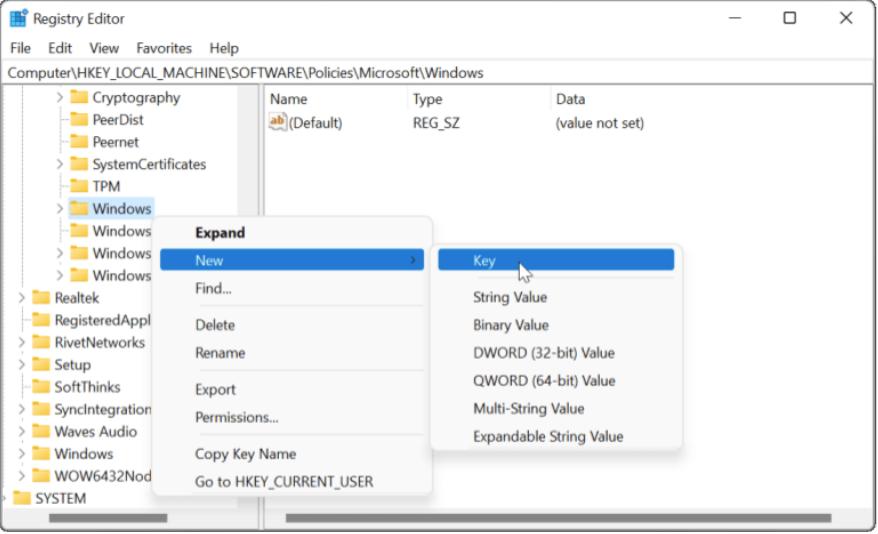
- Now as soon as the registry editor opens up, you can use the following path, copy paste it into the registry editor bar displayed the top: HKEY_LOCAL_MACHINE\SOFTWARE\Policies\Microsoft\Windows
Now right click the windows key displayed on the left side. Then select New>Key.

- Now name the new key as personalization and then tap on enter.
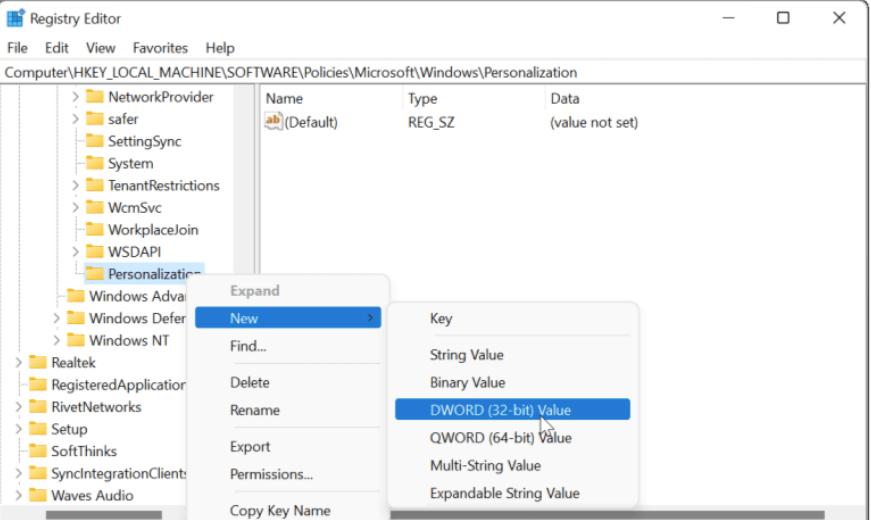
Now right-click on the personalization key that you just created. Then select New>DWORD (32-bit) value.

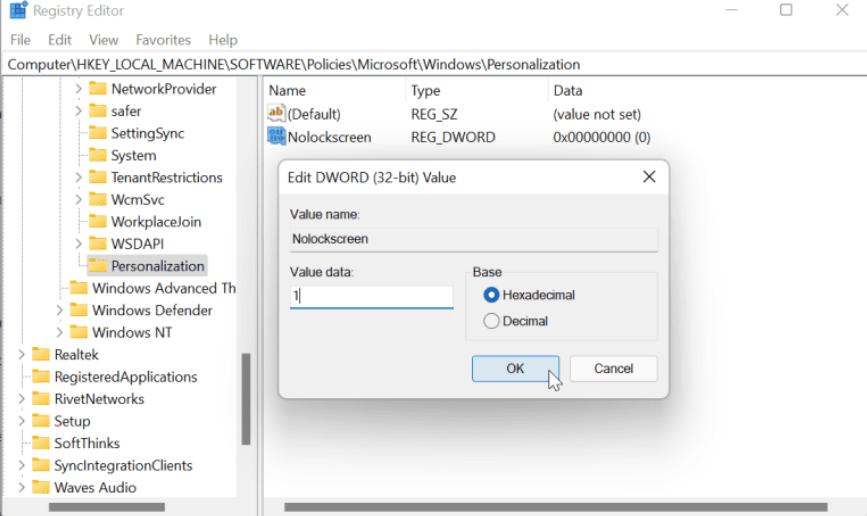
- Now name the DWORD value as Nolockscreen. Now hit enter on the keyboard.
Now double-click on the noclockscreen key that you just created. Now give it a value data of before you tap on the okay option.

- Now as soon as this is done, you can exit the registry editor and then restart the PC.
If you follow the steps stated below, your computer reboots and then the lockscreen will be disabled. You will only see the sign-in screen.
Way 3: Via Group Policy
You can disable the windows 11 via group policy using the steps stated below:
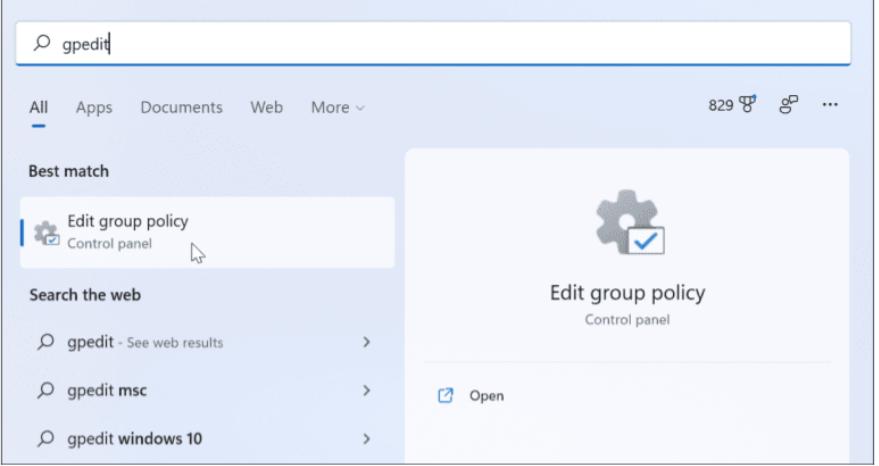
Begin by clicking on the start button, or tapping the windows key. Now type gpedit, and then click the top-most result.

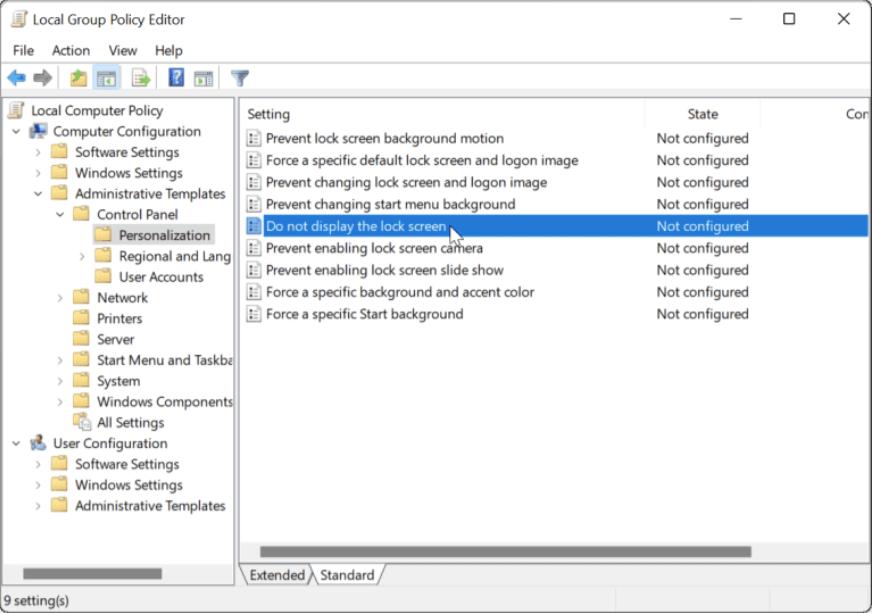
As soon as your windows 11, local group policy editor opens up. Click on Computer Configuration, then Adminstrative templates, Control Panel, Personalization.
Now, double click on the Do not display the lockscreen option.

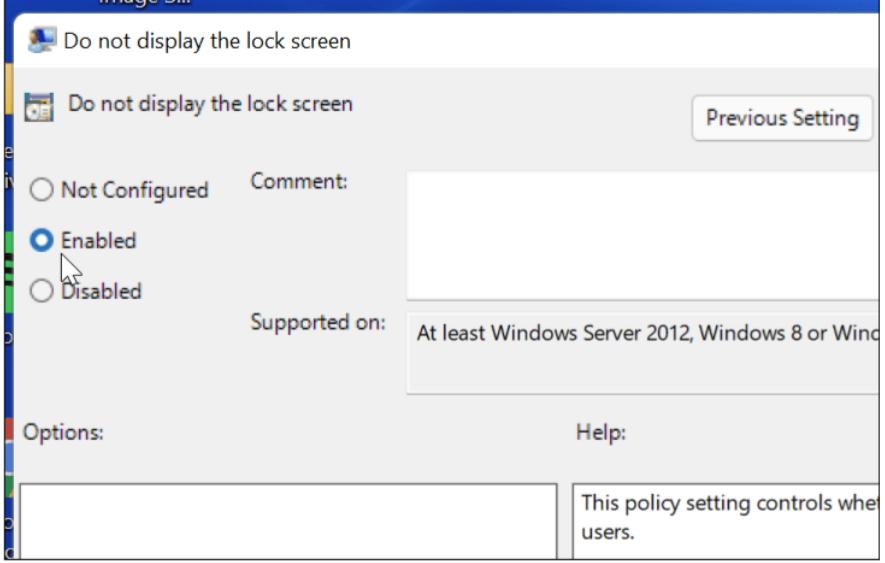
Now as soon as the policy screen pops up, click the Enabled option and then click Apply. Now tap on OK displayed at the bottom of the screen.

Now you can exit the local group policy editor and then restart your laptop or desktop.
- Voila! It’s done.
Part 3: How to Personalize Your Lock Screen
The lock screen is the first thing someone sees when they login to your device. This is why it is important that you personalize it. Here are three steps on how to personalize your lock screen.
Step 1: Pick a background image
If you want your lock screen to have a specific theme, pick an image that fits that theme and use it as the background image. This will make your lock screen look more personalized and unique.
Step 2: Pick a wallpaper
If you are not sure what images would fit with the theme of your lock screen, pick an image that looks good with the colors of your wallpaper and use it as the background image. This will make your lock screen look more personalized and unique.
Step 3: Add widgets to customize your lock screen
There are many ways to personalise and customise your lock screen. One of them is the ability to add widgets to your lockscreen. This is a great way to personalise your device and make it unique.
- To add widgets, simply open up the Quick Settings menu.
- Scroll down until you see the "Widgets" option.
- From there, choose which widget you want to add and then follow the prompts on screen.
External Tips: Locked Out of Windows 11 Login Screen? Try PassFab 4Winkey
If you forget Windows 11 password and wish to reset it without losing your data or reinstalling your Windows. The you should use the password recovery tool that is PassFab 4WinKey. The tool is specifically designed to resolve any password related problems in all the windows versions. This tool ensures you get access to your locked PC and allows you to create a Password reset disk without logging in your computer.
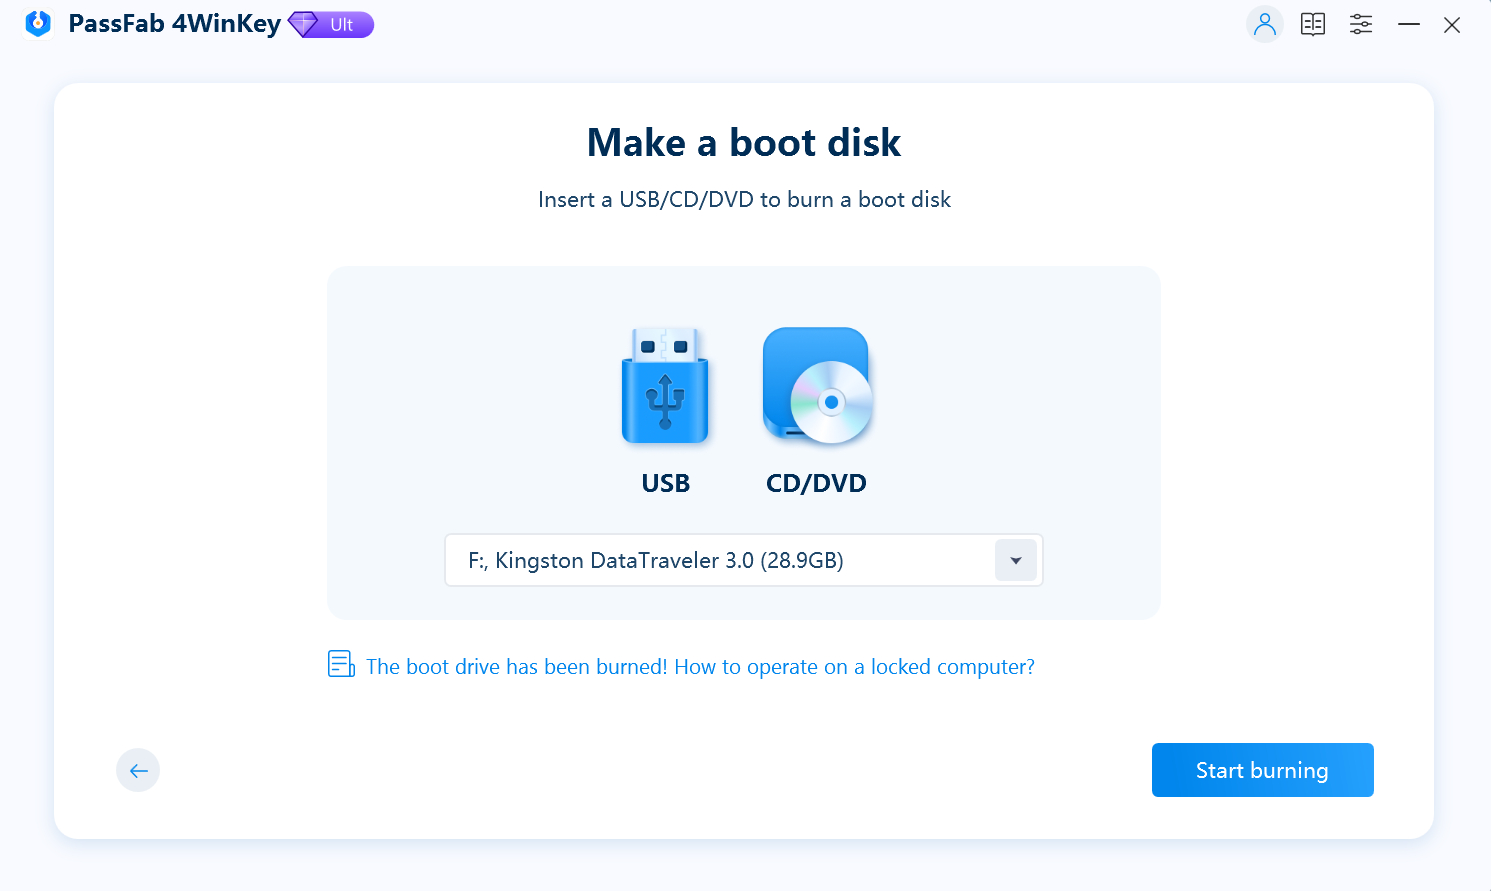
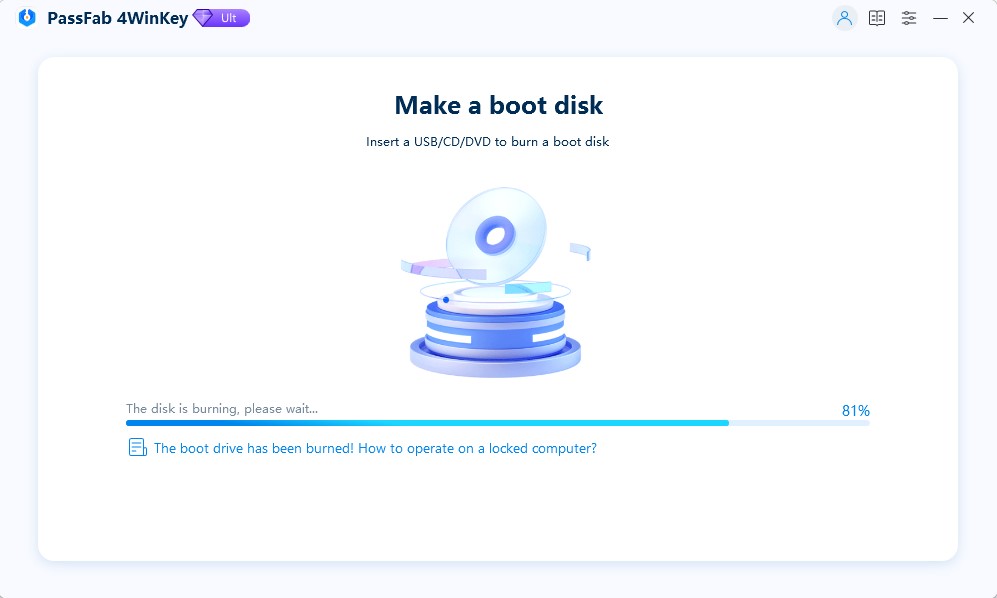
- Start by plugging in your USB/CD/DVD into your laptop or PCs.
Then choose your device from the drop-down list shown on the screen.

Then click Next, and then let the drive burn all your instructions.

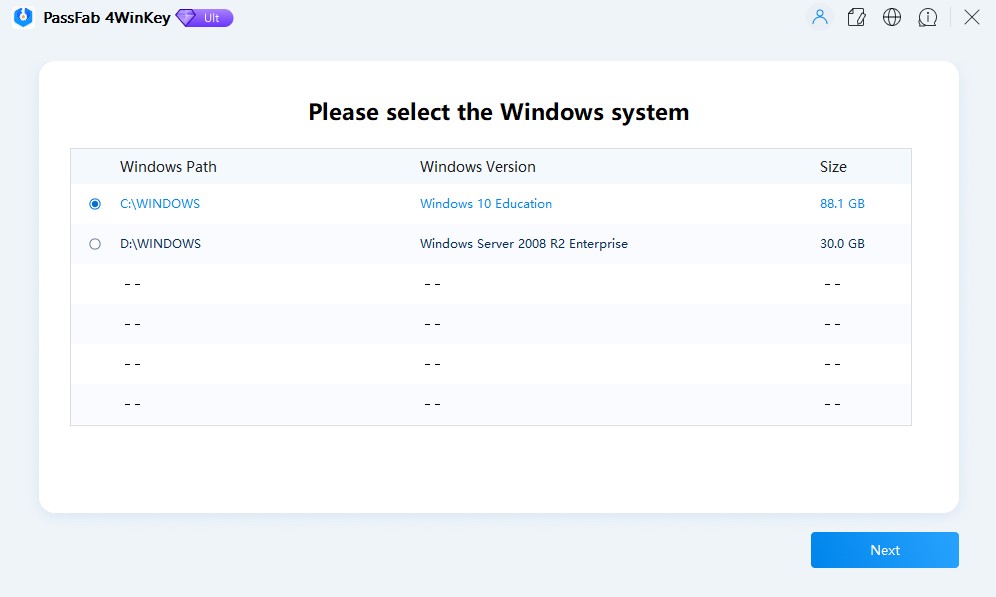
- Boot the locked laptop or PC using the bootable drive
From the operating systems displayed, now choose windows 11 and then click on Next.

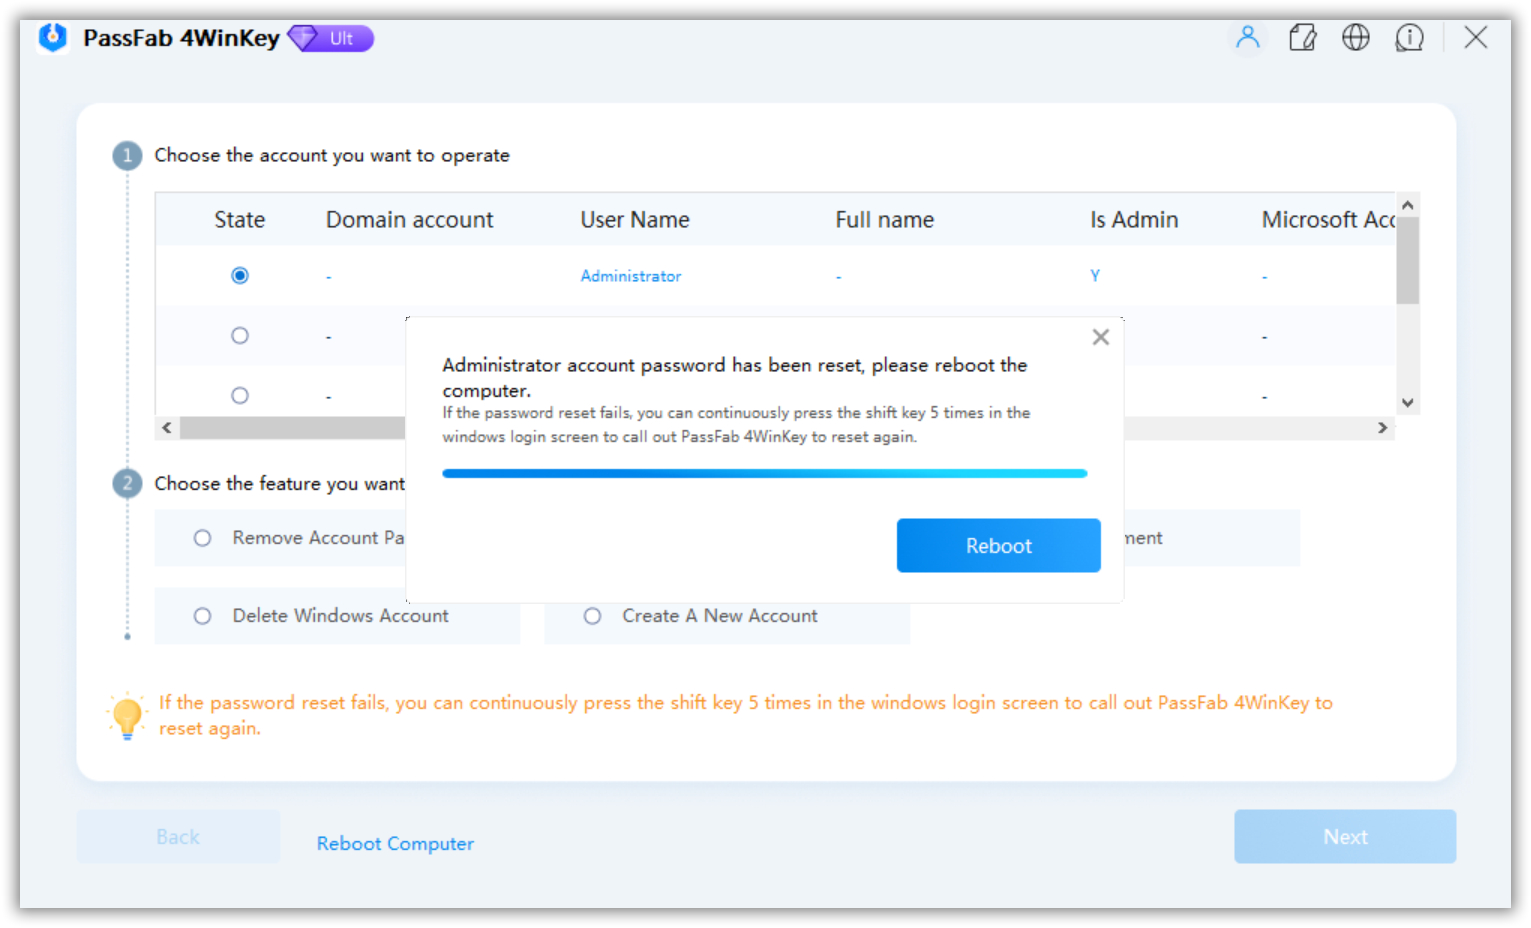
choose the account whose password you want to reset.

- After this your PC will restart and you will easily be able to log in to your account. This is how helpful PassFab 4 WinKey!
Final Notes
You now know how to turn off log in windows 11. You can make use of all these methods and disable lock screen windows 11 with ease. These methods are easy and very quick so you do not have to worry about them taking your time.
