SPD Flash Tool is an essential utility for devices powered by Spreadtrum/Unisoc chipsets. Flashing firmware with this tool has become a crucial skill for troubleshooting, upgrading, and reviving such devices. It can fix persistent boot loops, update outdated software, and even recover seemingly dead phones. Mastering the use of the SPD Flash Tool can be a real lifesaver.
This comprehensive guide will walk you through everything you need to know about SPD Flash Tool download, its impressive features, detailed usage instructions, and expert troubleshooting tips to help you achieve flashing success with minimal hassle.
Struggling with FRP APK installations? Download PassFab Android Unlock for free to effortlessly bypass FRP on a wide range of Android devices, such as Samsung, Huawei, Xiaomi, OPPO, and more.
Part 1: What Is SPD Flash Tool
SPD Flash Tool (also referred to as Spreadtrum Flash Tool) is a specialized and powerful Windows-based software utility developed to flash stock ROMs, recovery files, and firmware updates on Android devices running Spreadtrum/Unisoc chipsets. It is a trusted tool among technicians and DIY users alike for solving complex software issues with Spreadtrum-powered devices.
1.1 Key Features of SPD Flash Tool:
- Flashing stock firmware (.pac files) to restore or upgrade devices
- Unbricking dead or unresponsive phones
- Repairing corrupted software or damaged partitions
- Formatting and erasing device data when necessary
- Custom flashing for advanced users
1.2 Supported File Formats
SPD Flash Tool primarily supports the .pac file format, which conveniently bundles all the essential firmware binaries needed for a complete device flash. These binaries typically include:
- Bootloader
- System Image
- Recovery Image
- Vendor partitions
This all-in-one package format simplifies the flashing process compared to flashing individual files.
1.3 SPD Flash Tool All Versions
Depending on your needs and technical expertise, you can choose from several versions of the SPD Flash Tool:
- Upgrade Tool: Best for users who simply want to update their firmware without tweaking advanced settings.
- Research Tool: Geared toward developers and power users who need greater control over the flashing process, including partition customization.
- Factory Tool: Tailored for factories and repair centers that need to flash multiple devices in bulk efficiently.
Each version is optimized for a specific flashing scenario, so understanding your requirements will help you pick the right tool.
Part 2: Preparing for Flashing Process - Requirements & Download
2.1 Requirements
Before downloading SPD Flash Tool for PC, make sure you have the following essential tools and files ready:
- Windows PC: Preferably Windows 7 or later for better compatibility.
- USB Cable: Use the original or a high-quality USB cable to ensure a stable connection.
- Spreadtrum/Unisoc Device: The smartphone or tablet you intend to flash.
- SPD Flash Tool Drivers: These are mandatory for your PC to recognize the device.
- Correct Firmware (.pac File): Always double-check the firmware version to match your device model precisely to prevent bricking.
2.2 SPD Flash Tool Download for PC
| Name | SPD Flash Tool |
|---|---|
| Type | PAC Flash Tool |
| Developer | UniSoc Communications |
| File Name | SPD Upgrade Tool_R27.24.2301.zip |
| File Size | 13.00 MB |
| Version | R27.24.2301 |
| Supports | Microsoft Windows (32-bit and 64-bit) |
| Download | SPD Flash Tool Download |
Pro Tips:
- Always download the SPD Latest Flash Tool to maximize device compatibility and reduce bugs.
- Verify the firmware’s checksum or version number to ensure it’s genuine and suitable for your device.
Part 3: How to Use SPD Flash Tool
With all preparations in place, let’s move on to the step-by-step flashing procedure. Taking the right approach can make the difference between a perfectly revived phone and an expensive paperweight.
3.1 Installing SPD Flash Tool USB Drivers
The first and foremost step is ensuring your PC can recognize your Spreadtrum/Unisoc device by installing the necessary drivers.
Installation Steps:
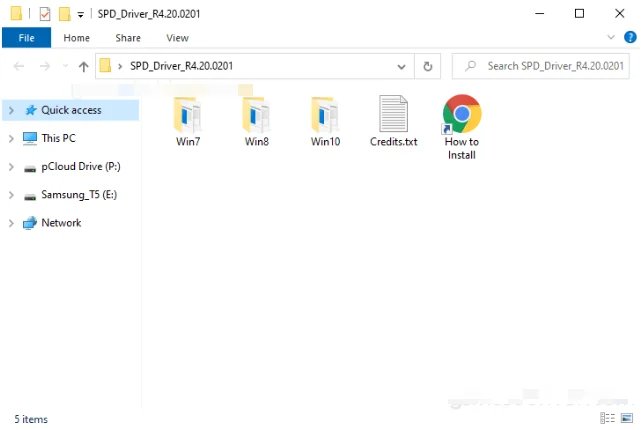
Download and install the SPD USB Drivers package.
Extract the ZIP file to a new folder.

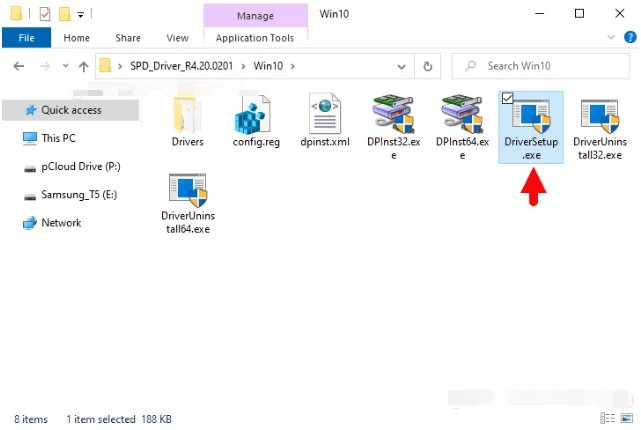
Locate the "DriverSetup.exe" file inside the extracted folder.
Double-click the file and follow wizard to complete its installation.

Click “Finish” and reboot your PC after successful installation.

Driver Troubleshooting:
- Use "Device Manager" to manually update drivers if automatic installation fails.
- Try installing drivers in Compatibility Mode for older Windows versions.
- Disable Windows Driver Signature Enforcement temporarily if the drivers aren't installing.
3.2 Launching the SPD Upgrade Tool
Now that drivers are installed, it's time to launch the flashing software itself.
Extract the downloaded SPD Flash Tool ZIP file.
Open the extracted folder.
Run UpgradeDownload.exe as an administrator.

Familiarize yourself with the simple interface, with options clearly marked for loading packets, starting download, and monitoring progress.

3.3 Loading the Firmware
With the Upgrade Tool open, it’s time to prepare the actual firmware.
Click the "Load Packet" button (gear icon).

Navigate to the location where your .pac firmware file is stored.
Select the .pac file and wait for it to load automatically.
Confirm that all firmware sections (Boot, System, Recovery, etc.) are correctly populated in the tool.
Verification Tip:
Check if the loaded firmware matches your device’s model and variant to avoid mismatched flashing.
3.4 Connecting the Device
Power off your Spreadtrum/Unisoc device completely.
Hold any required buttons (e.g., Volume Down or Volume Up) depending on your device model.
Connect the device to the PC using the USB cable.
The flashing tool should recognize your device automatically.
If recognition fails:
- Recheck drivers
- Use a different USB cable or port
- Restart both the PC and the device
3.5 Initiating the Flashing Process
Now comes the final and most critical step—flashing your device!
- Click the "Start Downloading" button.
- Observe the progress bar moving, which indicates the firmware installation progress.
- Wait for the green "Passed" message.
- Once completed, disconnect your device and reboot.
Important Reminders:
- Keep the device connected until the entire process is completed.
- Avoid using the PC for other tasks during flashing to prevent interruptions.
Part 4: Common Issues and Troubleshooting
Even with careful preparation, issues can occur. Here are some common issues you may encounter during the flashing process.
4.1 Device Not Recognized
A device that’s not recognized can be frustrating but is often easy to fix.
- Confirm the device is properly powered off before connecting.
- Swap USB ports or cables.
- Reinstall SPD drivers manually.
- Use a different PC if problems persist.
4.2 Flashing Errors
Flashing errors can occur during the process, but most have straightforward solutions.
Common Flashing Errors and Solutions:
- "NV Write Failed": Try a different firmware version or reflash after formatting.
- "Invalid NV": Make sure to use the correct .pac file.
- Checksum Errors: Re-download the firmware to ensure file integrity.
Always make sure you’re using the correct tool version and verified firmware to minimize risks.
4.3 Post-Flashing Problems
If your device encounters issues after flashing, such as being stuck in a boot loop or not powering on, try the following fixes:
- Boot into Recovery Mode and perform a factory reset.
- Reflash using a different firmware version.
- Use "Format All + Download" mode cautiously to clean the device entirely.
Patience and methodical troubleshooting are key when dealing with post-flashing issues.
Bonus Tip: Best Google FRP Unlock Tool for Android 14 - Easy to Use
If you've encountered a Google FRP lock after resetting your Android device, simply flashing the firmware won't be enough to regain access. This is because the FRP lock is designed to prevent unauthorized access after a factory reset, making it a challenge for users who don’t have the previously synced Google credentials. That’s where a specialized FRP bypass tool becomes essential.
PassFab Android Unlocker stands out as a reliable and effective solution for bypassing Google FRP locks. It supports a wide range of Android brands and is fully compatible with the latest Android 14 version, offering a quick and user-friendly way to unlock your device without needing technical expertise.
Key Advantages of PassFab Android Unlock:
- Quick removal of screen locks and FRP locks without needing password and previous account credentials.
- Full support for Android 14 and previous versions.
- User-friendly interface perfect for beginners and pros.
- High success rates with minimal risk to device data.
- Supports most of Android devices, including Samsung, Xiaomi, Motorola, Huawei, and more.
How to Bypass Google FRP Lock with PassFab Android Unlock
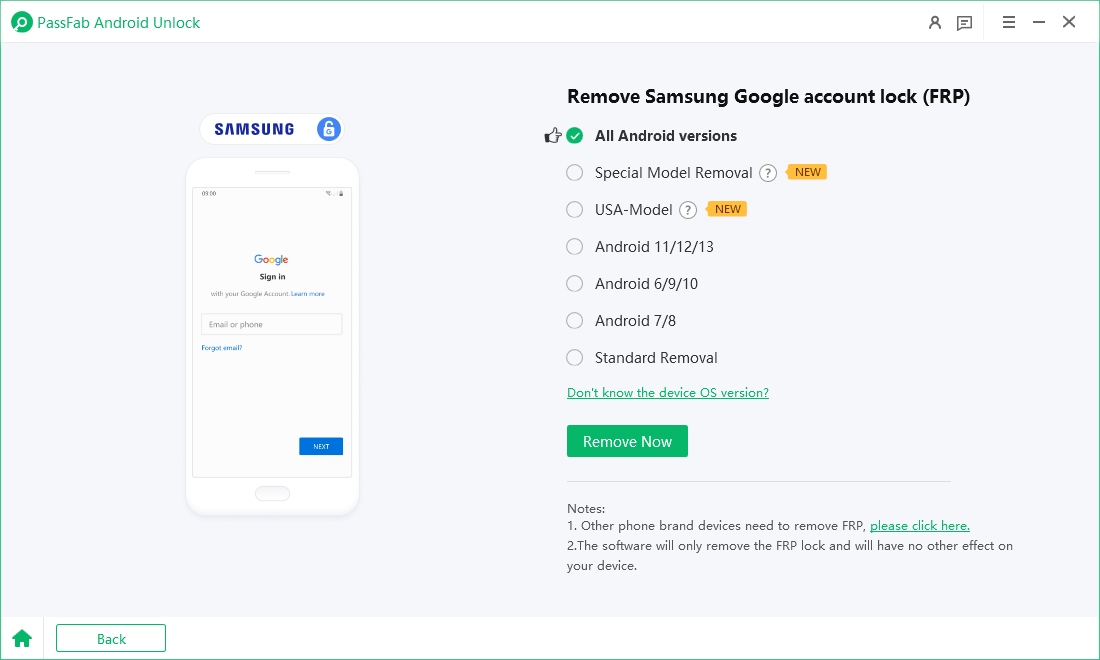
First download and install PassFab Andorid Unlock tool. Connect the device and select "Remove Google Lock".

Select Samsung brand and the Android version it running.

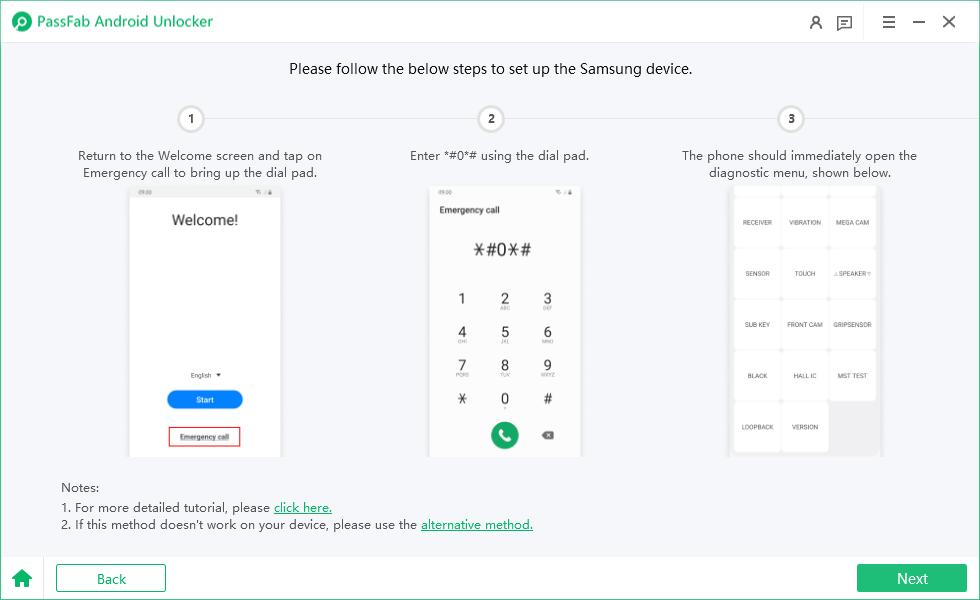
Then follow the onscreen prompts to start the removing process.

-
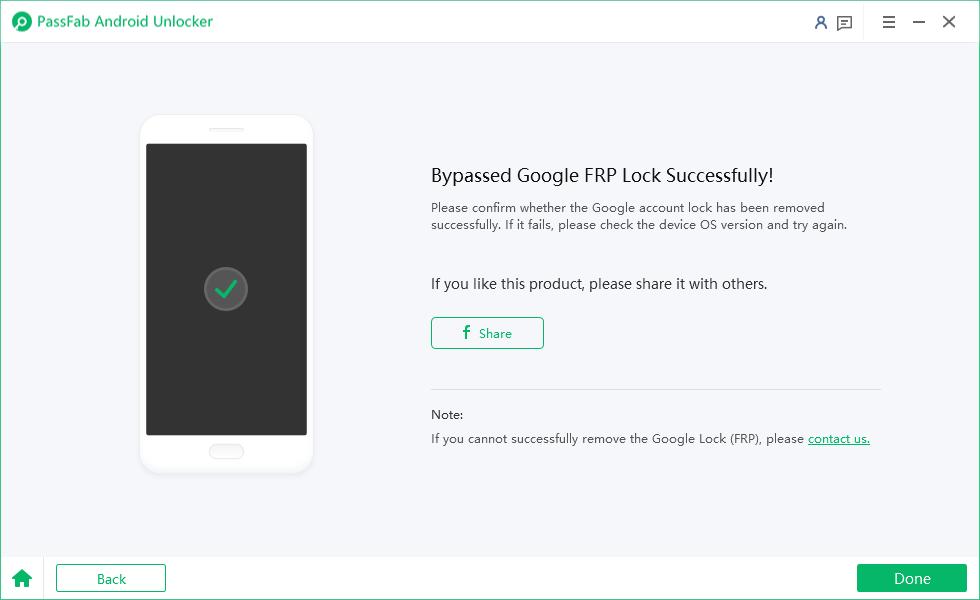
Wait for the FRP removal to complete until you’re prompted with “Bypassed Google FRP Lock Successfully.”

Conclusion
In summary, the SPD Flash Tool is an indispensable tool for anyone working with Spreadtrum/Unisoc-based Android devices. Always ensure you download the correct version of the SPD Flash Tool for PC, use verified firmware, and install necessary drivers beforehand to minimize risks. In case of post-flashing problems, knowing how to troubleshoot common issues will save you a lot of time and stress.
And for users dealing with FRP locks on Android devices, PassFab Android Unlocker remains the ultimate solution for quick, effective, and safe unlocking.
